Use custom security attributes to scope a workflow
Workflows created using Lifecycle workflows can be scoped based on attributes, including custom security attributes, configured for a user. You can use existing custom security attributes configured for your tenant, which contains sensitive data for a user to further control the set of users the workflow is to be executed. For more information about custom security attributes, and their use cases, see: What are custom security attributes in Microsoft Entra ID?.
Prerequisites
Using this feature requires Microsoft Entra ID Governance or Microsoft Entra Suite licenses. To find the right license for your requirements, see Microsoft Entra ID Governance licensing fundamentals.
To scope a workflow using a custom security attribute, you must have a custom security attribute set and its definitions created in your tenant. For a guide on adding a custom security attribute set, and setting its definitions, see: Add or deactivate custom security attribute definitions in Microsoft Entra ID. When you have created a custom set attribute and set its definitions, you must also assign this attribute to a user. For a guide on assigning custom security attributes to a user, see: Assign custom security attributes to a user.
Note
The prerequisite steps of creating, defining, and assigning a custom security attribute must be performed using the Attribute Assignment Administrator role. The Lifecycle Workflows Administrator role alone cannot create, update, or assign custom security attributes.
Add a custom security attribute to the scope of a workflow using the Microsoft Entra admin center
Workflows can be created with, or edited, to include a custom security attribute as a scope. The following steps walk you through editing an existing workflow to use a custom security attribute as a scope. For a guide on creating a workflow from scratch, with which you could scope a workflow using custom security attributes, see: Create a lifecycle workflow. To edit a workflow to include a custom security attribute to its scope, you complete the following steps.
Sign in to the Microsoft Entra admin center as at least a Lifecycle Workflows Administrator and Attribute Assignment Administrator.
Browse to Identity governance > Lifecycle workflows > Workflows.
On the Workflows page, select the workflow that you want to use a custom security attribute as part of the scope for.
On the specific workflow page, select Execution conditions.
On the execution conditions page, select Scope details.
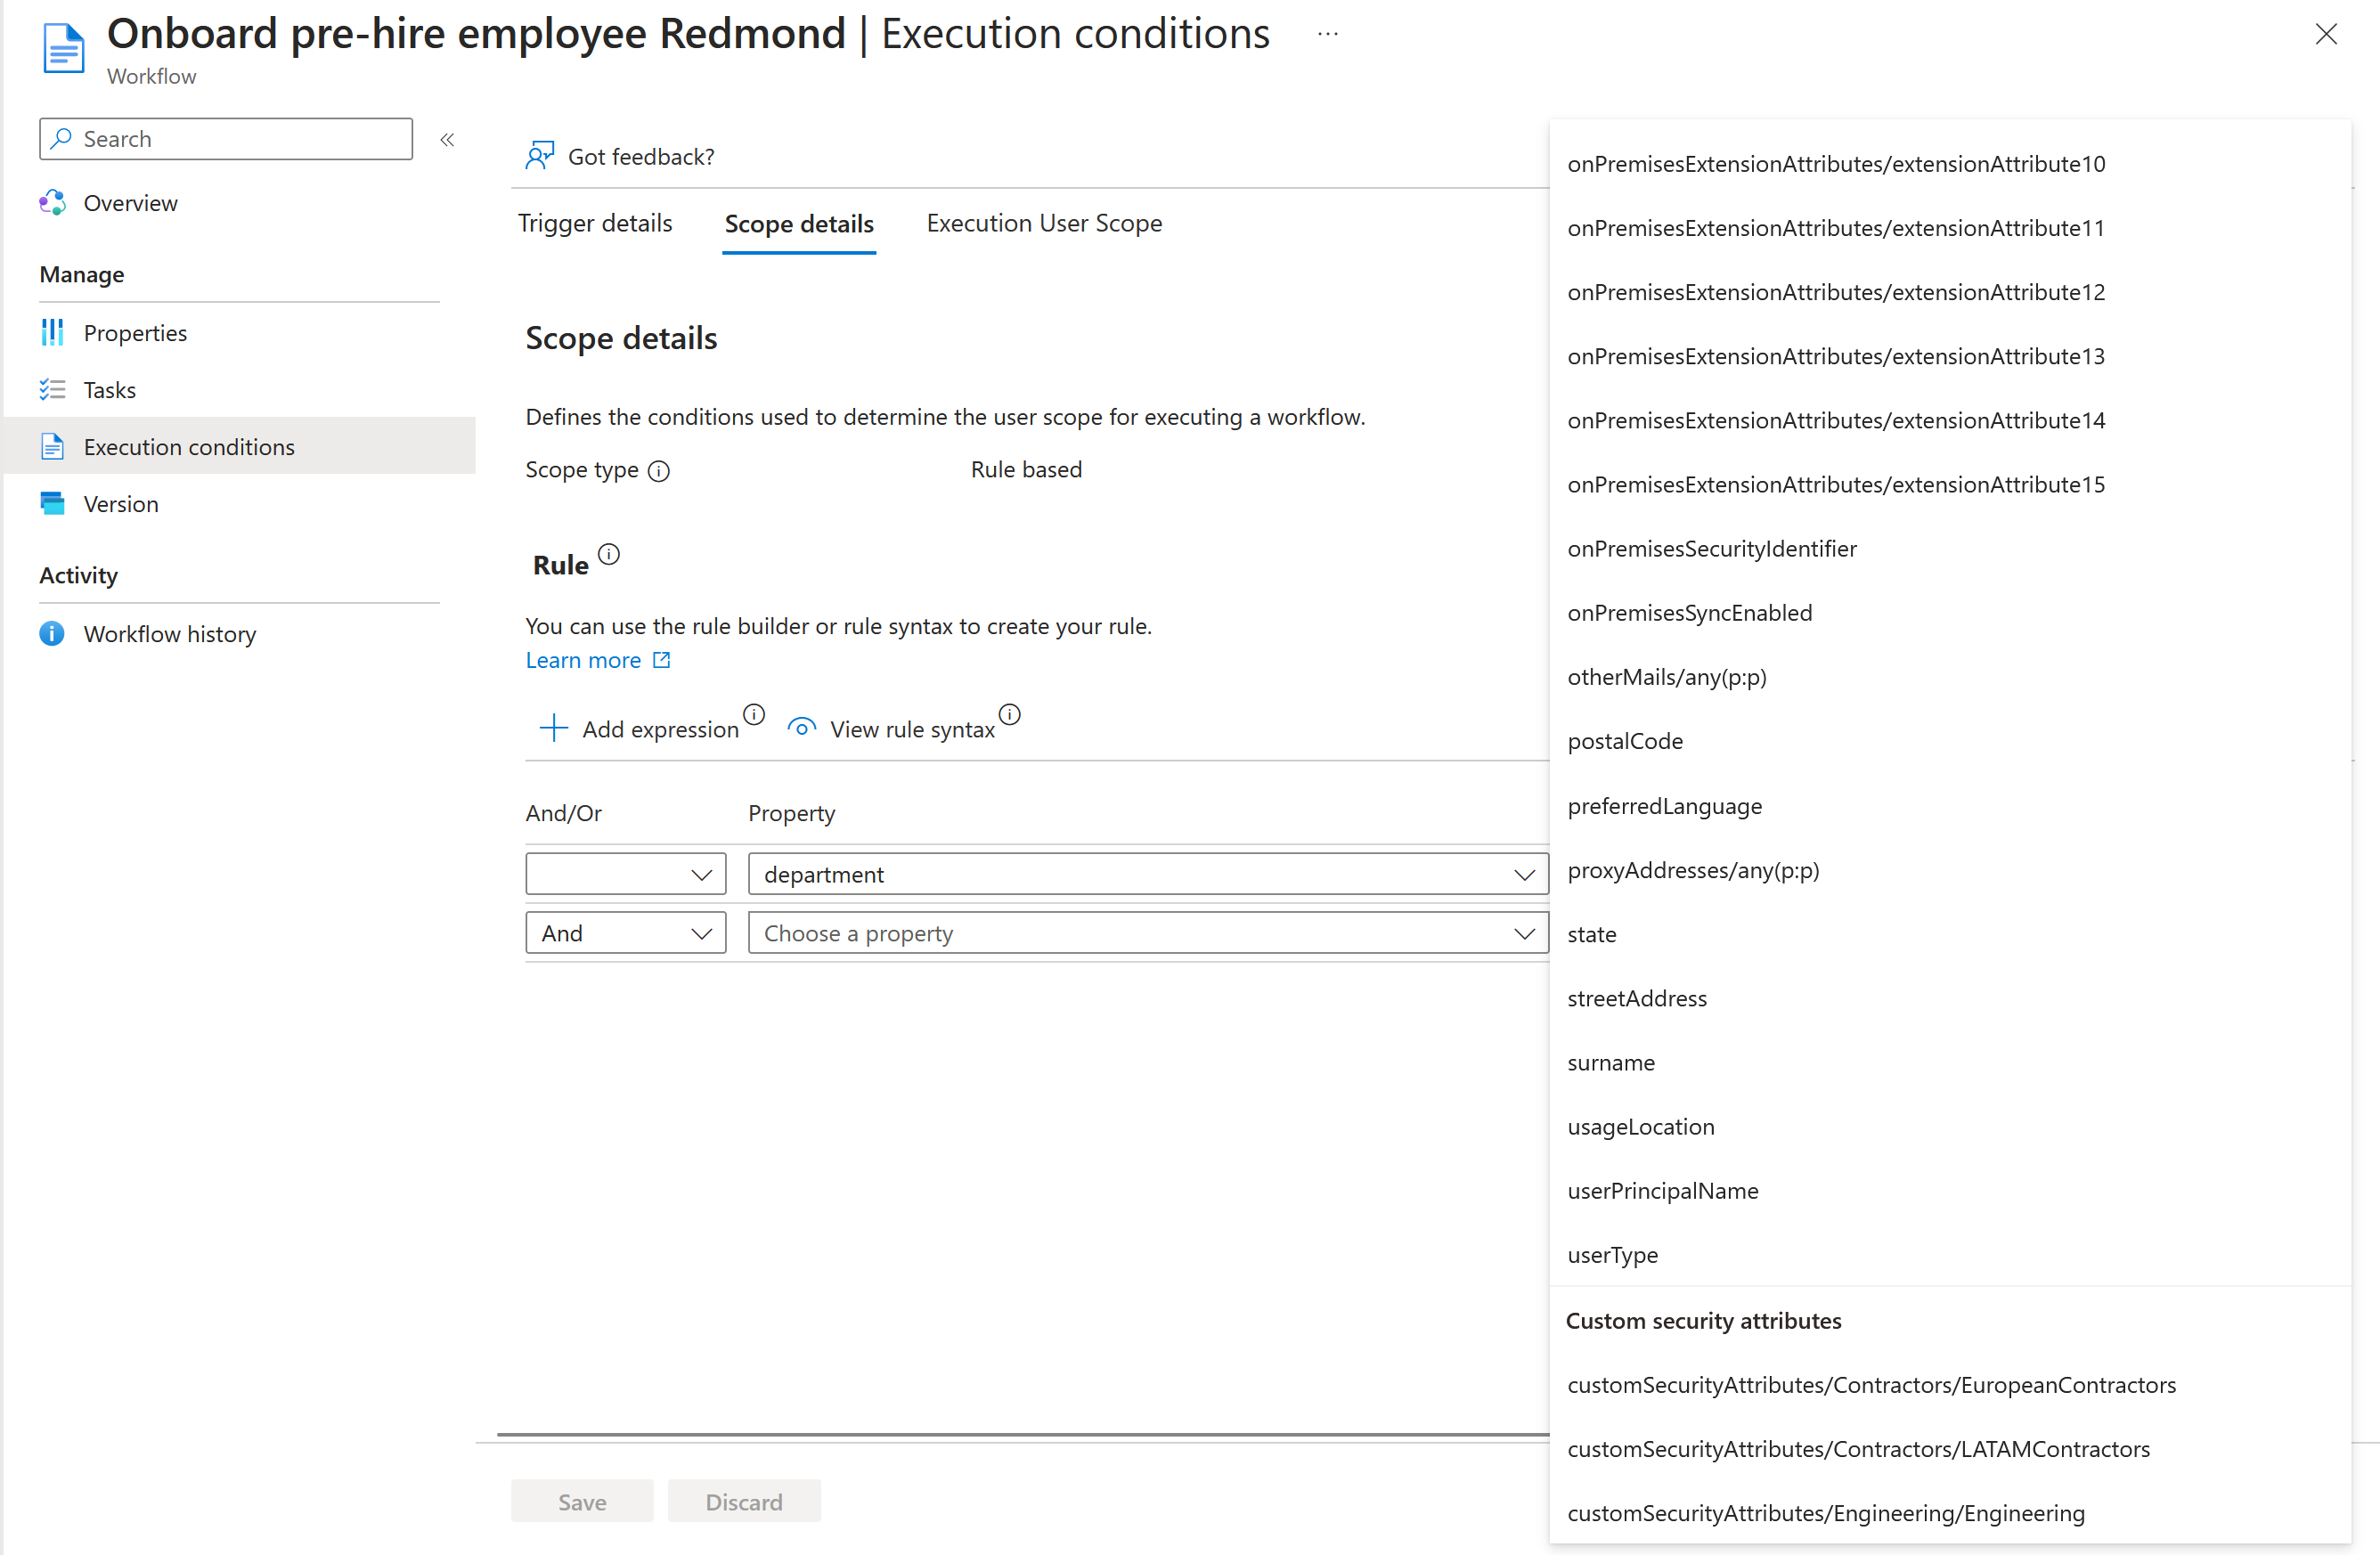
On the scope details page, select Add expression, and from the drop-down list locate your custom security attributes, and then set its value.

Note
Deactivated Custom Security Attributes will not appear in this list.
After setting the value for the custom security attribute, select Save.
Add a custom security attribute to the scope of the workflow using Microsoft Graph
As adding a custom security attribute to the scope of a workflow updates its execution conditions, you'd be creating a new version of the workflow. To create a new version of a workflow via API using Microsoft Graph, see: workflow: createNewVersion.
View custom security attribute used as a scope of the workflow
After you scoped a workflow using a custom security attribute, you can view this information within the workflow audit logs. To view these details, you'd do the following steps:
Sign in to the Microsoft Entra admin center as at least a Lifecycle Workflows Administrator and Attribute Assignment Administrator.
Browse to Identity governance > Lifecycle workflows > Workflows.
On the workflows page, select Audit Logs.
Tip
Custom security attribute information of a workflow is also viewable, with proper permissions, from a specific workflow's version page.
Select an event where a custom security attribute was used to scope a workflow during creation, or added to an updated workflow and select Modified properties.
On the version information page, under Configure, you should see the custom security attribute as the rule.

Depending on your roles determines if you can see the full details of the custom security attributes being used. If you attempt to view custom security attribute information while not having the Attribute Assignment Administrator or Attribute Assignment Reader roles set, you see that the information is hidden.

Note
For more information about custom security attributes being hidden, see: Why can’t I see any custom security attributes in the Property list?.