Add a website, email, guide, or app link to a step
Create a seamless workflow for operators by adding a website, email, guide, custom app, or Power Apps link to a Step card or a custom Completion step card in Dynamics 365 Guides. If you configure an action link with a Uniform Resource Identifier (URI) scheme, the HoloLens opens the corresponding app or page when an operator activates the link.
To add a link to a custom Completion step card, first add the custom completion step, then choose the type of link to add.
To add a link to a Step card, choose the type of link to add:
Link: Add a link to a step so that operators can view and interact with information outside the guide. For example, connect a sequence of guides, open a website, open a page of the Settings app, or open a custom app that has been installed on the device.
Power Apps link: Add a Power Apps link to a step. Power Apps provides low-code tools that teams can use to create custom applications to solve unique business workflows. By combining Guides and Power Apps, you can extend Guides capabilities to create a more seamless end-to-end solution that fits the needs of your operators. For example, you can add a link to an interactive quiz app, an app for reordering parts, or an app that provides the latest status on Internet of Things (IoT) sensors.
Note
To run Power Apps from Guides, operators need a Power Apps license. They must also have permission to view the app that is created in Power Apps.
Add a custom completion step
The completion step is the final step in a guide. Create a custom completion step to let the operator know that they're at the end of the guide and can navigate to the custom app or resource of your choice. For example, if you have a custom launching app or landing page for Guides operators, use the completion step to tell them that the guide is complete and they can return to the landing page.
You can't add action links to the default completion step, you must add a custom completion step.
In the PC app, choose one of the following options:
To add a completion step at the end of a task, go to the task in the Outline page and select Add step > Add a completion step.
To add a completion step as a next step, go to the last step in the Step Editor page and select Add step > Add a completion step.
Choose one of the following options:
Add a link to a step
To add a link to a step, you add an action. You can add one action per step. If a step already includes an action, any new action that you add overwrites the existing action.
In the PC app, go to the appropriate step, and then select the Action circle in the Step Editor pane.
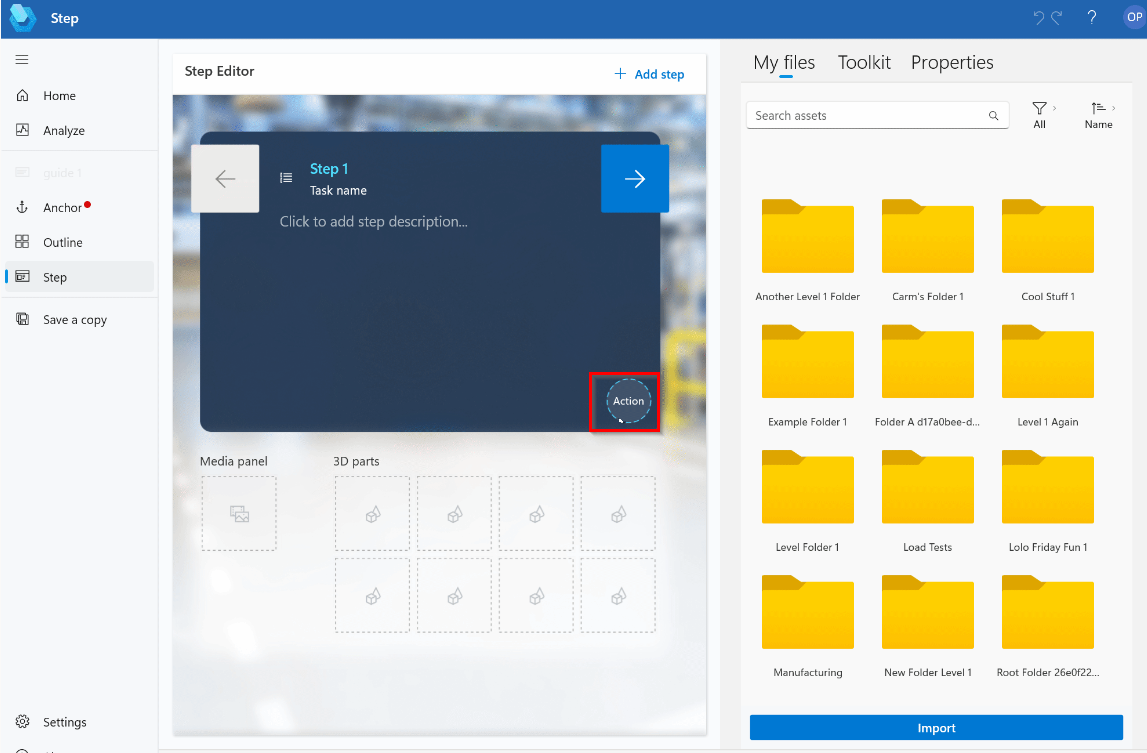
Select Website, Guide link, or other link to perform the following actions. Enter the appropriate information in the Link field.
Email: Enter mailto: and then the email address.
Guide or step: Create and copy a link to a guide or step.
Web page: Enter the web address, starting with http: or https:.
A HoloLens settings page: Enter ms-settings:<URI>, where <URI> is the URI of the appropriate settings page for HoloLens in the Settings app. For example, enter ms-settings: bluetooth to open the Bluetooth settings.
A custom app: Enter the registered URI in the format that the app expects.
Note
If a custom app has been registered as the default handler for a URI, an author can open it by specifying a URI in the format that the app expects. Apps can be opened in kiosk mode. Administrators can use Windows Defender Application Control (WDAC) and Windows PowerShell to allow or block apps on HoloLens 2 devices with Microsoft Intune.
Select Save.
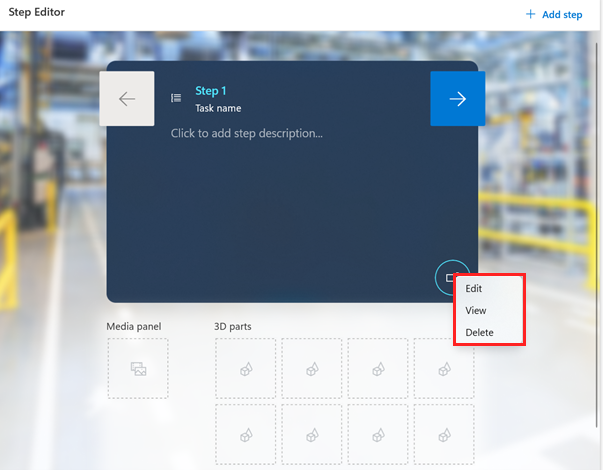
To view, edit, or delete the link, select and hold (or right-click) the Link button in the Step Editor pane, and then select the appropriate command.
Add a Power Apps link to a step
The process of adding a Power Apps link has two steps:
- Copy the Power Apps link.
- Add the link to a step in the PC app.
Copy the Power Apps link
You can link to a published app that was created in Power Apps if you have edit permissions for that app.
Open the Power Apps maker portal.
Select the More Commands button (…) next to the appropriate app, and then select Edit.
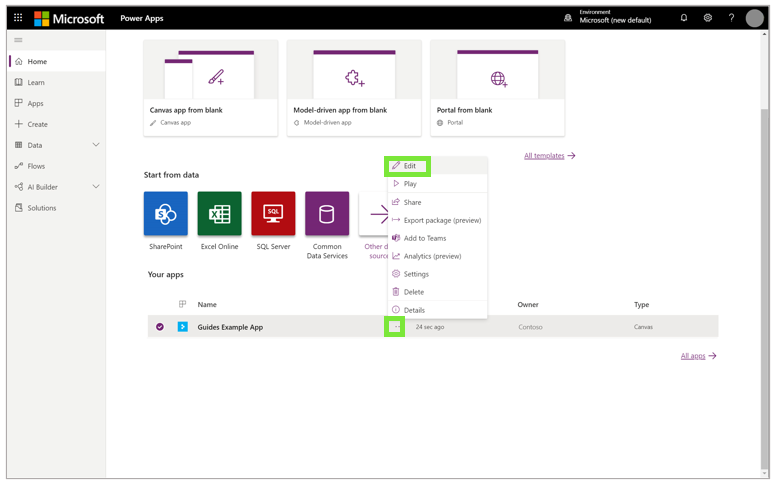
In the left pane, select File, and then select Share.
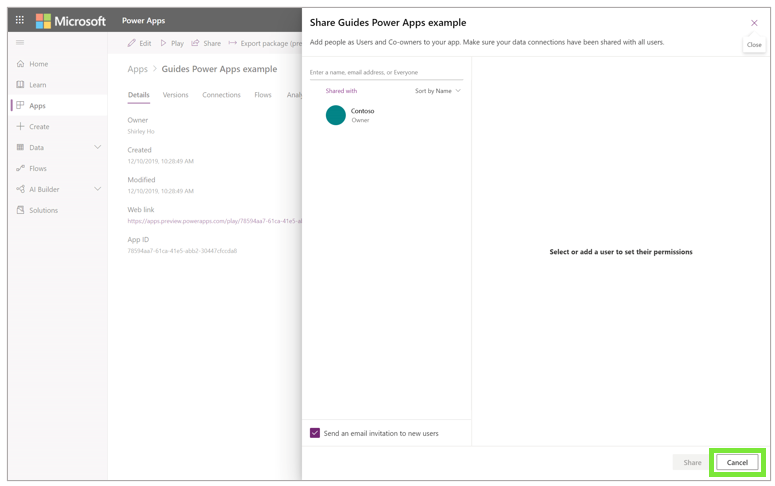
Under Guides Power Apps example, select Share.
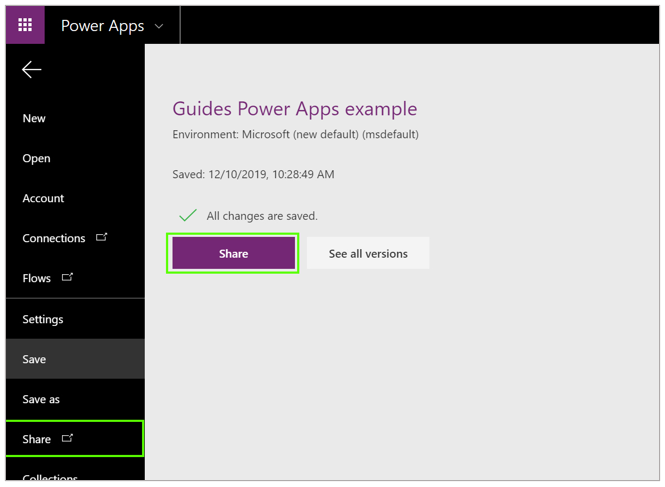
In the Share Guides Power Apps example dialog box, select Cancel.
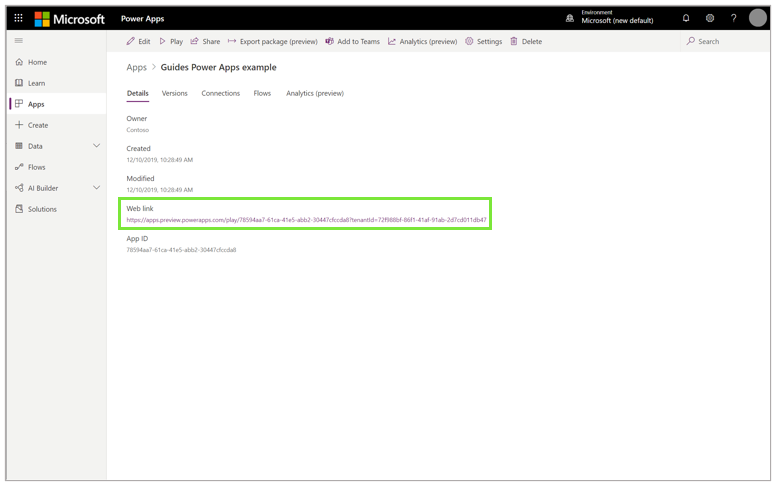
In the Web link field, copy the URL.
Add the Power Apps link to a step
To add a Power Apps link to a step, you add an action. You can add one action per step. If a step already includes an action, any new action that you add overwrites the existing action.
In the PC app, go to the appropriate step, and then select the Action circle in the Step Editor pane.

Select Power Apps and then paste the URL for the Power Apps link in the Link field.
Select Save.
To view, edit, or delete the Power Apps link, select and hold (or right-click) the Power Apps button in the Step Editor pane, and then select the appropriate command.
