Service Fabric application upgrade tutorial using Visual Studio
Azure Service Fabric simplifies the process of upgrading cloud applications by ensuring that only changed services are upgraded, and that application health is monitored throughout the upgrade process. It also automatically rolls back the application to the previous version upon encountering issues. Service Fabric application upgrades are Zero Downtime, since the application can be upgraded with no downtime. This tutorial covers how to complete a rolling upgrade from Visual Studio.
Step 1: Build and publish the Visual Objects sample
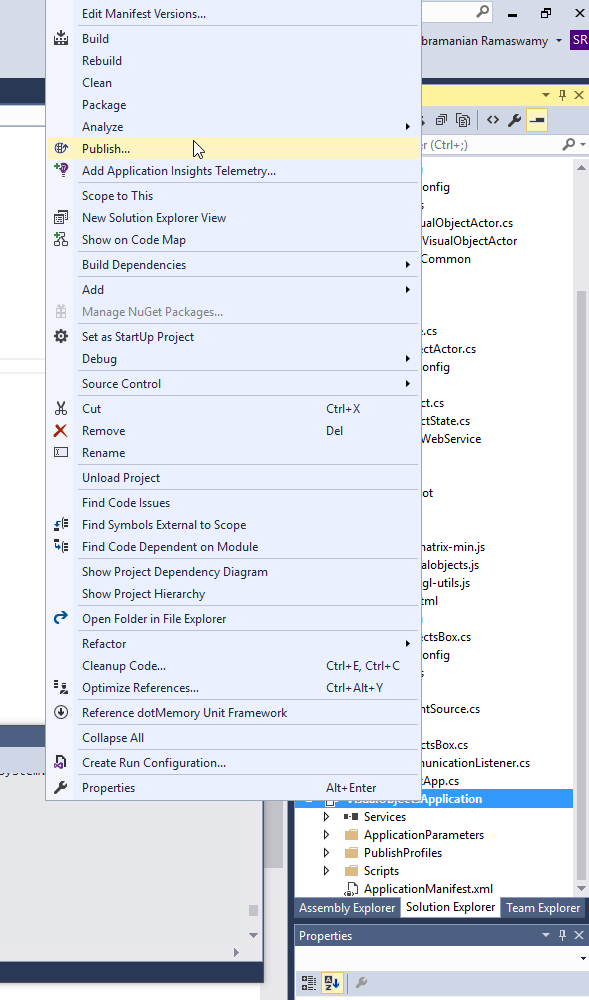
First, download the Visual Objects application from GitHub. Then, build and publish the application by right-clicking on the application project, VisualObjects, and selecting the Publish command in the Service Fabric menu item.

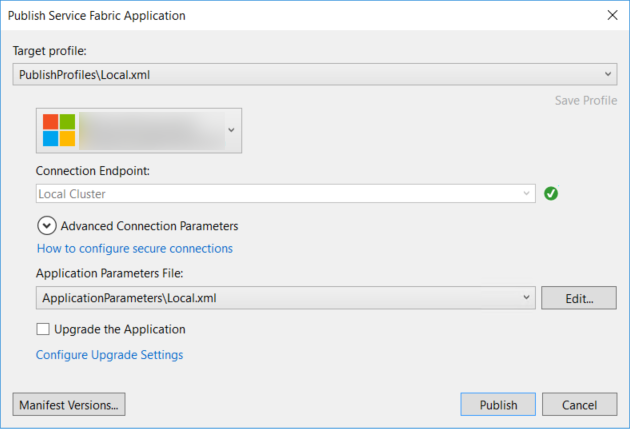
Selecting Publish brings up a popup, and you can set the Target profile to PublishProfiles\Local.xml. The window should look like the following before you click Publish.

Now you can click Publish in the dialog box. You can use Service Fabric Explorer to view the cluster and the application. The Visual Objects application has a web service that you can go to by typing http://localhost:8081/visualobjects/ in the address bar of your browser. You should see 10 floating visual objects moving around on the screen.
NOTE: If deploying to Cloud.xml profile (Azure Service Fabric), the application should then be available at http://{ServiceFabricName}.{Region}.cloudapp.azure.com:8081/visualobjects/. Make sure you do have 8081/TCP configured in the Load Balancer (find the Load Balancer in the same resource group as the Service Fabric instance).
Step 2: Update the Visual Objects sample
You might notice that with the version that was deployed in step 1, the visual objects do not rotate. Let's upgrade this application to one where the visual objects also rotate.
Select the VisualObjects.ActorService project within the VisualObjects solution, and open the VisualObjectActor.cs file. Within that file, go to the method MoveObject, comment out visualObject.Move(false), and uncomment visualObject.Move(true). This code change rotates the objects after the service is upgraded. Now you can build (not rebuild) the solution, which builds the modified projects. If you select Rebuild all, you have to update the versions for all the projects.
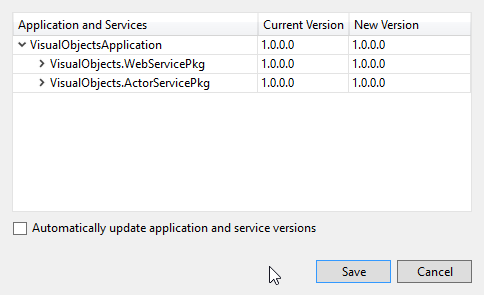
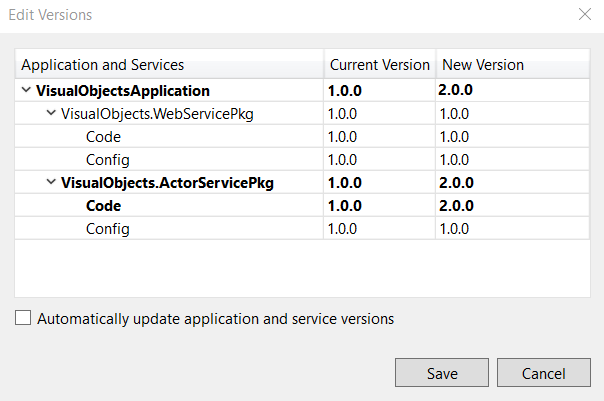
We also need to version our application. To make the version changes after you right-click on the VisualObjects project, you can use the Visual Studio Edit Manifest Versions option. Selecting this option brings up the dialog box for edition versions as follows:

Update the versions for the modified projects and their code packages, along with the application to version 2.0.0. After the changes are made, the manifest should look like the following (bold portions show the changes):

The Visual Studio tools can do automatic rollups of versions upon selecting Automatically update application and service versions. If you use SemVer, you need to update the code and/or configuration package version alone if that option is selected.
Save the changes, and now check the Upgrade the Application box.
Step 3: Upgrade your application
Familiarize yourself with the application upgrade parameters and the upgrade process to get a good understanding of the various upgrade parameters, time-outs, and health criterion that can be applied. For this walkthrough, the service health evaluation criterion is set to the default (unmonitored mode). You can configure these settings by selecting Configure Upgrade Settings and then modifying the parameters as desired.
Now we are all set to start the application upgrade by selecting Publish. This option upgrades your application to version 2.0.0, in which the objects rotate. Service Fabric upgrades one update domain at a time (some objects are updated first, followed by others), and the service remains accessible during the upgrade. Access to the service can be checked through your client (browser).
Now, as the application upgrade proceeds, you can monitor it with Service Fabric Explorer, by using the Upgrades in Progress tab under the applications.
In a few minutes, all update domains should be upgraded (completed), and the Visual Studio output window should also state that the upgrade is completed. And you should find that all the visual objects in your browser window are now rotating!
You may want to try changing the versions, and moving from version 2.0.0 to version 3.0.0 as an exercise, or even from version 2.0.0 back to version 1.0.0. Play with time-outs and health policies to make yourself familiar with them. When deploying to an Azure cluster as opposed to a local cluster, the parameters used may have to differ. We recommend that you set the time-outs conservatively.
Next steps
Upgrading your application using PowerShell walks you through an application upgrade using PowerShell.
Control how your application is upgraded by using upgrade parameters.
Make your application upgrades compatible by learning how to use data serialization.
Learn how to use advanced functionality while upgrading your application by referring to Advanced topics.
Fix common problems in application upgrades by referring to the steps in Troubleshooting application upgrades.