Restore a snapshot to a new volume using Azure NetApp Files
Snapshots enable point-in-time recovery of volumes. This article describes how to create a new volume from a snapshot by using Azure NetApp Files.
Considerations
Currently, you can restore a snapshot only to a new volume.
To avoid unnecessary slowness in the restore operation, only restore one snapshot to a new volume at a time.
If you use the cool access feature, see Manage Azure NetApp Files storage with cool access for more considerations.
Cross-region replication and cross-zone replication operations are suspended and cannot be added while restoring a snapshot to a new volume.
Only enable backup, snapshots, and replication (cross-region or cross-zone) on the new volume after it's fully restored from the snapshot. To ensure the volume is fully restored, check the progress indicator in the volume details.
Steps
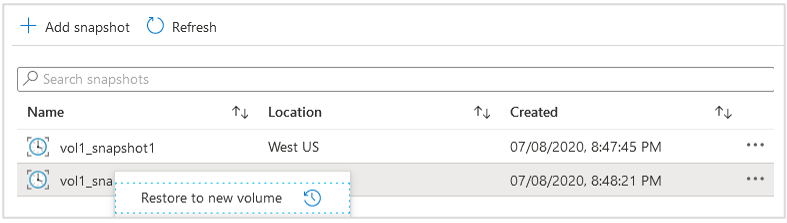
Select Snapshots from the Volume page to display the snapshot list.
Right-click the snapshot to restore and select Restore to new volume from the menu option.
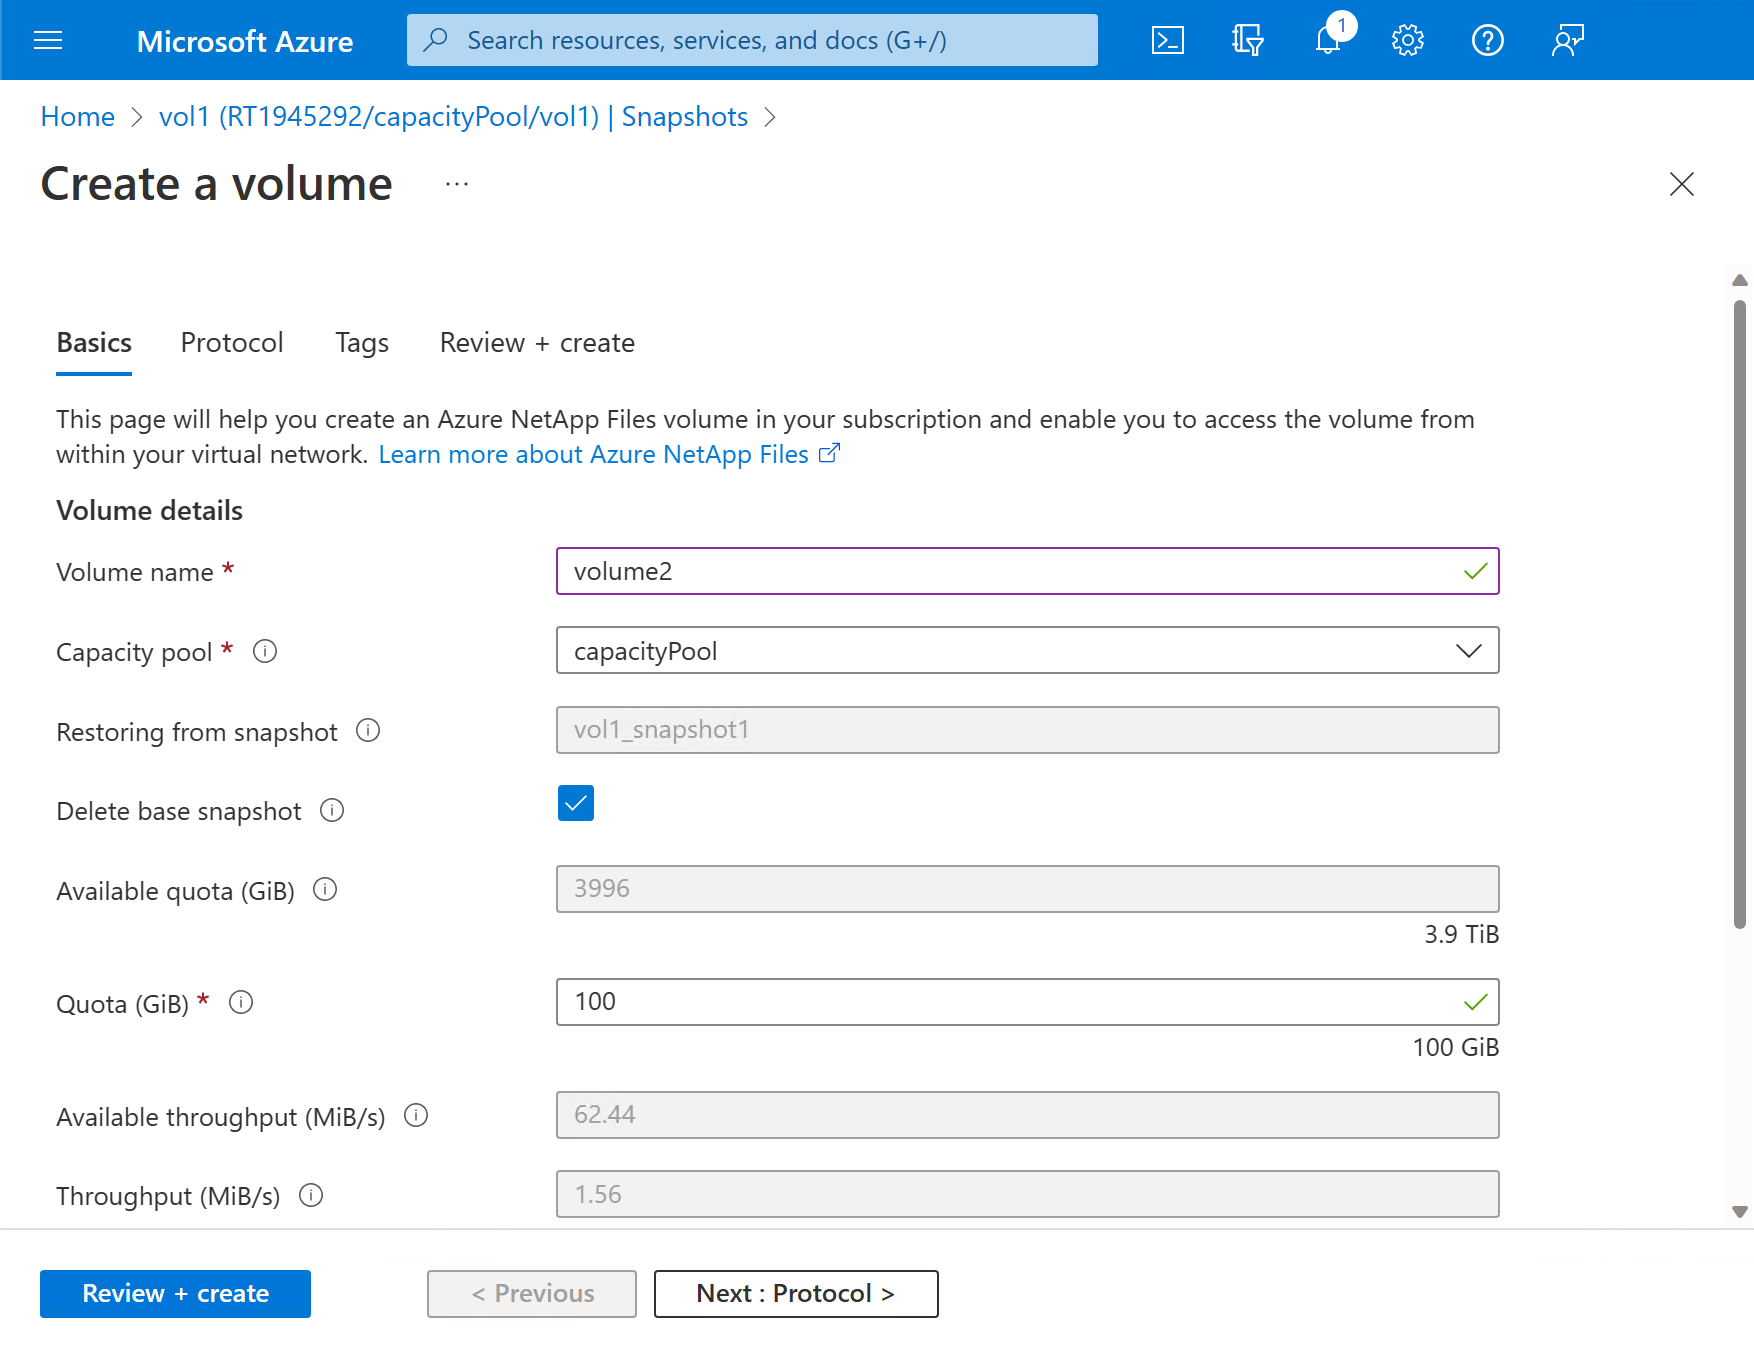
In the Create a Volume page, provide information for the new volume.
The new volume uses the same protocol that the snapshot uses.
For information about the fields in the Create a Volume page, see:By default, the new volume includes a reference to the snapshot that was used for the restore operation from the original volume from Step 2, referred to as the base snapshot. This base snapshot does not consume any additional space because of how snapshots work. If you don't want the new volume to contain this base snapshot, select Delete base snapshot during the new volume creation.
Select Review + create then Create.
The Volumes page displays the new volume to which the snapshot restores. Refer to the Originated from field to see the name of the snapshot used to create the volume.