Storage thin provisioning in Azure Stack HCI
Applies to: Azure Stack HCI, version 22H2
Important
Azure Stack HCI is now part of Azure Local. However, older versions of Azure Stack HCI, for example 22H2 will continue to reference Azure Stack HCI and won't reflect the name change. Learn more.
Thin provisioning is now available in Azure Stack HCI 21H2. Traditionally, volumes are fixed provisioned, meaning that all storage is allocated from the storage pool when a volume is created. Despite the volume being empty, a portion of the storage pool's resources are depleted. Other volumes can't make use of this storage, which impacts storage efficiency and requires more maintenance.
Capacity management: thin vs. fixed provisioned volumes
Thin provisioning is recommended over the traditional fixed provisioning if you don't know exactly how much storage a volume will need and want more flexibility. If you want to limit the size of a volume or limit how much storage a volume can take from the pool, then use fixed provisioning instead.
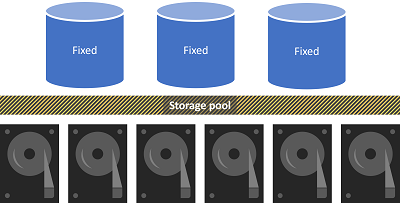
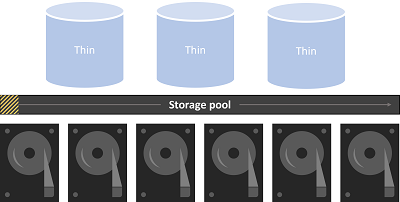
Below is a comparison of the two provisioning types with empty volumes.
With traditional fixed provisioning, pre-allocated space is not available in the storage pool. With thin provisioning, space is allocated from the pool when needed and volumes can be over-provisioned (size larger than available capacity) to accommodate anticipated growth.
| Fixed provisioning | Thin provisioning |
|---|---|
|
|
When a thin-provisioned volume is created, the footprint will be smaller than the specified size of volume. As data is added or removed from the volume, the volume footprint will increase and decrease accordingly.
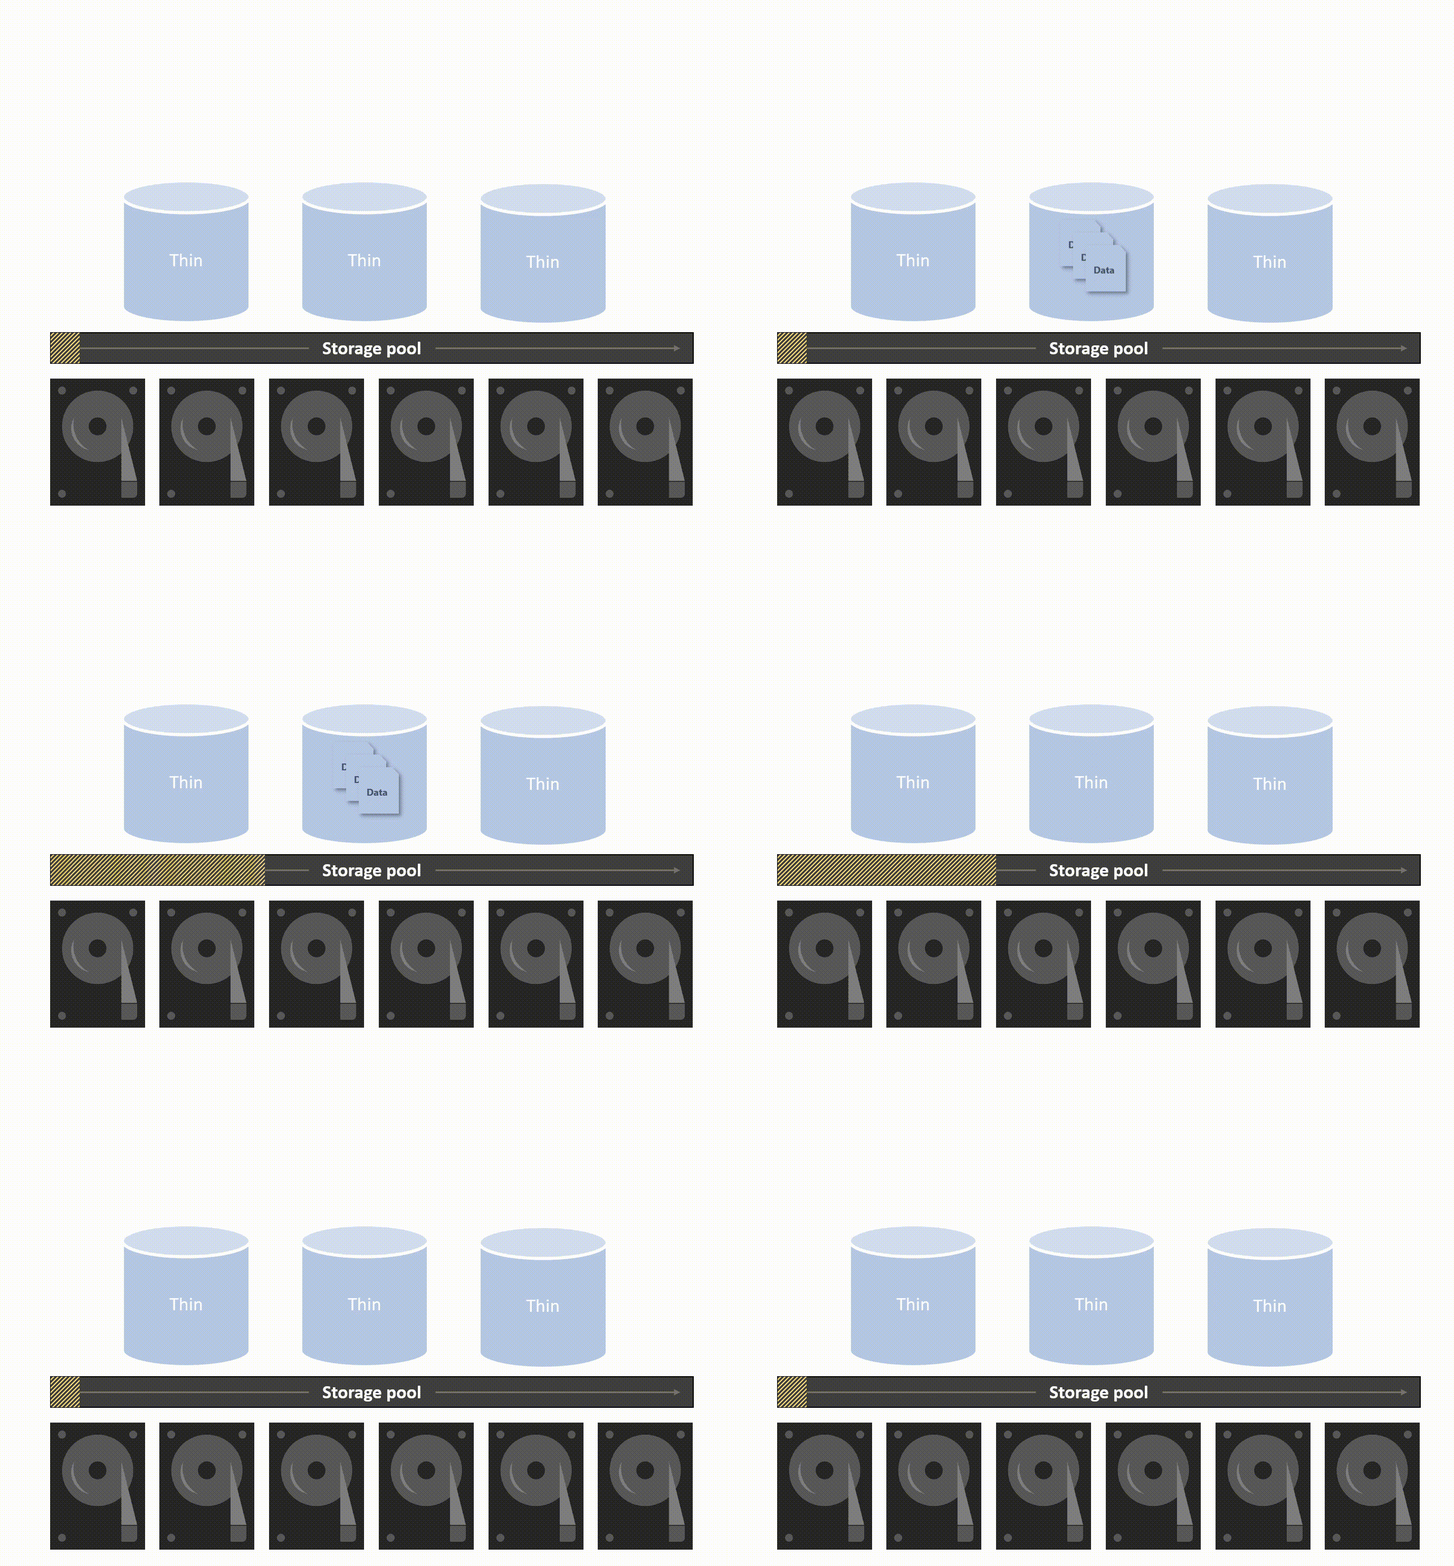
Thin provisioning will work with all resiliency settings (three-way mirror, mirror accelerated parity, etc.) and all types of clusters. Because TRIM is disabled for stretched clusters, storage will not be returned to the pool after data is deleted.
You can create volumes that exceed the total available storage capacity by overprovisioning. An alert will be sent in Windows Admin Center when over 70% (customizable) of the pool capacity is used, signaling that you should add more capacity or delete some of the data.
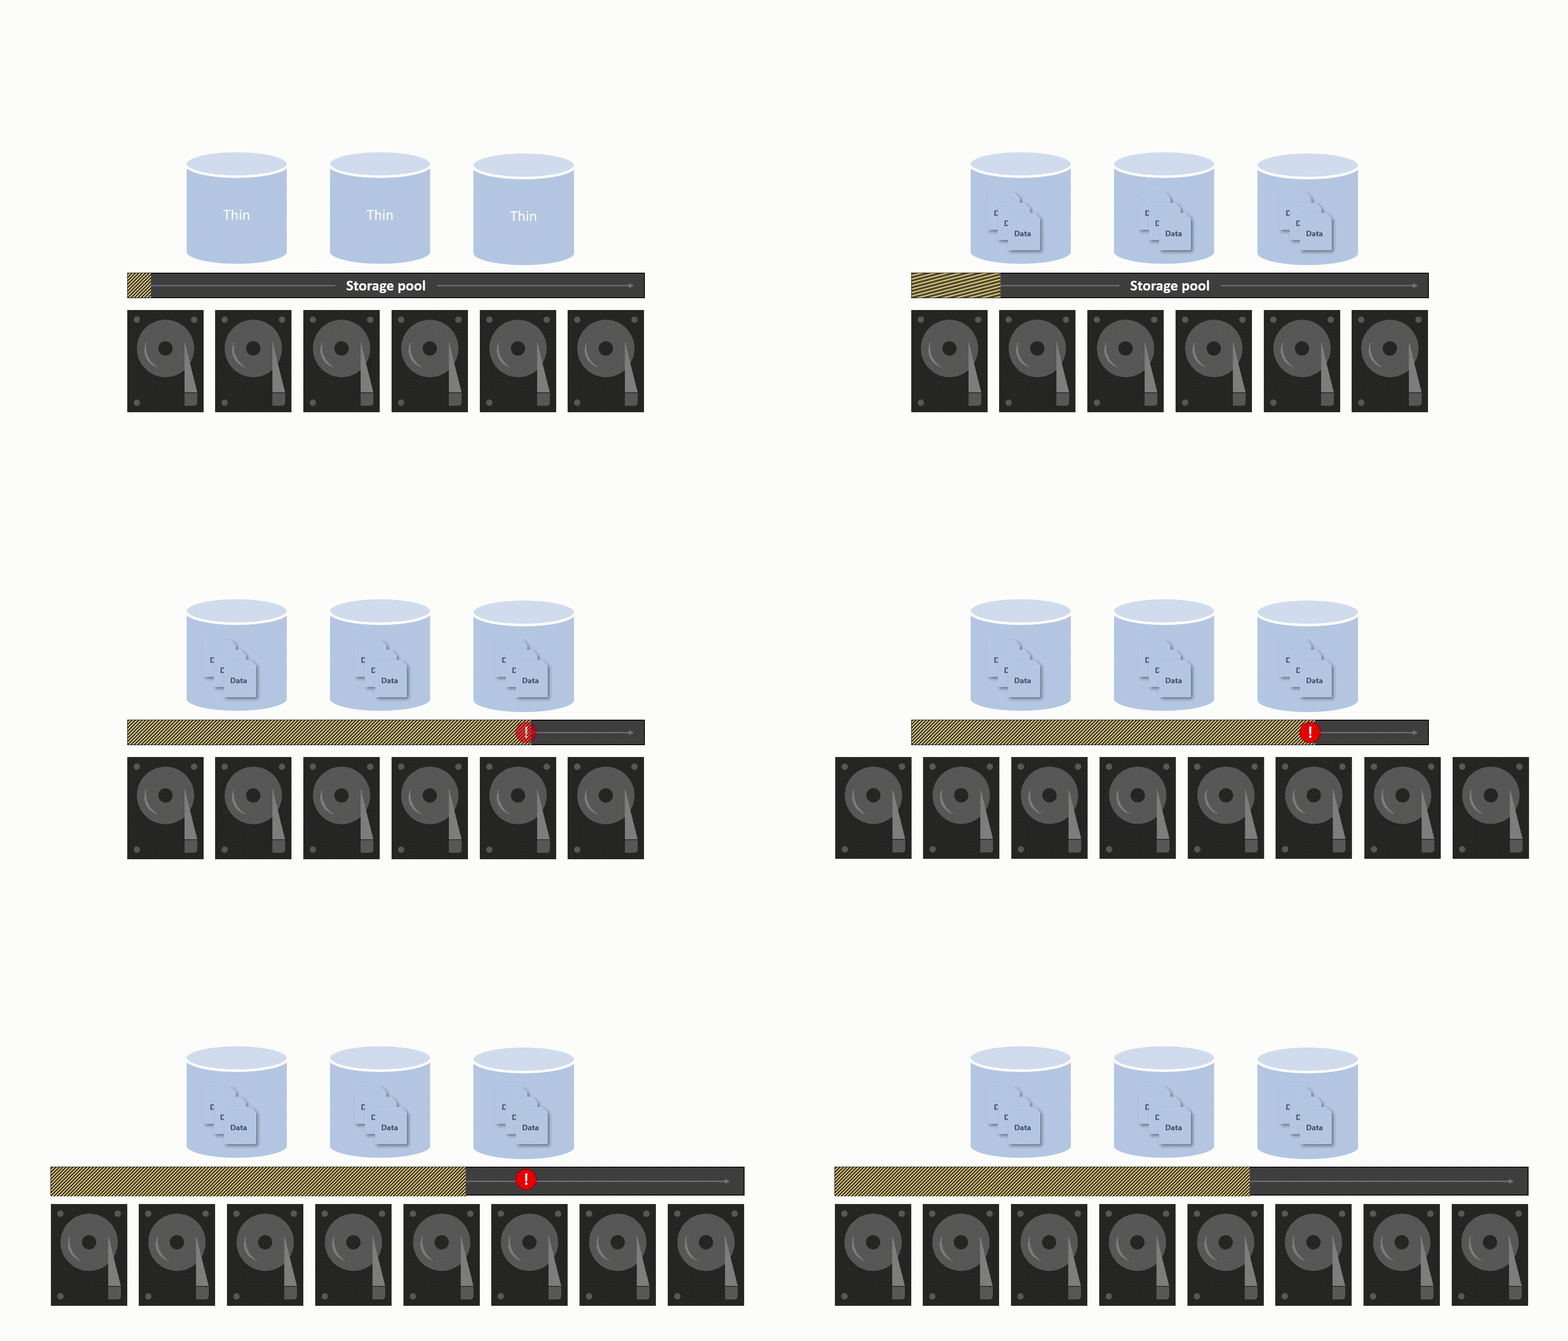
Use thin provisioning with PowerShell
The two options for provisioning a volume with PowerShell are Fixed and Thin. This can be set at the volume level or applied as a default provisioning type to the storage pool. Use the cmdlets below to create a thin-provisioned volume or check/change the default settings.
Option 1: Apply thin provisioning at the volume level
Create a new thin-provisioned volume:
New-Volume -FriendlyName <name> -Size <size> -ProvisioningType Thin
Create a new thin-provisioned mirror accelerated parity volume:
Get-StorageTier <mirror tier> | Set-StorageTier -ProvisioningType Thin
Get-StorageTier <parity tier> | Set-StorageTier -ProvisioningType Thin
New-Volume -FriendlyName <name> -StorageTierFriendlyNames <mirror tier,parity tier> -StorageTierSizes 200GB,800GB
Check the volume provisioning type:
Get-VirtualDisk -FriendlyName <name of virtual disk> | ft FriendlyName,ProvisioningType
Option 2: Set pool default provisioning type to thin
Change the pool default setting to create thin provisioned volumes:
Set-StoragePool -FriendlyName <name of storage pool> -ProvisioningTypeDefault Thin
Check the default provisioning setting:
Get-StoragePool -FriendlyName <name of storage pool> | ft FriendlyName,ProvisioningTypeDefault
Change the default thin provisioning alert threshold:
Set-StoragePool -FriendlyName <name of storage pool> -ThinProvisioningAlertThresholds <% value>
Use thin provisioning in Windows Admin Center
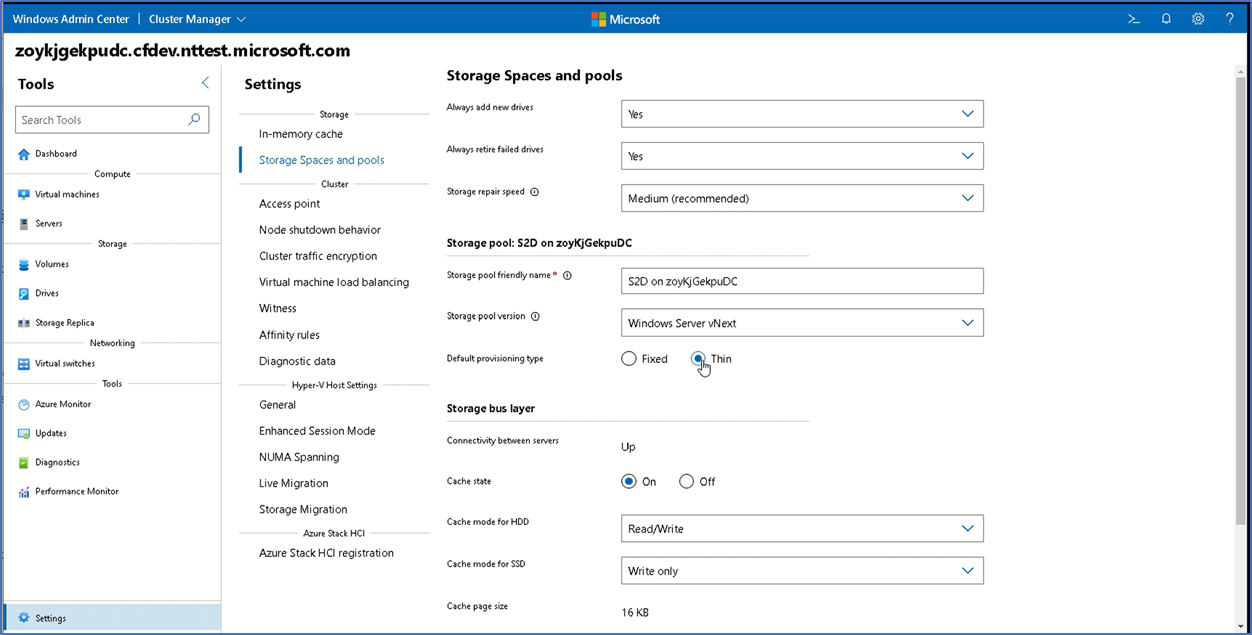
To change the default provisioning type for a storage pool to Thin in Windows Admin Center:
- In Cluster Manager, select Settings from the lower left.
- In the Settings pane, select Storage Spaces and pools.
- Under Storage pool > Default provisioning type, select Thin.
- Select Save.
- Select Volumes from the Tools pane at the left and go to the Inventory tab.
- Click + to create a new volume.
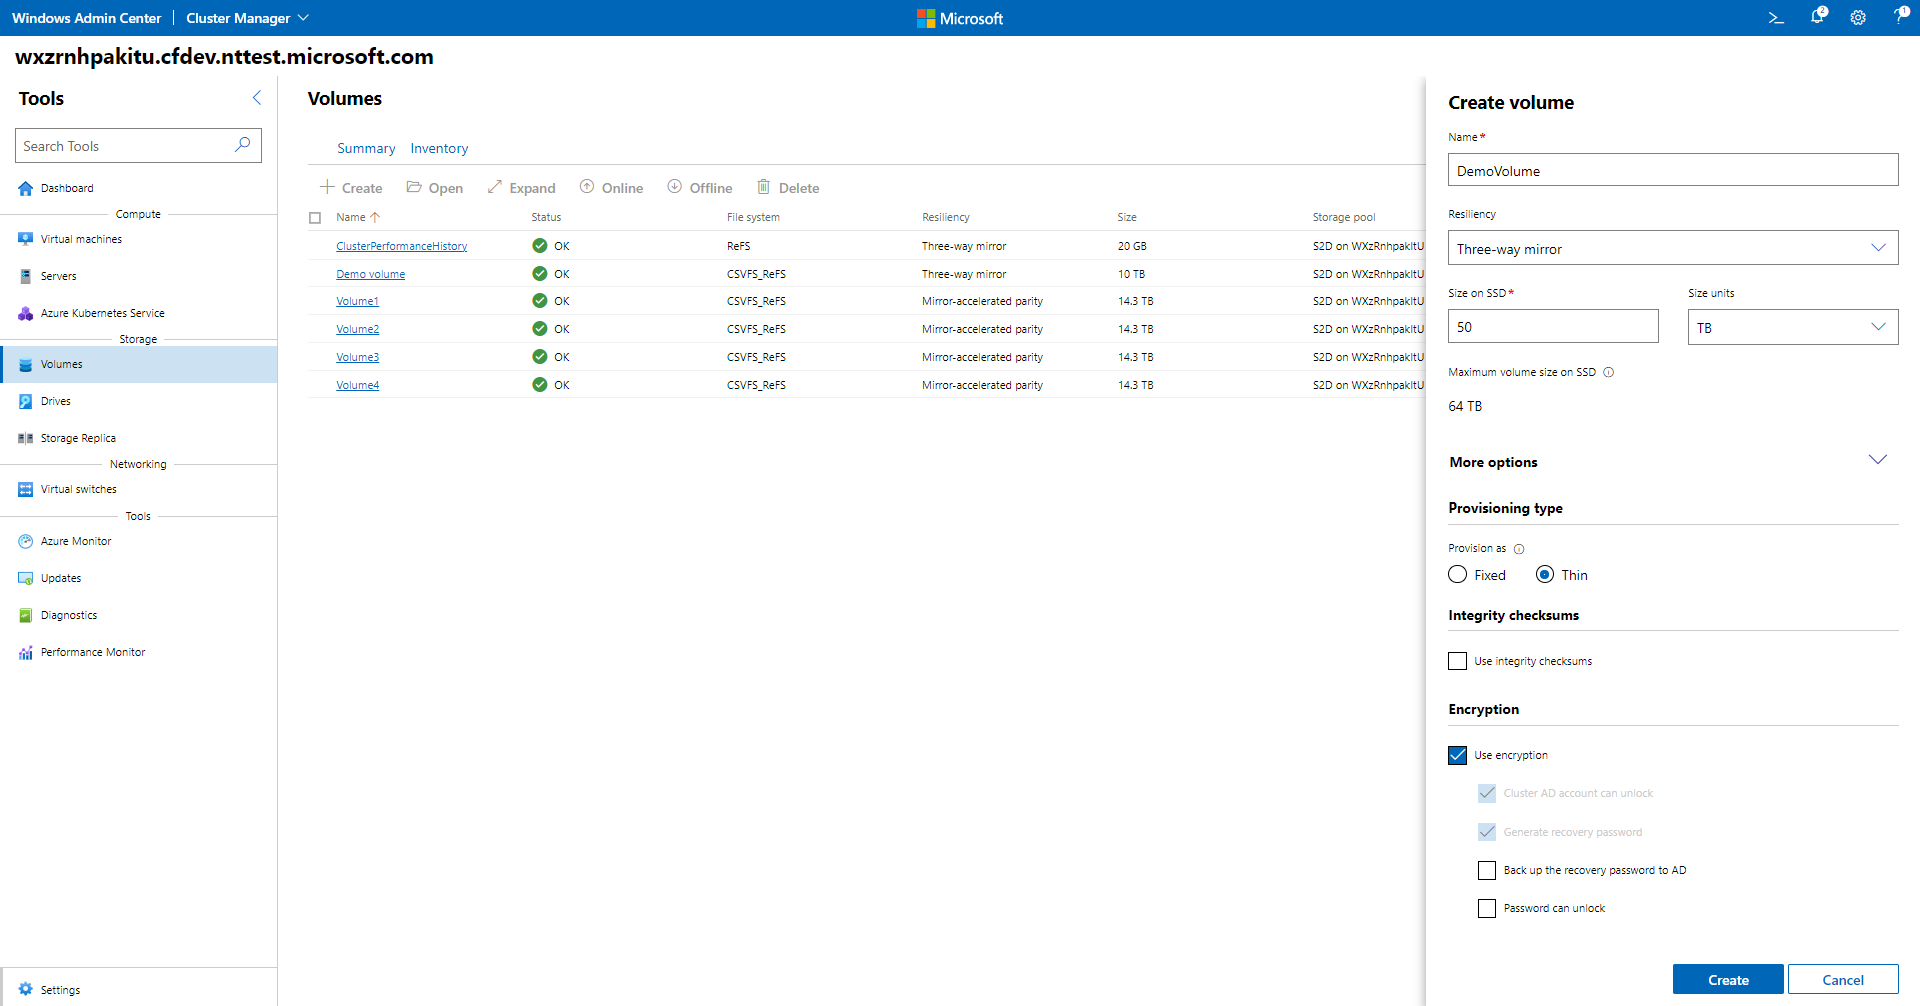
To create a thinly provisioned volume in Windows Admin Center:
- In Cluster Manager, select Volumes from the Tools pane at the left and go to the Inventory tab.
- Click + to open the volume creation pane and fill in the volume name, resiliency, and size.
- Click on More options.
- Under Provisioning type, select Thin.
- Click Create to finish the process.
To check a volume's provisioning type:
- In Cluster Manager, select Volumes from the Tools pane at the left and go to the Inventory tab.
- Select a volume to visit its Properties page.
- Check the provisioning type.
To display Provisioning type as a column heading:
- In Cluster Manager, select Volumes from the Tools pane at the left and go to the Inventory tab.
- Click on the Column picker icon.
- Click Add a column and search for Provisioning type
- Select Save.
Thin provisioning FAQ
This section answers frequently asked questions about thin provisioning on Azure Stack HCI, version 21H2.
Can existing fixed volumes be converted to thin?
Yes. Converting from a fixed volume to a thin volume is supported, see Convert fixed to thin provisioned volumes on Azure Stack HCI.
Is it possible to go back to creating fixed provisioned volumes as a default after switching the setting to thin?
Yes. Navigate to Settings > Storage Spaces and pools, and change the Default provisioning type back to Fixed.
Can there be a mix of fixed and thin volumes in one storage pool?
Yes, it's possible to have a mix of both fixed and thin volumes in one pool.
Will space be given back to the pool immediately after files are deleted?
No. This is a gradual process that can take 15 minutes or so after the files are deleted. If there are many workloads running on the cluster, it may take longer for all of the space to be returned to the pool.
Can I overprovision the volume in Windows Admin Center?
Yes. When creating a volume, the size can be greater than the pool's available capacity if the Provisioning type is Thin.
Next steps
For more information, see also:
