Manage your function app
In Azure Functions, a function app provides the execution context for your individual functions. Function app behaviors apply to all functions hosted by a given function app. All functions in a function app must be of the same language.
Individual functions in a function app are deployed together and are scaled together. All functions in the same function app share resources, per instance, as the function app scales.
Connection strings, environment variables, and other application settings are defined separately for each function app. Any data that must be shared between function apps should be stored externally in a persisted store.
Get started in the Azure portal
Note
Because of limitations on editing function code in the Azure portal, you should develop your functions locally and publish your code project to a function app in Azure. For more information, see Development limitations in the Azure portal
To view the app settings in your function app, follow these steps:
Sign in to the Azure portal using your Azure account. Search for your function app and select it.
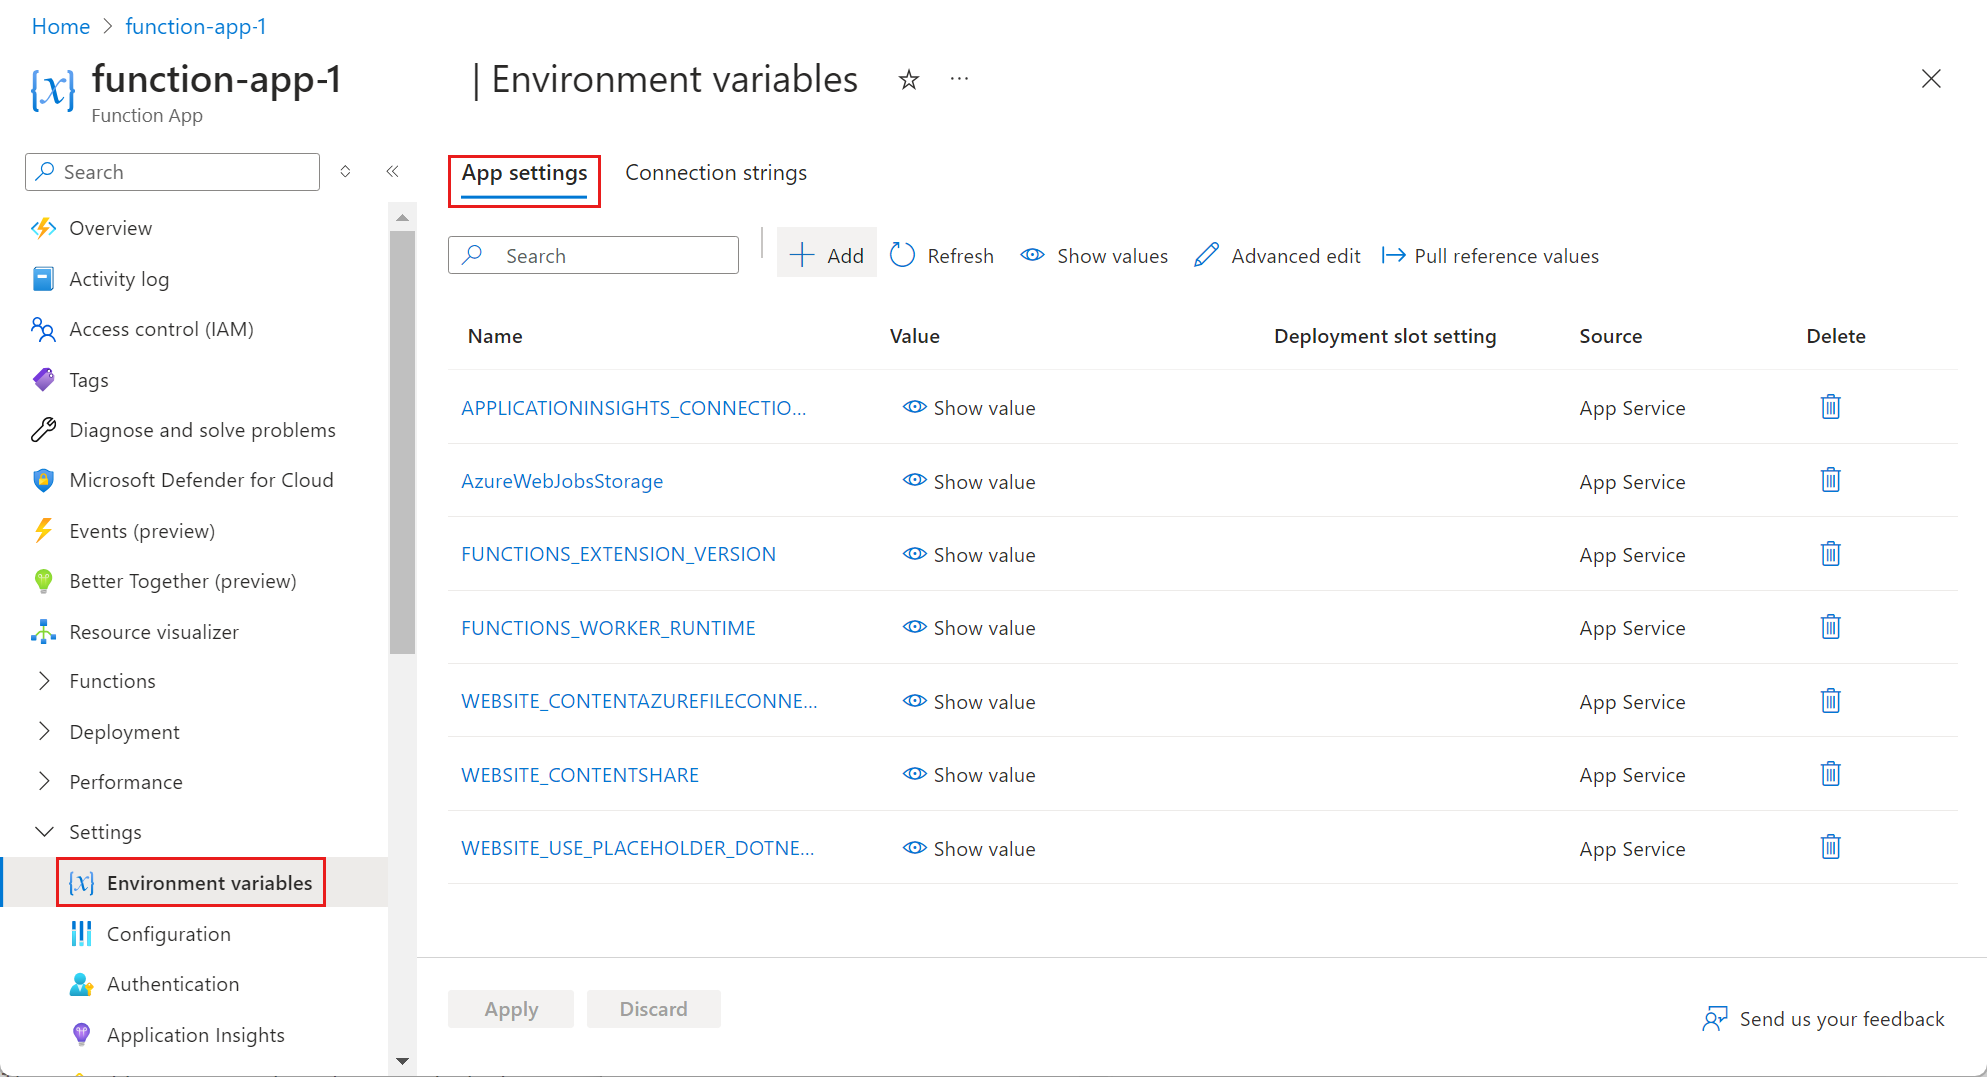
In the left pane of your function app, expand Settings, select Environment variables, and then select the App settings tab.
Work with application settings
In addition to the predefined app settings used by Azure Functions, you can create any number of app settings, as required by your function code. For more information, see App settings reference for Azure Functions.
These settings are stored encrypted. For more information, see App settings security.
You can manage app settings from the Azure portal, and by using the Azure CLI and Azure PowerShell. You can also manage app settings from Visual Studio Code and from Visual Studio.
To view your app settings, see Get started in the Azure portal.
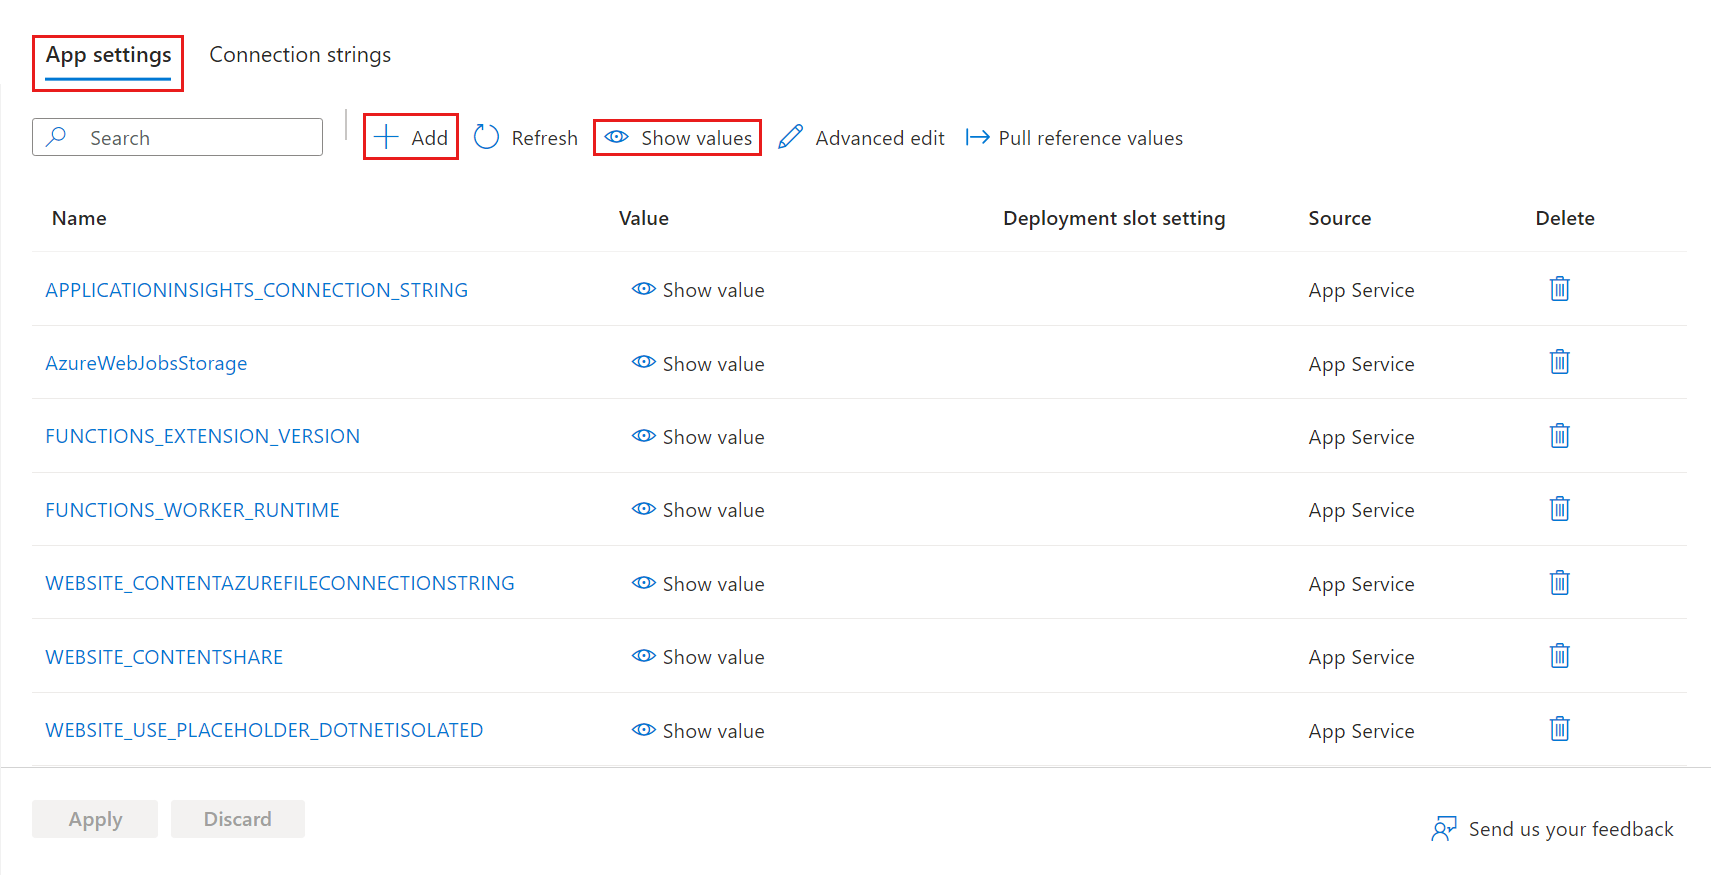
The App settings tab maintains settings that are used by your function app:
Use application settings
The function app settings values can also be read in your code as environment variables. For more information, see the Environment variables section of these language-specific reference articles:
When you develop a function app locally, you must maintain local copies of these values in the local.settings.json project file. For more information, see Local settings file.
FTPS deployment settings
Azure Functions supports deploying project code to your function app by using FTPS. Because this deployment method requires you to sync triggers, it isn't recommended. To securely transfer project files, always use FTPS and not FTP.
To get the credentials required for FTPS deployment, use one of these methods:
You can get the FTPS publishing credentials in the Azure portal by downloading the publishing profile for your function app.
Important
The publishing profile contains important security credentials. Always secure the downloaded file on your local computer.
To download the publishing profile of your function app:
In the Azure portal, locate the page for your function app, expand Settings > Configuration in the left column.
In the Configuration page, select the General settings tab and make sure that SCM Basic Auth Publishing Credentials is turned On. When this setting is Off, you can't use publish profiles, so select On and then Save.
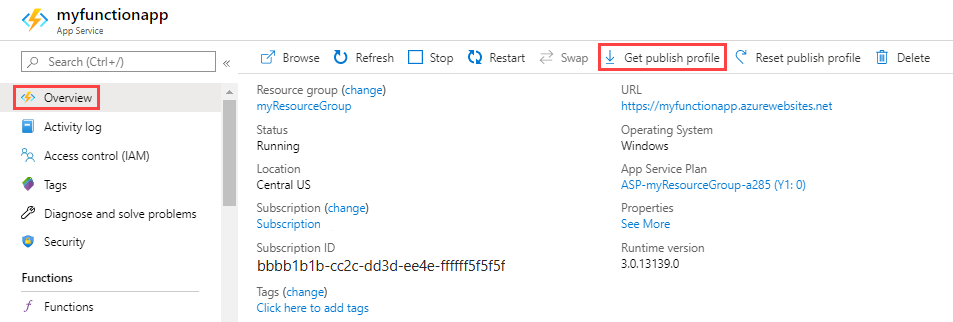
Go back to the function app's Overview page, and then select Get publish profile.
Save and copy the contents of the file.
- In the file, locate the
publishProfileelement with the attributepublishMethod="FTP". In this element, thepublishUrl,userName, anduserPWDattributes contain the target URL and credentials for FTPS publishing.
Hosting plan type
When you create a function app, you also create a hosting plan in which the app runs. A plan can have one or more function apps. The functionality, scaling, and pricing of your functions depend on the type of plan. For more information, see Azure Functions hosting options.
You can determine the type of plan being used by your function app from the Azure portal, or by using the Azure CLI or Azure PowerShell APIs.
The following values indicate the plan type:
| Plan type | Azure portal | Azure CLI/PowerShell |
|---|---|---|
| Consumption | Consumption | Dynamic |
| Premium | ElasticPremium | ElasticPremium |
| Dedicated (App Service) | Various | Various |
To determine the type of plan used by your function app, see the App Service Plan in the Overview page of the function app in the Azure portal.
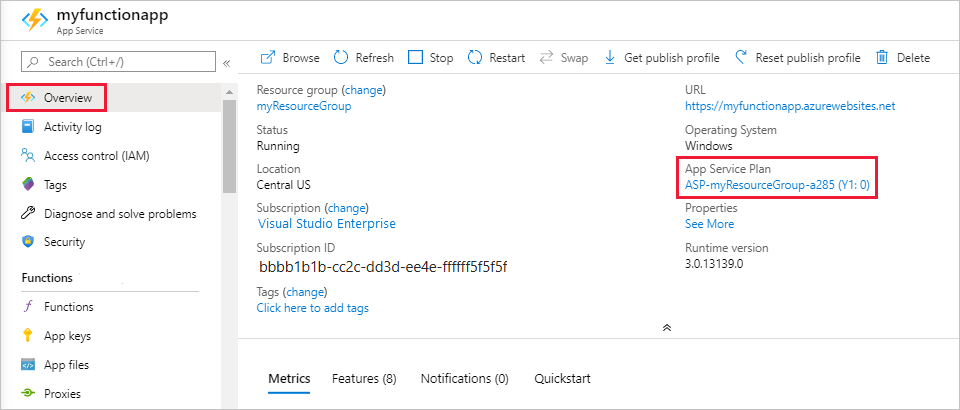
To see the pricing tier, select the name of the App Service Plan, and then select Settings > Properties from the left pane.
Plan migration
You can migrate a function app between a Consumption plan and a Premium plan on Windows. When migrating between plans, keep in mind the following considerations:
- Direct migration to a Dedicated (App Service) plan isn't supported.
- Migration isn't supported on Linux.
- The source plan and the target plan must be in the same resource group and geographical region. For more information, see Move an app to another App Service plan.
- The specific CLI commands depend on the direction of the migration.
- Downtime in your function executions occurs as the function app is migrated between plans.
- State and other app-specific content is maintained, because the same Azure Files share is used by the app both before and after migration.
You can migrate your plan using these tools:
You can use the Azure portal to switch to a different plan.
Choose the direction of the migration for your app on Windows.
Development limitations in the Azure portal
The following table shows the operating systems and languages that support in-portal editing:
| Language | Windows Consumption | Windows Premium | Windows Dedicated | Linux Consumption | Linux Premium | Linux Dedicated |
|---|---|---|---|---|---|---|
| C# | ||||||
| Java | ||||||
| JavaScript (Node.js) | ✔ | ✔ | ✔ | ✔ | ✔ | |
| Python | ✔ | ✔ | ✔ | |||
| PowerShell | ✔ | ✔ | ✔ | |||
| TypeScript (Node.js) |
Consider these limitations when you develop your functions in the Azure portal:
- In-portal editing is supported only for functions that were created or last modified in the Azure portal.
- In-portal editing is supported only for JavaScript, PowerShell, Python, and C# Script functions.
- In-portal editing isn't currently supported by the Flex Consumption plan.
- When you deploy code to a function app from outside the Azure portal, you can no longer edit any of the code for that function app in the portal. In this case, just continue using local development.
- For Python, development with custom modules isn't currently supported in the portal. To add custom modules to your function app, you must develop your app locally.
- For compiled C# functions and Java functions, you can create the function app and related resources in the portal. However, you must create the functions code project locally and then publish it to Azure.
When possible, develop your functions locally and publish your code project to a function app in Azure. For more information, see Code and test Azure Functions locally.
Manually install extensions
C# class library functions can include the NuGet packages for binding extensions directly in the class library project. For other non-.NET languages and C# script, you should use extension bundles. If you must manually install extensions, you can do so by using Azure Functions Core Tools locally. If you can't use extension bundles and are only able to work in the portal, you need to use Advanced Tools (Kudu) to manually create the extensions.csproj file directly in the site. Make sure to first remove the extensionBundle element from the host.json file.
This same process works for any other file you need to add to your app.
Important
When possible, don't edit files directly in your function app in Azure. We recommend downloading your app files locally, using Core Tools to install extensions and other packages, validating your changes, and then republishing your app using Core Tools or one of the other supported deployment methods.
The Functions editor built into the Azure portal lets you update your function code and configuration files directly in the portal:
Select your function app, then under Functions, select Functions.
Choose your function and select Code + test under Developer.
Choose your file to edit and select Save when you finish.
Files in the root of the app, such as function.proj or extensions.csproj need to be created and edited by using the Advanced Tools (Kudu):
Select your function app, expand Development tools, and then select Advanced tools > Go.
If prompted, sign in to the Source Control Manager (SCM) site with your Azure credentials.
From the Debug console menu, choose CMD.
Navigate to
.\site\wwwroot, select the plus (+) button at the top, and select New file.Give the file a name, such as
extensions.csproj, and then press Enter.Select the edit button next to the new file, add or update code in the file, and then select Save.
For a project file like extensions.csproj, run the following command to rebuild the extensions project:
dotnet build extensions.csproj
Platform features
Function apps run in the Azure App Service platform, which maintains them. As such, your function apps have access to most of the features of Azure's core web hosting platform. When you use the Azure portal, the left pane is where you access the many features of the App Service platform that you can use in your function apps.
The following matrix indicates Azure portal feature support by hosting plan and operating system:
| Feature | Consumption plan | Flex Consumption plan | Premium plan | Dedicated plan |
|---|---|---|---|---|
| Advanced tools (Kudu) | Windows: ✔ Linux: X |
X | ✔ | ✔ |
| App Service editor | Windows: ✔ Linux: X |
X | Windows: ✔ Linux: X |
Windows: ✔ Linux: X |
| Backups | X | X | X | ✔ |
| Console | Windows: command-line Linux: X |
X | Windows: command-line Linux: SSH |
Windows: command-line Linux: SSH |
The rest of this article focuses on the following features in the portal that are useful for your function apps:
For more information about how to work with App Service settings, see Configure Azure App Service Settings.
App Service editor
The App Service editor is an advanced in-portal editor that you can use to modify JSON configuration files and code files alike. Choosing this option launches a separate browser tab with a basic editor. This editor enables you to integrate with the Git repository, run and debug code, and modify function app settings. This editor provides an enhanced development environment for your functions compared with the built-in function editor.
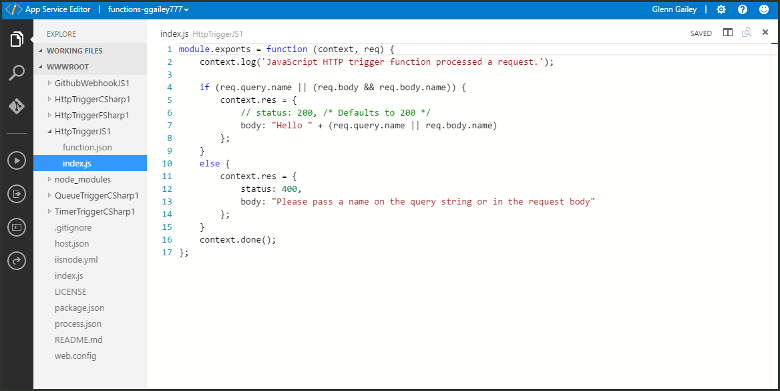
We recommend that you consider developing your functions on your local computer. When you develop locally and publish to Azure, your project files are read-only in the Azure portal. For more information, see Code and test Azure Functions locally.
Console
The in-portal console is an ideal developer tool when you prefer to interact with your function app from the command line. Common commands include directory and file creation and navigation, as well as executing batch files and scripts.
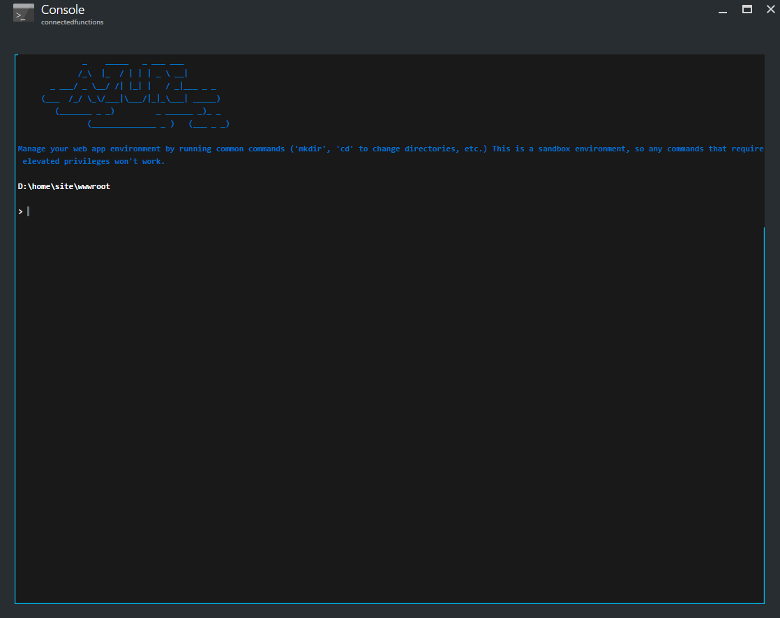
When developing locally, we recommend using the Azure Functions Core Tools and the Azure CLI.
Advanced tools (Kudu)
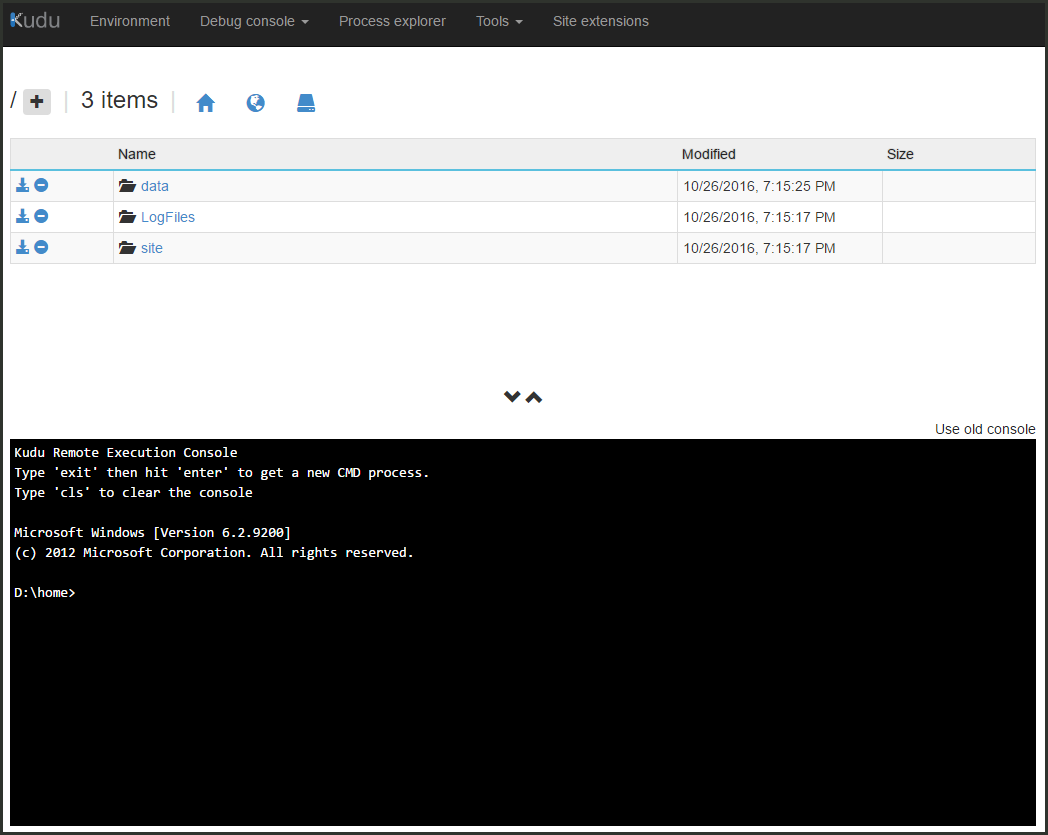
The advanced tools for App Service (also known as Kudu) provide access to advanced administrative features of your function app. From Kudu, you manage system information, app settings, environment variables, site extensions, HTTP headers, and server variables. You can also launch Kudu by browsing to the SCM endpoint for your function app, for example: https://<myfunctionapp>.scm.azurewebsites.net/.
Deployment Center
When you use a source control solution to develop and maintain your functions code, Deployment Center lets you build and deploy from source control. Your project is built and deployed to Azure when you make updates. For more information, see Deployment technologies in Azure Functions.
Cross-origin resource sharing
To prevent malicious code execution on the client, modern browsers block requests from web applications to resources running in a separate domain. Cross-origin resource sharing (CORS) lets an Access-Control-Allow-Origin header declare which origins are allowed to call endpoints on your function app.
When you configure the Allowed origins list for your function app, the Access-Control-Allow-Origin header is automatically added to all responses from HTTP endpoints in your function app.
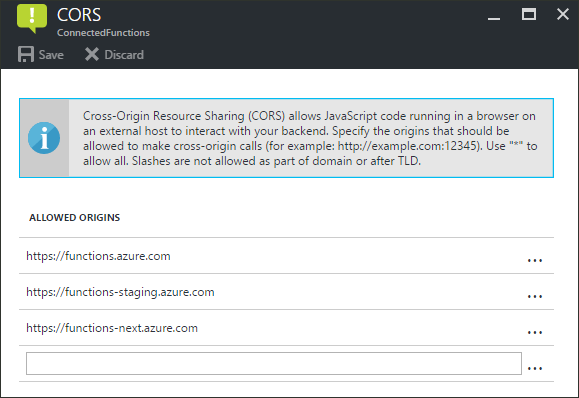
If there's another domain entry, the wildcard (*) is ignored.
Authentication
When functions use an HTTP trigger, you can require calls to first be authenticated. App Service supports Microsoft Entra authentication and sign-in with social providers, such as Facebook, Microsoft, and X. For information about configuring specific authentication providers, see Azure App Service authentication overview.
