Debugging Windows Azure–Getting Tools onto the VM, Part 1
Debugging Windows Azure Series
In the second part of the Debugging Windows Azure series we will look at the various ways you can get your troubleshooting tools onto the VM.
The simple and obvious way is to do a Copy from your desktop machine and then Paste in the Azure VM. This uses rdpclip.exe to do standard Copy/Paste between your machine and the RDP machine. This works really well if your files are small and you have them handy on your local machine. The biggest problem with rdpclip is that transferring files can be very slow. It also replaces whatever was on your clipboard, just like doing a Copy/Paste on your local machine. Transferring a 12 MB file took about 1.5 minutes.
You can also do a pseudo-UNC file share by using \\tsclient\<drive> from within the Azure VM. The file transfers are still slow (the same 12 MB file took about 1.5 minutes), but it does allow easy file transfer back and forth, especially if you are working with multiple files. To enable this functionality you first have to turn on local resource sharing in mstsc. To do this you will click the Connect button on the Management Portal to connect to your Azure VM, but instead of doing an Open on the file, do a Save-As and save the .rdp file onto your local machine. Browse to this file and select Edit. This will open the mstsc client and allow you to configure the settings used to RDP into the machine. In the RDP client go to the Local Resources tab, select More under Local devices and resources, then expand Drives and select any drive that you want to share. Then within the VM you can go to Start –> Run and enter \\tsclient\<drive>. In the below example, I would enter \\tsclient\c (note there is no ‘$’ after the c).
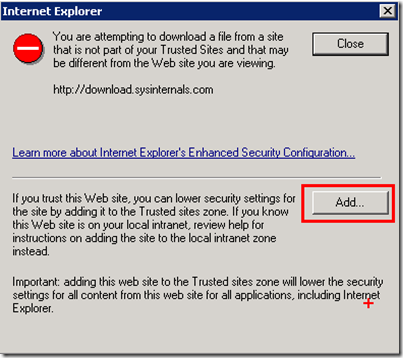
You can also download tools using Internet Explorer. The benefit of this method is the transfers are very fast (the 12 MB file took about 10 seconds), but you do have to know where to find all of your tools on the internet. You will also have to add the download site your list of trusted sites. Using the Sysinternals Suite as an example you would browse to https://technet.microsoft.com/en-us/sysinternals/bb842062 and click on ‘Download Sysinternals Suite’, then click ‘Add’ on the Trusted Sites dialog.
If you have a set of frequently used tools (for me it is Debugging Tools for Windows a.k.a WinDBG, Sysinternals Suite, and Netmon) you can put those tools into Blob Storage and then access the files from blob storage while on the VM. The benefit here is that file transfers are extremely fast since the transfers are all in the same datacenter. The drawback is that you have to get an Azure storage explorer tool (see list here) onto the VM using one of the above methods and then configure it with your account and key before you can download from blob storage. Stay tuned for a future blog post about a custom lightweight tool which provides access to these blobs along with several other useful features when you are RDPed onto an Azure VM. Alternatively you could store your tools in public blogs and then just browse the URL, but you would have to make sure the license of the tool allows you to do this.


