Conversión de una imagen de dispositivo personalizada existente en una máquina virtual de generación 2
Para admitir Windows 11, las imágenes de dispositivo personalizadas deben basarse en máquinas virtuales (VM) de generación 2 (Gen2). Si ya tiene imágenes de dispositivo personalizadas basadas en máquinas virtuales de generación 1 (Gen1), puede convertir esas imágenes de dispositivo personalizadas siguiendo los pasos siguientes. Una vez completados estos pasos, todos los equipos en la nube futuros aprovisionados a partir de la imagen de dispositivo convertida se basarán en máquinas virtuales de generación 2.
Windows 365 no impedirá el aprovisionamiento de nuevos equipos en la nube de imágenes personalizadas existentes basadas en máquinas virtuales de generación 1. Sin embargo, si desea agregar nuevas imágenes personalizadas, Windows 365 solo aceptará imágenes basadas en la generación 2. Las máquinas virtuales de generación 2 son necesarias para admitir Windows 11.
Hay cuatro pasos principales para este proceso:
- Crear una nueva máquina virtual
- Convertir el registro de arranque maestro en la partición GUID
- Convertir el disco a un tamaño fijo y formato VHD
- Cargar la máquina virtual convertida en Azure
Crear una nueva máquina virtual
- Asegúrese de que Hyper-V está instalado en el equipo de administración. Para obtener información sobre cómo instalar Hyper-V, consulte Instalación de Hyper-V en Windows.
- Descargue el archivo de unidad de imagen personalizada del disco duro virtual (VHD) existente desde la dirección URL de blob del almacenamiento de Azure en el equipo que tenga Hyper-V disponible. El archivo VHD tiene el tamaño exacto del disco del sistema operativo, que puede ser un archivo de gran tamaño. Asegúrese de usar una conexión a Internet rápida y estable para descargar el archivo VHD y prepararse para tiempos de descarga largos. Para más información sobre cómo descargar un disco administrado, consulte Descargar un VHD de Azure. También puede descargar el VHD directamente mediante el Explorador de Azure Storage, como VHD de disco administrado o blobs de almacenamiento.
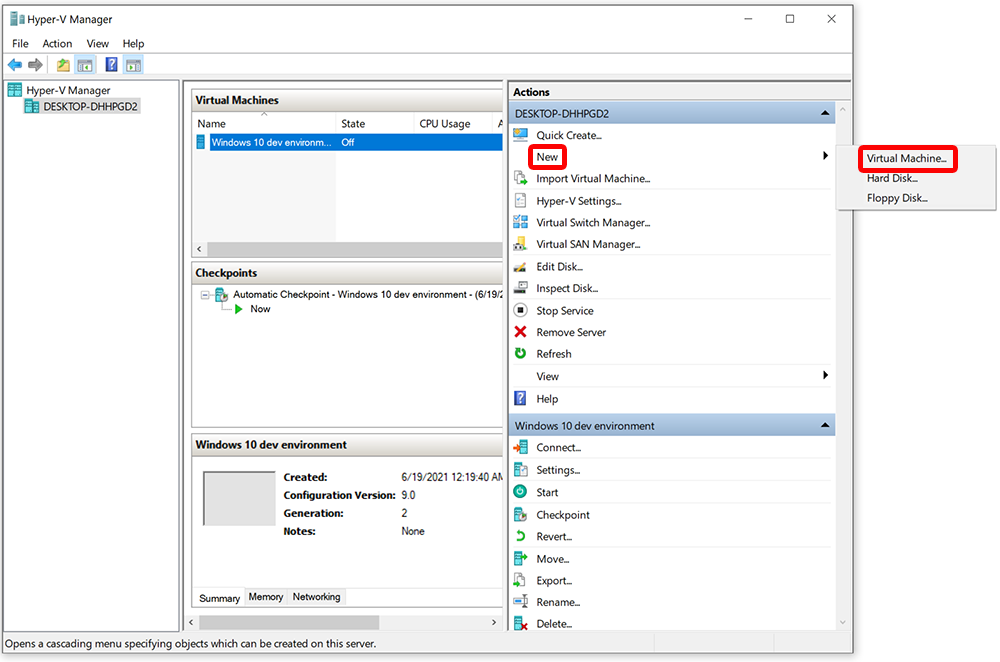
- Cambie a su equipo local y abra el Administrador de Hyper-V.
- En Acciones, seleccione Nueva>Máquina virtual.
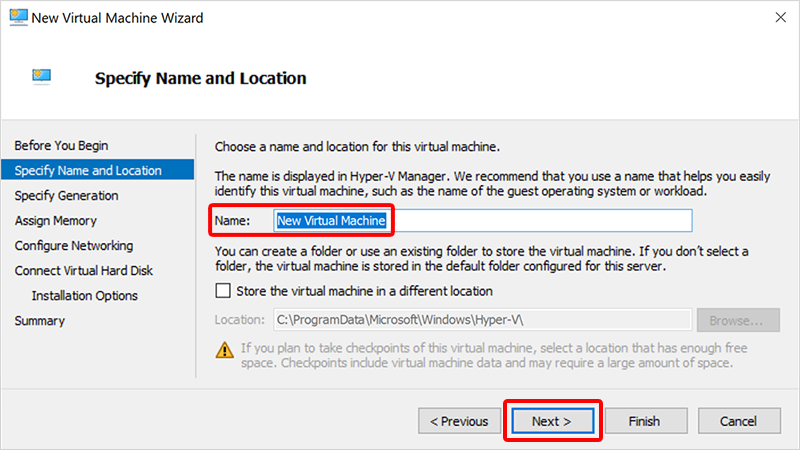
- En la página Antes de empezar, seleccione Siguiente.
- En la página Especificar nombre y ubicación, escriba un nombre descriptivo, como CustomFinanceImageg2 y, a continuación, seleccione Siguiente.
- En la página Especificar generación, seleccione Generación 1 (no Generación 2). La generación 2 es necesaria aquí para montar el disco y cambiar el modelo de partición a la tabla de particiones GUID (GPT). Seleccione Siguiente.
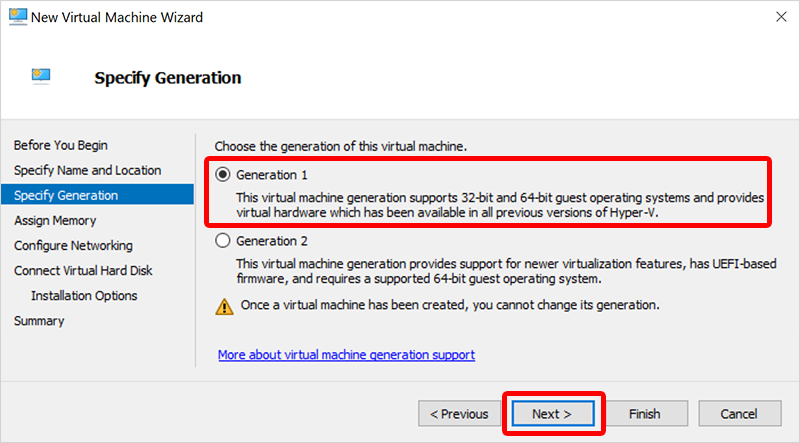 Hyper-V solo admite imágenes de generación 2 en imágenes VHDX y de generación 1 en VHD. Azure solo admite imágenes de generación 2 en VHD. Por lo tanto, estamos creando una imagen de VHD de generación 1 aquí con el fin de convertirla en una imagen de VHD de generación 2.
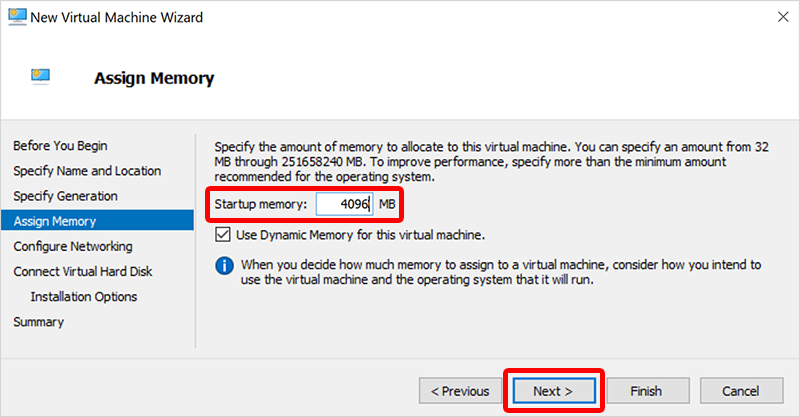
 - En la página Asignar memoria, establezca la Memoria de inicio en al menos 1024 MB, preferiblemente 4096 MB. Seleccione Siguiente.
- En la página Configurar redes, seleccione Cambiar predeterminado>Siguiente.
- En la página Conectar disco duro virtual, seleccione Usar un disco duro virtual existente.
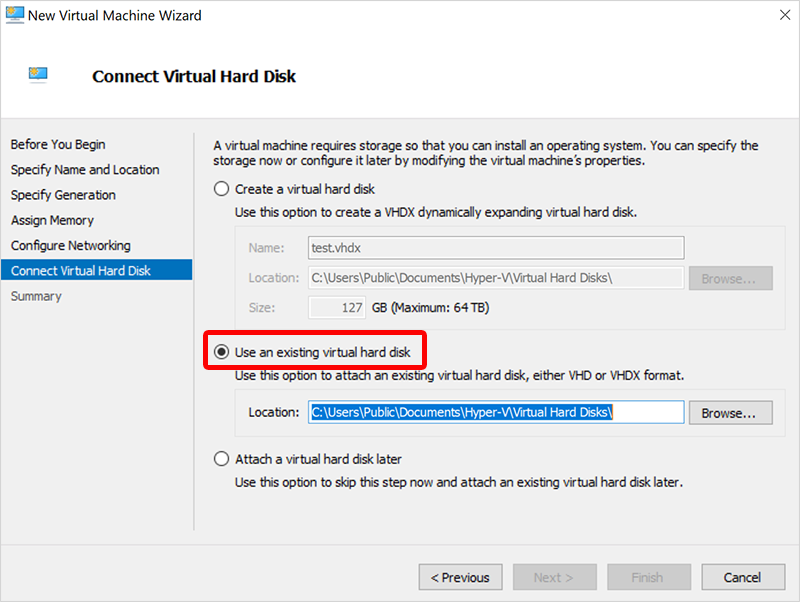
- En Ubicación, seleccione Examinar y seleccione el VHD que descargó anteriormente.
- Seleccione Siguiente y, en la página Resumen, seleccione Finalizar.
Convertir el registro de arranque maestro en la partición GUID
- Crear una ISO WinPE multimedia. Para obtener instrucciones sobre cómo crear una ISO, vea Create WinPE multimedia de arranque. Como alternativa, arranque desde una ISO de Windows 11 y presione Shift + F10 para que aparezca un solicitud de CMD.
- En el Administrador de Hyper-V, en Máquinas virtuales, seleccione la nueva máquina virtual y, a continuación, en Acciones, seleccione Configuración.
- En el panel de navegación izquierdo, en Controlador IDE 1, seleccione Unidad de DVD.
- En Unidad de DVD, en Controlador, seleccione Controlador IDE 1.
- Seleccione Archivo de imagen y busque el nuevo archivo ISO que ha creado.
- Seleccione Aceptar.
- En Acciones, seleccione Iniciar.
- Espere a que se abra el símbolo del sistema wpeinit.
- Para convertir el registro de arranque maestro (MBR) en la partición de la tabla de particiones GUID (GPT), ejecute los dos comandos a continuación en la ventana wpeinit. La GPT es el nuevo estándar para las máquinas virtuales basadas en la generación 2.
- Para determinar qué disco es adecuado para la conversión y validarlo, ejecute
mbr2gpt /validate /disk:0. - Para convertir el disco en la tabla de particiones GUID (GPT), ejecute
mbr2gpt /convert /disk:0Para más información sobre MBR2GPT, consulte la documentación del archivo MBR2GPT.exe.
- Para determinar qué disco es adecuado para la conversión y validarlo, ejecute
- Después de que los comandos se ejecuten correctamente, pase al siguiente paso.
Convertir el disco a un tamaño fijo y formato VHD
- Apague la máquina virtual.
- En el Administrador de Hyper-V, seleccione el nuevo disco de edición de máquina > virtual (en Acciones).
- En la página Antes de empezar, seleccione Siguiente.
- En la página Buscar disco, vaya a la ubicación del disco > convertido Siguiente.
- En la página Elegir acción, seleccione Compact>Finish.
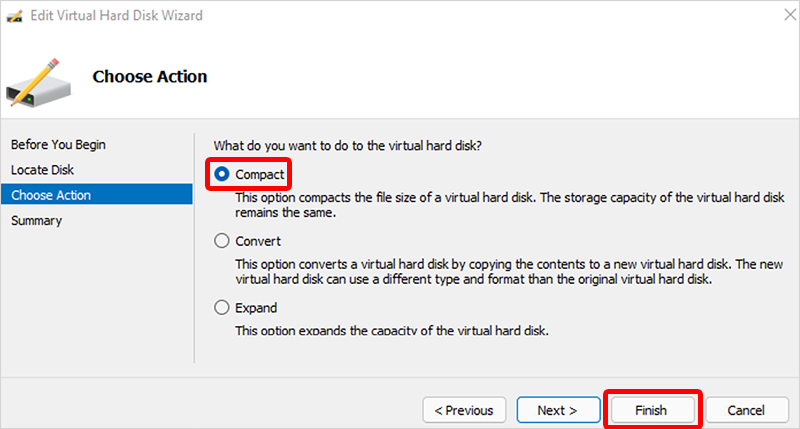
- Una vez completado el proceso, vuelva a > seleccionar la nueva máquina virtual Editar disco.
- En la página Antes de empezar, seleccione Siguiente.
- En la página Buscar disco, vaya a la ubicación del disco > convertido Siguiente.
- En la página Elegir acción, seleccione Convert>Siguiente.
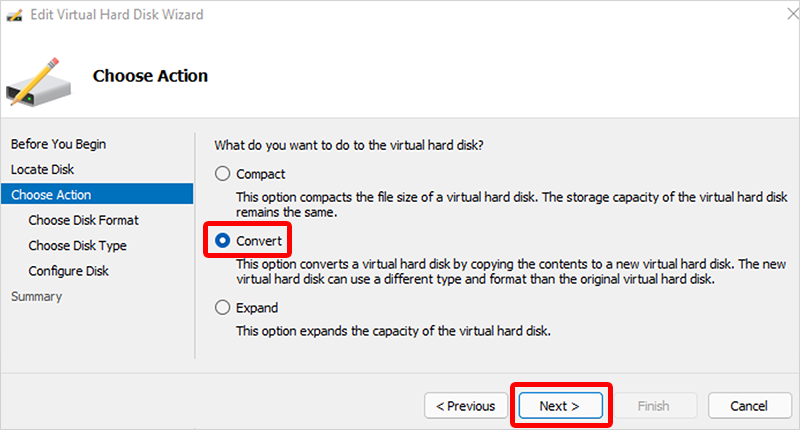
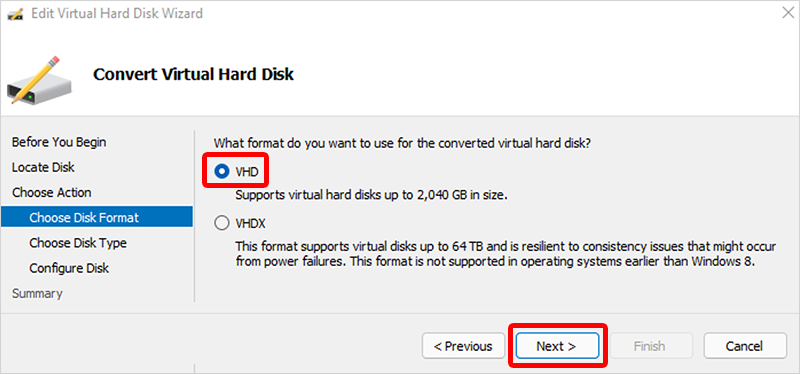
- En la página Elegir formato de disco, seleccione VHD>Siguiente.
- En la página Elegir tipo de disco, seleccione Tamaño fijo>Siguiente.
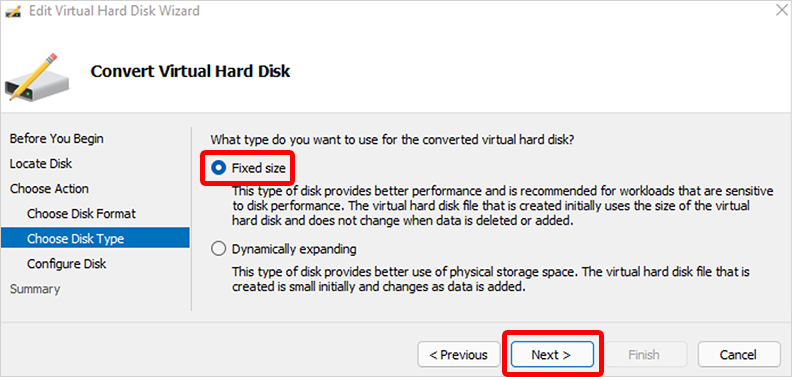
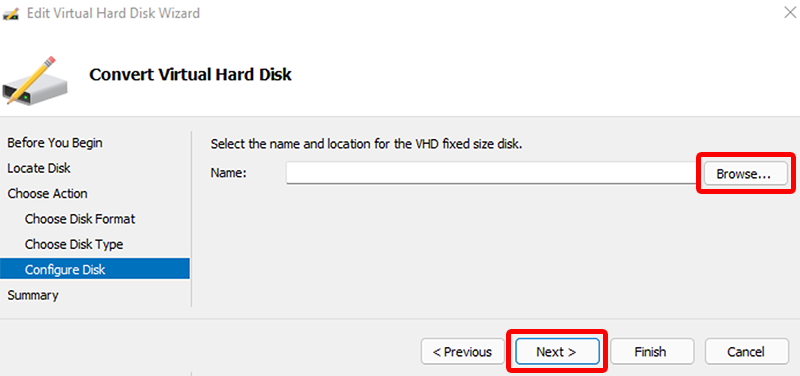
- En la página Configurar disco , vaya a una nueva ubicación para el disco que se va a crear >a continuación.
- En la página Resumen, confirme que todos los detalles son correctos y seleccione Finalizar.
- Una vez completado el proceso, desmonte la imagen ISO de WinPE siguiendo estos pasos:
- En el Administrador de Hyper-V, en Máquinas virtuales, seleccione la nueva máquina virtual y, a continuación, en Acciones, seleccione Configuración.
- En el panel de navegación izquierdo, seleccione Controlador IDE 1.
- En Unidad de DVD, en Controlador, seleccione Controlador IDE 1.
- Seleccione Aceptar.
Cargue el VHD convertido a Azure.
- Vuelva a cargar el VHD convertido a Azure. Puede usar el Explorador de Azure Storage. Para otras opciones de carga, consulte Cargar un VHD de Windows generalizado y úselo para crear nuevas máquinas virtuales en Azure.
Nota:
Asegúrese de que el VHD sigue siendo un VHD de tamaño fijo. Azure no admite VHDX como formato.
- Vaya al portal de Azure, abra Imágenes>Crear.
- Rellene los campos necesarios y asegúrese de seleccionar Gen 2 para la generación de una VM.
- Seleccione Revisar + Crear.
- (Opcional) Una vez creada la imagen, puede cargarla. Para obtener instrucciones sobre cómo cargar, consulte Carga de un disco duro virtual en Azure o copia de un disco administrado en otra región, Azure PowerShell.
- Ahora puede agregar la imagen del dispositivo a Windows 365. Para obtener información sobre cómo cargar imágenes personalizadas, consulte Agregar una imagen de dispositivo personalizada.