Record Power Automate for desktop actions
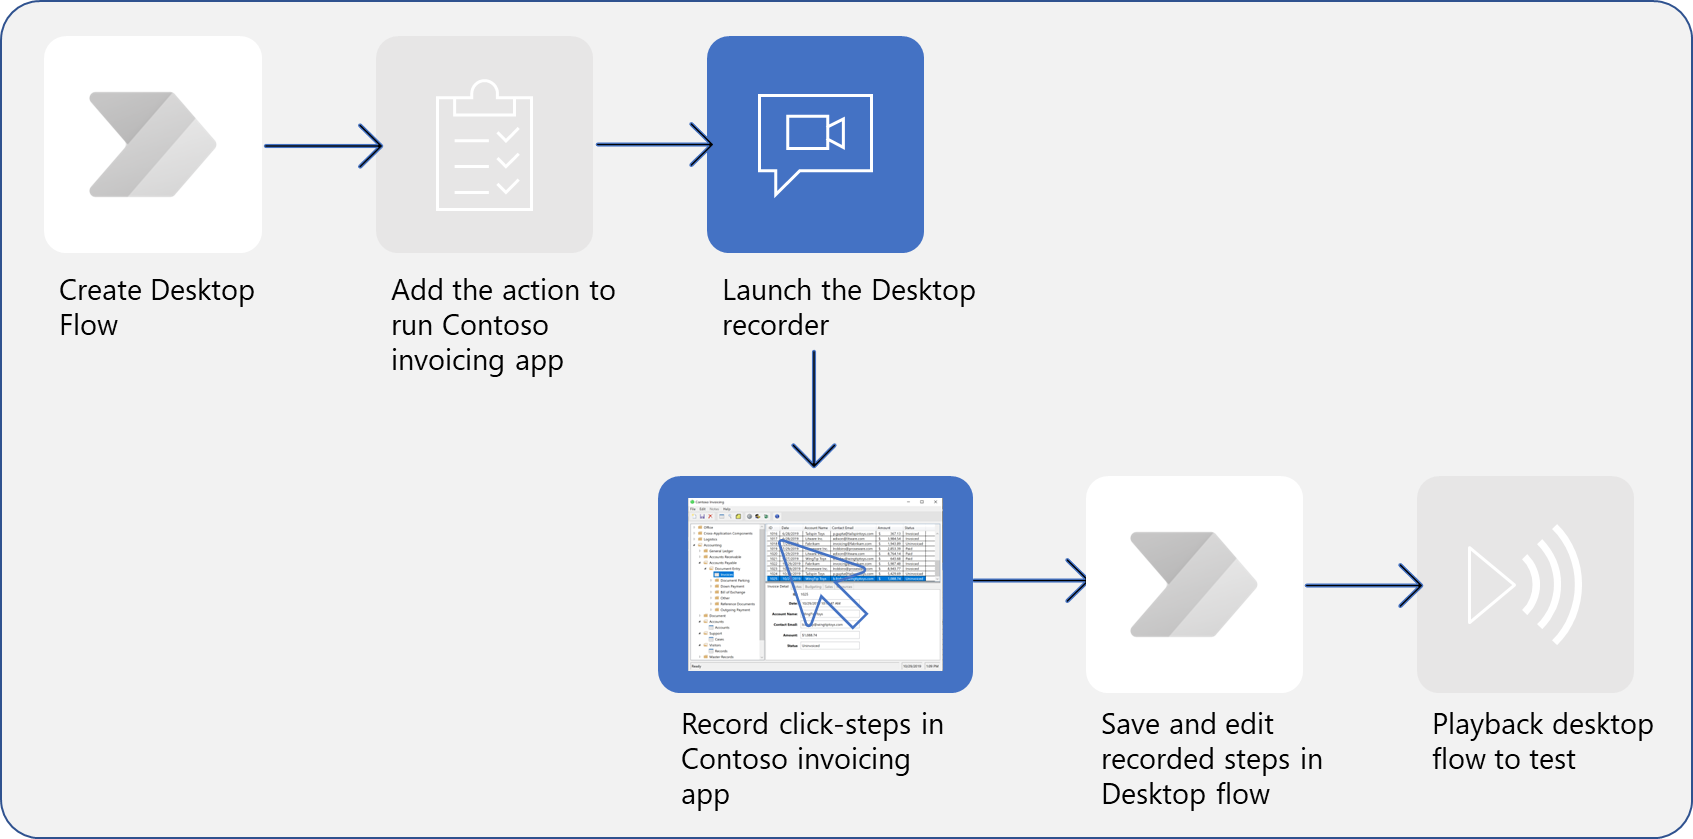
In this unit, you learn how to record Power Automate for desktop actions.
Watch the following video demonstration of the steps that you complete in this unit.
Note
Before getting started, you should be aware of some cleanup items. The process will be more effortless if you exit out of unnecessary applications while you're recording. If you have more browsers or programs running, you should close them now. Additionally, it will be difficult to read the instructions and perform the actions that are required for the recording simultaneously. You might want to read through this unit completely before performing the outlined steps. With those items out of the way, you're now ready to begin recording.
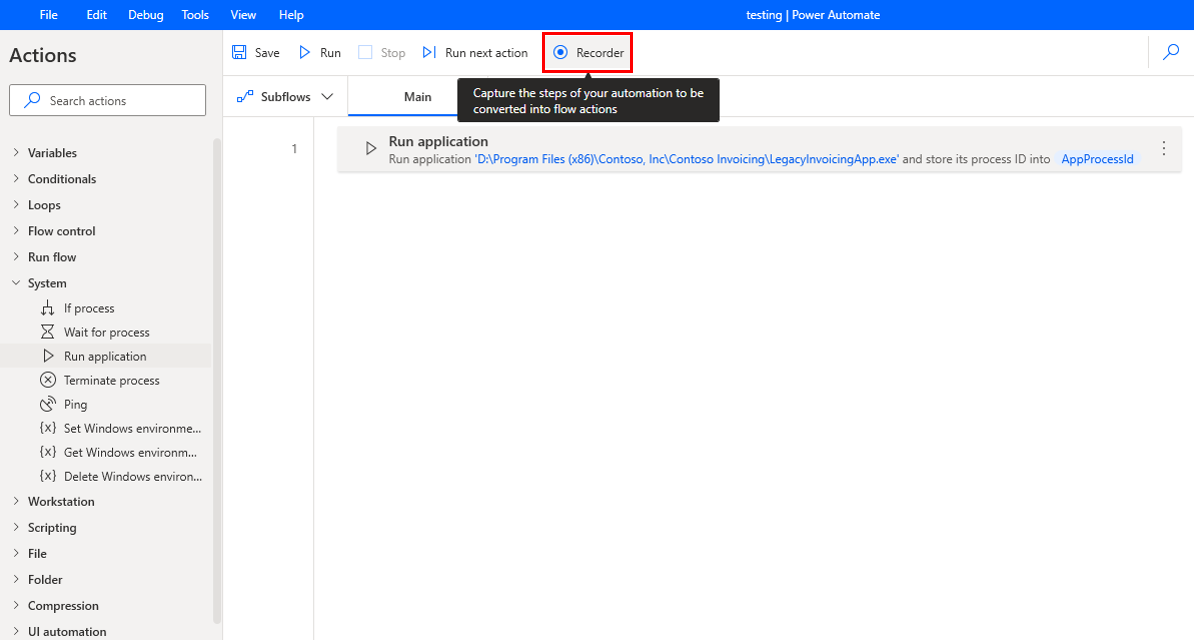
To begin recording your desktop actions, open the Contoso Invoicing app (see Set up the environment unit of this module) and the Desktop recorder in Power Automate. If your application isn't maximized, the desktop recorder shows as an icon without text in the toolbar. Select the Start recording button in Power Automate.
As you record, make sure that you go slowly and wait several seconds between actions. A red outline displays on a control before you select it, and a blue highlight displays afterward. If these outlines and highlights don't appear, your actions might not be recorded properly.
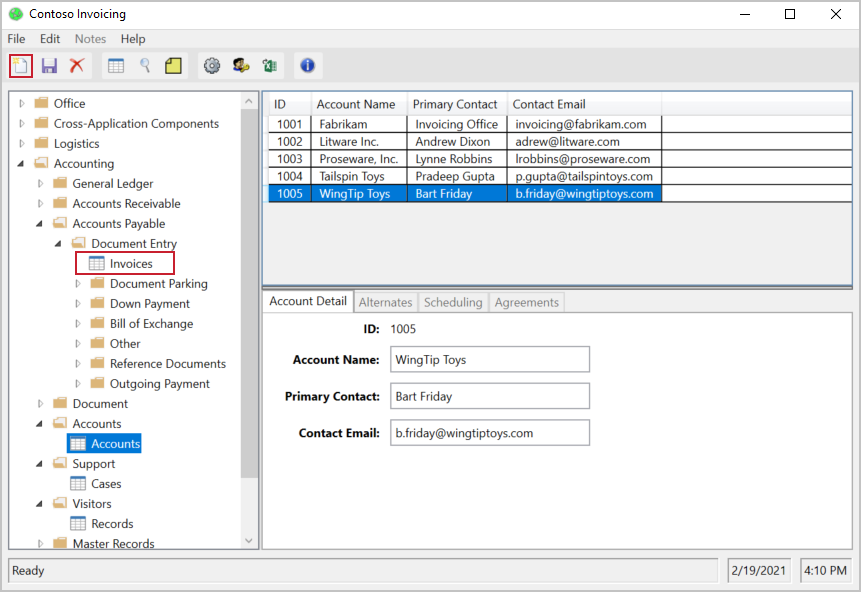
In the Contoso Invoicing app, select Invoices and then create a new record by selecting the appropriate icon in the upper left.
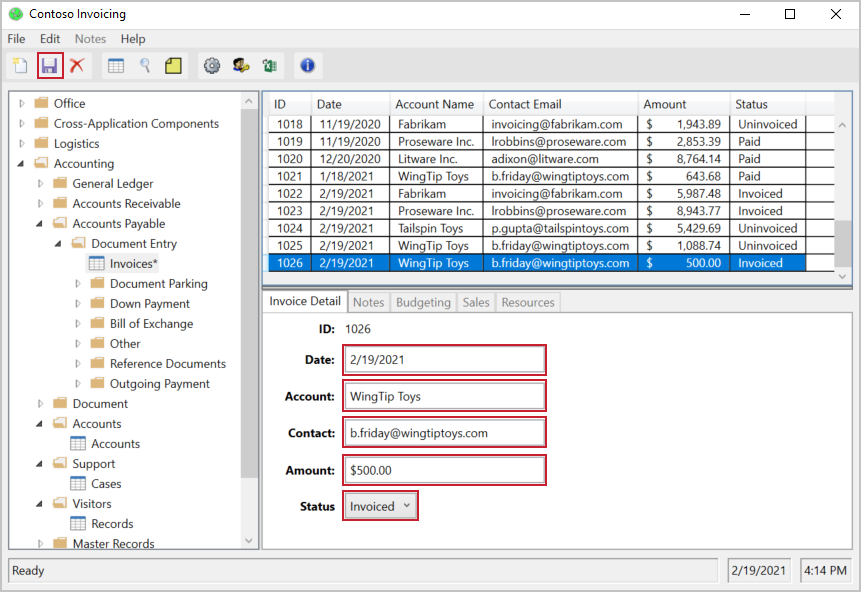
Complete the required information for the invoice: Date, Account, Contact, Amount, and Status. You can use whatever values you want, or you could copy the values that are used in the following screenshot. Edit the Date field, even if it has the value that you want. This action allows you to change it through the flow instead of always having to use the default date. To go to the next field, be sure to only use your mouse, not keyboard shortcuts. You can pause the recording or delete actions if you make a mistake.
When you're finished, select the Save icon in the Contoso Invoicing app to save your record.
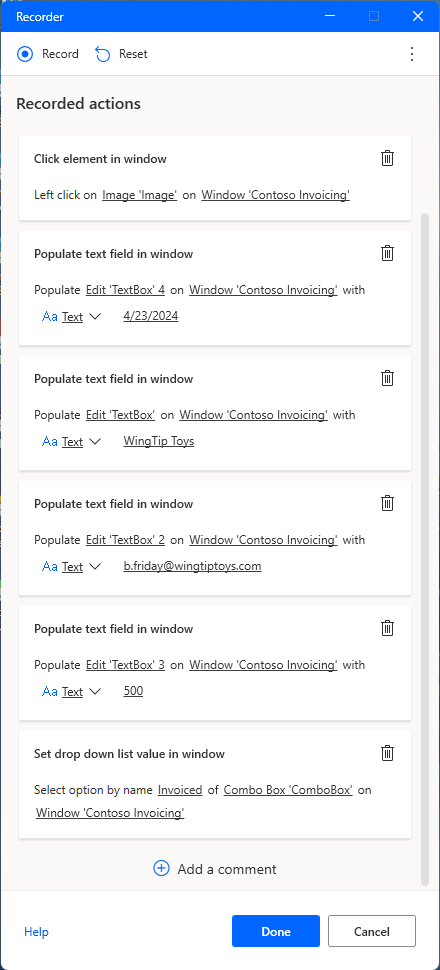
Return to your Recorder, pause it, and then select Done. Your recorded actions should look similar to the following screenshot.
After you select Done, your newly recorded actions display beneath the action to open your app. The action of closing the app wasn't recorded. Additionally, this unit didn't demonstrate how running your flow results in a new instance of the app being open for every run.
At this point, if you test your desktop flow, by selecting the Run (play) icon in the command bar, you see it duplicate your hardcoded inputs in the Contoso Invoicing app.
In the next unit, we'll add some input variables to our desktop flows, so we can make it dynamic.
