Combine CSV files
In Power Query, you can combine multiple files from a given data source. This article describes how the experience works when the files that you want to combine are CSV files. More information: Combine files overview
Tip
You can follow along with this example by downloading the sample files used in this article from this download link. You can place those files in the data source of your choice, such as a local folder, SharePoint folder, Azure Blob storage, Azure Data Lake Storage, or other data source that provides the file system view.
For simplicity, the example in this article uses the Folder connector. More information: Folder
About the sample files used
To combine files, it's imperative that they all have the same structure and the same extension. All the files used in this example have the same structure and extension (.csv).
There are 12 CSV files, one for each month of the calendar year 2019. The following image shows the first 15 rows of the file for the month of January.
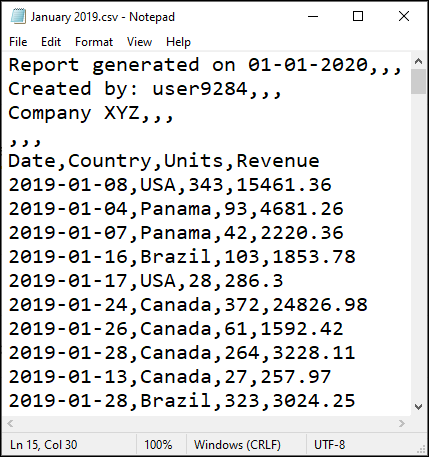
The number of rows varies from file to file, but all files have a header section in the first four rows. They have column headers in the fifth row, and the data for the table begins in the sixth row and continues through all subsequent rows.
The goal is to combine all 12 files into a single table. This combined table contains the header row at the top of the table, and includes the source name, date, country, units, and revenue data for the entire year in separate columns after the header row.

Table preview
When connecting to the folder that hosts the files that you want to combine—in this example, the name of that folder is CSV Files—you're shown the table preview dialog box, which displays your folder path in the upper-left corner. The data preview shows the file system view.

For this example, select Combine. For Excel or Power Query Desktop, select Combine & Transform Data.
Note
In a different situation, you might select Transform data to further filter and transform your data before combining the files. Selecting Combine is only recommended when you're certain that the folder contains only the files that you want to combine.
Combine files dialog box
After you select Combine in the table preview, the Combine files dialog box appears.

Note
Power Query automatically detects what connector to use based on the first file found in the list. To learn more about the CSV connector, go to Text/CSV.
For this example, leave all the default settings (Example file set to First file, and the default values for File origin, Delimiter, and Data type detection).
Now select Transform data in the lower-right corner to go to the output query.
Output query
After selecting Transform data in the Combine files dialog box, you'll be taken back to the Power Query Editor in the query that you initially created from the connection to the local folder. The output query now contains the source file name in the left-most column, along with the data from each of the source files in the remaining columns.

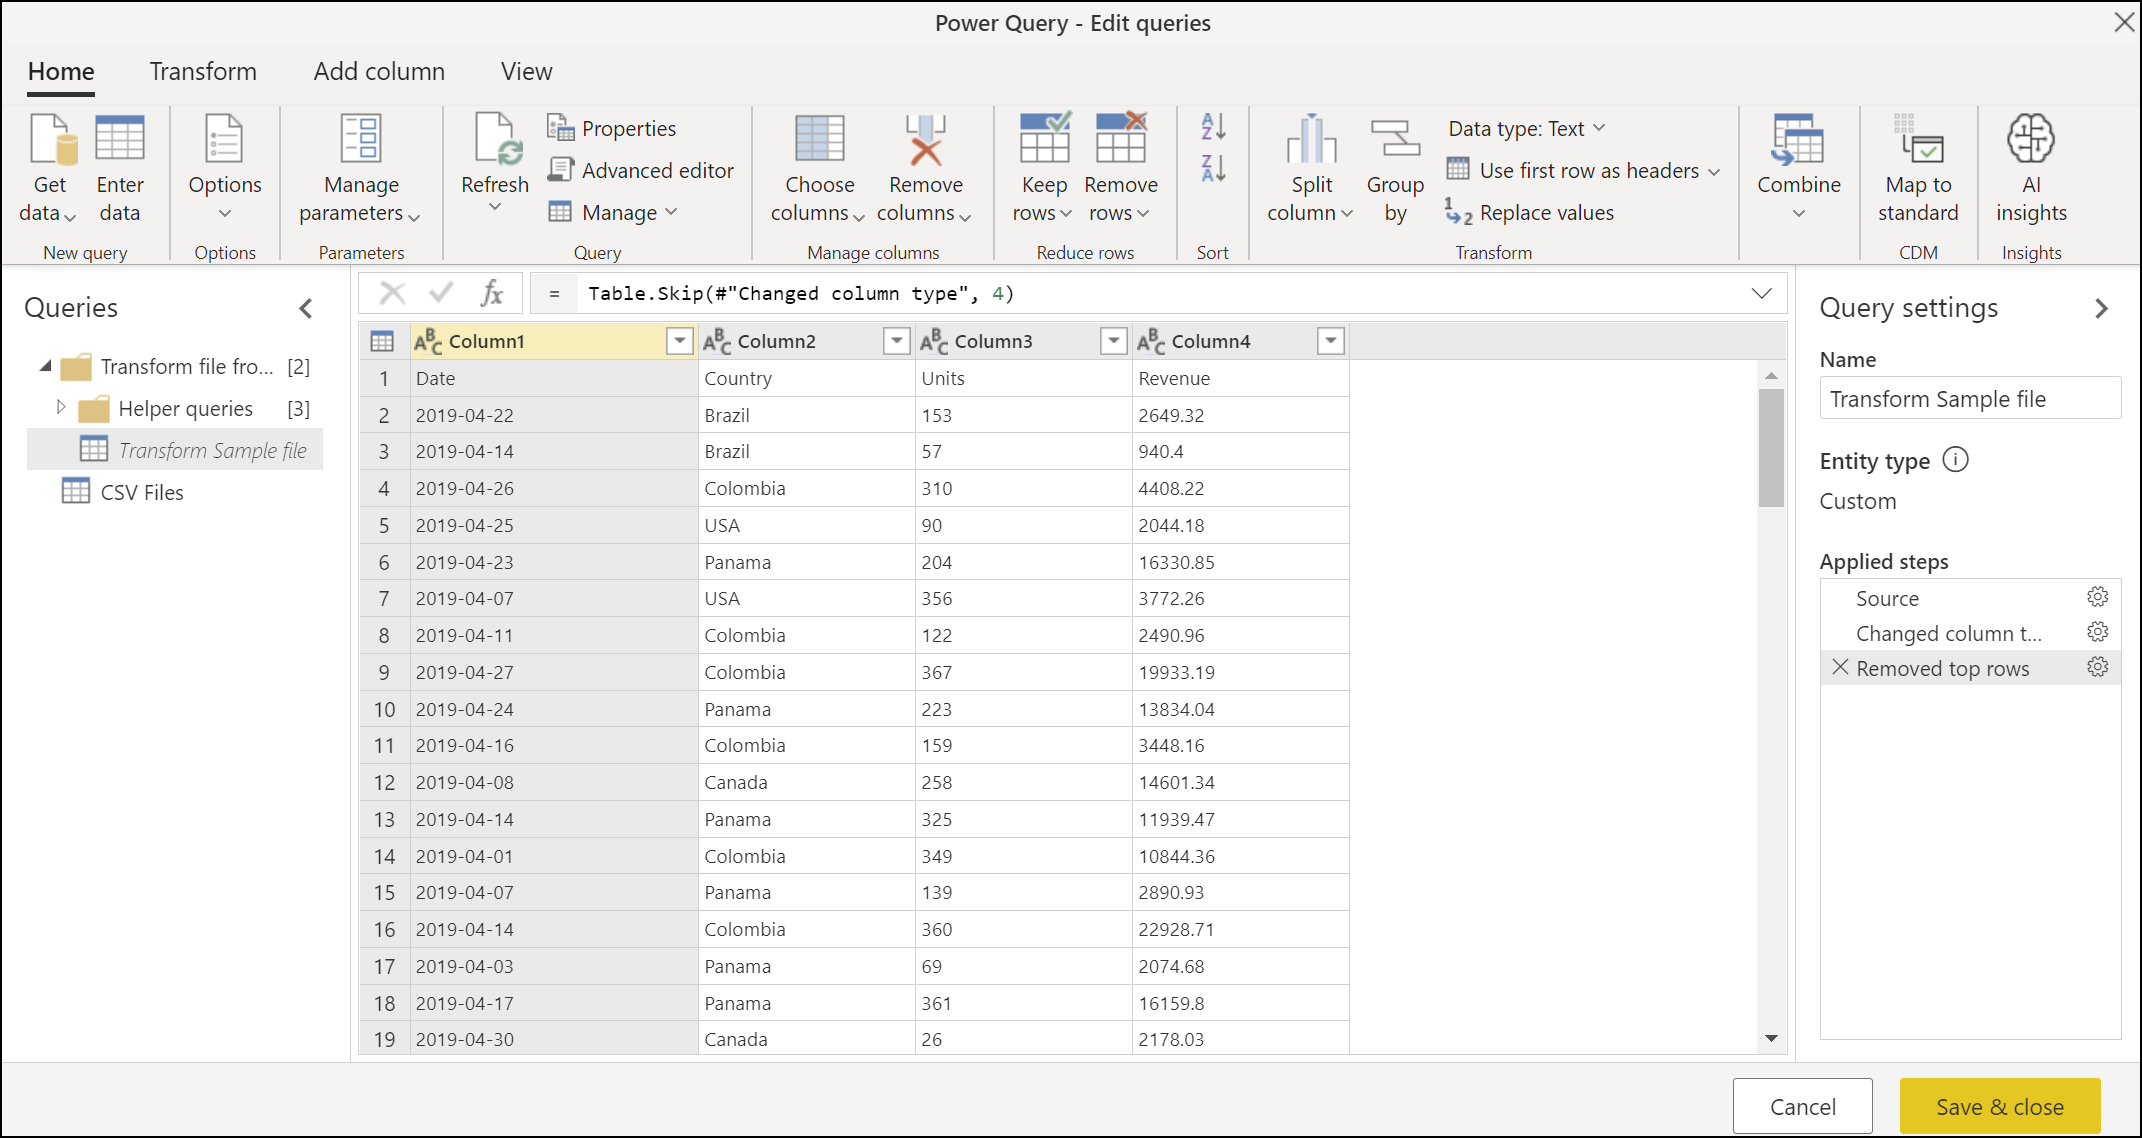
However, the data isn't in the correct shape. You need to remove the top four rows from each file before combining them. To make this change in each file before you combine them, select the Transform Sample file query in the Queries pane on the left side of your screen.
Modify the Transform Sample file query
In this Transform Sample file query, the values in the Date column indicate that the data is for the month of April, which has the year-month-day (YYYY-MM-DD) format. April 2019.csv is the first file displayed in the table preview.

You now need to apply a new set of transformations to clean the data. Each transformation is automatically converted to a function inside the Helper queries group that is applied to every file in the folder before combining the data from each file.
The transformations that need to be added to the Transform Sample file query are:
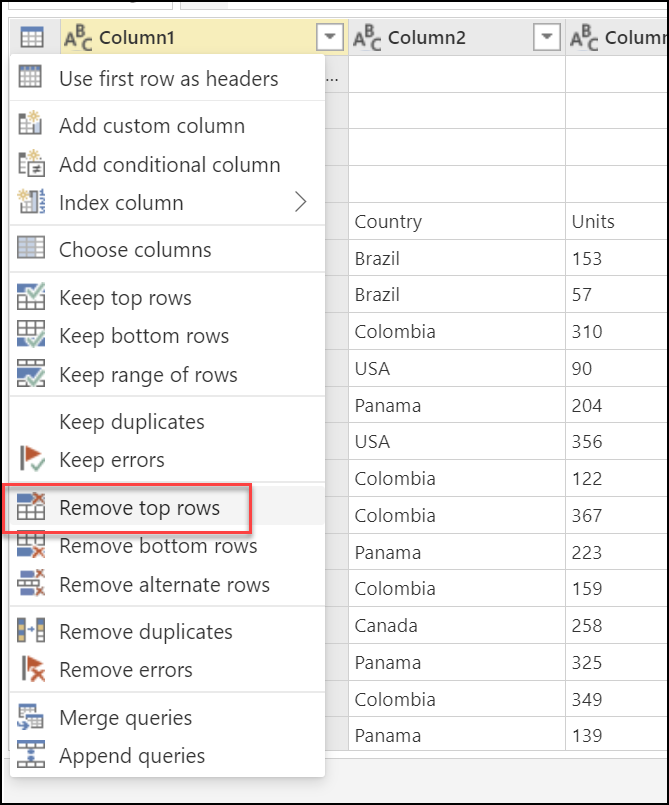
Remove top rows: To perform this operation, select the table icon menu in the upper-left corner of the table, and then select Remove top rows.
In the Remove top rows dialog box, enter 4, and then select OK.
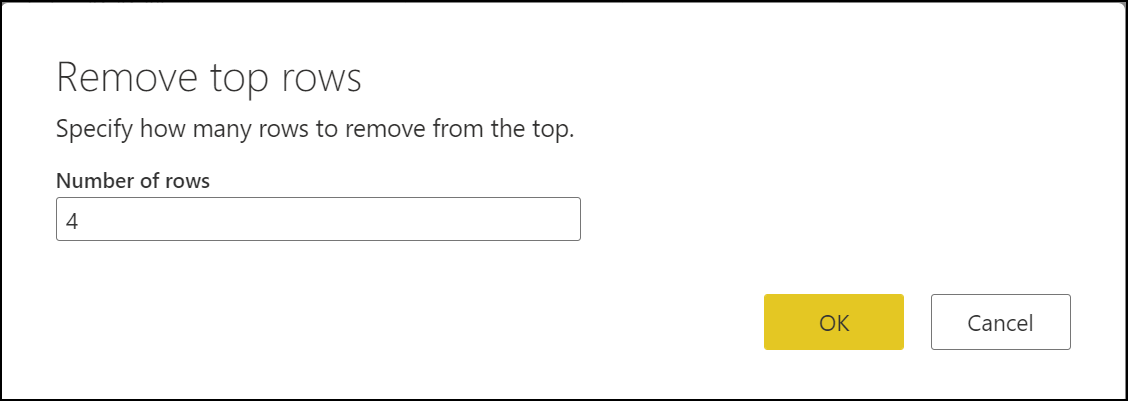
After you select OK, your table no longer has the top four rows.
Use first row as headers: Select the table icon again, and then select Use first row as headers.

The result of that operation promotes the first row of the table to the new column headers.
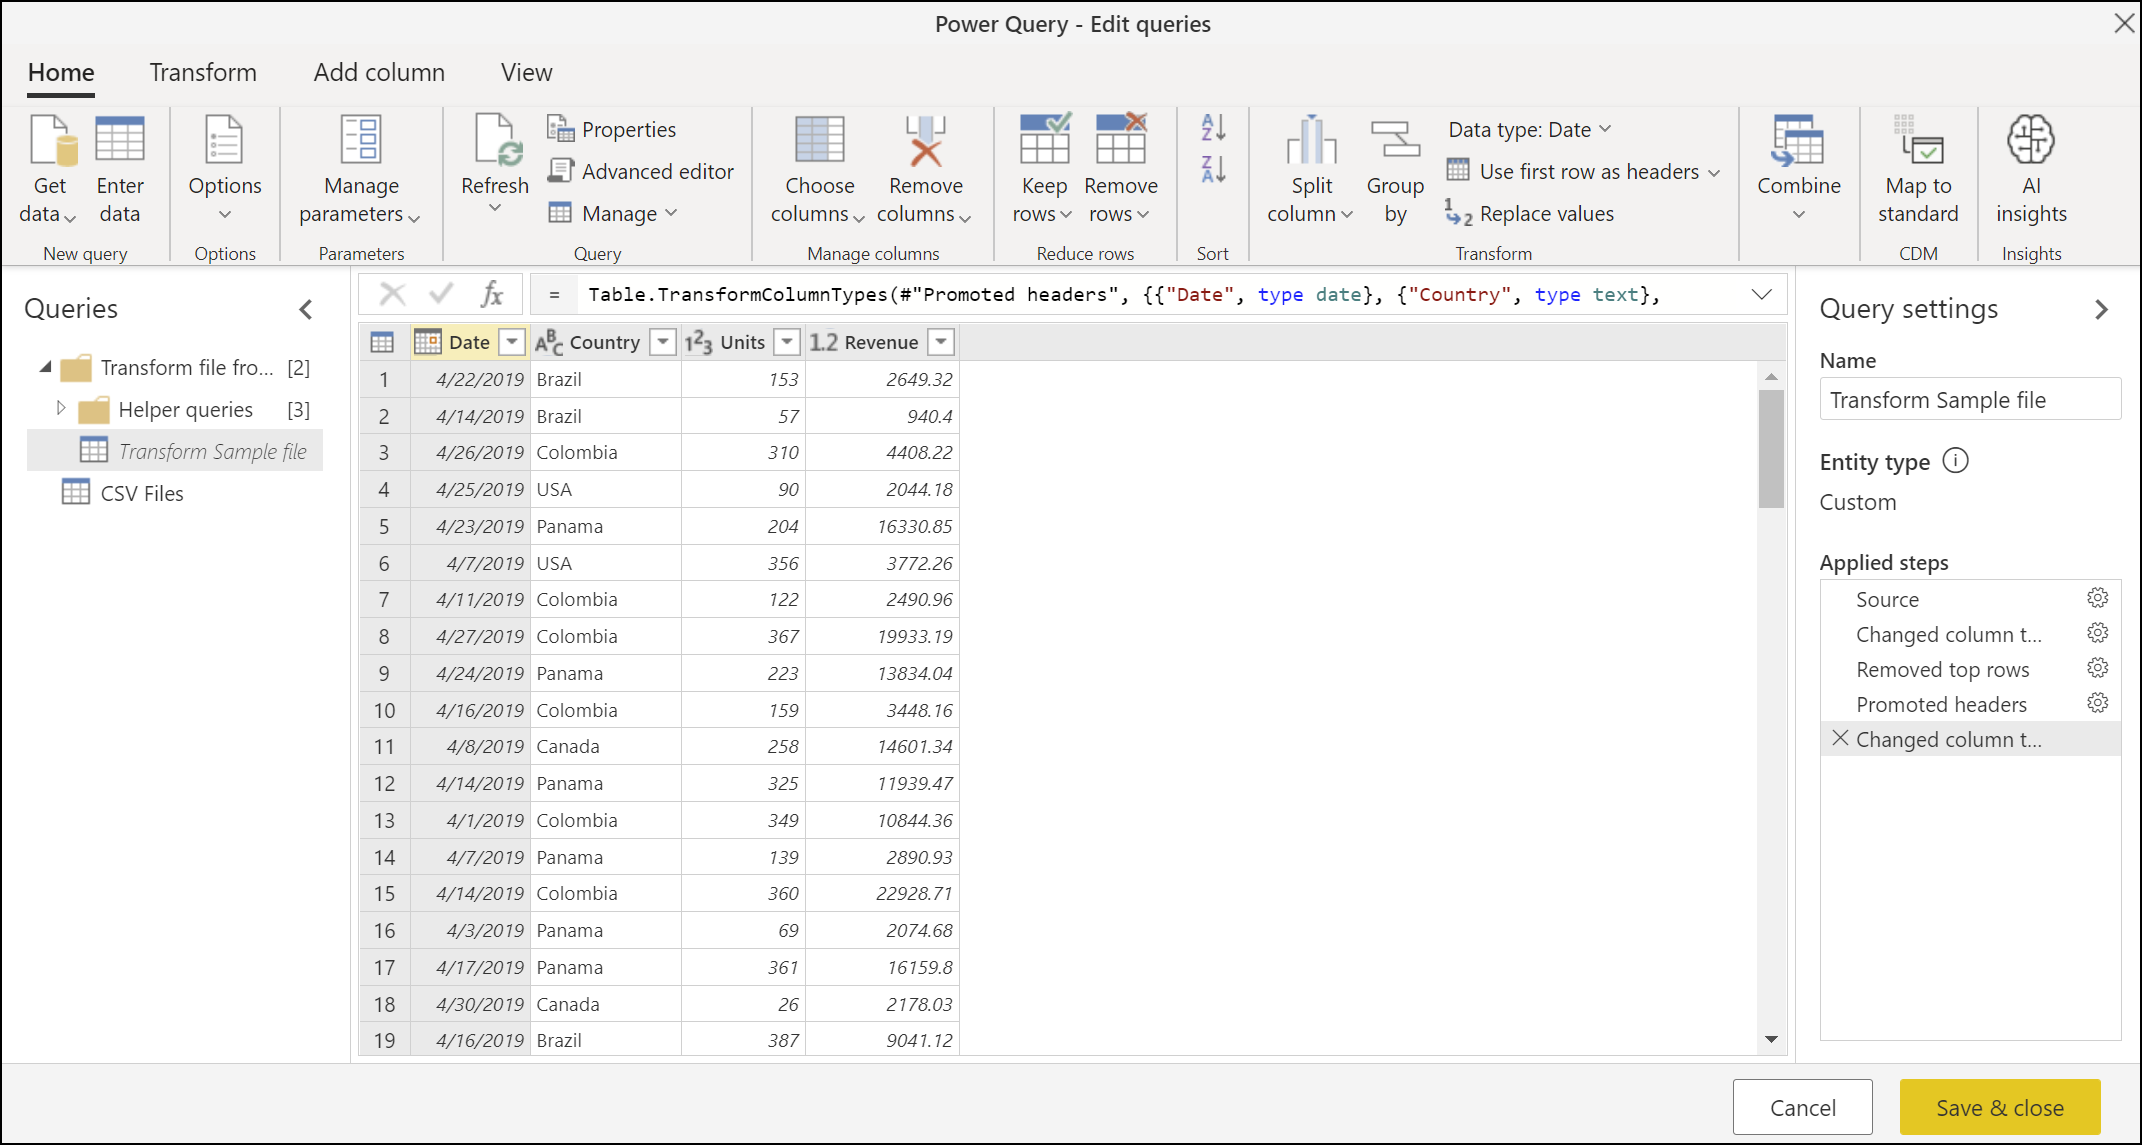


After this operation is completed, Power Query by default tries to automatically detect the data types of the columns and add a new Changed column type step.
Revising the output query
When you go back to the CSV Files query in Power Query Desktop, the last step is giving you an error that reads "The column 'Column1' of the table wasn't found." When you go back to the CSV Files query in Power Query Online, the changes you previously made to remove the first four rows and use the first row as headers isn't applied to the table. In Power Query Online, select Refresh from the Home tab. Once the screen is refreshed, the same error message is displayed.
The reason behind this error is that the previous state of the query was doing an operation against a column named Column1. But because of the changes made to the Transform Sample file query, this column no longer exists. More information: Dealing with errors in Power Query

You can remove this last step of the query from the Applied steps pane by selecting the X delete icon on the left side of the name of the step. After you delete this step, your query shows the correct results.

However, notice that none of the columns derived from the files (Date, Country, Units, Revenue) have a specific data type assigned to them. Assign the correct data type to each column by using the following table.
| Column name | Data type |
|---|---|
| Date | Date |
| Country | Text |
| Units | Whole number |
| Revenue | Currency |
After defining the data types for each column, you're ready to load the table.
Note
To learn how to define or change column data types, go to Data types.
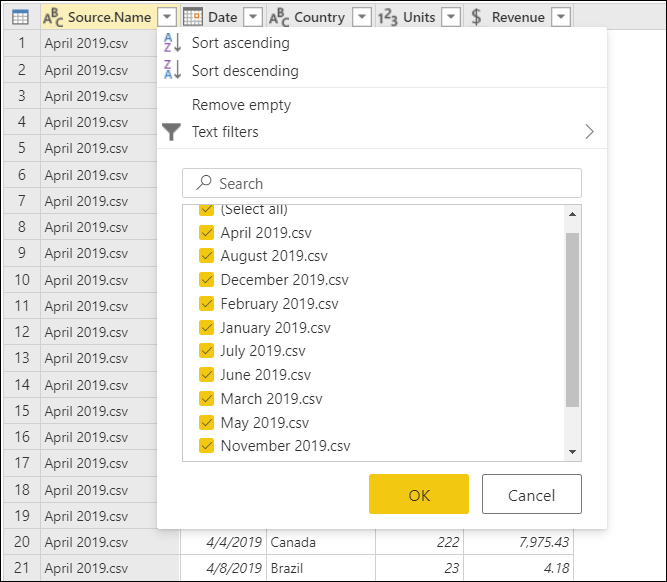
Verification
To validate that all files are combined, you can select the filter icon on the Source.Name column heading, which displays all the names of the files that are combined. If you get the warning "List may be incomplete," select Load more at the bottom of the menu to display more available values in the column.
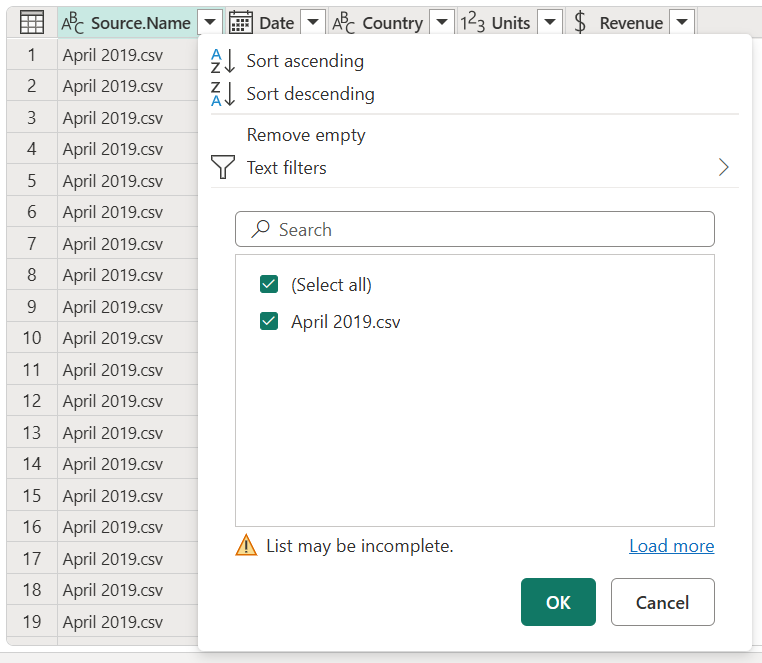
After you select Load more, all available file names are displayed.