Tutorial: Add custom page layout to your site
When you create new webpages using the Pages workspace, you have a choice of provided page layouts. In some cases, you might want to create a custom page layout to display information in a certain format or to provide a specialized user interface.
In this tutorial, you learn how to create a custom page layout using Liquid.
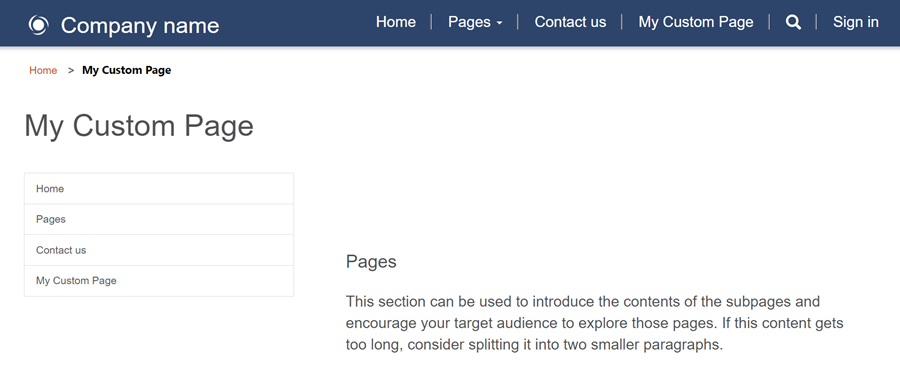
Our example scenario is to build a two-column template with the main site menu as left-side navigation and the page content to the right.
Here are the following steps and assets that are created to provide a custom page layout:
- We'll create a common base web template with custom code to establish the basic page layout.
- We'll create a second web template with additional code to demonstrate the modular features of web templates.
- We'll also create a page template record referencing the web template that configures how the page layout is rendered on the site.
- Finally, we'll create a web page using the custom page layout.
Prerequisites
- A Power Pages subscription or trial. Get a Power Pages trial here
- A Power Pages site created. Create a Power Pages site
- Basic knowledge of HTML and Liquid
Step 1: Create a web template and write the Liquid template code
First, create your web template and write the Liquid template code. You're likely to reuse some common elements of this template in future templates. So, create a common base template that you extend with your specific template. Your base template provides breadcrumb links, your page title/header, and defines your two-column layout.
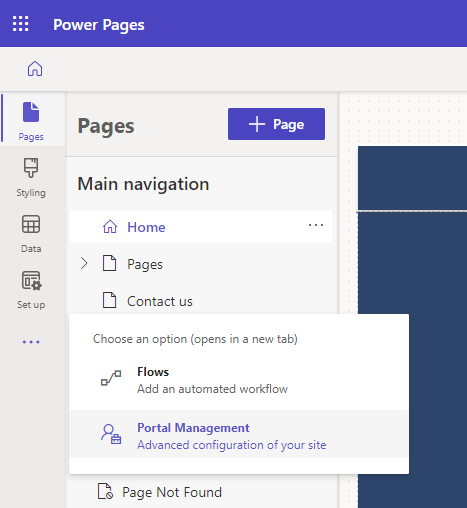
Go to Power Pages.
In the design studio, choose ... and then select Portal Management. Use the Portal Management app to create a web template record and enter your custom code.
In the Portal Management app, scroll to the Content section and select Web Templates.
From the Active Web Templates screen, select New.
Name the web template Two Column Layout.
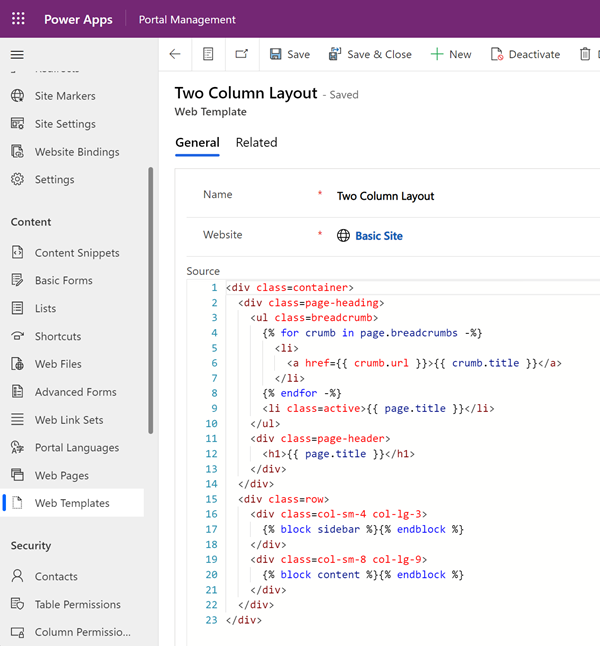
Paste the following code into the Source field:
<div class=container>
  <div class=page-heading>
    <ul class=breadcrumb>
      {% for crumb in page.breadcrumbs -%}
        <li>
          <a href={{ crumb.url }}>{{ crumb.title }}</a>
        </li>
      {% endfor -%}
      <li class=active>{{ page.title }}</li>
    </ul>
    <div class=page-header>
      <h1>{{ page.title }}</h1>
    </div>
  </div>
  <div class=row>
    <div class=col-sm-4 col-lg-3>
      {% block sidebar %}{% endblock %}
    </div>
    <div class=col-sm-8 col-lg-9>
      {% block content %}{% endblock %}
    </div>
  </div>
</div>
Select Save.
Step 2: Create a new web template that extends our base layout template
We're creating a web template that reads the navigation record from the associated web page (see below). We also extend the base template we created in the previous step. Web templates can be used as reusable components when creating advanced sites.
In the Portal Management app, scroll to the Content section and select Web Templates.
From the Active Web Templates screen, select New.
Name the web template Weblinks Left Navigation.

Weblinks Left Navigation (Web Template)
Note how the code uses the Liquid extends keyword to incorporate the base layout template.
{% extends 'Two Column Layout' %}

{% block sidebar %}
  {% assign weblinkset_id = page.adx_navigation.id %}
  {% if weblinkset_id %}
    {% assign nav = weblinks[page.adx_navigation.id] %}
    {% if nav %}
      <div class=list-group>
        {% for link in nav.weblinks %}
          <a class=list-group-item href={{ link.url }}>
            {{ link.name }}
          </a>
        {% endfor %}
      </div>
    {% endif %}
  {% endif %}
{% endblock %}

{% block content %}
  <div id="mainContent" class = "wrapper-body" role="main">
    {% include 'Page Copy' %}
  </div>
{% endblock %}
Step 3: Create a new page template based on the web template
In this step, create a new page template based on the web template created in the previous step. The page template is required for the custom page layout to be an option you can select when creating a new web page.
In the Portal Management app, scroll to the Website section and select Page Templates.
From the Active Page Templates screen, select New.
Fill in the fields:
Field Value Name Type in a name. Website Select the website to which the theme is applied. To display a list of available options, put your cursor in the field and hit enter on your keyboard. Type Choose Web Template Web Template Select Web Links Left Navigation (or whatever you named your web template). Use Website Header and Footer Checked. Is Default Unchecked. Table Name None selected. Description A description of your page template. 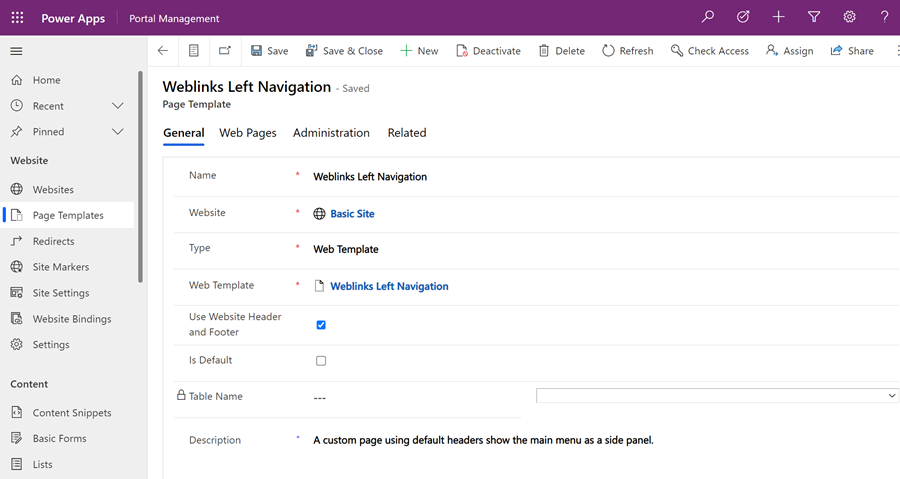
Select Save.
Step 4: Create a web page to display content
In the design studio, select Sync. This action brings updates made in the Portal Management app to the design studio.
In the Pages workspace, select + Page.
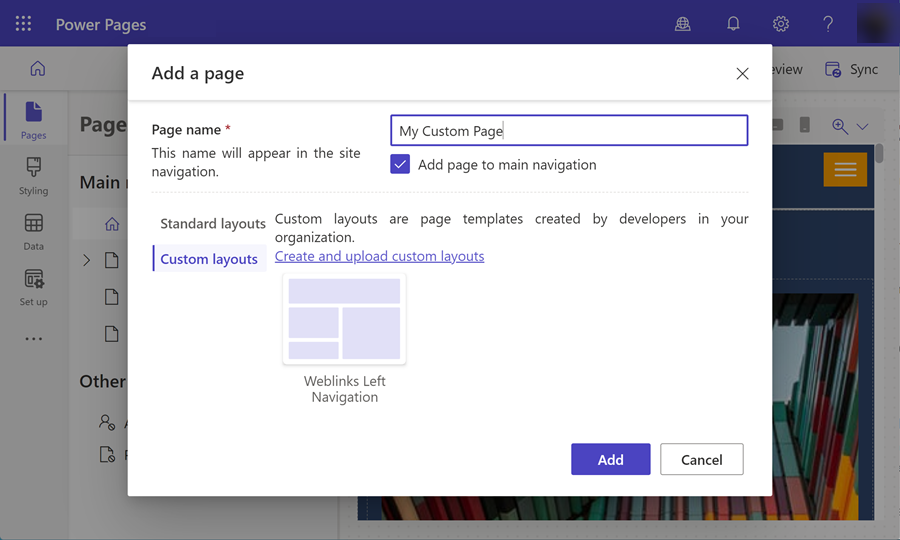
In the Add a page dialog:
- Enter Page name.
- From the Custom layouts, select your custom page layout.
- Select Add.
Add any more content to the editable sections of the page.
Additional page configuration
In this example, link the navigation record to the content page for the custom code to render the menu on the left navigation.
In the design studio, choose ... and then select Portal Management. Use the Portal Management app to add more configurations to your page.
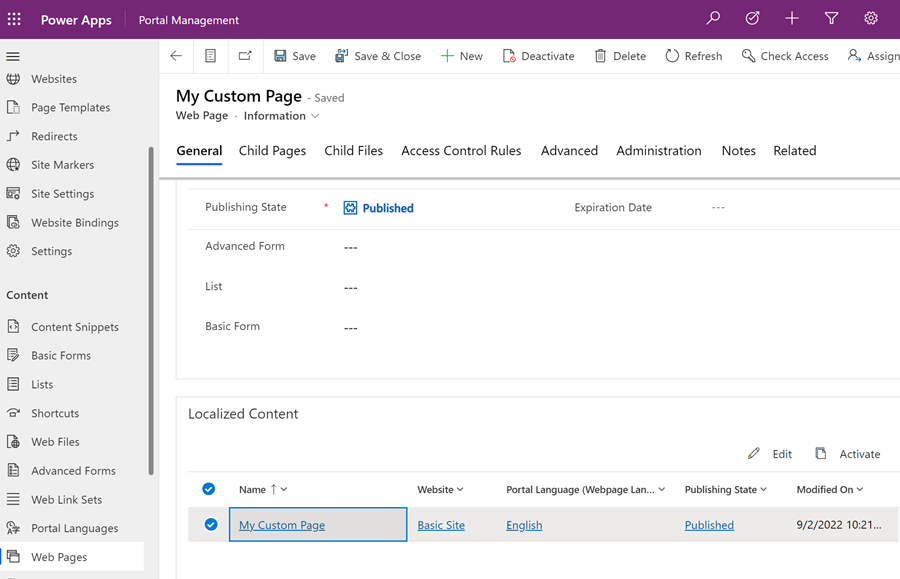
In the Portal Management app, scroll to the Content section and select Web Pages.
Locate and open the page you created previously in the Pages workspace. This opens the root webpage. Make changes in the related localized content page.
Within the Localized Content section, select the localized content web page.
Note
If you have multiple languages provisioned, update each localized page.
Go to the Miscellaneous section and select the web link set to display in the Navigation field.
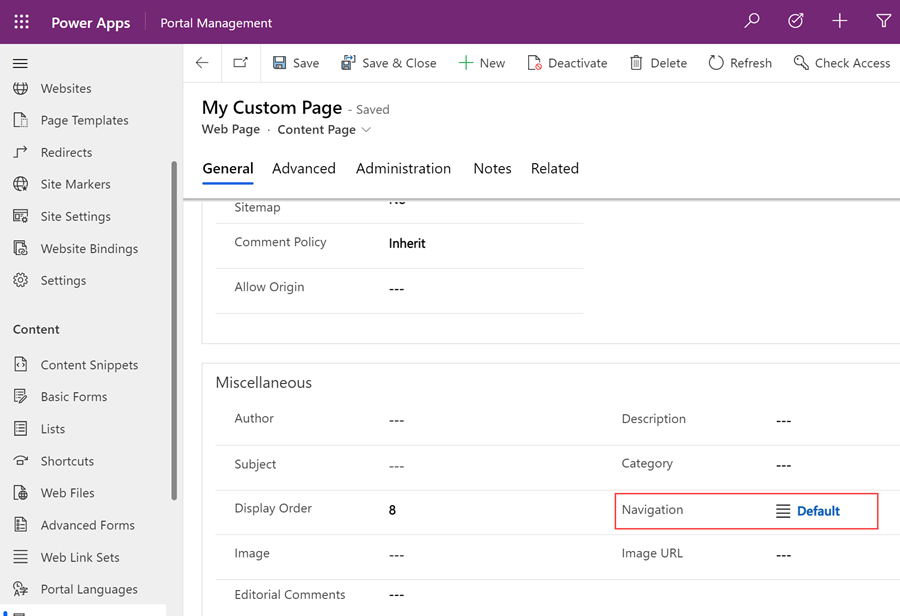
Save your changes and return to the design studio.
Select Preview and then Desktop to view your custom page with the side navigation.