Custom page layouts in Power Pages
When you create a new web page using the design studio, you need to select a page layout. The Pages workspace provides a set of pre-configured page layouts.
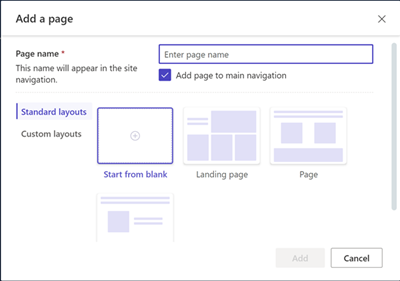
You can also create your own custom page layouts using HTML, Liquid, JavaScript and CSS.
Tip
We've created a series of tutorials and videos for you to learn to use Power Pages and how create a custom page layout. For more information, go to Tutorial: Add a custom page layout.
Create a custom page layout
To create a custom page, you'll need to follow these steps:
- Create a web template containing your custom code.
- Create and configure a corresponding page template that will appear as a custom page layout when creating new web pages in the Pages workspace.
Creating a web template
The web template will contain your code for your layout. Web template code can be a combination of Liquid, HTML, CSS, and JavaScript.
Web templates can be included in other content or combined with other templates to build a modular system of templates when building web applications.
Go to Power Pages.
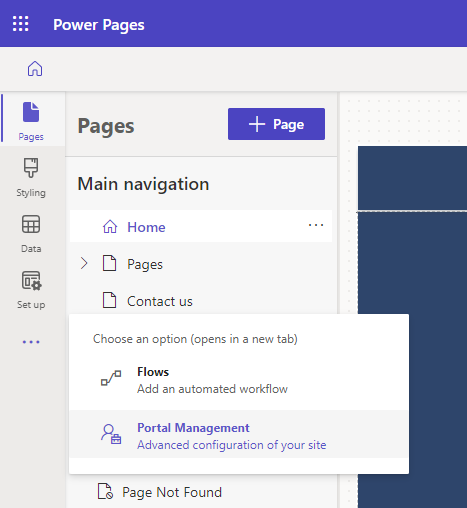
In the design studio, choose ... and then select Portal Management. You'll need to use the Portal Management app to create a web template record and enter in your custom code.
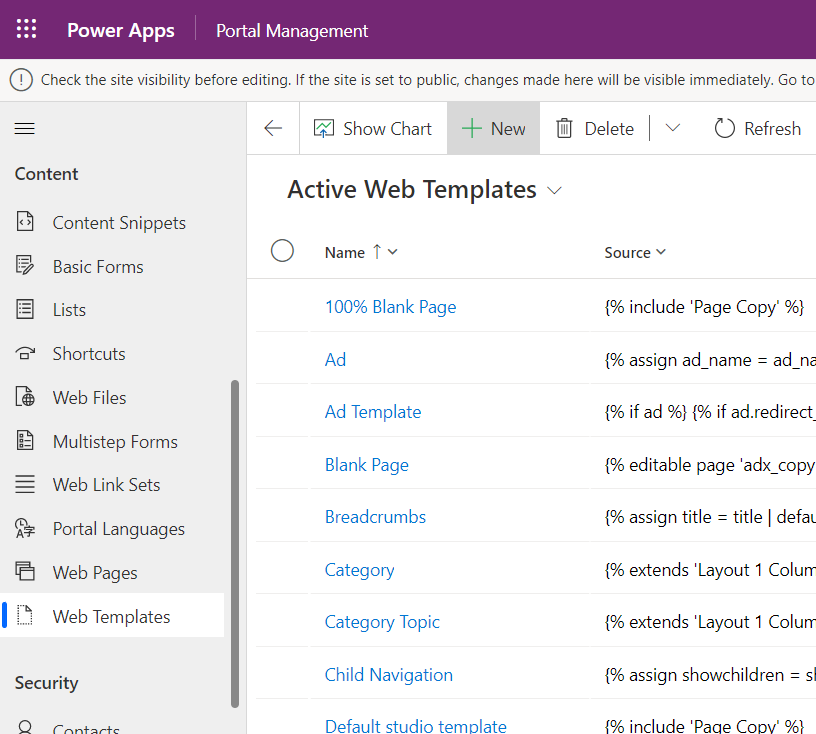
In the Portal Management app, scroll to the Content section and select Web Templates.
From Active Web Templates screen, select New.
Fill in the fields.
Field Value Name Type in a name. Website Select the web site to which the theme will be applied. Put your cursor in the field and hit enter on your keyboard to display a list of available options. Source The source code content of your web template, the code is typically a combination of Liquid, HTML, CSS, and JavaScript. You'll create the code based on your requirements. MIME Type (Scroll down to view this field) The field optionally provides a MIME type for the content of the template. A type of text/html is assumed if none is provided. This value will only be used in cases where the template is associated with a page template and controls the rendering of all content for that template. 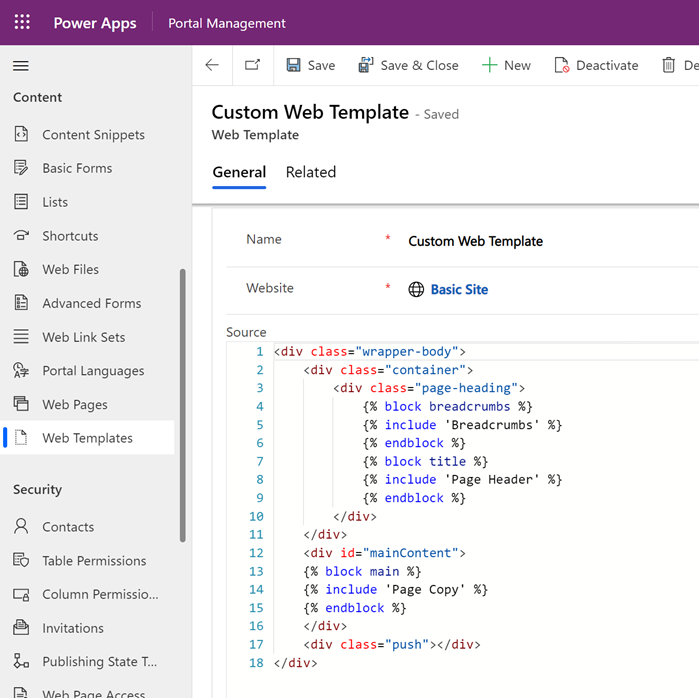
Select Save.
Creating a page template
Web templates can be used with page templates to create custom page layouts to be used when creating new web pages in the design studio.
In the Portal Management app, scroll to the Website section and select Page Templates.
From Active Page Templates screen, select New.
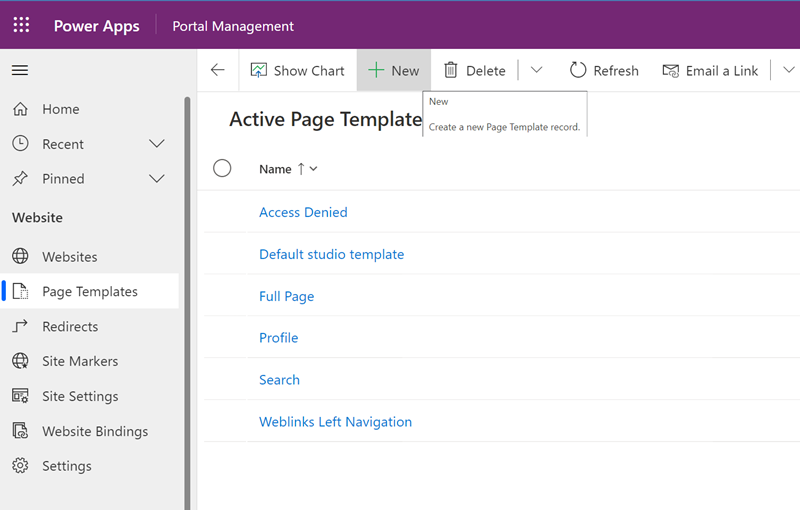
Fill in the fields.
Field Value Name Type in a name. Website Select the web site to which the theme will be applied. Put your cursor in the field and hit enter on your keyboard to display a list of available options. Type Choose Web Template Web Template Select the web template where your custom code is located. Put your cursor in the field and hit enter on your keyboard to display a list of available options. Use Website Header and Footer If the setting is checked, your web template will control rendering of all page content between the global website header and footer. If this option is unchecked, your web template will be responsible for rendering the entire response in the case that you're rendering HTML, this means everything from the doctype to the root <html>tags, and everything in between.Is Default Unchecked. Table Name None selected. Description A description of your page template. 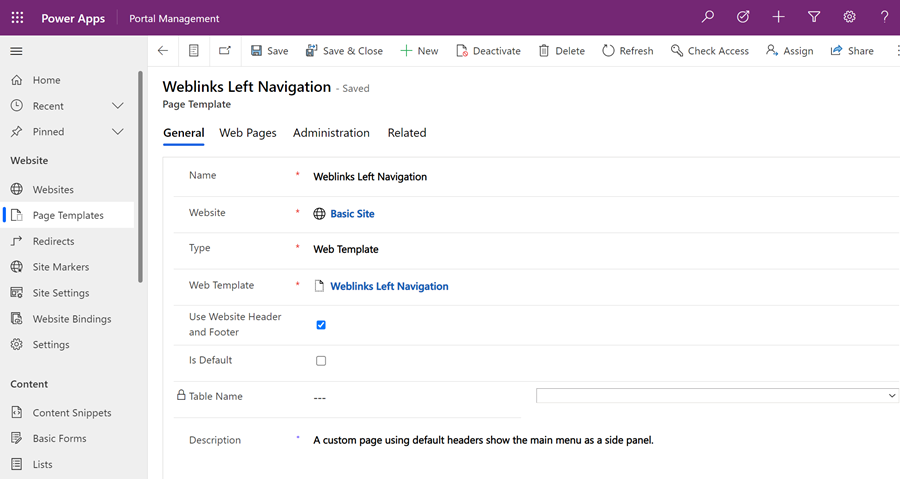
Select Save.
While the most common use cases for web templates will be to render HTML, rendering the entire response (by deselecting Use Website Header and Footer) gives you the option of rendering any text-based format you choose. This is where the MIME Type attribute of the web template becomes relevant. If a page template that doesn't use the website header and footer is rendered, the HTTP response Content-Type header will be set to the MIME Type of the associated Web Template (text/html will be used if no MIME Type is provided.), providing a wide variety of options for rendering non-HTML content by using Liquid. A common use case would be to render an RSS feed, by setting a MIME Type of application/rss+xml.
Creating a web page using a custom template
In the design studio, in the Pages workspace, select + Page.
In the Add a page dialog;
- Enter in Page name
- From the Custom layouts, select your custom page layout.
- Select Add.
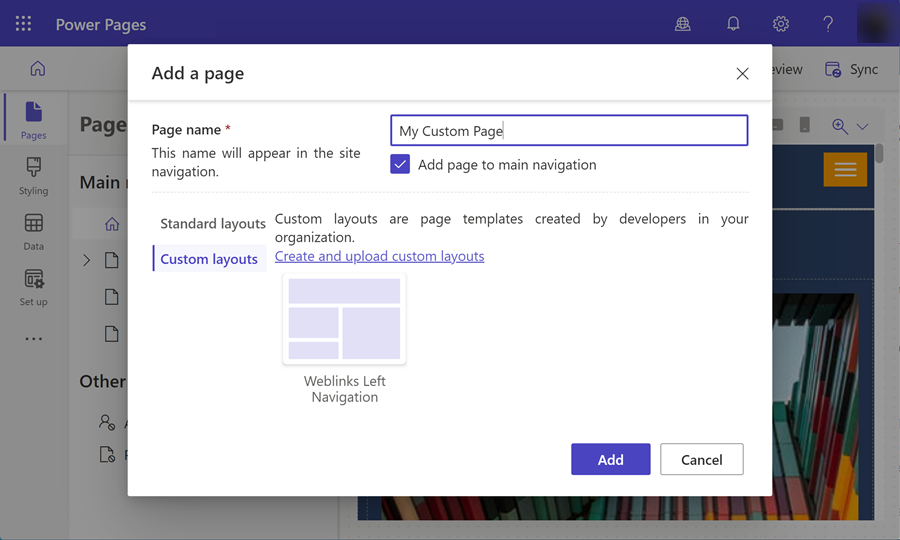
Choose Preview to view your custom page on the site.