Use and update UI elements collections
You can include UI elements collections in desktop flows through the Assets library using Power Automate for desktop's designer.
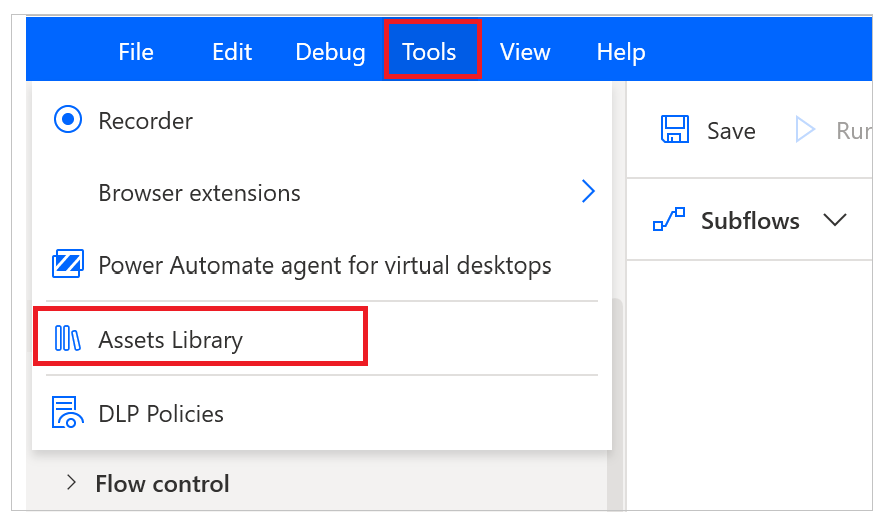
To open the Assets library, select Assets library in the designer.

Alternatively, use the Tools bar.
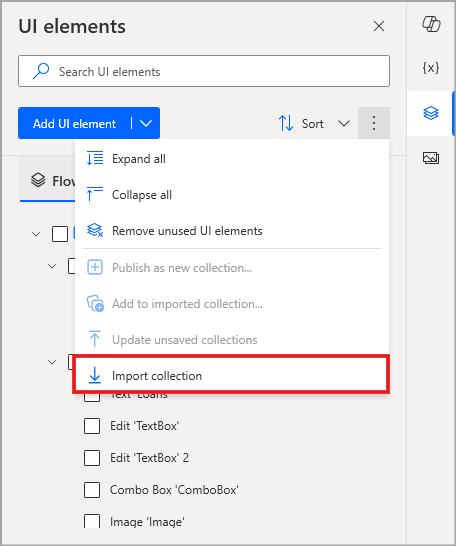
You can also use the option Import collection, found in the context menu at the top right of the UI elements pane.
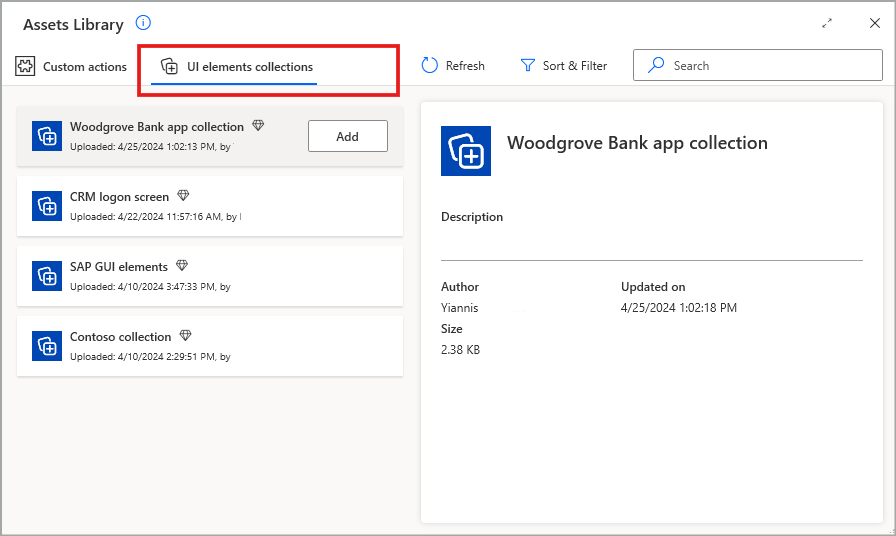
Import collections
The UI elements collections tab shows you the collections that are published in the environment you select and are accessible to you.
Note
You can only see UI elements collections that you have created or are shared with you. The list of collections in the respective Assets library tab is identical to the list available in the portal page for each maker.
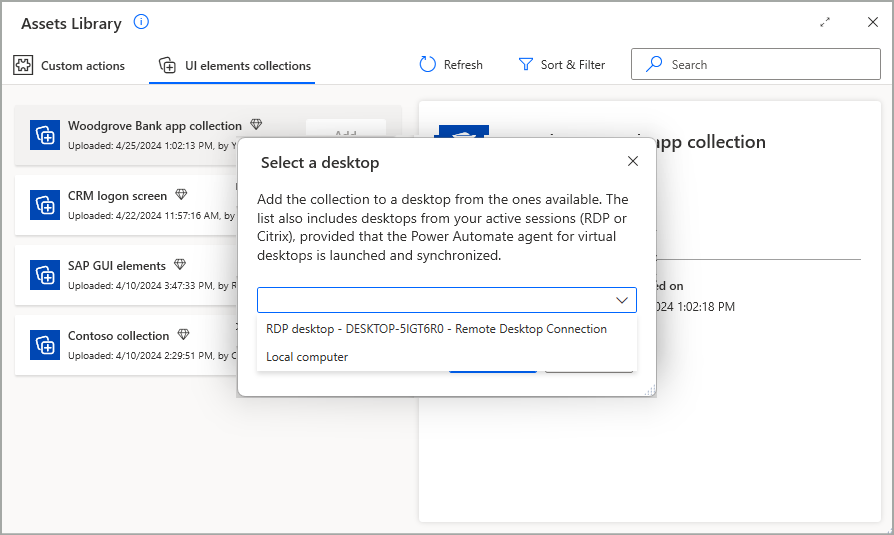
After selecting the collection you want to add to your flow, you also need to select a specific desktop under which the collection will be imported. This determines which desktop the collection's UI elements are searched when the flow runs.
Note
- The list of available desktops includes the local computer, the RDP and/or Citrix desktops that may have already been added in the Flow repository tab, as well as any currently active RDP and/or Citrix connections in your machine.
- Each collection can only be imported into one target desktop per flow.
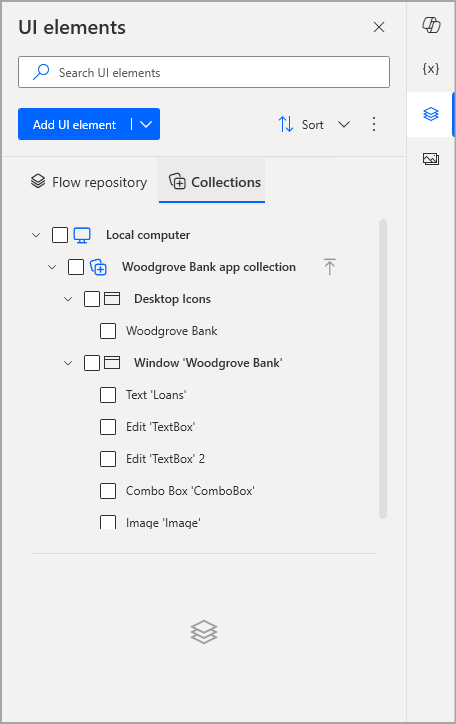
After you complete the collection inclusion and close the assets library, the collection will now appear in the Collections tab of the UI elements pane, imported under the desktop that was previously selected.
Remove collections
After being added to a flow, a collection can similarly be removed through the Assets library. All added collections are tagged accordingly, so you can select the option Remove that is available for those collections, to remove them from the flow. In this way, the UI elements they contain are no longer available in that flow.
Important
Removing a collection from a flow doesn't delete the collection from the environment. You can only permanently delete a collection through the UI elements collections' dedicated portal page.
Note
If a collection is removed from a flow while any of its UI elements are already used in the flow's actions, those actions will throw an error and will need to be fixed.
Use UI elements collections in the actions of a flow
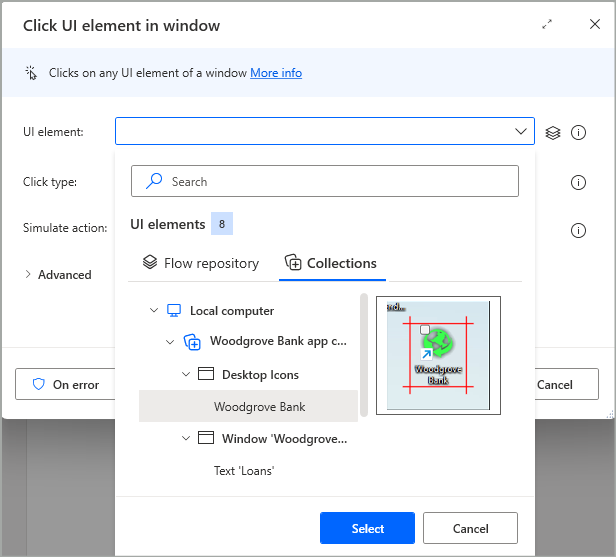
After a collection is imported and becomes available in a desktop flow, the UI elements it contains can be used in the UI and web automation actions of that flow. In the corresponding action modals, in the field where the action's associated UI element is specified, you can now find the same two tabs of the UI elements pane, Flow repository and Collections. Under the Collections tab, you can use any UI element you need that belongs to an imported collection.
Edit a UI elements collection
After creating and publishing a collection, it can be shared with other users so that it's imported and used in multiple flows. However, the application that the collection targets may eventually undergo an update, which could lead to the need to update the CSS/UI selectors of the UI elements that belong to that collection. Similarly, you may need to add more UI elements to an existing collection, or remove some obsolete elements that are no longer needed.
To make any required adjustments to a collection, that collection needs to be imported to a desktop flow, so that you can access the collection's contents in the flow designer. In addition, you need to be an Owner or have at least Co-owner rights on that collection to be able to modify it.
The methods to edit and update a collection include the following:
Add more UI elements to an imported collection
When you want to add new UI elements to a collection, you have to normally capture them first, if they aren't already available in the flow via the UI elements pane. You then need to mark those elements as checked through their checkbox in the tree structure, and then select the option Add to imported collection, either via the main context menu at the top right of the UI elements pane, or through the context menu of the currently selected (highlighted) element that should be included in the checked ones.
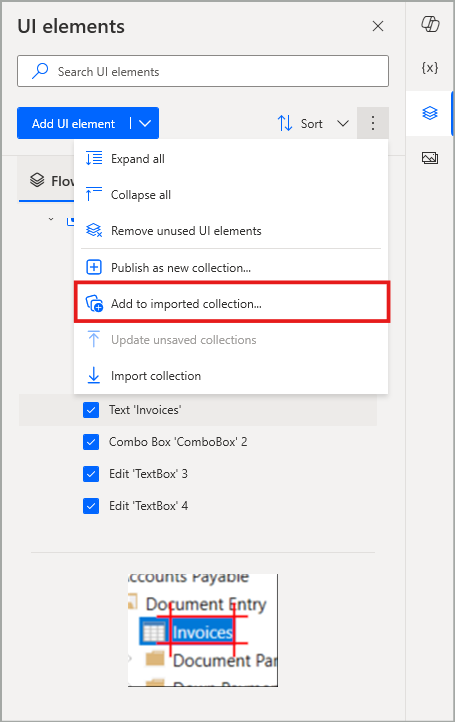
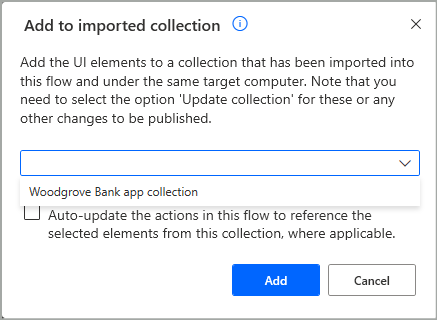
Selecting this option brings up a confirmation dialog, where you need to choose the target collection to which the elements should be added. The respective dropdown field lists all the eligible collections for this action, based on the following criteria:
- The target collection is already imported into this flow.
- All the checked UI elements, and the target collection, belong to the same desktop in the tree structure of the UI elements pane.
Additionally, if you associated any or all of the selected UI elements with UI or web automation actions in your desktop flow, you can check the 'Auto-update' option below the dropdown field. Doing so automatically updates the specified actions for you, so they no longer reference the UI elements that are only 'locally' available in this flow, but rather their newly added equivalents that are part of the target collection.
Important
You can't add UI elements to an existing collection that is not imported in the flow you are working on. If no collection is imported or meets the required criteria previously mentioned for a certain selection of UI elements, the option Add to imported collection is disabled.
Note
You can add UI elements to an imported collection by making a selection either from the Flow repository tab or the Collections tab. In the second scenario, you can add UI elements from one collection to another, or even add duplicates to the same collection if needed.
Adding some UI elements to a collection doesn't automatically update that collection with the new changes. For more information, see Update a UI elements collection.
Edit or rename the UI elements of a collection
Editing a UI element that belongs to a collection is identical to editing any other UI element found in the Flow repository tab. In the Collections tab, select and highlight the UI element whose CSS/UI selectors you want to edit, then double click on it, press 'Enter', or select the option Edit in its context menu. This opens the selectors screen for that UI element, where you can proceed to the necessary changes to the selectors, and even Repair or Test them through the corresponding options.
Similarly, you can rename a UI element belonging to a collection, by pressing 'F2' or selecting the option Rename in its context menu.
Note
In the context menu of a selected (highlighted) item, the options Edit and Rename are individual and apply only to that item. However, these options become disabled, if other unrelated items also happen to be checked, to avoid any potential confusion around the item they target.
Editing or renaming UI elements in a collection doesn't automatically update that collection with the new changes. For more information, see Update a UI elements collection.
Delete UI elements from a collection
Deleting a UI element that belongs to a collection is identical to deleting any other UI element found in the Flow repository tab. In the Collections tab, select and highlight the UI element you want to delete, then press Delete or select the option Delete in its context menu. This brings up the respective confirmation dialog to permanently delete that UI element.
Important
The option Remove unused UI elements in the main context menu at the top right of the UI elements pane is disabled, when you navigate to the Collections tab. This option is only available in the Flow repository tab. This behavior is meant to protect you from the unintentional deletion of a collection's UI elements; there can be elements that are unused in your current flow, which may still be used in other flows where the same collection is referenced.
Note
In the context menu of a selected (highlighted) item, the option Delete is individual and applies only to that item. However, this option becomes disabled, if other unrelated items also happen to be checked, to avoid any potential confusion around the item it targets.
Deleting UI elements from a collection doesn't automatically update that collection with the new changes. For more information, see Update a UI elements collection.
Rename a UI elements collection
Apart from the portal page, collections can also be renamed via the flow designer, after being imported to a flow. In the Collections tab, select (highlight) the collection whose name you want to change, and press 'F2' or select Rename in its context menu.
Renaming a collection doesn't automatically update that collection with the new change. For more information, see Update a UI elements collection.
Update a UI elements collection
After making any of the changes described earlier, a collection is only updated locally within the context of the desktop flow. This is to ensure that you can safely go through the necessary testing and debugging in the flow designer, to confirm your changes in the collection have the expected behavior, before affecting any other flows that reference the same collection.
Once you verify the changes to the collection are correct, you can publish your changes by updating the collection. To do this, in the Collections tab, select the collection that was changed, and then select Update collection in its context menu. As a shortcut, you can also select the Update icon, between the collection's name and its context icon.
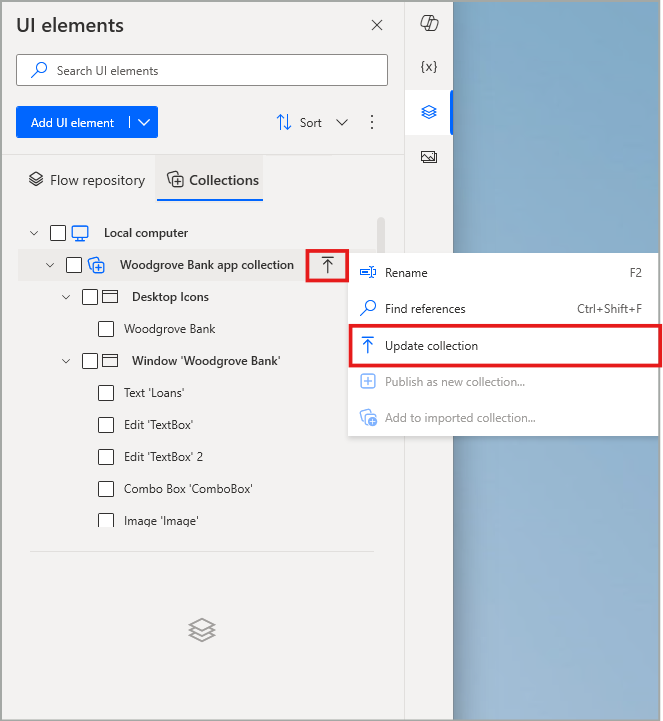
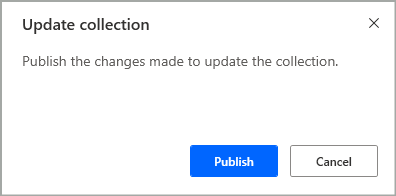
Upon selecting Publish in the confirmation dialog that appears, the flow enters a Publishing state, during which the collection is saved and uploaded in Dataverse, so its changes become available in the specific environment. While publishing takes place, the UI of the flow designer remains disabled.
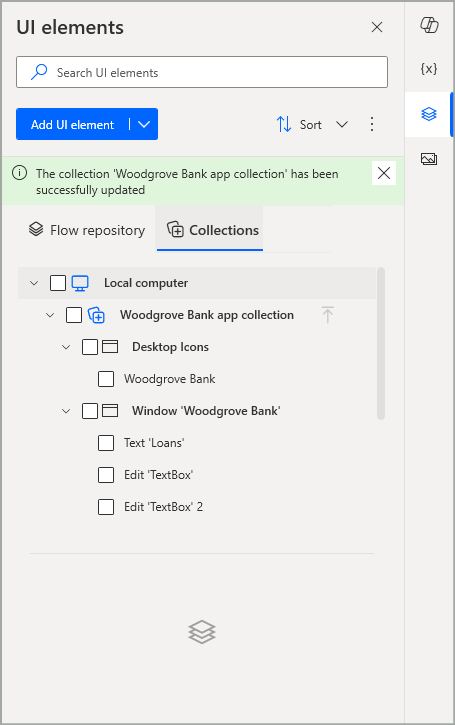
When the collection is successfully updated in this way, the corresponding success banner appears in the UI elements pane to inform you accordingly. At this point, the collection's new state has overwritten the previous one, and the desktop flows that reference this collection in the current environment are affected accordingly in their following runs, without requiring any manual update themselves.
Note
If the collection is up-to-date, the Update collection option is disabled.
If you made changes in multiple collections at the same time, you can always use the option Update unsaved collections in the main context menu at the top right of the UI elements pane, to update all of them at once.
Important
When your imported collections have unpublished changes, trying to save your flow first will prompt you to also update the collections. If you don't confirm publishing the updated state of the collections, your flow won't be saved.
Known limitations
When selected to be added to an imported collection, individual screens and web pages carry over their child UI elements with them, as the latter are automatically checked.