Create a flow to manage project approvals
Note
This article is part of a tutorial series on using Power Apps, Power Automate, and Power BI with SharePoint Online. Make sure you read the series introduction to get a sense of the big picture, as well as related downloads.
In this task we'll create a flow that drives the process of approving projects. Power Automate is integrated with SharePoint, so it's easy to create a flow directly from a list. The flow we'll create is triggered when an item is added to the Project Requests list. The flow sends an email to the project approver, who approves or rejects the request directly in email. The flow then sends an approval or rejection email to the project requestor and updates our lists appropriately.
Step 1: Configure the flow template
In the Project Requests list, click or tap Flow, then Create a flow.

In the right pane, click or tap Start approval when a new item is added.
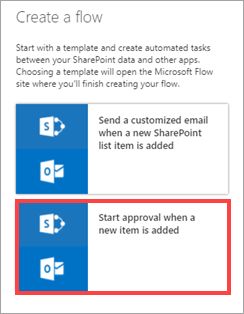
If you're not already signed in, sign into SharePoint and Outlook, then click or tap Continue.
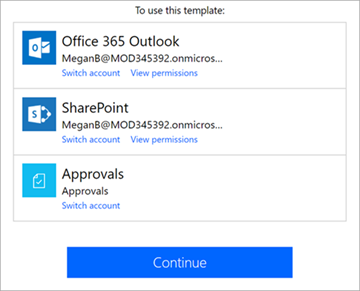
You now see the template for this flow, ready for you to complete. The boxes in the flow represent steps. They take input from previous steps, as well as input that you provide. Each step can then provide output to subsequent steps.
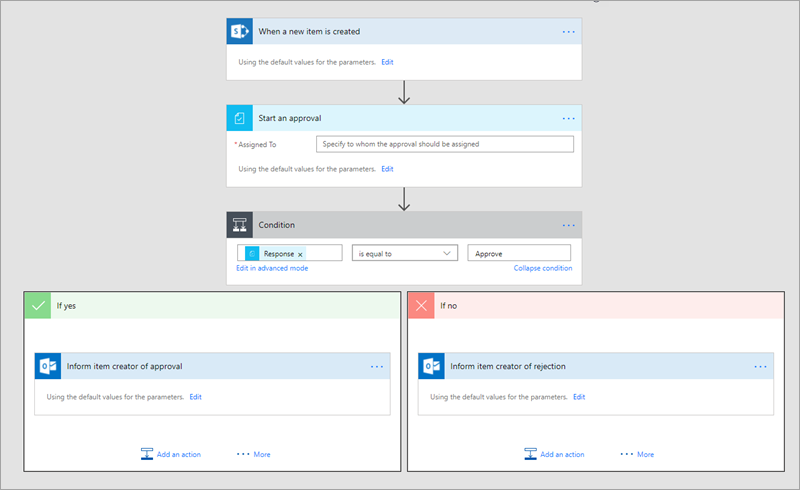
In the Assigned To box, enter a name that is valid in your tenant.

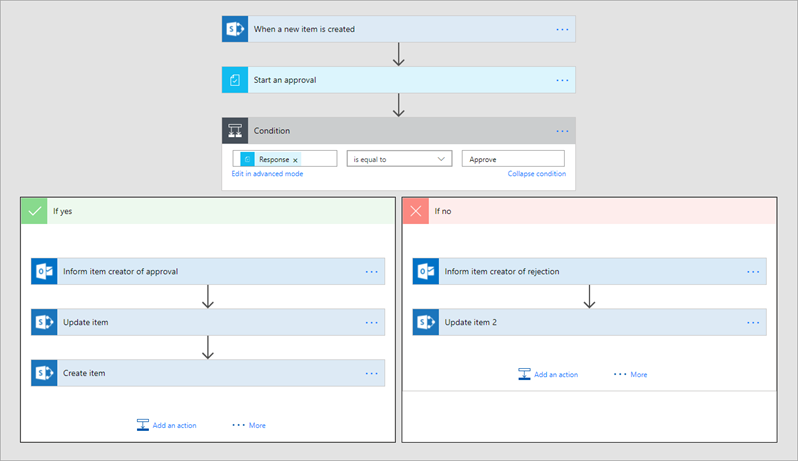
The next box in the flow responds to the project approver's decision and routes the flow to one of two branches: If yes or If no.

Step 2: Create actions for Approve = yes
By default, this branch sends an approval email to the requestor. We'll also update the Project Requests list, and add an item to the Project Details list because the project has been approved.
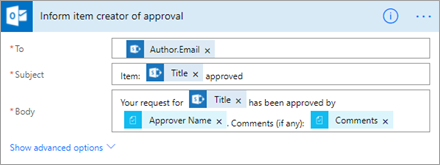
In the If yes branch, click or tap Inform item creator of approval, then Edit to see the default options for the email sent to the requestor.

By default, an email is sent to the person who created the list item, with the subject line and message body that you see. You can update these if you like.
Click or tap Add an Action.

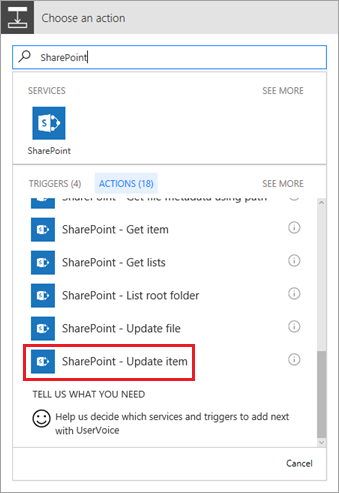
Under Choose an action, search for "SharePoint", then click or tap SharePoint – Update item.
Enter the SharePoint site URL and list name.

Select the Id box, then click or tap ID in the dynamic content dialog box.
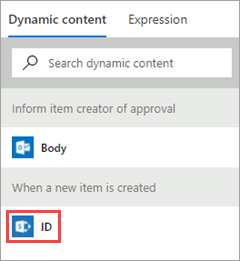
Dynamic content is available throughout the flow, based on previous steps. In this case, the list information is available, and we can use it in the actions that we create.
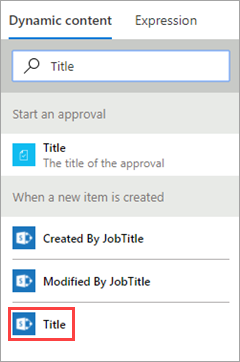
Select the Title box, search for "Title" in the dynamic content dialog box, then click or tap Title.
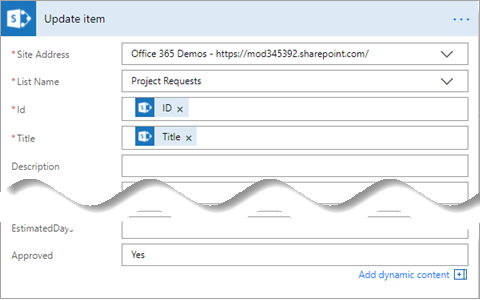
In the Approved box, enter "Yes". This part of the flow should now look like the following image.
Click or tap Add an Action again. This time we'll add an item to the Project Details list for the project that was approved.

Under Choose an action, search for "SharePoint", then select SharePoint – Create item.
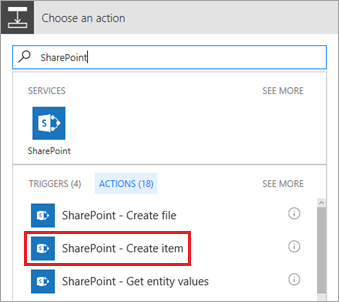
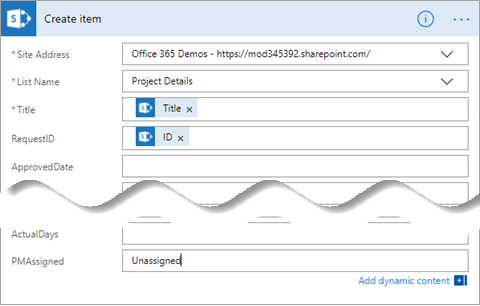
Enter the SharePoint site URL and list name.

Select the Title box, search for "Title" in the dynamic content dialog box, then click or tap Title.

Select the RequestId box, then click or tap ID in the dynamic content dialog box.

In the PMAssigned box, enter "Unassigned". This part of the flow should now look like the following image.
Step 3: Review action for Approve = no
By default, this branch sends a rejection email to the requestor. We'll also update the Project Requests list. The project isn't moving forward, so we don't add an item to the Project Details list.
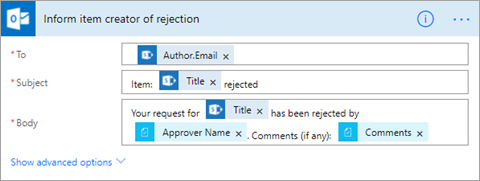
In the If no branch, click or tap Inform item creator of rejection, then Edit to see the default options for the email sent to the requestor.

By default, an email is sent to the person who created the list item, with the subject line and message body that you see. You can update these if you like.
Click or tap Add an Action.

Under Choose an action, search for "SharePoint", then click or tap SharePoint – Update item.

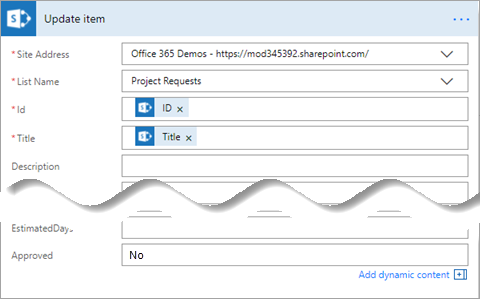
Enter the SharePoint site URL and list name.

Select the Id box, then click or tap ID in the dynamic content dialog box.

Select the Title box, search for "Title" in the dynamic content dialog box, then click or tap Title.

In the Approved box, enter "No". This part of the flow should now look like the following image.
At the top right of the screen, click or tap Create flow.
The flow is now complete, and it should look like the following image if you collapse the boxes.
At the top right of the screen, click or tap Done.

Step 4: Run the approval flow
In the Project Requests list, click Quick Edit and add an item like the following:
Title = "New monitor for Megan"
Description = "Megan needs a 24" monitor"
ProjectType = "New hardware"
RequestDate = "02/03/2017"
Requestor = "Megan Bowen"
EstimatedDays = "1"
Approved = "Pending"

Click Done at the top of the page when you're finished.

Check the inbox of the approver's email account. You should have an email like the following.
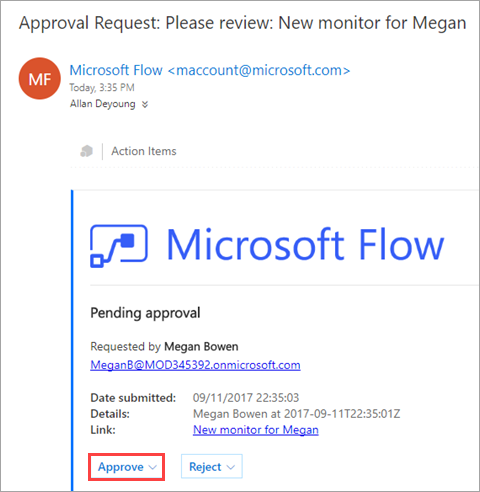
After you click Approve or Reject, the flow runs another process, and you get feedback like the following, directly in the email.

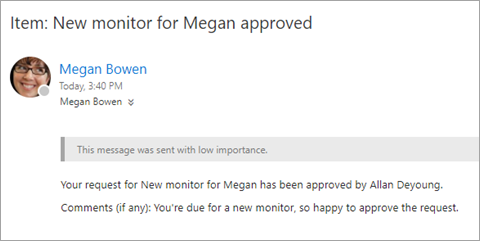
The flow sends an email to Megan with Allan's response, as in the following image. This email comes from Megan because they owns the flow.
Next steps
The next step in this tutorial series is to create an app to manage projects.