Build a RAG bot in Teams
The advanced Q&A chatbots are powerful apps built with the help of Large Language Models (LLMs). The chatbots answer questions by pulling information from specific sources using a method called Retrieval-Augmented Generation (RAG). The RAG architecture has two main flows:
Data ingestion: A pipeline for ingesting data from a source and indexing it. This usually happens offline.
Retrieval and generation: The RAG chain, which takes the user query at run time and retrieves the relevant data from the index, then passes it to the model.
Microsoft Teams enables you to build a conversational bot with RAG to create an enhanced experience to maximize productivity. Teams Toolkit provides a series of ready to use app templates in the Chat With Your Data category that combines the functionalities of Azure AI search, Microsoft 365 SharePoint, and custom API as different data source and LLMs to create a conversational search experience in Teams.
Prerequisites
| Install | For using... |
|---|---|
| Visual Studio Code | JavaScript, TypeScript, or Python build environments. Use the latest version. |
| Teams Toolkit | Microsoft Visual Studio Code extension that creates a project scaffolding for your app. Use the latest version. |
| Node.js | Back-end JavaScript runtime environment. For more information, see Node.js version compatibility table for project type. |
| Microsoft Teams | Microsoft Teams to collaborate with everyone you work with through apps for chat, meetings, and calls all in one place. |
| Azure OpenAI | First create your OpenAI API key to use OpenAI's Generative Pretrained Transformer (GPT). If you want to host your app or access resources in Azure, you must create an Azure OpenAI service. |
Create a new basic AI chatbot project
Open Visual Studio Code.
Select the Teams Toolkit
 icon in the Visual Studio Code Activity Bar.
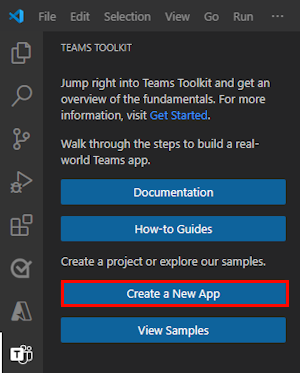
Select Create a New App.
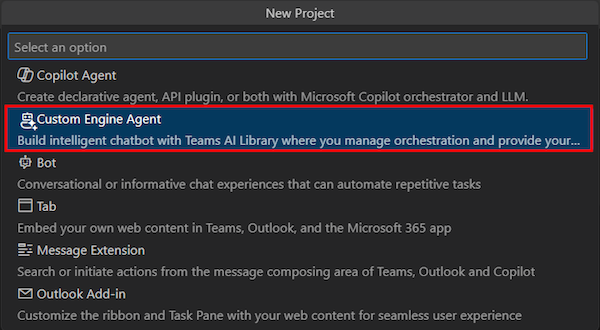
Select Custom Engine Agent.
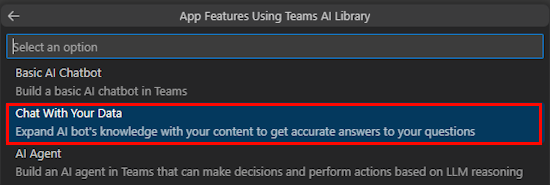
Select Chat With Your Data.
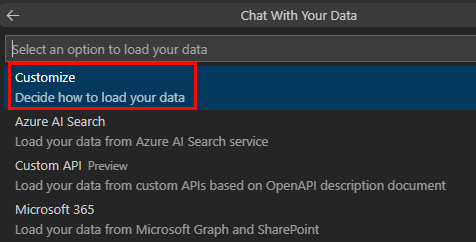
Select Customize.
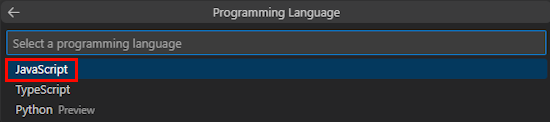
Select JavaScript.
Select Azure OpenAI or OpenAI.

Enter your Azure OpenAI or OpenAI credentials based on the service you select. Select Enter.

Select Default folder.

To change the default location, follow these steps:
- Select Browse.
- Select the location for the project workspace.
- Select Select Folder.
Enter an app name for your app and then select the Enter key.

You've successfully created your Chat With Your Data project workspace.
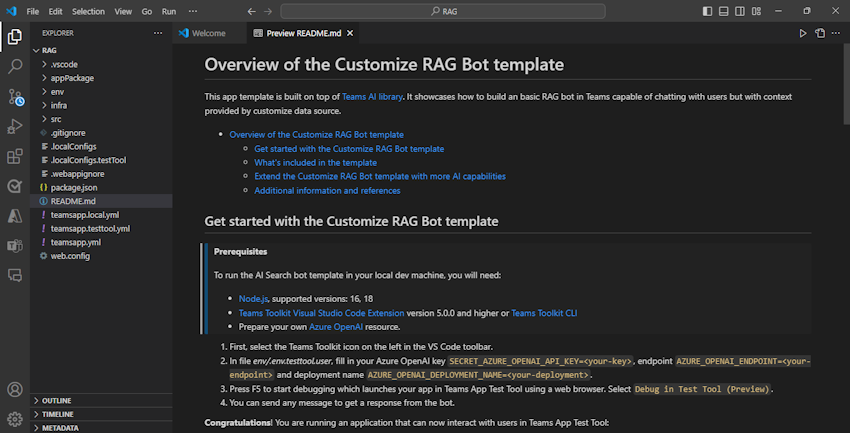
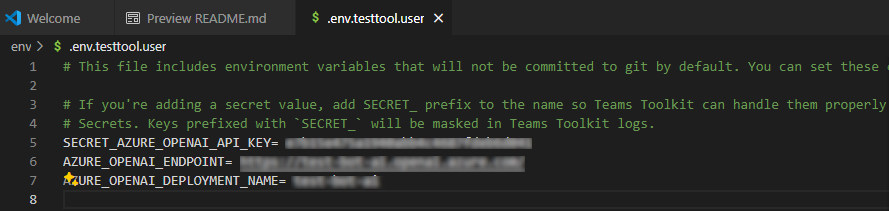
Under EXPLORER, go to the env > .env.testtool.user file.
Update the following values:
SECRET_AZURE_OPENAI_API_KEY=<your-key>AZURE_OPENAI_ENDPOINT=<your-endpoint>AZURE_OPENAI_DEPLOYMENT_NAME=<your-deployment>
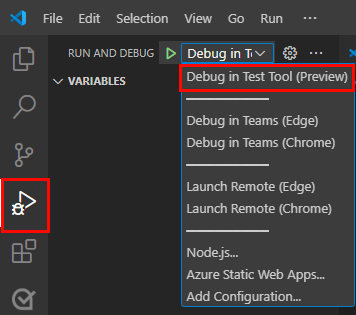
To debug your app, select the F5 key or from the left pane, select Run and Debug (Ctrl+Shift+D) and then select Debug in Test Tool (Preview) from the dropdown list.
Test Tool opens the bot in a webpage.

Take a tour of the bot app source code
| Folder | Contents |
|---|---|
.vscode |
Visual Studio Code files for debugging. |
appPackage |
Templates for the Teams app manifest. |
env |
Environment files. |
infra |
Templates for provisioning Azure resources. |
src |
The source code for the app. |
src/index.js |
Sets up the bot app server. |
src/adapter.js |
Sets up the bot adapter. |
src/config.js |
Defines the environment variables. |
src/prompts/chat/skprompt.txt |
Defines the prompt. |
src/prompts/chat/config.json |
Configures the prompt. |
src/app/app.js |
Handles business logics for the RAG bot. |
src/app/myDataSource.js |
Defines the data source. |
src/data/*.md |
Raw text data sources. |
teamsapp.yml |
This is the main Teams Toolkit project file. The project file defines the properties and configuration stage definitions. |
teamsapp.local.yml |
This overrides teamsapp.yml with actions that enable local execution and debugging. |
teamsapp.testtool.yml |
This overrides teamsapp.yml with actions that enable local execution and debugging in Teams App Test Tool. |
RAG scenarios for Teams AI
In AI context, the vector databases are widely used as RAG storages, which store embeddings data and provide vector-similarity search. Teams AI library provides utilities to help create embeddings for the given inputs.
Tip
Teams AI library doesn't provide the vector database implementation, so you need to add your own logic to process the created embeddings.
// create OpenAIEmbeddings instance
const model = new OpenAIEmbeddings({ ... endpoint, apikey, model, ... });

// create embeddings for the given inputs
const embeddings = await model.createEmbeddings(model, inputs);

// your own logic to process embeddings
The following diagram shows how Teams AI library provides functionalities to ease each step of the retrieval and generation process:
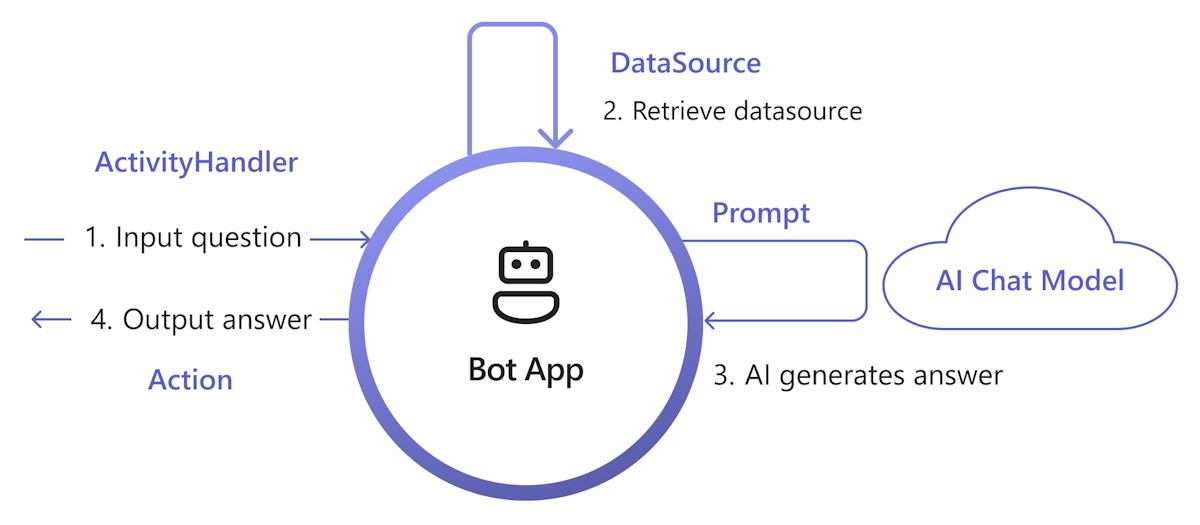
Handle input: The most straight forward way is to pass the user’s input to the retrieval without any change. However, if you'd like to customize the input before retrieval, you can add an activity handler to certain incoming activities.
Retrieve DataSource: Teams AI library provides
DataSourceinterface to let you add your own retrieval logic. You need to create your ownDataSourceinstance, and Teams AI library calls it on demand.class MyDataSource implements DataSource { /** * Name of the data source. */ public readonly name = "my-datasource"; /** * Renders the data source as a string of text. * @param context Turn context for the current turn of conversation with the user. * @param memory An interface for accessing state values. * @param tokenizer Tokenizer to use when rendering the data source. * @param maxTokens Maximum number of tokens allowed to be rendered. * @returns The text to inject into the prompt as a `RenderedPromptSection` object. */ renderData( context: TurnContext, memory: Memory, tokenizer: Tokenizer, maxTokens: number ): Promise<RenderedPromptSection<string>> { ... } }Call AI with prompt: In the Teams AI prompt system, you can easily inject a
DataSourceby adjusting theaugmentation.data_sourcesconfiguration section. This connects the prompt with theDataSourceand the library orchestrator to inject theDataSourcetext into the final prompt. For more information, see authorprompt. For example, in the prompt'sconfig.jsonfile:{ "schema": 1.1, ... "augmentation": { "data_sources": { "my-datasource": 1200 } } }Build response: By default, Teams AI library replies to the AI generated response as a text message to the user. If you want to customize the response, you can override the default SAY actions or explicitly call the AI Model to build your replies, for example, with Adaptive Cards.
Here's a minimal set of implementations to add RAG to your app. In general, it implements DataSource to inject your knowledge into prompt, so that AI can generate response based on the knowledge.
Create
myDataSource.tsfile to implementDataSourceinterface:export class MyDataSource implements DataSource { public readonly name = "my-datasource"; public async renderData( context: TurnContext, memory: Memory, tokenizer: Tokenizer, maxTokens: number ): Promise<RenderedPromptSection<string>> { const input = memory.getValue('temp.input') as string; let knowledge = "There's no knowledge found."; // hard-code knowledge if (input?.includes("shuttle bus")) { knowledge = "Company's shuttle bus may be 15 minutes late on rainy days."; } else if (input?.includes("cafe")) { knowledge = "The Cafe's available time is 9:00 to 17:00 on working days and 10:00 to 16:00 on weekends and holidays." } return { output: knowledge, length: knowledge.length, tooLong: false } } }Register the
DataSourceinapp.tsfile:// Register your data source to prompt manager planner.prompts.addDataSource(new MyDataSource());
Create the
prompts/qa/skprompt.txtfile and add the following text:The following is a conversation with an AI assistant. The assistant is helpful, creative, clever, and very friendly to answer user's question. Base your answer off the text below:Create the
prompts/qa/config.jsonfile and add the following code to connect with the data source:{ "schema": 1.1, "description": "Chat with QA Assistant", "type": "completion", "completion": { "model": "gpt-35-turbo", "completion_type": "chat", "include_history": true, "include_input": true, "max_input_tokens": 2800, "max_tokens": 1000, "temperature": 0.9, "top_p": 0.0, "presence_penalty": 0.6, "frequency_penalty": 0.0, "stop_sequences": [] }, "augmentation": { "data_sources": { "my-datasource": 1200 } } }
Select data sources
In the Chat With Your Data or RAG scenarios, Teams Toolkit provides the following types of data sources:
Customize: Allows you to fully control the data ingestion to build your own vector index and use it as data source. For more information, see build your own data ingestion.
You can also use Azure Cosmos DB Vector Database Extension or Azure PostgreSQL Server vector Extension as vector databases, or Bing Web Search API to get latest web content to implement any data source instance to connect with your own data source.
Azure AI Search: Provides a sample to add your documents to Azure AI Search Service, then use the search index as data source.
Custom API: Allows your chatbot to invoke the API defined in the OpenAPI description document to retrieve domain data from the API service.
Microsoft Graph and SharePoint: Provides a sample to use Microsoft 365 content from Microsoft Graph Search API as data source.
Build your own data ingestion
To build your data ingestion, follow these steps:
Load your source documents: Ensure that your document has a meaningful text as the embedding model takes only text as a input.
Split into chunks: Ensure you split the document to avoid API call failures as the embedding model has an input token limitation.
Call embedding model: Call the embedding model APIs to create embeddings for the given inputs.
Store embeddings: Store the created embeddings into a vector database. Also include useful metadata and raw content to further reference.
Sample code
loader.ts: Plain text as source input.import * as fs from "node:fs"; export function loadTextFile(path: string): string { return fs.readFileSync(path, "utf-8"); }splitter.ts: Split text into chunks, with an overlap.// split words by delimiters. const delimiters = [" ", "\t", "\r", "\n"]; export function split(content: string, length: number, overlap: number): Array<string> { const results = new Array<string>(); let cursor = 0, curChunk = 0; results.push(""); while(cursor < content.length) { const curChar = content[cursor]; if (delimiters.includes(curChar)) { // check chunk length while (curChunk < results.length && results[curChunk].length >= length) { curChunk ++; } for (let i = curChunk; i < results.length; i++) { results[i] += curChar; } if (results[results.length - 1].length >= length - overlap) { results.push(""); } } else { // append for (let i = curChunk; i < results.length; i++) { results[i] += curChar; } } cursor ++; } while (curChunk < results.length - 1) { results.pop(); } return results; }embeddings.ts: Use Teams AI libraryOpenAIEmbeddingsto create embeddings.import { OpenAIEmbeddings } from "@microsoft/teams-ai"; const embeddingClient = new OpenAIEmbeddings({ azureApiKey: "<your-aoai-key>", azureEndpoint: "<your-aoai-endpoint>", azureDeployment: "<your-embedding-deployment, e.g., text-embedding-ada-002>" }); export async function createEmbeddings(content: string): Promise<number[]> { const response = await embeddingClient.createEmbeddings(content); return response.output[0]; }searchIndex.ts: Create Azure AI Search Index.import { SearchIndexClient, AzureKeyCredential, SearchIndex } from "@azure/search-documents"; const endpoint = "<your-search-endpoint>"; const apiKey = "<your-search-key>"; const indexName = "<your-index-name>"; const indexDef: SearchIndex = { name: indexName, fields: [ { type: "Edm.String", name: "id", key: true, }, { type: "Edm.String", name: "content", searchable: true, }, { type: "Edm.String", name: "filepath", searchable: true, filterable: true, }, { type: "Collection(Edm.Single)", name: "contentVector", searchable: true, vectorSearchDimensions: 1536, vectorSearchProfileName: "default" } ], vectorSearch: { algorithms: [{ name: "default", kind: "hnsw" }], profiles: [{ name: "default", algorithmConfigurationName: "default" }] }, semanticSearch: { defaultConfigurationName: "default", configurations: [{ name: "default", prioritizedFields: { contentFields: [{ name: "content" }] } }] } }; export async function createNewIndex(): Promise<void> { const client = new SearchIndexClient(endpoint, new AzureKeyCredential(apiKey)); await client.createIndex(indexDef); }searchIndexer.ts: Upload created embeddings and other fields to Azure AI Search Index.import { AzureKeyCredential, SearchClient } from "@azure/search-documents"; export interface Doc { id: string, content: string, filepath: string, contentVector: number[] } const endpoint = "<your-search-endpoint>"; const apiKey = "<your-search-key>"; const indexName = "<your-index-name>"; const searchClient: SearchClient<Doc> = new SearchClient<Doc>(endpoint, indexName, new AzureKeyCredential(apiKey)); export async function indexDoc(doc: Doc): Promise<boolean> { const response = await searchClient.mergeOrUploadDocuments([doc]); return response.results.every((result) => result.succeeded); }index.ts: Orchestrate above components.import { createEmbeddings } from "./embeddings"; import { loadTextFile } from "./loader"; import { createNewIndex } from "./searchIndex"; import { indexDoc } from "./searchIndexer"; import { split } from "./splitter"; async function main() { // Only need to call once await createNewIndex(); // local files as source input const files = [`${__dirname}/data/A.md`, `${__dirname}/data/A.md`]; for (const file of files) { // load file const fullContent = loadTextFile(file); // split into chunks const contents = split(fullContent, 1000, 100); let partIndex = 0; for (const content of contents) { partIndex ++; // create embeddings const embeddings = await createEmbeddings(content); // upload to index await indexDoc({ id: `${file.replace(/[^a-z0-9]/ig, "")}___${partIndex}`, content: content, filepath: file, contentVector: embeddings, }); } } } main().then().finally();
Azure AI Search as data source
In this section you'll learn how to:
- Add your document to Azure AI Search through Azure OpenAI Service.
- Use Azure AI Search index as data source in the RAG app.
Add document to Azure AI Search
Note
This approach creates an end-to-end chat API called as AI model. You can also use the index created earlier as a data source, and use Teams AI library to customize the retrieval and prompt.
You can ingest your knowledge documents to Azure AI Search Service and create a vector index with Azure OpenAI on your data. After ingestion, you can use the index as a data source.
Prepare your data in Azure Blob Storage.
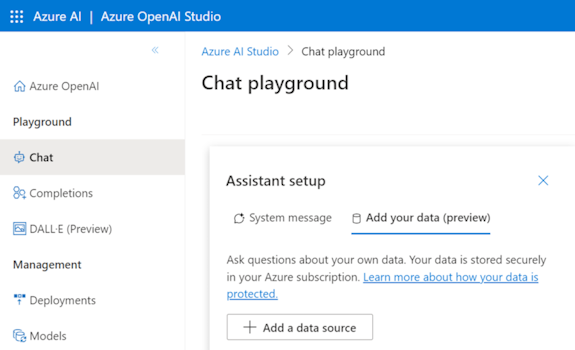
In Azure OpenAI Studio, select Add a data source.
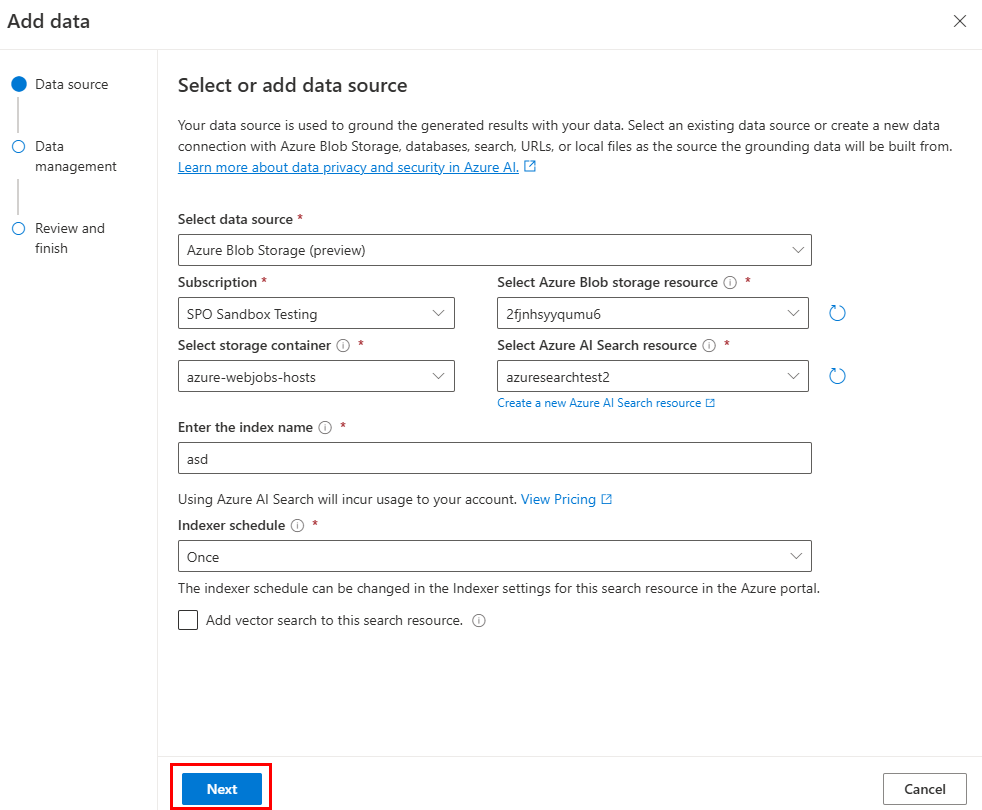
Update the required fields.
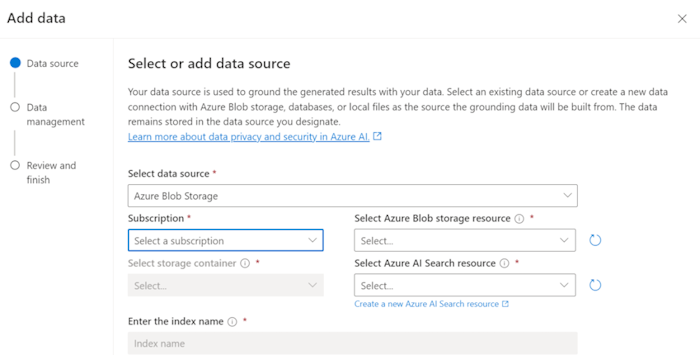
Select Next.
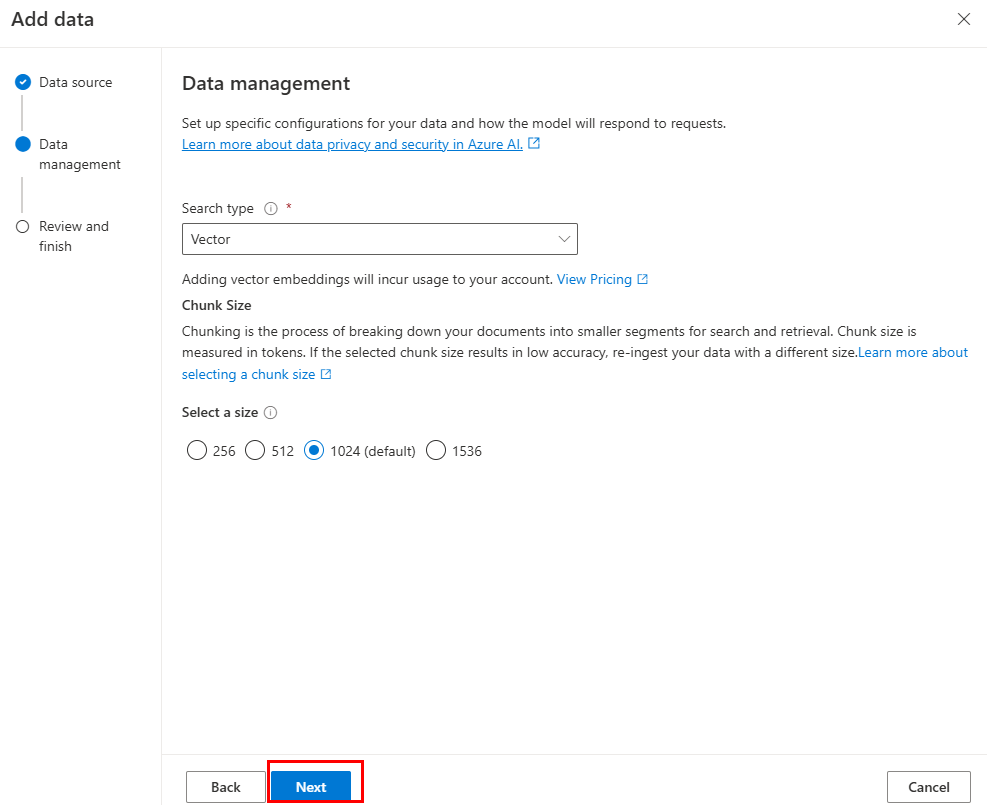
The Data management page appears.
Update the required fields.
Select Next.
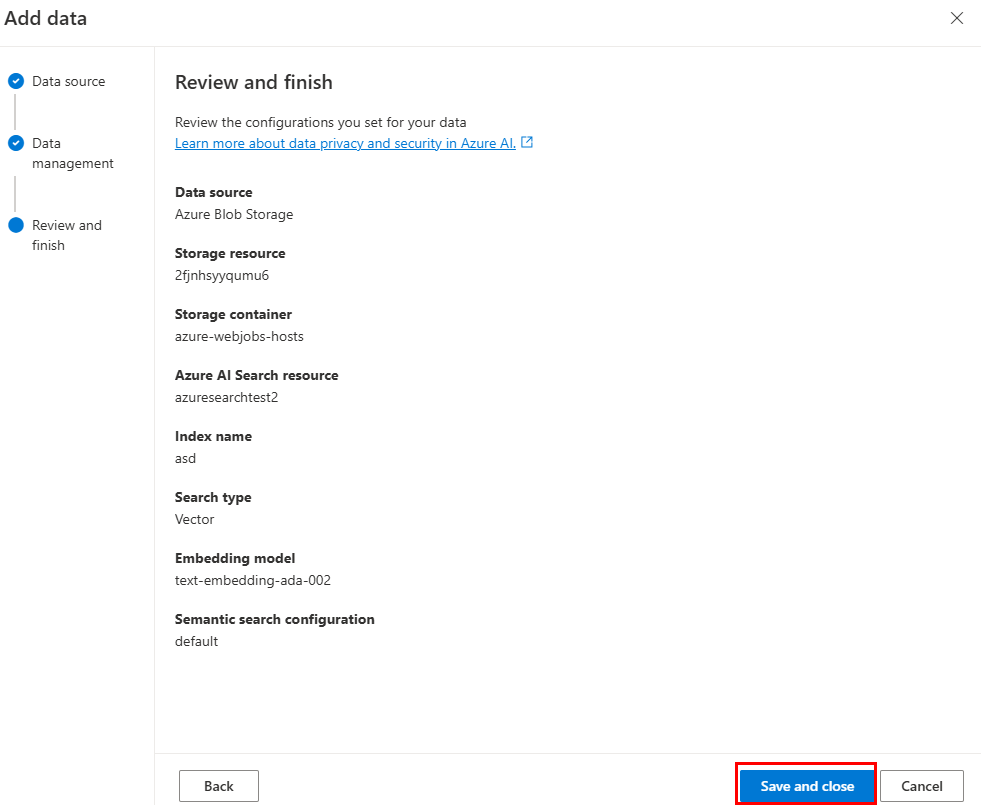
Update the required fields. Select Next.
Select Save and close.
Use Azure AI Search index data source
After ingesting data into Azure AI Search, you can implement your own DataSource to retrieve data from search index.
const { AzureKeyCredential, SearchClient } = require("@azure/search-documents");
const { DataSource, Memory, OpenAIEmbeddings, Tokenizer } = require("@microsoft/teams-ai");
const { TurnContext } = require("botbuilder");

// Define the interface for document
class Doc {
  constructor(id, content, filepath) {
    this.id = id;
    this.content = content; // searchable
    this.filepath = filepath;
  }
}

// Azure OpenAI configuration
const aoaiEndpoint = "<your-aoai-endpoint>";
const aoaiApiKey = "<your-aoai-key>";
const aoaiDeployment = "<your-embedding-deployment, e.g., text-embedding-ada-002>";

// Azure AI Search configuration
const searchEndpoint = "<your-search-endpoint>";
const searchApiKey = "<your-search-apikey>";
const searchIndexName = "<your-index-name>";

// Define MyDataSource class implementing DataSource interface
class MyDataSource extends DataSource {
  constructor() {
    super();
    this.name = "my-datasource";
    this.embeddingClient = new OpenAIEmbeddings({
      azureEndpoint: aoaiEndpoint,
      azureApiKey: aoaiApiKey,
      azureDeployment: aoaiDeployment
    });
    this.searchClient = new SearchClient(searchEndpoint, searchIndexName, new AzureKeyCredential(searchApiKey));
  }

  async renderData(context, memory, tokenizer, maxTokens) {
    // use user input as query
    const input = memory.getValue("temp.input");

    // generate embeddings
    const embeddings = (await this.embeddingClient.createEmbeddings(input)).output[0];

    // query Azure AI Search
    const response = await this.searchClient.search(input, {
      select: [ "id", "content", "filepath" ],
      searchFields: ["rawContent"],
      vectorSearchOptions: {
        queries: [{
          kind: "vector",
          fields: [ "contentVector" ],
          vector: embeddings,
          kNearestNeighborsCount: 3
        }]
      },
      queryType: "semantic",
      top: 3,
      semanticSearchOptions: {
        // your semantic configuration name
        configurationName: "default",
      }
    });

    // Add documents until you run out of tokens
    let length = 0, output = '';
    for await (const result of response.results) {
      // Start a new doc
      let doc = `${result.document.content}\n\n`;
      let docLength = tokenizer.encode(doc).length;
      const remainingTokens = maxTokens - (length + docLength);
      if (remainingTokens <= 0) {
          break;
      }

      // Append doc to output
      output += doc;
      length += docLength;
    }
    return { output, length, tooLong: length > maxTokens };
  }
}
Add more API for Custom API as data source
Follow these steps to extend the custom engine agent from Custom API template with more APIs.
Update
./appPackage/apiSpecificationFile/openapi.*.Copy corresponding part of the API you want to add from your spec and append to
./appPackage/apiSpecificationFile/openapi.*.Update
./src/prompts/chat/actions.json.Update the necessary info and properties for path, query, and body for the API in the following object:
{
  "name": "${{YOUR-API-NAME}}",
  "description": "${{YOUR-API-DESCRIPTION}}",
  "parameters": {
    "type": "object",
    "properties": {
      "query": {
        "type": "object",
        "properties": {
          "${{YOUR-PROPERTY-NAME}}": {
            "type": "${{YOUR-PROPERTY-TYPE}}",
            "description": "${{YOUR-PROPERTY-DESCRIPTION}}",
          }
          // You can add more query properties here
        }
      },
      "path": {
        // Same as query properties
      },
      "body": {
        // Same as query properties
      }
    }
  }
}
Update
./src/adaptiveCards.Create a new file with name
${{YOUR-API-NAME}}.jsonand fill in the Adaptive Card for the API response of your API.Update the
./src/app/app.jsfile.Add following code before
module.exports = app;:app.ai.action(${{YOUR-API-NAME}}, async (context: TurnContext, state: ApplicationTurnState, parameter: any) => { const client = await api.getClient(); const path = client.paths[${{YOUR-API-PATH}}]; if (path && path.${{YOUR-API-METHOD}}) { const result = await path.${{YOUR-API-METHOD}}(parameter.path, parameter.body, { params: parameter.query, }); const card = generateAdaptiveCard("../adaptiveCards/${{YOUR-API-NAME}}.json", result); await context.sendActivity({ attachments: [card] }); } else { await context.sendActivity("no result"); } return "result"; });
Microsoft 365 as data source
Learn to utilize the Microsoft Graph Search API to query Microsoft 365 content as a data source for the RAG app. To learn more about Microsoft Graph Search API, you can refer to use the Microsoft Search API to search OneDrive and SharePoint content.
Prerequisite: You must create a Graph API client and grant it the Files.Read.All permission scope to access SharePoint and OneDrive files, folders, pages, and news.
Data ingestion
The Microsoft Graph Search API, which can search SharePoint content, is available. Therefore, you only need to ensure your document is uploaded to SharePoint or OneDrive, with no extra data ingestion required.
Note
SharePoint server indexes a file only if its file extension is listed on the manage file types page. For a complete list of supported file extensions, refer to the default indexed file name extensions and parsed file types in SharePoint server and SharePoint in Microsoft 365.
Data source implementation
An example of searching for the text files in SharePoint and OneDrive is as follows:
import {
  DataSource,
  Memory,
  RenderedPromptSection,
  Tokenizer,
} from "@microsoft/teams-ai";
import { TurnContext } from "botbuilder";
import { Client, ResponseType } from "@microsoft/microsoft-graph-client";

export class GraphApiSearchDataSource implements DataSource {
  public readonly name = "my-datasource";
  public readonly description =
    "Searches the graph for documents related to the input";
  public client: Client;

  constructor(client: Client) {
    this.client = client;
  }

  public async renderData(
    context: TurnContext,
    memory: Memory,
    tokenizer: Tokenizer,
    maxTokens: number
  ): Promise<RenderedPromptSection<string>> {
    const input = memory.getValue("temp.input") as string;
    const contentResults = [];
    const response = await this.client.api("/search/query").post({
      requests: [
        {
          entityTypes: ["driveItem"],
          query: {
            // Search for markdown files in the user's OneDrive and SharePoint
            // The supported file types are listed here:
            // https://learn.microsoft.com/sharepoint/technical-reference/default-crawled-file-name-extensions-and-parsed-file-types
            queryString: `${input} filetype:txt`,
          },
          // This parameter is required only when searching with application permissions
          // https://learn.microsoft.com/graph/search-concept-searchall
          // region: "US",
        },
      ],
    });
    for (const value of response?.value ?? []) {
      for (const hitsContainer of value?.hitsContainers ?? []) {
        contentResults.push(...(hitsContainer?.hits ?? []));
      }
    }

    // Add documents until you run out of tokens
    let length = 0,
      output = "";
    for (const result of contentResults) {
      const rawContent = await this.downloadSharepointFile(
        result.resource.webUrl
      );
      if (!rawContent) {
        continue;
      }
      let doc = `${rawContent}\n\n`;
      let docLength = tokenizer.encode(doc).length;
      const remainingTokens = maxTokens - (length + docLength);
      if (remainingTokens <= 0) {
        break;
      }

      // Append do to output
      output += doc;
      length += docLength;
    }
    return { output, length, tooLong: length > maxTokens };
  }

  // Download the file from SharePoint
  // https://docs.microsoft.com/en-us/graph/api/driveitem-get-content
  private async downloadSharepointFile(
    contentUrl: string
  ): Promise<string | undefined> {
    const encodedUrl = this.encodeSharepointContentUrl(contentUrl);
    const fileContentResponse = await this.client
      .api(`/shares/${encodedUrl}/driveItem/content`)
      .responseType(ResponseType.TEXT)
      .get();

    return fileContentResponse;
  }

  private encodeSharepointContentUrl(webUrl: string): string {
    const byteData = Buffer.from(webUrl, "utf-8");
    const base64String = byteData.toString("base64");
    return (
      "u!" + base64String.replace("=", "").replace("/", "_").replace("+", "_")
    );
  }
}
See also
Platform Docs