Assign licenses and manage access to Copilot Studio
This article is written for tenant administrators. If you want to sign up for Copilot Studio as an individual, see Sign up for a Copilot Studio trial.
To create and manage agents with Copilot Studio, you need:
- A license for each user, also known as a per user license (or Copilot Studio User License as referred to on the Microsoft 365 admin center), should be assigned to individual users who need access to create and manage agents.
- A license for your organization, also known as a tenant license (or Copilot Studio as referred to on the Microsoft 365 admin center), should be acquired by the tenant administrator. This license can't be assigned to individual users.
Note
Users of your agents don't need a special license. After you publish your agent, anyone who can access the published agent can interact with it.
Guest users of your tenant will not be able to access Copilot Studio.
More information: Licensing guide
Important
If you purchase a Copilot Studio license through volume licensing or any channel other than the Microsoft 365 admin center, you need to acquire both a tenant license and a user licenses through that channel, preferably as part of a single transaction.
Buy a tenant license
Purchase licenses for your organization by going to the Microsoft 365 admin center. You must sign in with an admin account to buy licenses.
- Go to the Microsoft 365 admin center and sign in with your administrator account.
- On the side pane, expand the Billing menu, and then select Purchase services.
- Search for Copilot Studio, and complete the checkout process.
Acquire user licenses
- After you've purchased a Copilot Studio license from the Microsoft 365 admin center, you need to purchase user licenses to give users access to the product. In the Microsoft 365 admin center, go to Billing, and then select Purchase services.
- Scroll down to the Add-ons section.
- Look for Copilot Studio User License. Select the number of licenses you need, and complete the checkout process.
Important
If you purchased a Copilot Studio license through volume licensing or any channel other than the Microsoft 365 admin center, you need to acquire both a tenant license and user licenses through that channel, preferably as part of a single transaction.
Assign licenses to users
Go to the Microsoft 365 admin center and sign in with your administrator account.
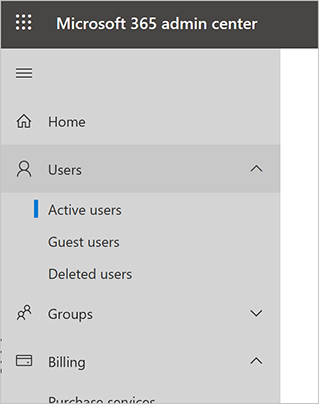
On the side pane, expand the Users menu, and then select Active users.

Select a name, and then select Manage product licenses.
On the flyout pane, select the check box next to Copilot Studio user license, and then select Save changes.
Repeat these steps to add more users, or exit the Microsoft 365 admin center if you're finished.
Note
To simplify user license management, you can assign licenses to a Microsoft Entra ID security group. More information: Assign licenses to users by group membership in Microsoft Entra ID
The users can now sign in to Copilot Studio.
How to differentiate between tenant and user licenses
If you're unsure whether you have both of the required licenses, on the Microsoft 365 admin center go to Billing and then Subscriptions to see the list of active licenses. For Copilot Studio, you should see two licenses:
- Copilot Studio
- Copilot Studio User License
You can only assign the Copilot Studio User License to specific users. You don't need to assign the Copilot Studio license.
Trial plans
Users in your organization can try Copilot Studio for a limited time period.
You can disable or enable the ability for users to sign up for a trial themselves by modifying the AllowAdHocSubscriptions flag in your organization settings.
Subscription capacity
When you purchase a license, you gain capacity for the specified number of billed sessions. Copilot Studio pools this capacity across the entire tenant.
The consumption of the capacity isn't reported at the tenant level, but can be seen for each individual agent.
For more information, see Quotas, limits, app registration, certificates, and configuration values.