Extend Microsoft 365 Copilot or Copilot agent with prompt actions (preview)
Note
Extending with prompt actions is only available for some Microsoft-branded agent experiences.
Open add a prompt action wizard
Sign in to Copilot Studio and select Agents on the side navigation pane.
Select the Copilot agent you want to add a prompt action to.
Note
For this example, we've chosen Microsoft 365 Copilot.
The agent overview page appears.
Select the Actions tab and then select + Add action.
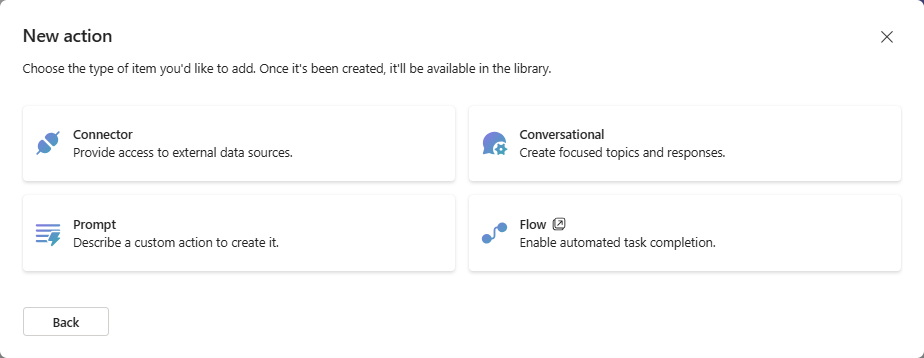
A New action menu appears.

Select Prompt.
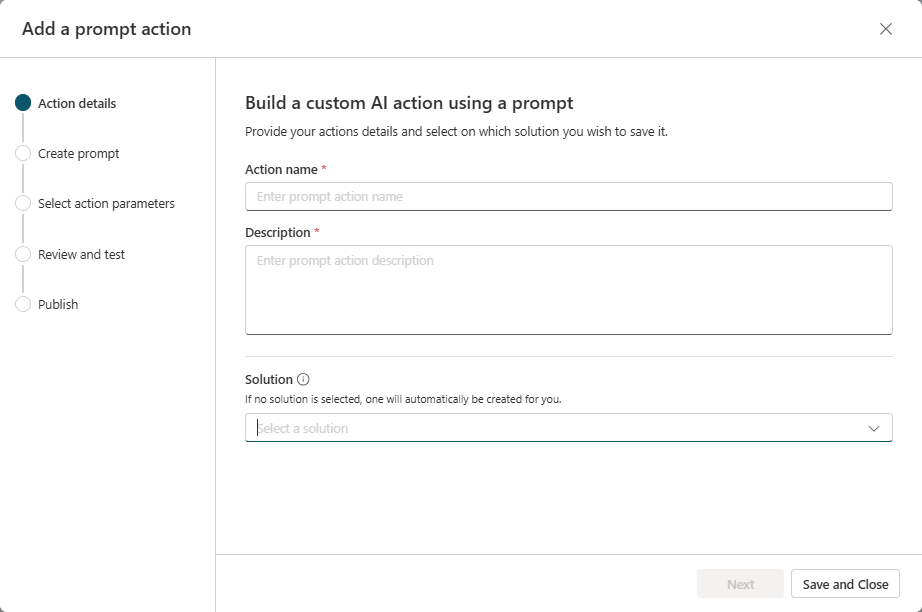
The Add a prompt action wizard opens.
Create a prompt action
In the wizard, follow these steps in sequence.
Action details
Enter a name and description for the action.
These details are used by the copilot to perform a semantic matching of the action with the user query.
Under Solution, a dropdown lists all solutions available within the current environment. If you defined a preferred solution, then it's preselected, otherwise select the solution you want to use or leave it for the wizard to autocreate a new solution for this action.

Select Next.
Create a prompt
Describe the task you want your copilot to perform using natural language.
In the Prompt field, enter instructions and data required to generate response-pertinent details for the use case.
To enable the Copilot agent to pass important pieces of information at runtime to the prompt action, add input variables. Write your own instructions or begin from one of the existing prompt templates.
Examples of prompts are Summarize text, Extract information from text, and Classify text.

Try out your prompt by selecting Test prompt.
Your prompt is generated and appears in the Prompt response field. You might need to revise and iterate on your prompt to meet your needs.
Note
Make sure your input variable has test data before you test.
When you're satisfied with the prompt response, select Save custom prompt.
Select action parameters
This step ensures descriptive input and output names are selected such that Copilot is able to prefill it with information from user utterance and consume the output from the prompt action.
In the Input parameters section, add the input variables that the prompt action needs to generate the response.
These are the variables that you want to pass to the prompt action at runtime. You can add multiple input variables.
In the Output parameters section, add the output variables that the prompt action generates.
These are the variables that you want to receive from the prompt action at runtime.
Review and test
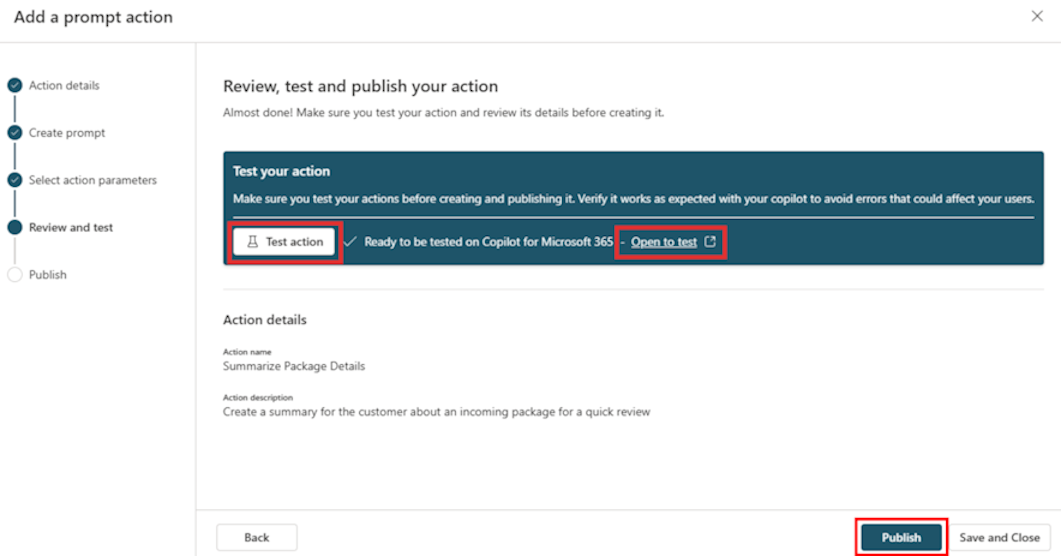
This step presents the opportunity for a copilot developer to test the prompt action by side-loading it in the Microsoft 365 Copilot.
To test the prompt action, select Test action.
Select Open to test to open the Copilot chat in a new window. Open the flyout to see the action and toggle it on.
The action appears with a beaker icon under the connector chosen with format Test-Action name.
You can now test the action by trying the prompts you expect a user to use. You can also use the
–developer oncommand to get more information on prompt execution. Once you're satisfied with the results, return to the Copilot Studio window.After you test the prompt and verify that it performs as expected, select Publish.

Publish
On the Review and test step, select Publish to see the confirmation message.
Your prompt action is now published to Microsoft 365 Copilot. It might take a few minutes for your action to show up in copilot experiences. Meanwhile, you can review information about using and administering actions in Microsoft 365 Copilot.
After you create your action, you need to enable it for use.
For more information about building and using prompt actions, see AI Builder prompts.