Create and deploy a custom AI agent
This article describes how to create and deploy a custom AI agent in Microsoft 365 Copilot for Service.
Prerequisites
- Get access to Copilot for Service.
- You need a System Customizer or System Administrator role on the environment where your custom AI agent is created. Learn more in predefined security roles.
Create a custom AI agent
You can create a custom AI agent in a few easy steps.
Go to the landing page for Copilot for Service.
A wizard appears, where you can create your custom AI agent. Select Custom service agent and then select Get Started.
Set the name of the custom AI agent you want to create or continue with the predefined name, and then select Create.
The environment defaults to the new Copilot for Service environment, but you can create the custom AI agent in a Copilot for Service trial environment. You're set up with System Customizer privileges in this environment.
Note
The custom AI agent can only be created in English language at this time.
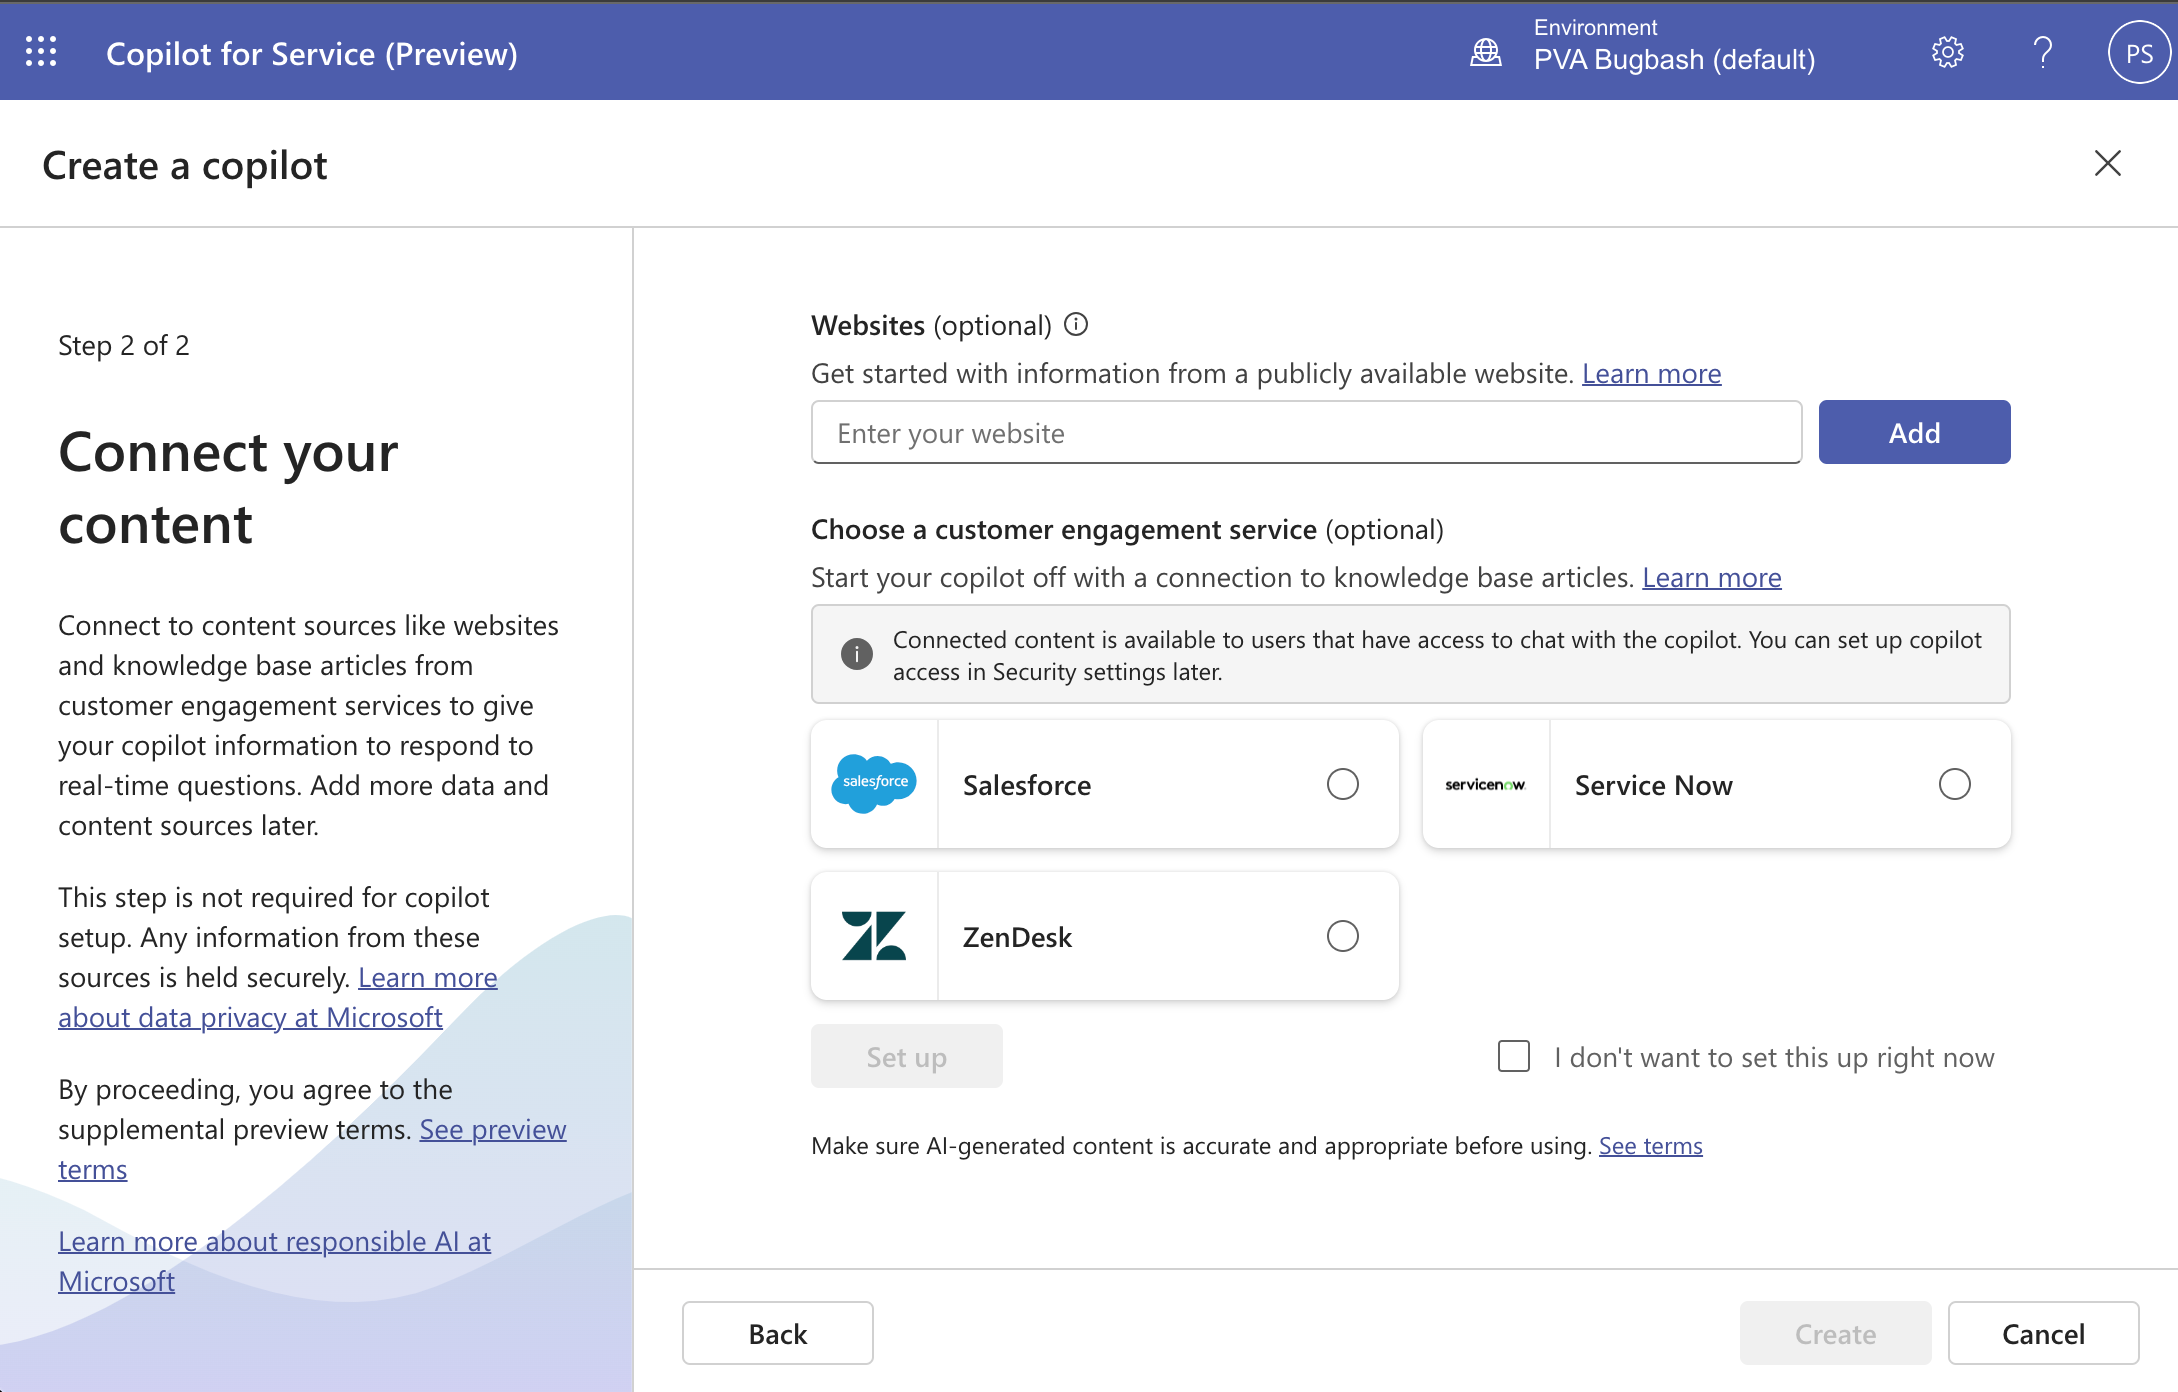
Set up your connections and sources of knowledge for your custom AI agent.
Add content sources like websites and knowledge base articles from customer engagement services, so that your AI agent can respond to real-time questions. These websites serve as a source of generative answers. Learn more in Manage content Sources.

Select Create to create your AI agent.
The new environment and AI agent are created. This process can take a few minutes. Once created, you land in the Overview page with a test chat open.
Test the custom AI agent by typing questions in the Chat. In the Test it out panel, you can ask questions that trigger the generative answers capability. You might receive some types unhelpful responses for questions such as personal questions, questions that require authenticated access to content, or have no source content in the specified URL.
Note
- Only one custom AI agent can be created per environment.
- You can only have one custom AI agent per environment.
Customize your agent
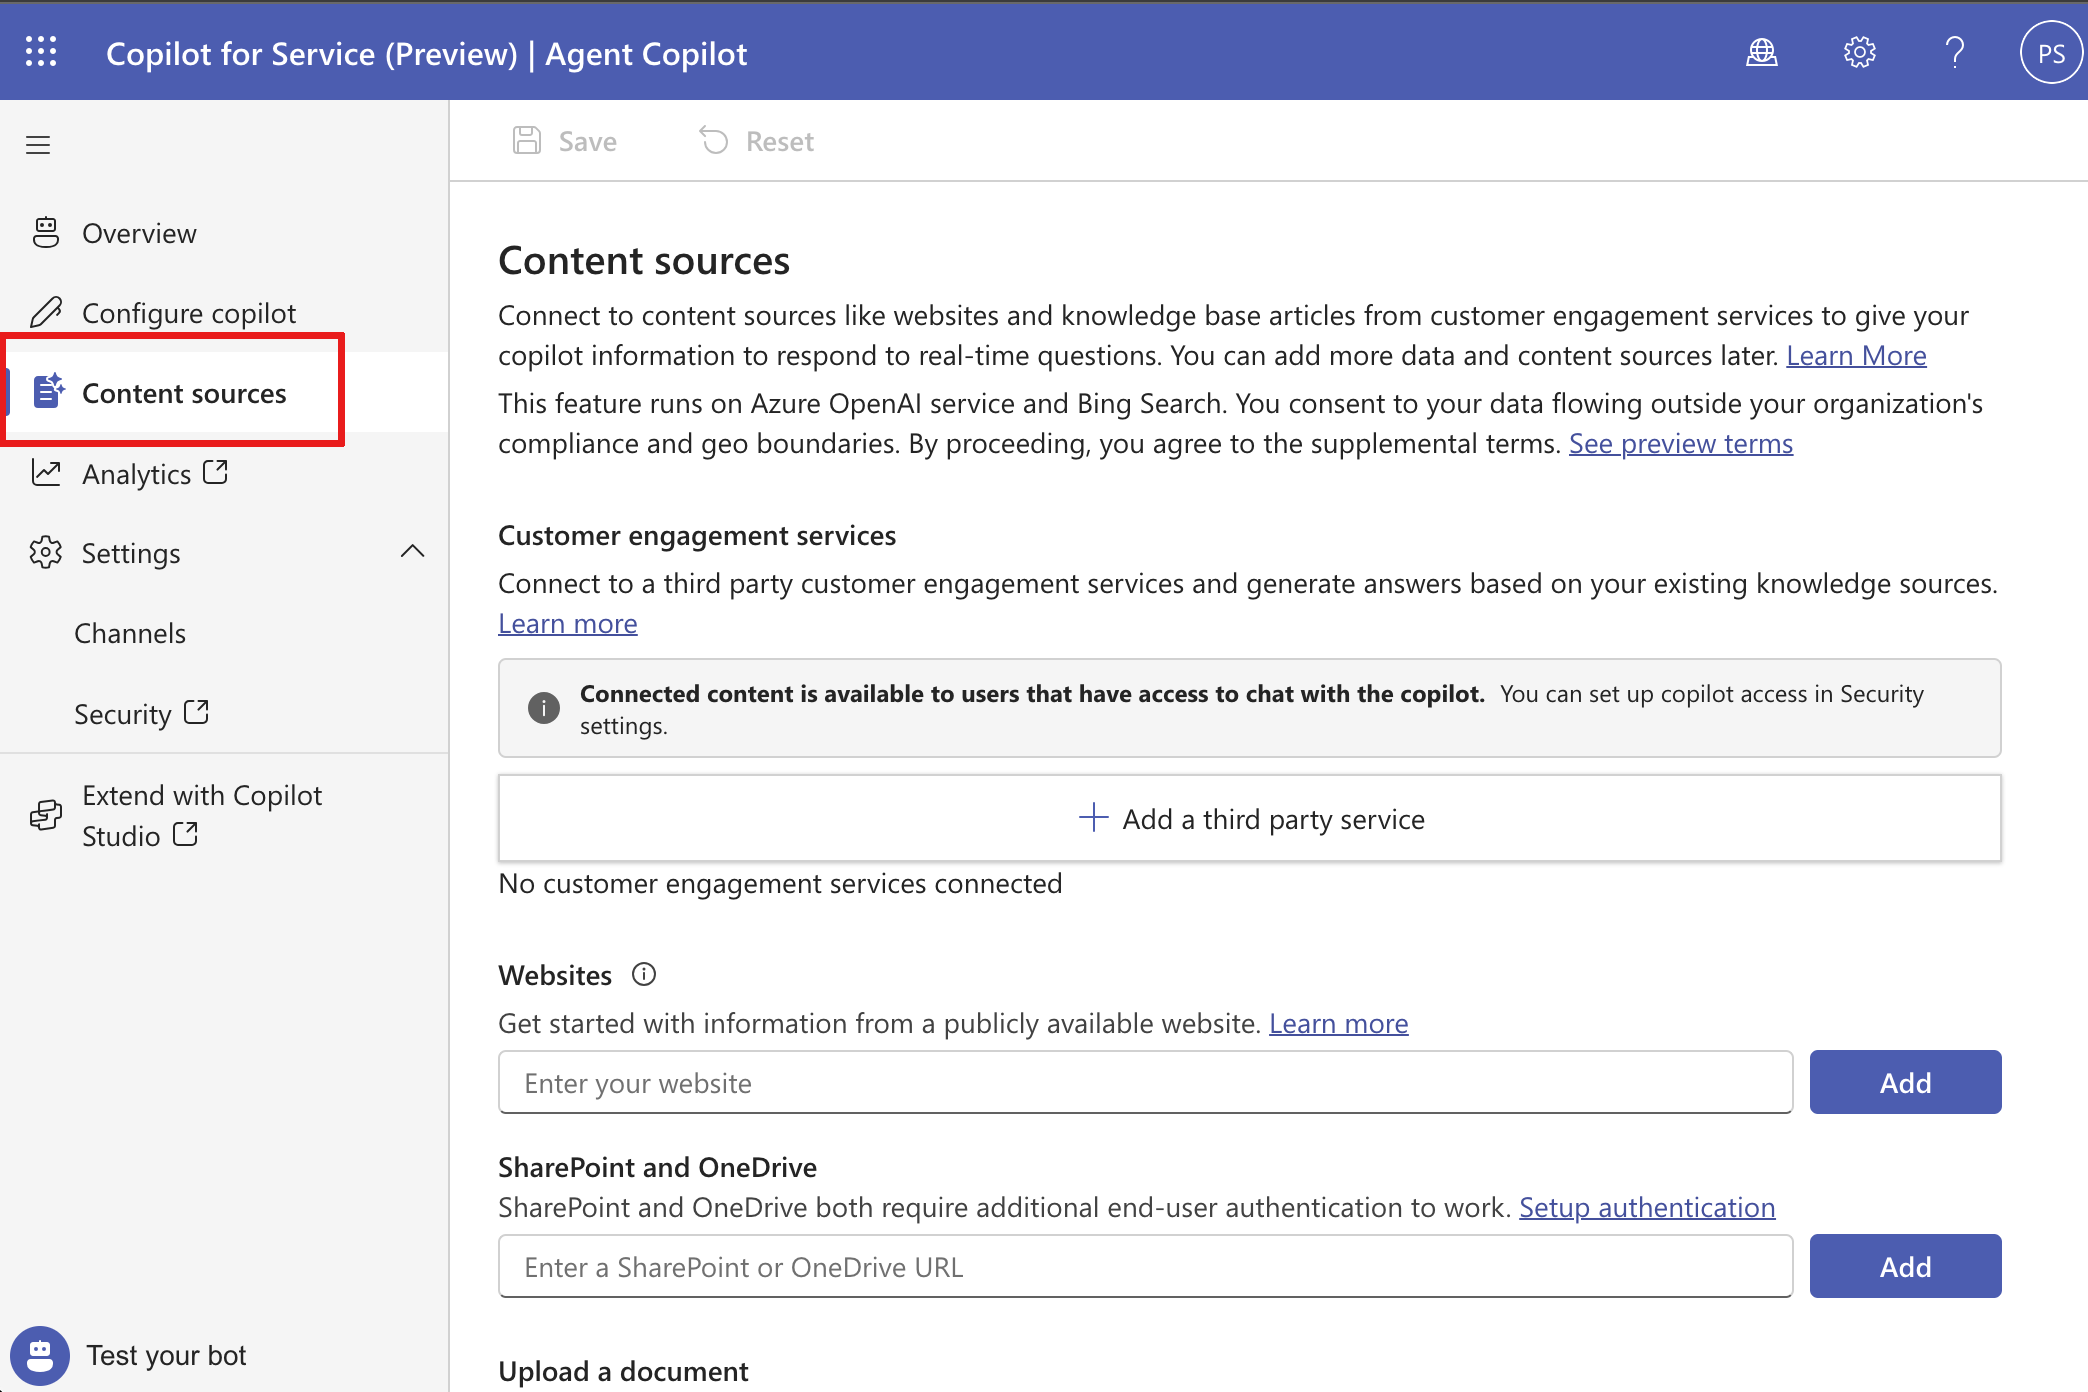
With your new custom AI agent, you can make customizations and enhancements by editing existing content sources or adding new ones to expand your AI agent's knowledge.
To customize your AI agent, navigate to the Content sources page.
To configure your agent, navigate to the Configure Copilot page.
Here you can manage your AI agent's conversational behavior and filter content from content sources.
Test your AI agent in the Chat box.
Publish your agent
Publish your custom AI agent after making any changes to ensure your service representatives can engage with the latest content and access the AI agent through multiple connections.
To publish, select the Overview page of Copilot for Service, and then select Publish in the Publish your copilot card.
It may take a few minutes for the AI agent to publish. After it successfully publishes, the status indicator shows the last published timestamp.
Tip
An error appears if the AI agent fails to publish. Select the link to open the Copilot in Microsoft Copilot Studio. Learn more about the error details by Publishing the Copilot again in Microsoft Copilot Studio.
Access your AI agent
Service representatives can talk to your AI agent from a web browser, in Microsoft Teams, or in your existing agent console.
Delete your agent
Perform the following steps to delete your custom AI agent in Copilot for Service:
Select Overview > (⋮) > Delete copilot. In the popup that appears, select Go to Power Apps solutions to open Power Apps.
In the Power Apps solution viewer, select the Managed tab to view the managed solutions of your custom AI agent solution. The solution that From the solutions listed that are associated with the AI agent.
If you have unpublished updates and changes to the custom AI agents result in unmanaged layers. Remove the unmanaged layers before deleting the solution.
- On the Unmanaged tab on the Power Apps solution page select Default solution.
- Find the topic as within the AI agent subcomponent where you previously made changes.
- Select ... > Advanced > See solution layers, then delete the unmanaged layers.
Search for solutions such as Service Copilot Service Now Knowledge Base, Service Copilot Salesforce Knowledge Base, or Service Copilot Zendesk Knowledge Base in all knowledge sources of the AI agent.
Select (⋮), and then select Delete. Delete all the solutions associated with knowledge sources the AI agent has, one by one.
Select and delete Base components to enable Service Copilot and Agent Copilot Base, one by one.
Important
Each solution needs to be deleted one at a time to successfully delete them.
Your AI agent is fully deleted once all the solutions are deleted.


