Inspect API requests issued by cloud services
When you integrate your application with cloud services, one of the challenges you might face is understanding how the cloud service interacts with the APIs it uses. Being able to inspect API requests is especially important when you're troubleshooting issues or when you're trying to understand how the cloud service works. Typically, it's challenging, because you don't have access to the cloud service's runtime, and you also might not have access to the monitoring tools for the cloud API. By using Dev Proxy and dev tunnels, you can inspect the API requests that cloud services issue to cloud APIs.
Important
Before you continue, install dev tunnels and configure the tool for use.
How cloud services call cloud APIs
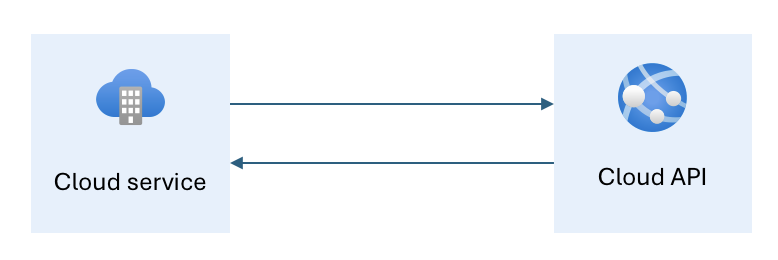
When you integrate your application with cloud services, the cloud service calls your API in the cloud. The following diagram illustrates this scenario:
To inspect API requests that the cloud service issues, you need access to the monitoring tools for the cloud API. Often, you don't have access to these tools. You could work around this limitation, by using a staging environment. However, it's time-consuming to set up and maintain a staging environment. What's more, if you don't own the cloud API, you might not be able to set up a staging environment at all.
Inspect API requests using Dev Proxy and dev tunnels
By using Dev Proxy and dev tunnels, you can inspect the API requests that the cloud service issues to the cloud API.
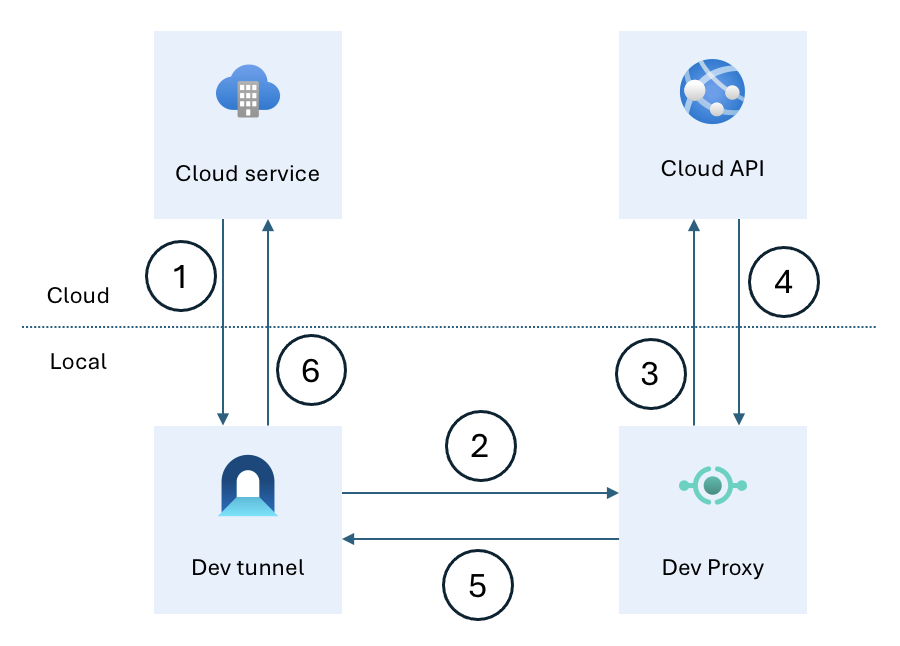
Rather than calling the cloud API directly, you configure the cloud service to call the dev tunnel you run on your local machine (1). You configure dev tunnel to use a host header that Dev Proxy intercepts. Each time the cloud service calls the dev tunnel, it passes the request to Dev Proxy which intercepts it (2). Using the Dev Proxy RewritePlugin, you change the URL of the intercepted request, and forward it to the cloud API (3). The cloud API processes the request and returns a response to Dev Proxy (4). Dev Proxy passes the response to dev tunnel (5), which forwards it to the cloud service (6). Because the request is routed through your local machine, you can inspect its information, including URL, headers, and body, and the response from the cloud API.
Scenario
Say you want to inspect API requests that a cloud service issues to the demo JSONPlaceholder API located at https://jsonplaceholder.typicode.com. By combining Dev Proxy and dev tunnels, you can intercept the requests and inspect their information.
You can inspect the requests either by using dev tunnels inspections tools, or using the Dev Proxy DevToolsPlugin. Both tools use Chrome Dev Tools to show information about intercepted requests and responses. When you use the dev tunnels inspections tools, you see the dev tunnel URL as the request URL. In comparison, when you use the Dev Proxy DevToolsPlugin, you see how Dev Proxy intercepts the request, using either the local or the rewritten URL.
Inspect API requests using Dev Proxy, dev tunnels, and dev tunnels inspection tools
Configure Dev Proxy to intercept requests to
https://jsonplaceholder.typicode.comandhttp://jsonplaceholder.typicode.local:{ "$schema": "https://raw.githubusercontent.com/microsoft/dev-proxy/main/schemas/v0.23.0/rc.schema.json", "plugins": [ { "name": "RewritePlugin", "enabled": true, "pluginPath": "~appFolder/plugins/dev-proxy-plugins.dll", "configSection": "rewritePlugin" } ], "urlsToWatch": [ "https://jsonplaceholder.typicode.com/*", "http://jsonplaceholder.typicode.local/*" ], "rewritePlugin": { "rewritesFile": "devproxy-rewrites.json" }, "logLevel": "information", "newVersionNotification": "stable", "showSkipMessages": true }The configuration file uses the RewritePlugin to rewrite the URL of the intercepted requests. It also configures Dev Proxy to intercept requests to
https://jsonplaceholder.typicode.comandhttp://jsonplaceholder.typicode.localURLs.Note
While it's not necessary to use a
.localdomain, it's a good practice that helps you distinguish between the real and the intercepted requests. Also notice, that for the.localdomain, you use the HTTP protocol, rather than HTTPS. Dev tunnels doesn't support HTTPS for routing requests to custom host headers on your local machine which is why you need to use HTTP.Create a rewrite file named
devproxy-rewrites.jsonthat changes the URL of the intercepted requests:{ "rewrites": [ { "in": { "url": "^http://jsonplaceholder.typicode.local(.*)" }, "out": { "url": "https://jsonplaceholder.typicode.com$1" } } ] }The rewrite file changes the URL of the intercepted requests from
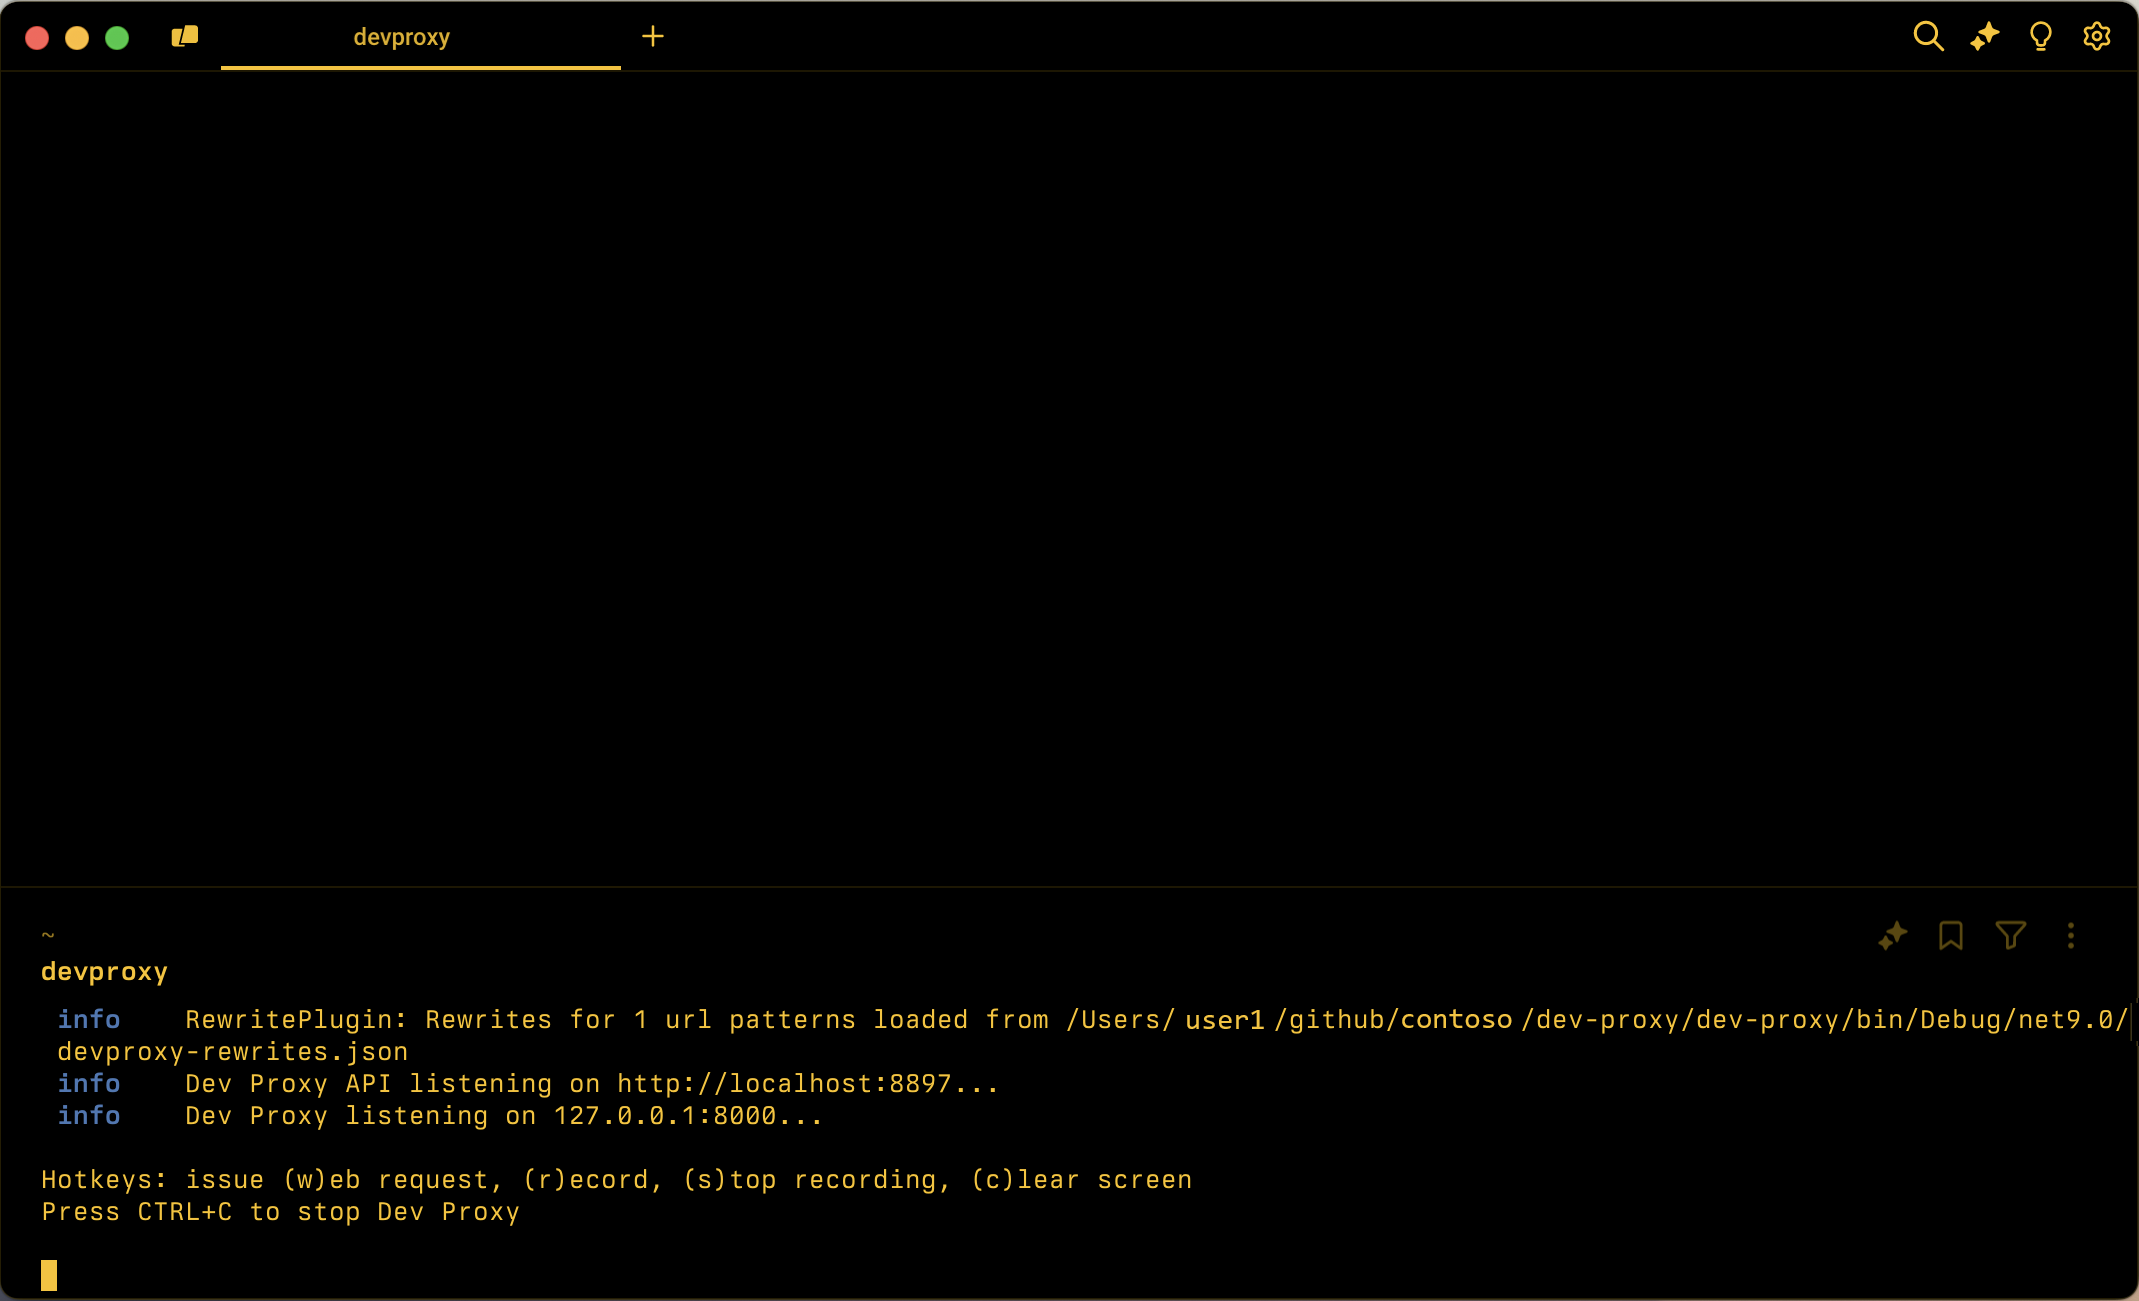
http://jsonplaceholder.typicode.localtohttps://jsonplaceholder.typicode.com.Start Dev Proxy by running in the command line
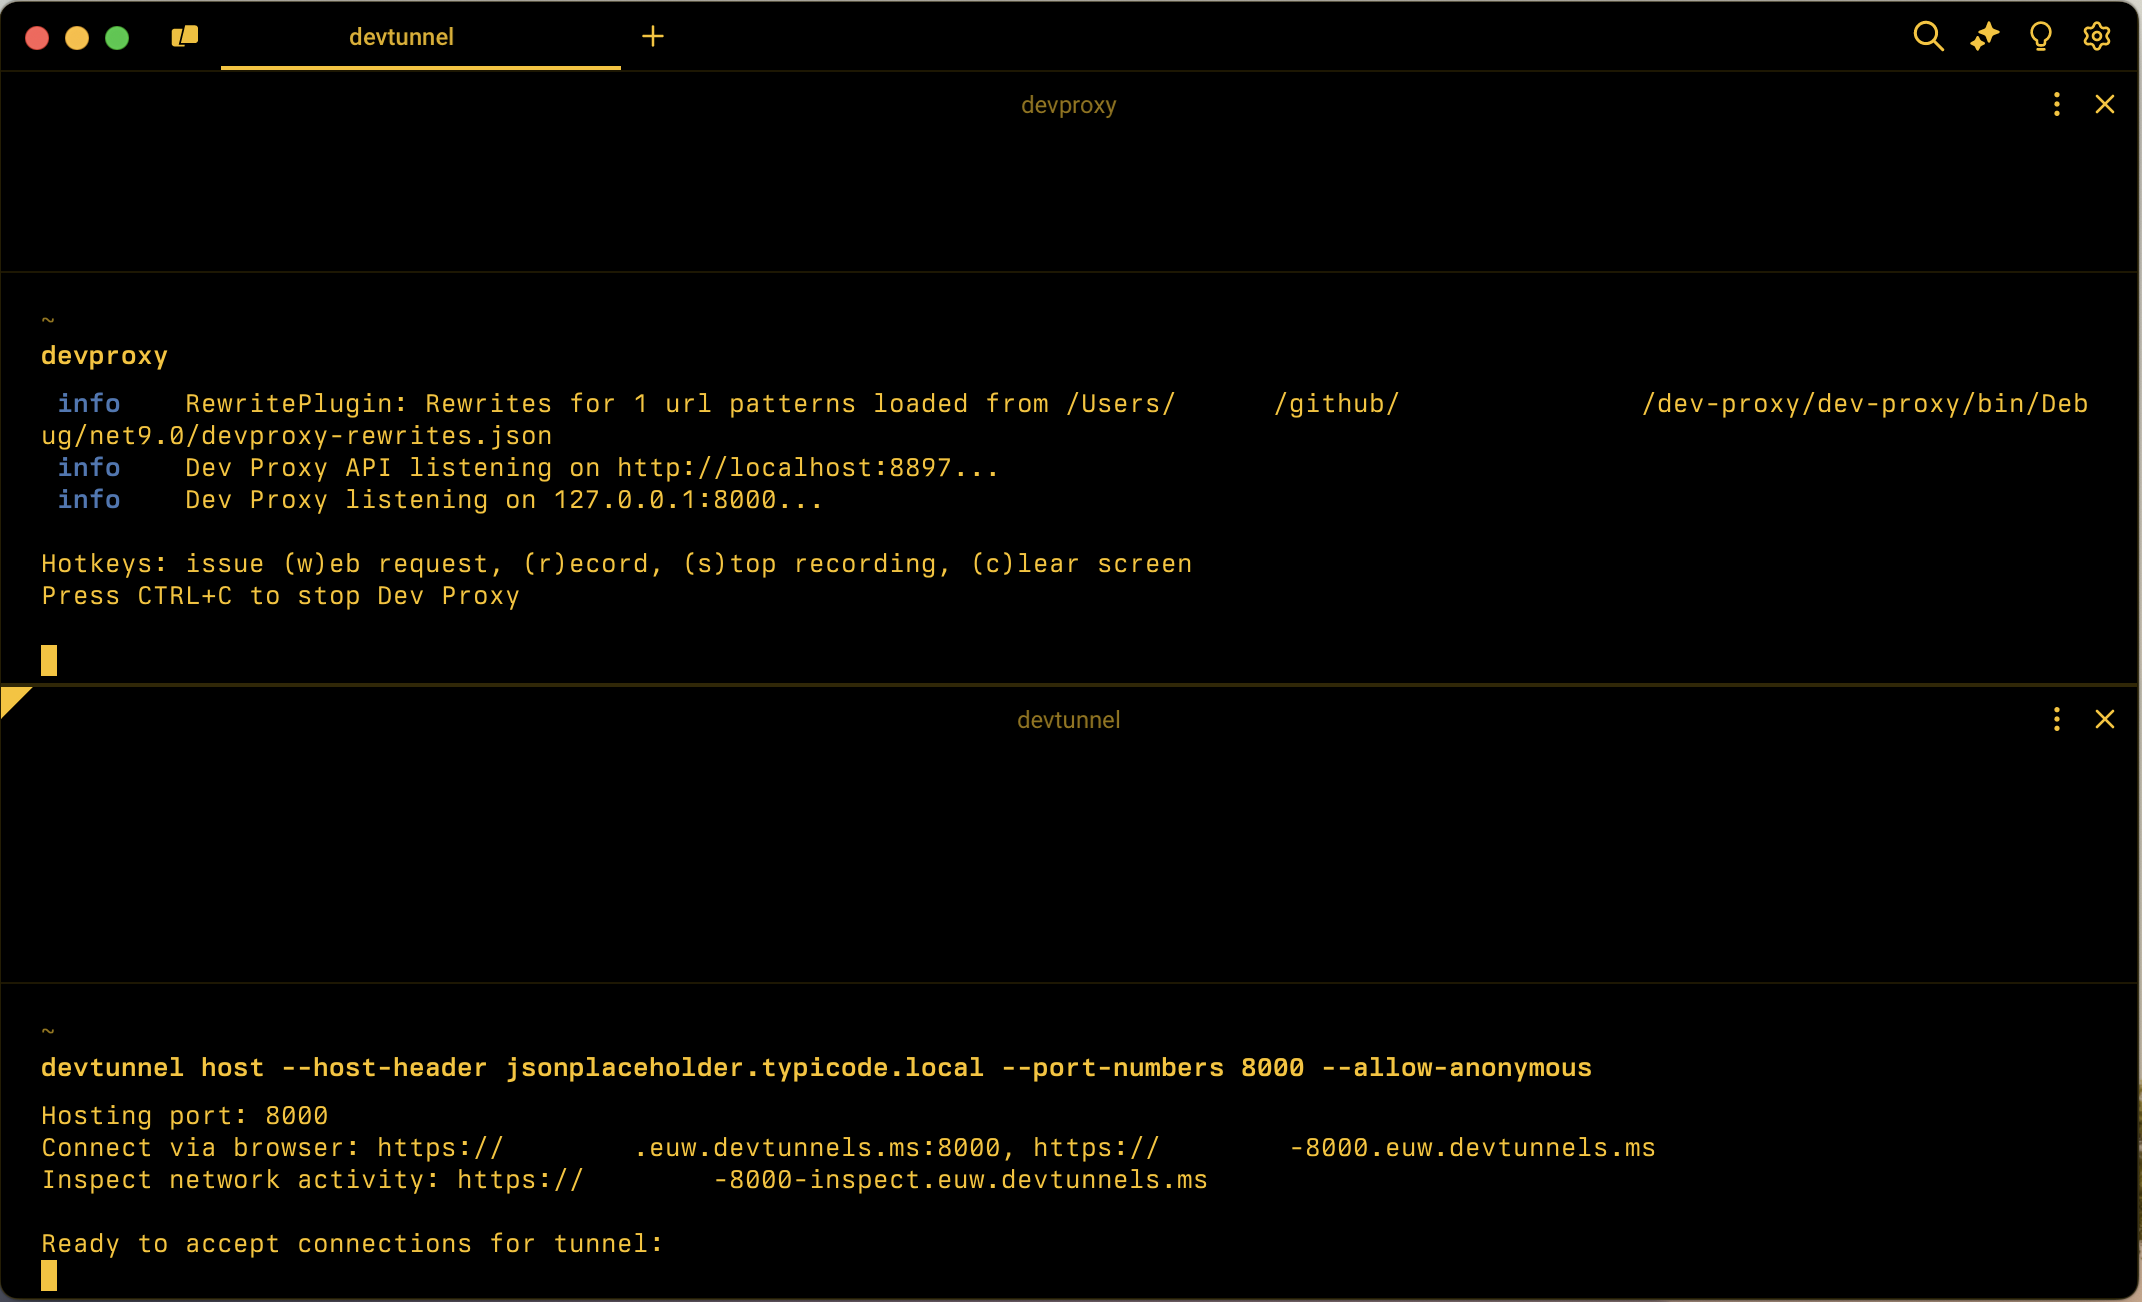
devproxy.Start dev tunnel by running in the command line
devtunnel host --host-header jsonplaceholder.typicode.local --port-numbers 8000 --allow-anonymous.Using this command, you open a new dev tunnel on your machine. You map it to the 8000 port which is where Dev Proxy listens for incoming requests. You also specify the host header that Dev Proxy intercepts.
Note the URL of the dev tunnel that you can use to configure the cloud service to call your local machine, for example
https://tunnel_id-8000.euw.devtunnels.ms.In a web browser, open the dev tunnel inspection URL, for example
https://tunnel_id-8000-inspect.euw.devtunnels.ms.Simulate a cloud service calling the cloud API by using the dev tunnel URL, by running in the command line:
curl https://tunnel_id-8000.euw.devtunnels.ms/posts/1.Note
Notice, that the host name corresponds to the URL of the dev tunnel on your machine. The path matches the path of the API you want to inspect.
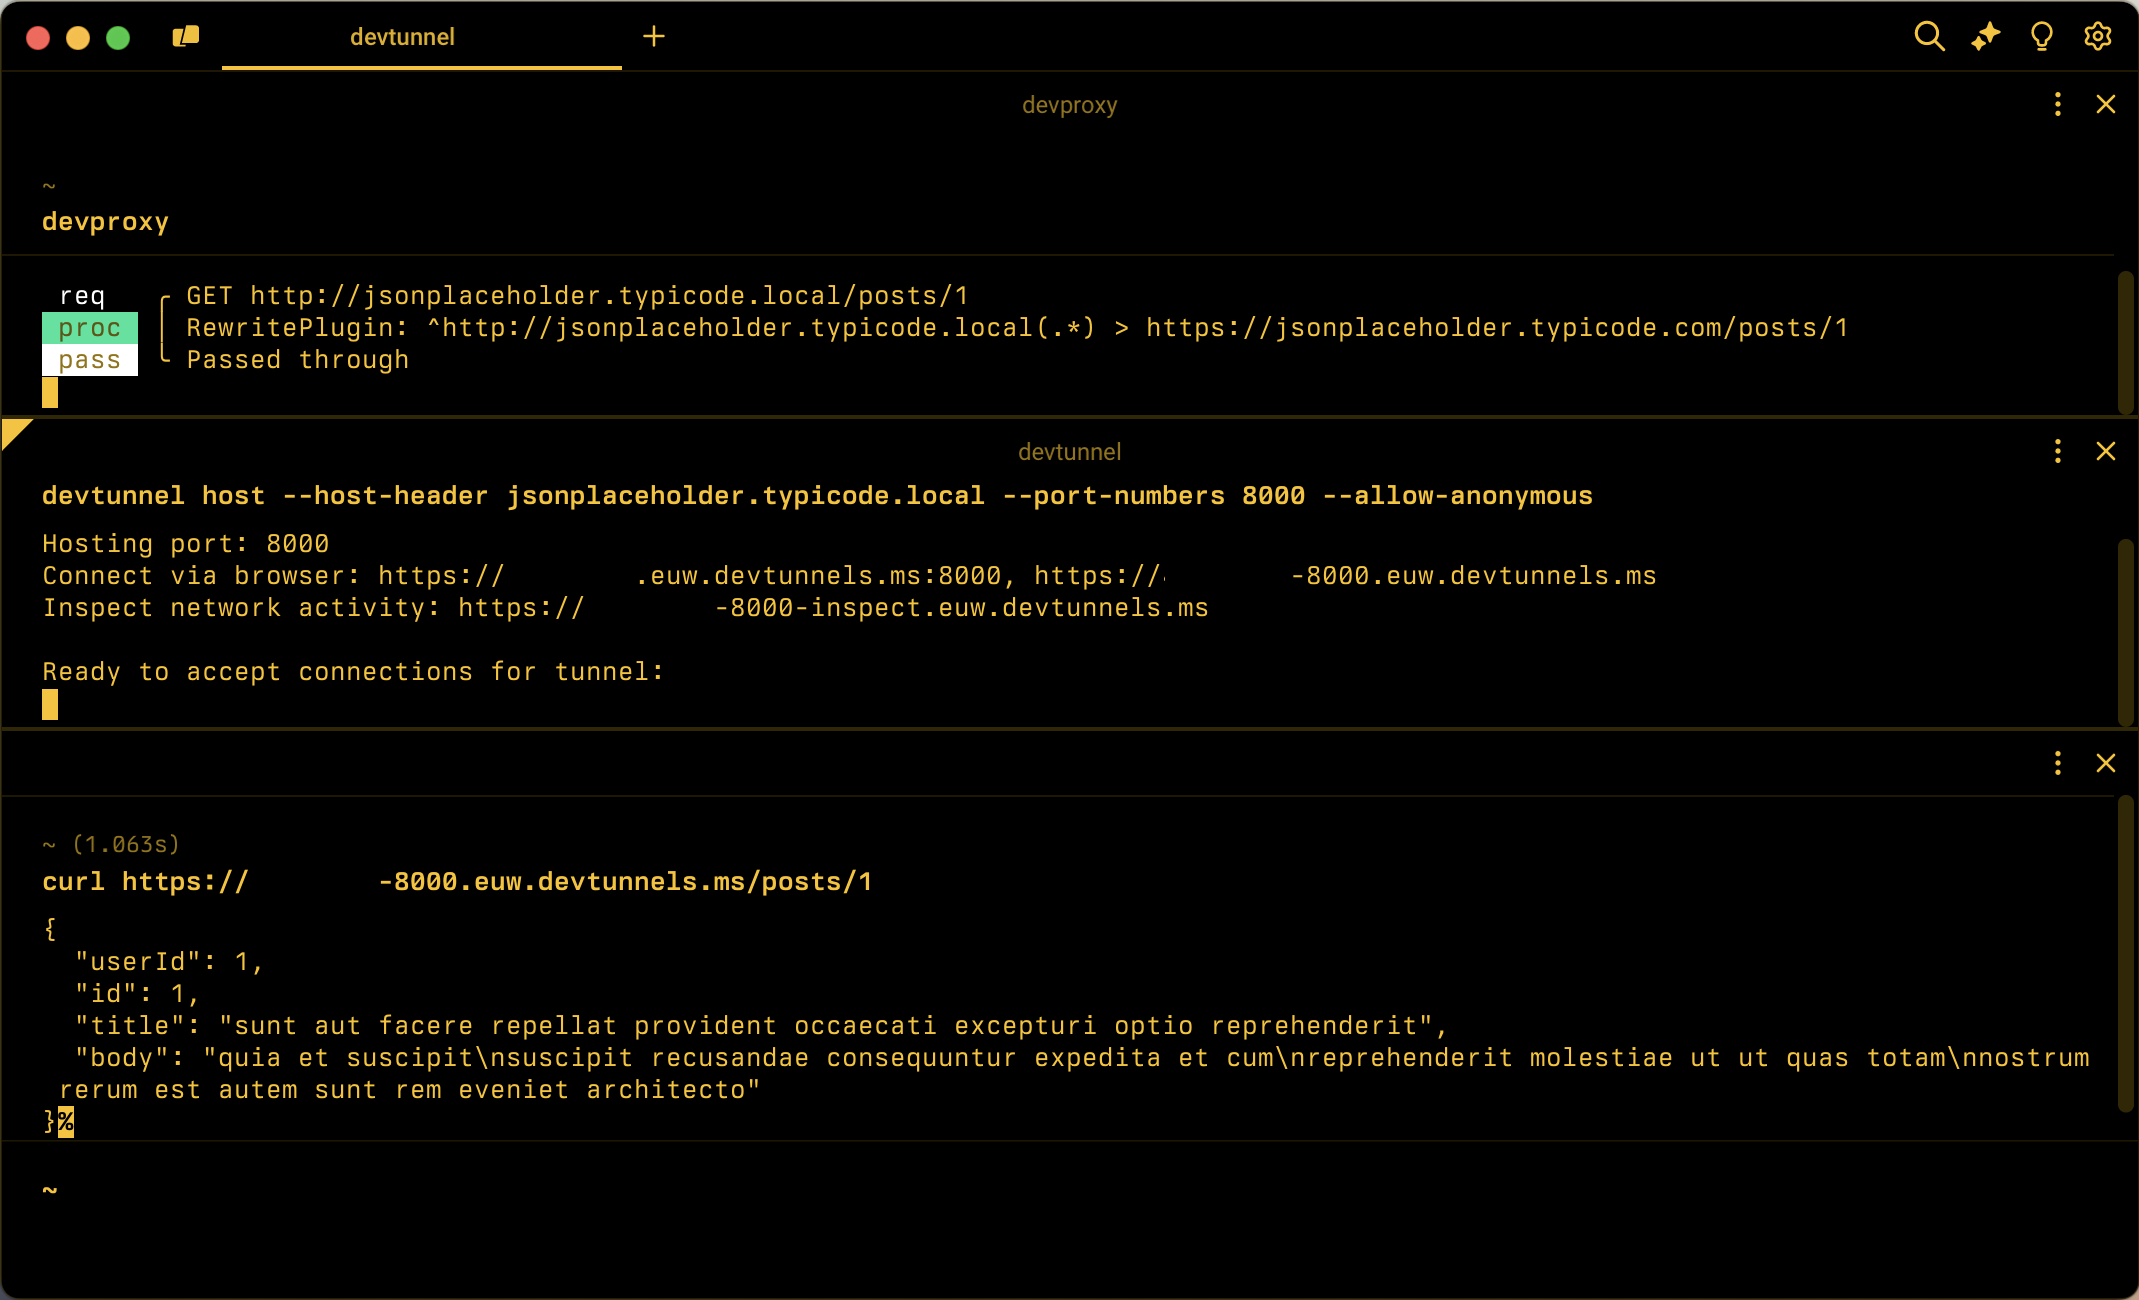
Notice how Dev Proxy intercepts the request, and forwards it to the cloud API, eventually returning the response to the client.
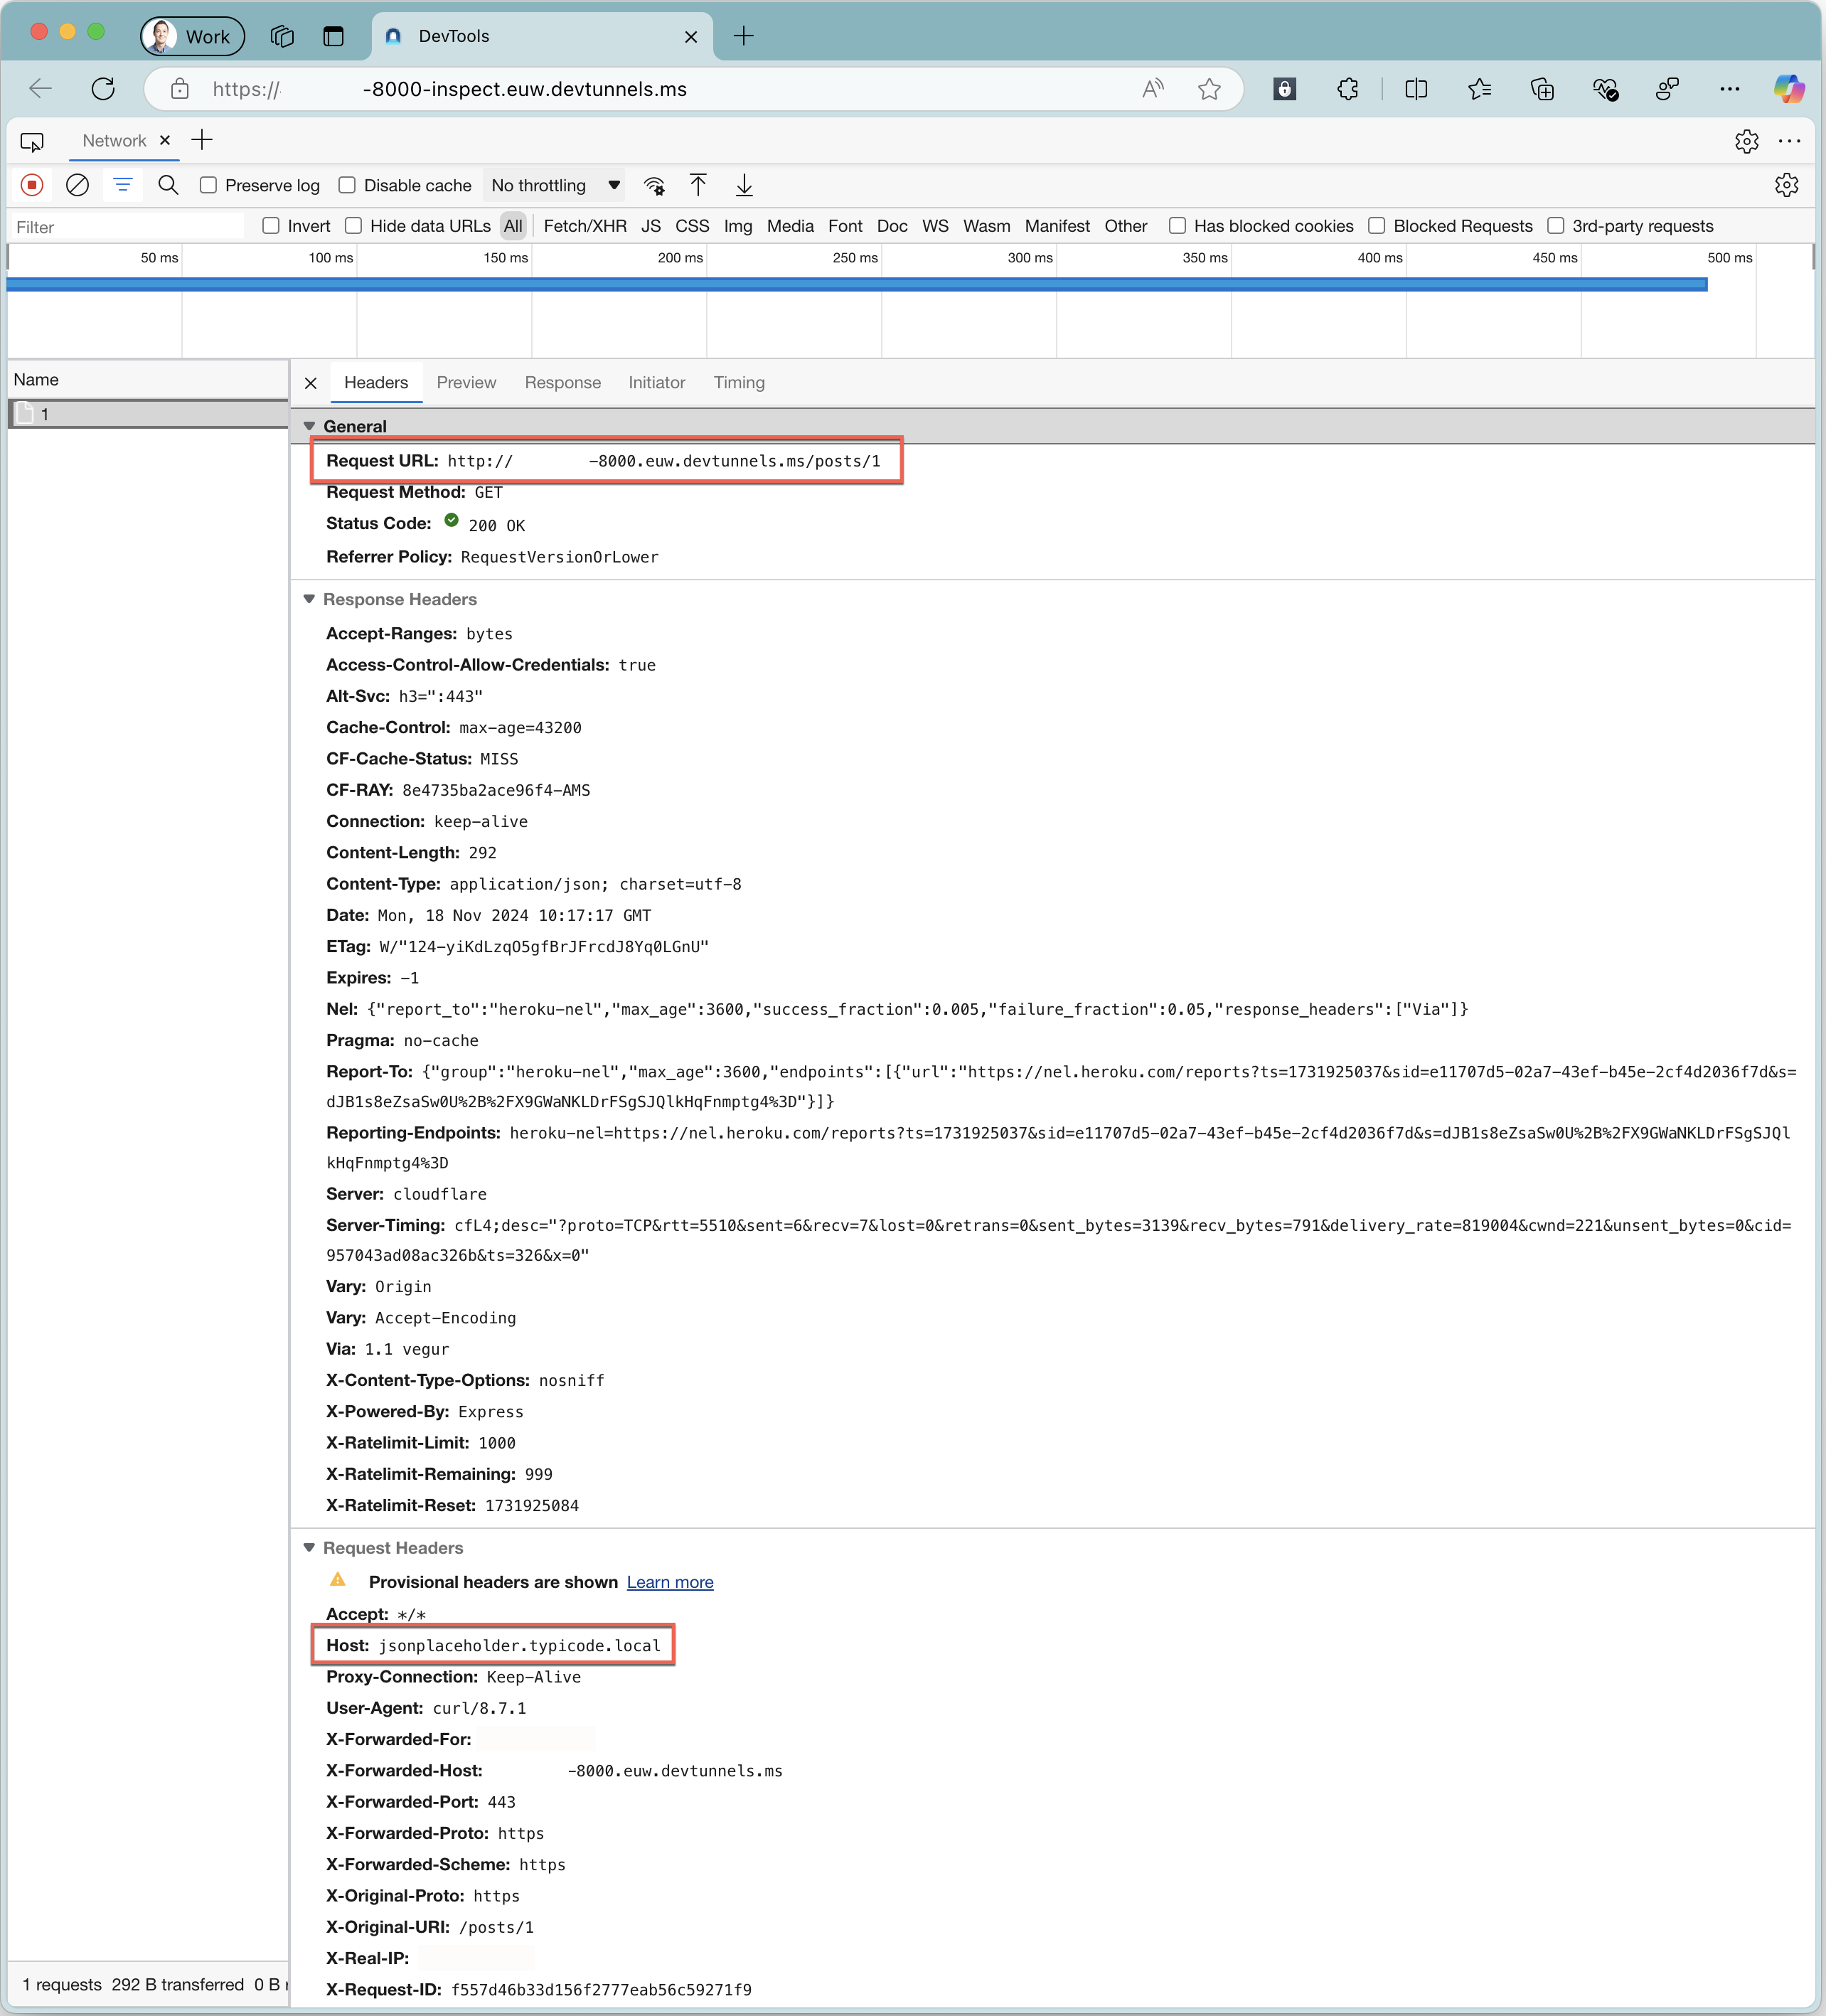
In the web browser, notice the information about the intercepted request and the response from the cloud API.
Note
Notice that the recorded request URL is the URL of the dev tunnel. The recorded host header is the host header that Dev Proxy intercepts.
Close the dev tunnel and stop Dev Proxy by pressing Ctrl+C in their respective sessions in the command line.
Inspect API requests using Dev Proxy and DevToolsPlugin
Another way to inspect the API requests that the cloud service issues, is by using the Dev Proxy DevToolsPlugin. The difference between using the DevToolsPlugin and the dev tunnels inspection tools is that the DevToolsPlugin shows how Dev Proxy intercepts the request, using either the local or the rewritten URL.
Configure Dev Proxy to use the DevToolsPlugin to inspect API requests using the intercepted URL
First, let's configure Dev Proxy to inspect cloud API requests. Let's configure the DevToolsPlugin to show the information about the URL before Dev Proxy rewrites it.
Update the Dev Proxy configuration file to use the DevToolsPlugin:
{
  "$schema": "https://raw.githubusercontent.com/microsoft/dev-proxy/main/schemas/v0.23.0/rc.schema.json",
  "plugins": [
    {
      "name": "DevToolsPlugin",
      "enabled": true,
      "pluginPath": "~appFolder/plugins/dev-proxy-plugins.dll"
    },
    {
      "name": "RewritePlugin",
      "enabled": true,
      "pluginPath": "~appFolder/plugins/dev-proxy-plugins.dll",
      "configSection": "rewritePlugin"
    }
  ],
  "urlsToWatch": [
    "https://jsonplaceholder.typicode.com/*",
    "http://jsonplaceholder.typicode.local/*"
  ],
  "rewritePlugin": {
    "rewritesFile": "devproxy-rewrites.json"
  },
  "logLevel": "information",
  "newVersionNotification": "stable",
  "showSkipMessages": true
}
Note
Notice, that we add the DevToolsPlugin before the RewritePlugin. By adding the DevToolsPlugin first, it shows the information about the intercepted request before it's rewritten.
Start Dev Proxy by running in the command line
devproxy. Notice that Dev Proxy opens a web browser window with Chrome Dev Tools visible.Start dev tunnel by running in the command line
devtunnel host --host-header jsonplaceholder.typicode.local --port-numbers 8000 --allow-anonymous.Simulate a cloud service calling the cloud API by using the dev tunnel URL, by running in the command line:
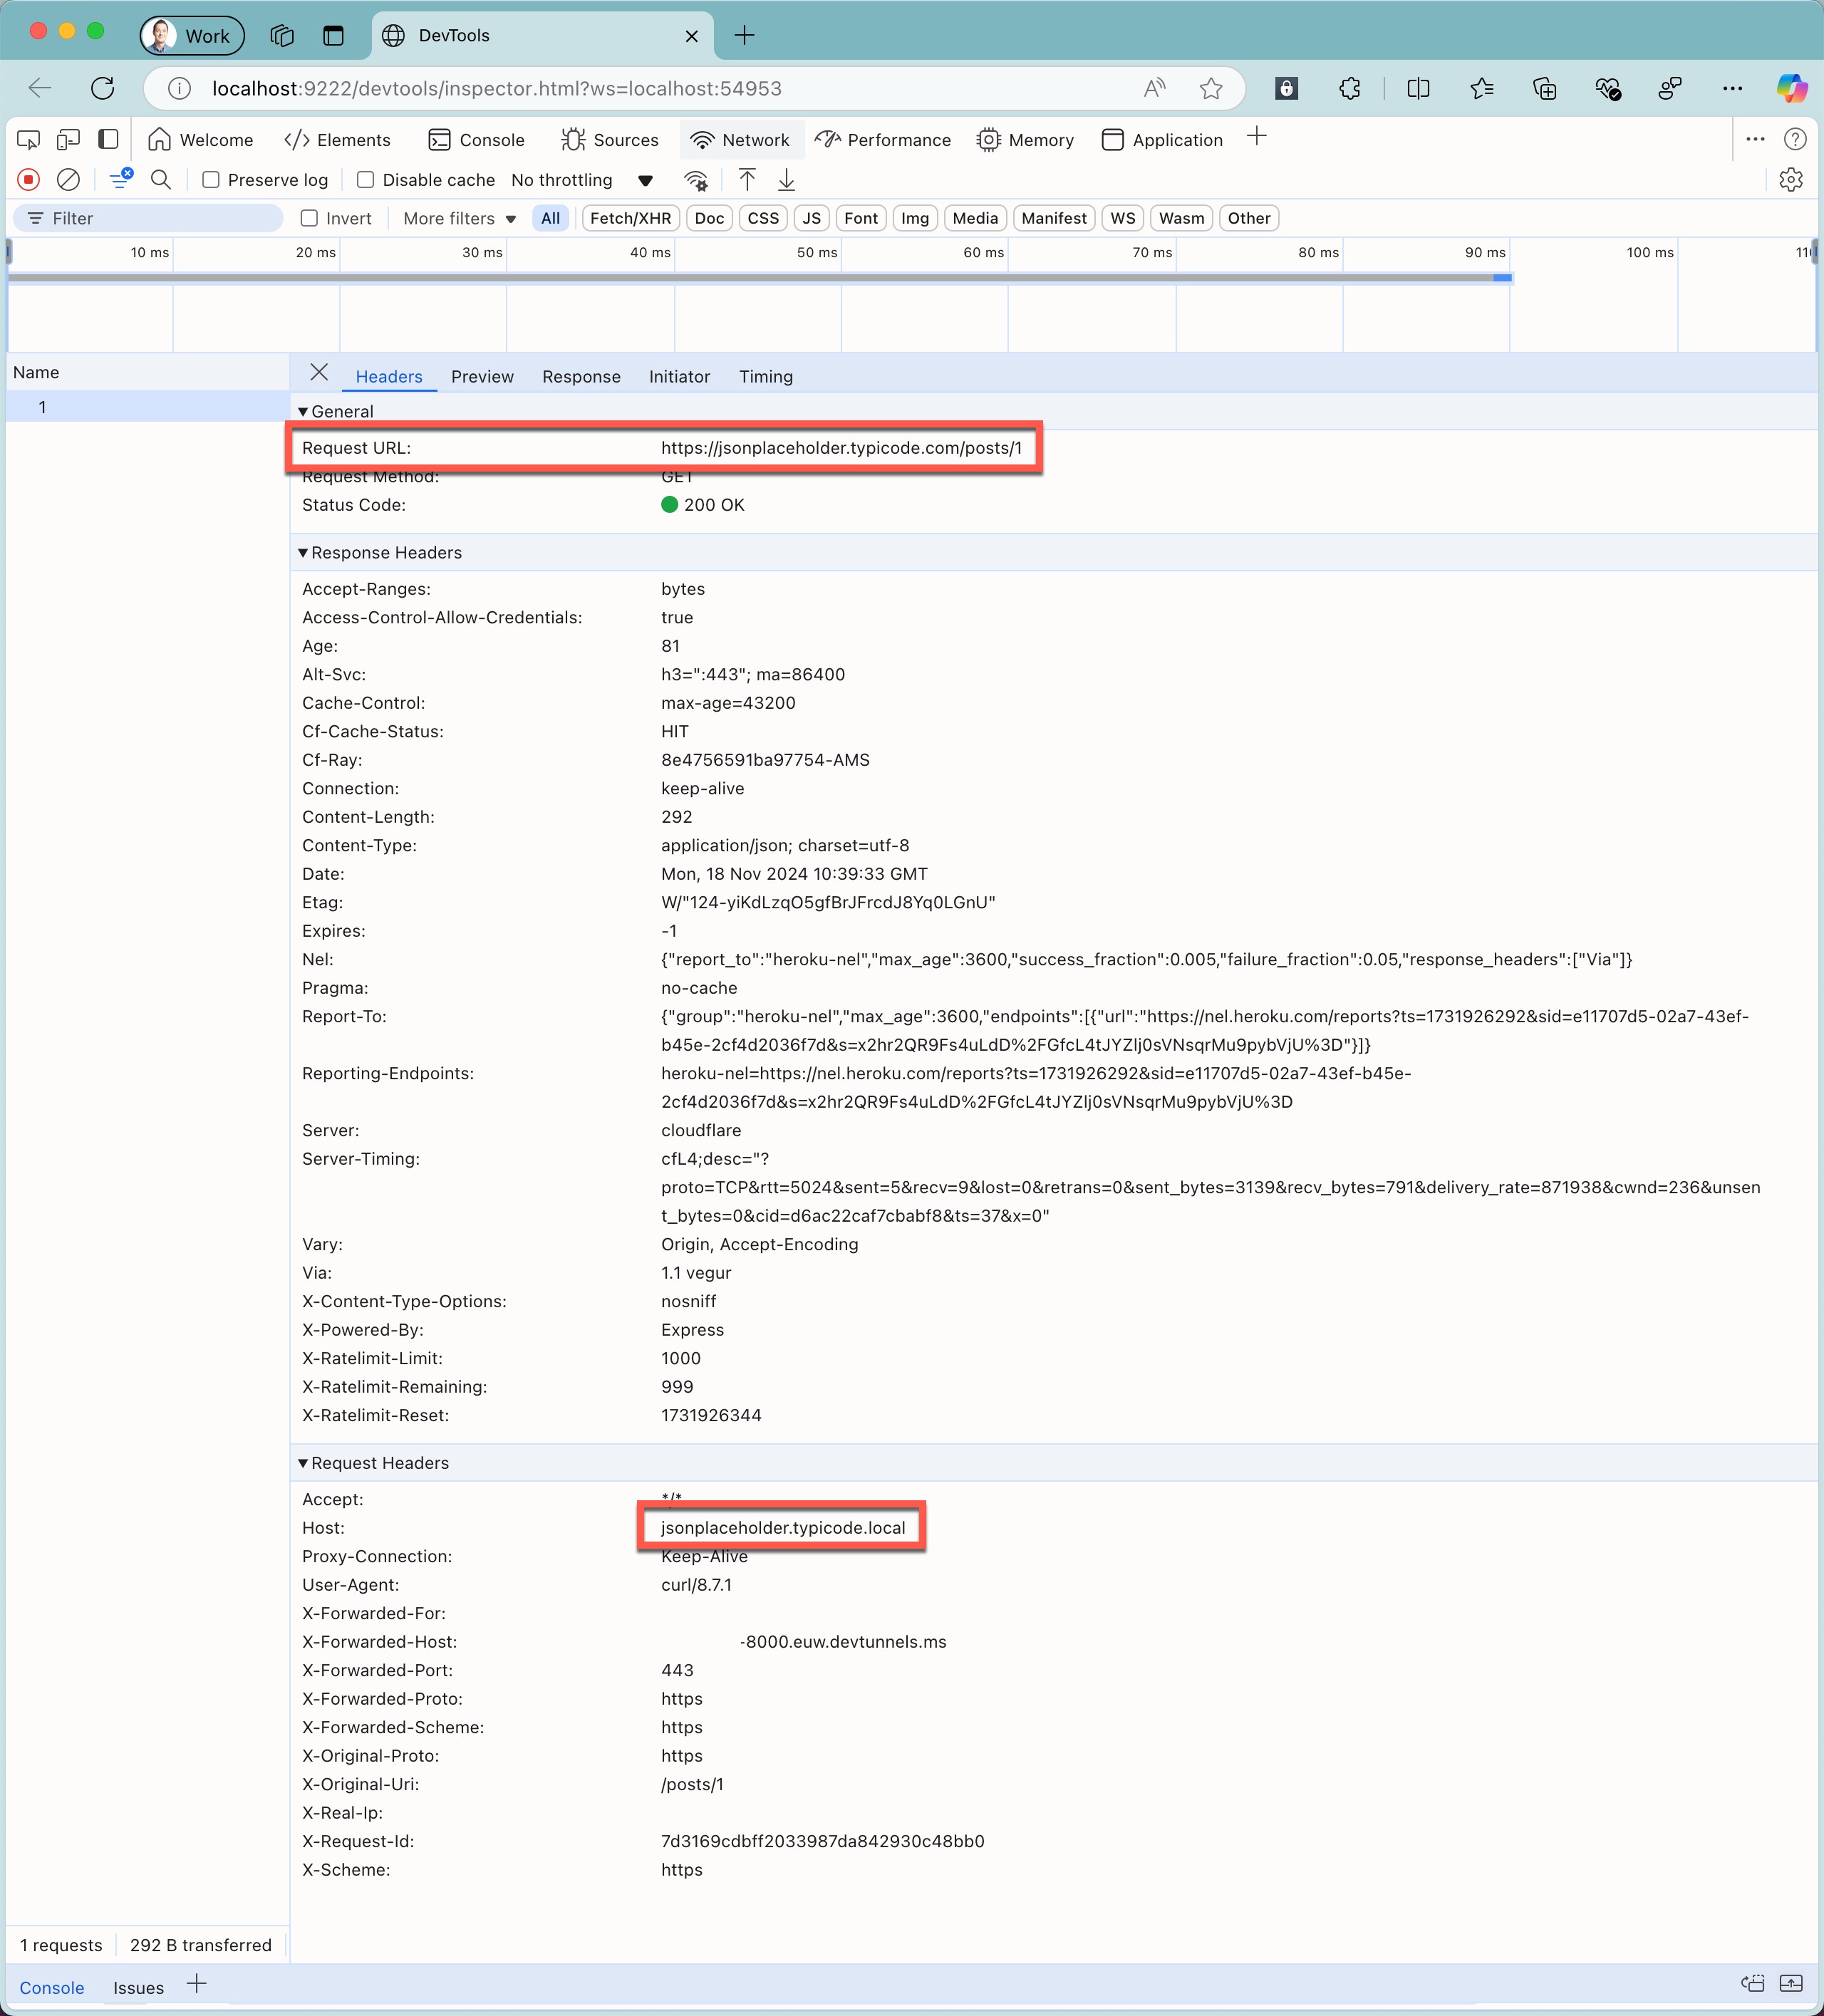
curl https://tunnel_id-8000.euw.devtunnels.ms/posts/1.In the web browser with Chrome Dev Tools, notice the information about the intercepted request and the response from the cloud API.
Note
Notice that the recorded request URL is the URL of the cloud API. The recorded host header is the host header that Dev Proxy intercepts.
Close the dev tunnel and stop Dev Proxy by pressing Ctrl+C in their respective sessions in the command line.
Configure Dev Proxy to use the DevToolsPlugin to inspect API requests using the rewritten URL
Next, let's update Dev Proxy configuration to show the information about the rewritten URL.
Update the Dev Proxy configuration file by moving the DevToolsPlugin after the RewritePlugin:
{
  "$schema": "https://raw.githubusercontent.com/microsoft/dev-proxy/main/schemas/v0.23.0/rc.schema.json",
  "plugins": [
    {
      "name": "RewritePlugin",
      "enabled": true,
      "pluginPath": "~appFolder/plugins/dev-proxy-plugins.dll",
      "configSection": "rewritePlugin"
    },
    {
      "name": "DevToolsPlugin",
      "enabled": true,
      "pluginPath": "~appFolder/plugins/dev-proxy-plugins.dll"
    }
  ],
  "urlsToWatch": [
    "https://jsonplaceholder.typicode.com/*",
    "http://jsonplaceholder.typicode.local/*"
  ],
  "rewritePlugin": {
    "rewritesFile": "devproxy-rewrites.json"
  },
  "logLevel": "information",
  "newVersionNotification": "stable",
  "showSkipMessages": true
}
Start Dev Proxy by running in the command line
devproxy. Notice that Dev Proxy opens a web browser window with Chrome Dev Tools visible.Start dev tunnel by running in the command line
devtunnel host --host-header jsonplaceholder.typicode.local --port-numbers 8000 --allow-anonymous.Simulate a cloud service calling the cloud API by using the dev tunnel URL, by running in the command line:
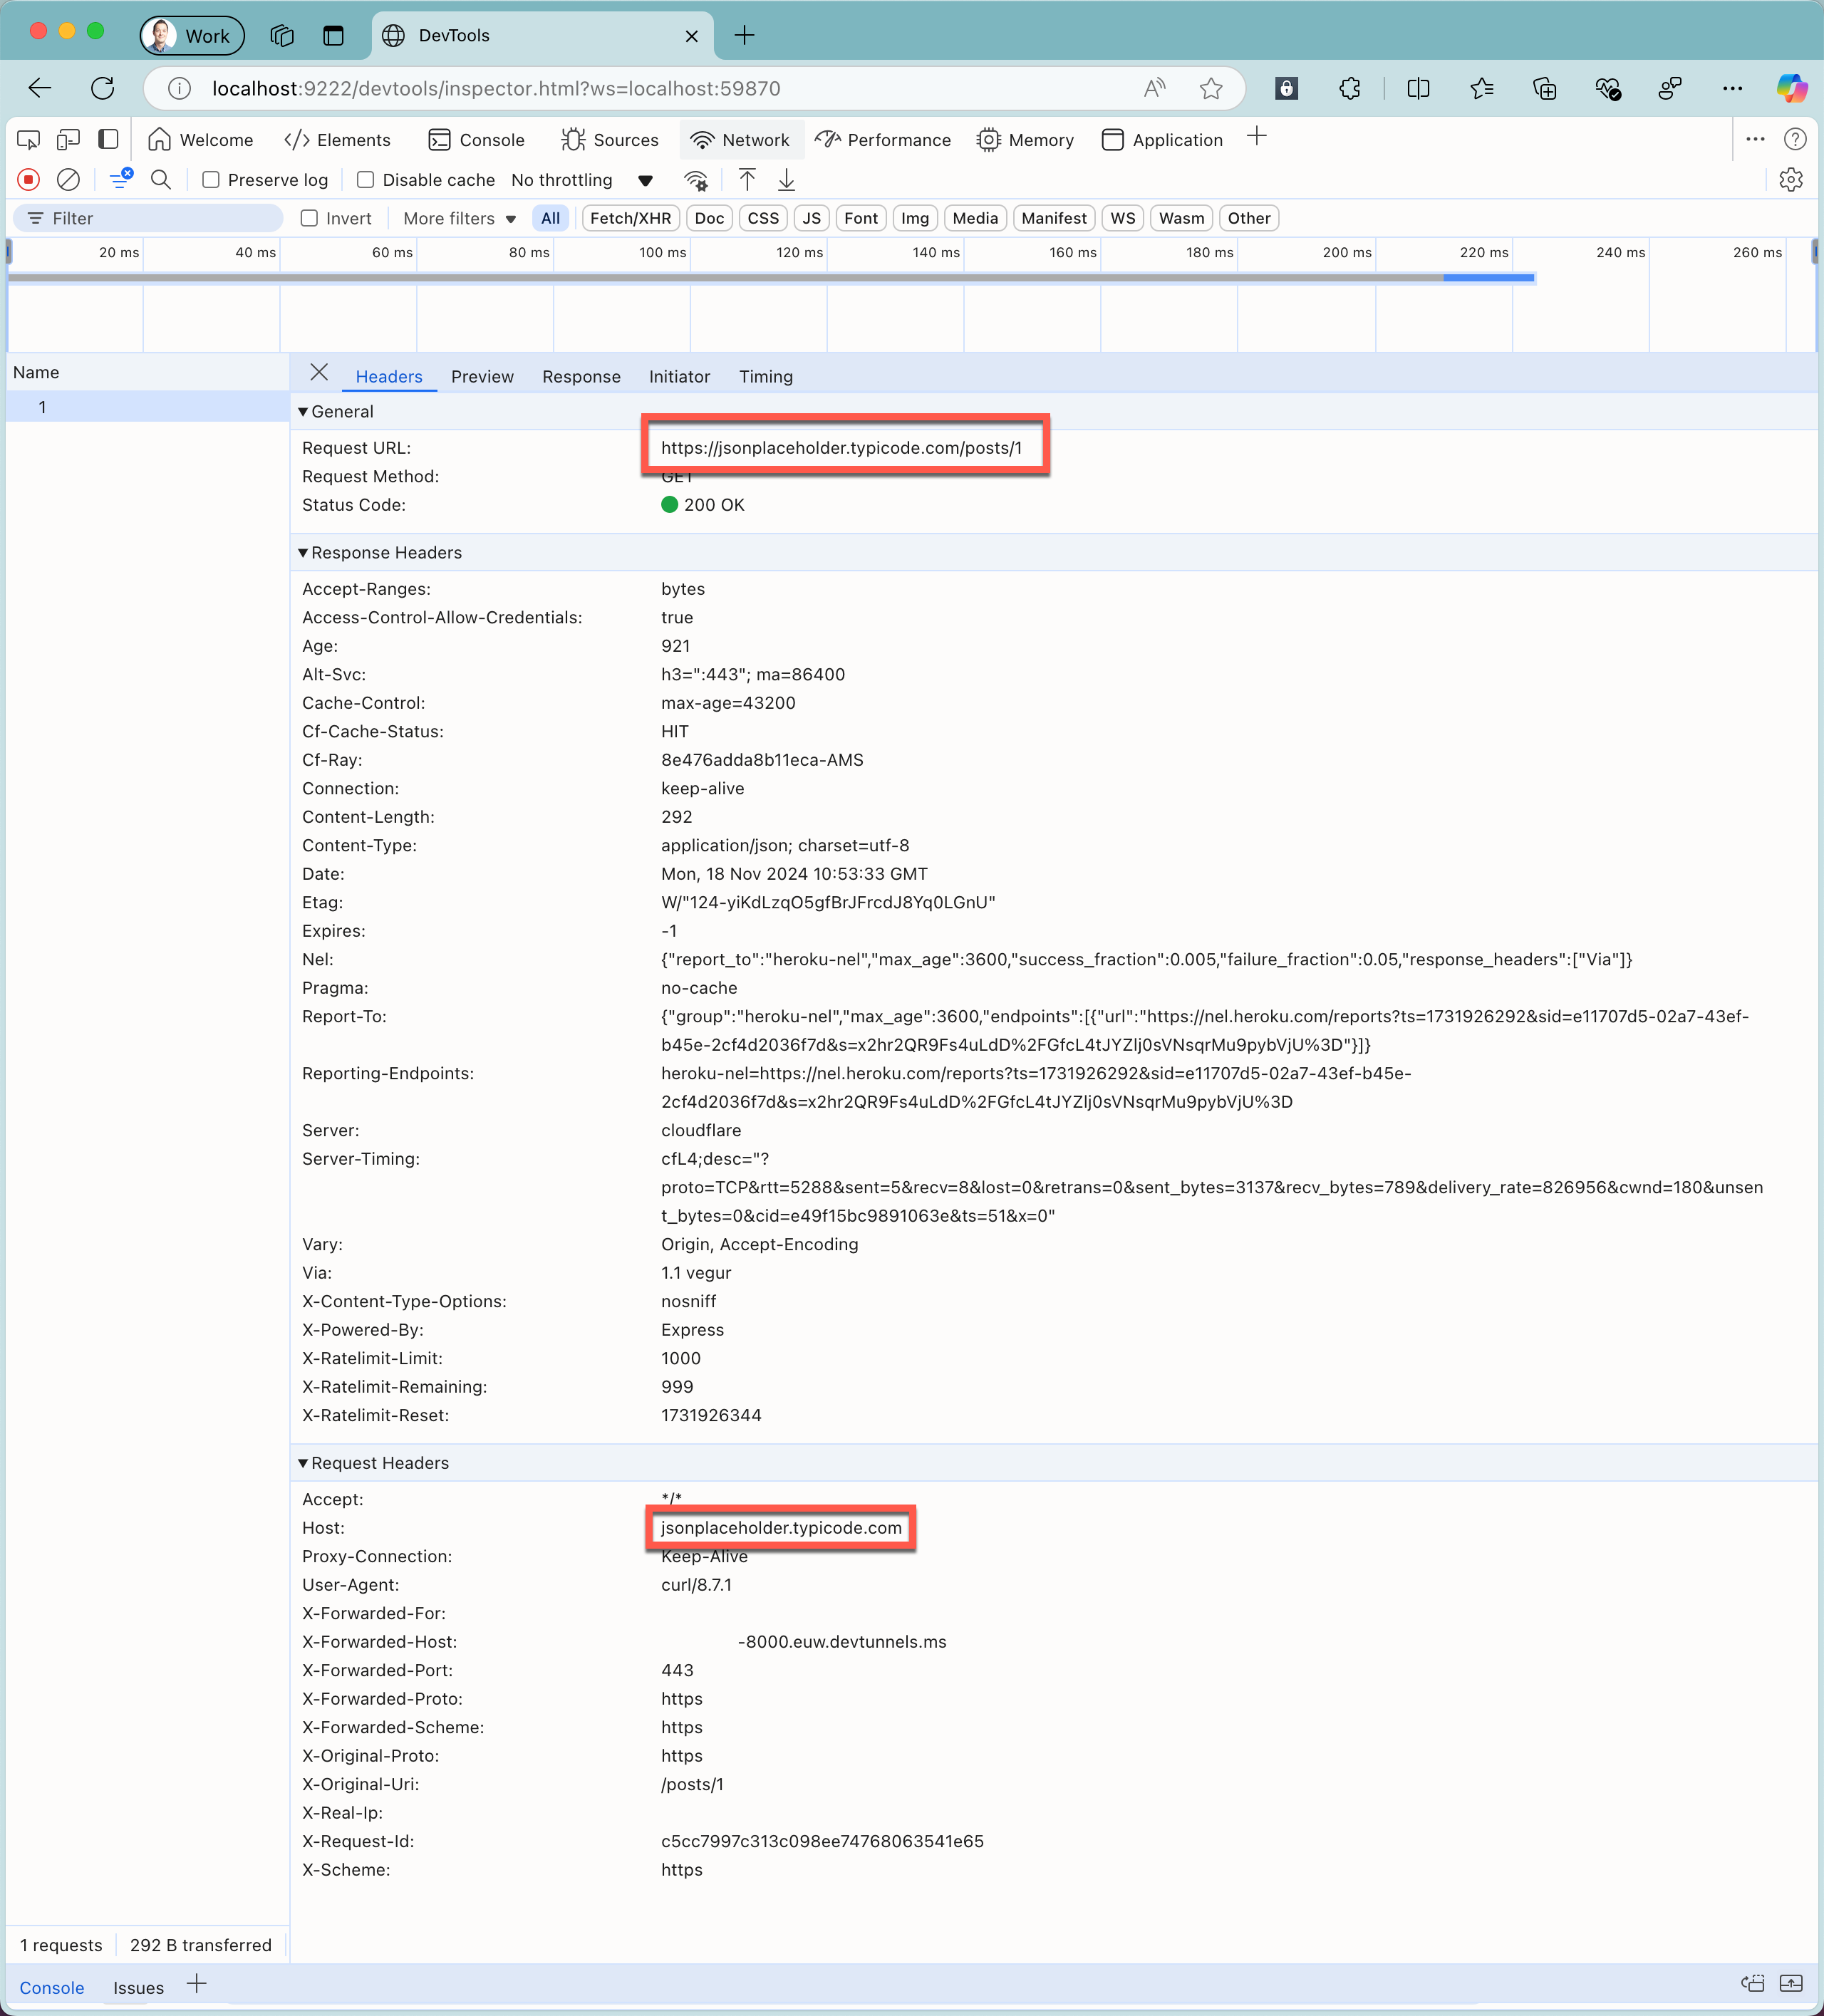
curl https://tunnel_id-8000.euw.devtunnels.ms/posts/1.In the web browser with Chrome Dev Tools, notice the information about the intercepted request and the response from the cloud API.
Note
Notice that both the recorded request URL, and the host header show the URL of the cloud API.
Close the dev tunnel and stop Dev Proxy by pressing Ctrl+C in their respective sessions in the command line.
Summary
By using Dev Proxy and dev tunnels, you can inspect the API requests that cloud services issue to cloud APIs. You can use either dev tunnels inspection tools, or the Dev Proxy DevToolsPlugin to inspect the requests. Both tools show you the information about the intercepted requests, including the URL, headers and body, and the response from the cloud API. By using Dev Proxy and dev tunnels, you can better understand how cloud services interact with cloud APIs, and troubleshoot issues more effectively.
Next steps
Learn more about the RewritePlugin.
