Prerequisites for deploying Financial document analysis skill for agents (preview)
Important
This is a preview feature. This information relates to a prerelease feature that may be substantially modified before it's released. Microsoft makes no warranties, expressed or implied, with respect to the information provided here.
Before deploying Financial document analysis skill for agents, ensure that your environment meets all the necessary prerequisites:
You need to have the Owner role on the Azure subscription.
Enable the system-assigned managed identity for the Azure OpenAI resource. Learn more at Enable managed identity.
Configure the storage account as follows:
Enable the automatic removal of a document from the search index, as explained in Change and delete detection using indexers for Azure Storage in Azure AI Search.
Set the retention policy to a value higher than the indexer interval schedule.
Configure the blob container from where the documents are ingested.
Register the app, as explained in Create the app registration.
Ensure you have sufficient Premium v3 P1mv3 resources in your subscription before deployment. If you need additional resources, open a support ticket from the Help + support section, select Quota, and request an increase. Contact support for assistance. For more information on the most common Microsoft Azure limits, see Azure subscription and service limits, quotas, and constraints.
Prerequisite tasks
You need to perform a few before deploying Financial document analysis skill for agents.
Create the app registration
Important
You need to have the Application Administrator role to create the app registration. Learn more at Assign Microsoft Entra roles to users.
Sign in to the Azure portal.
Select Microsoft Entra ID, as shown.
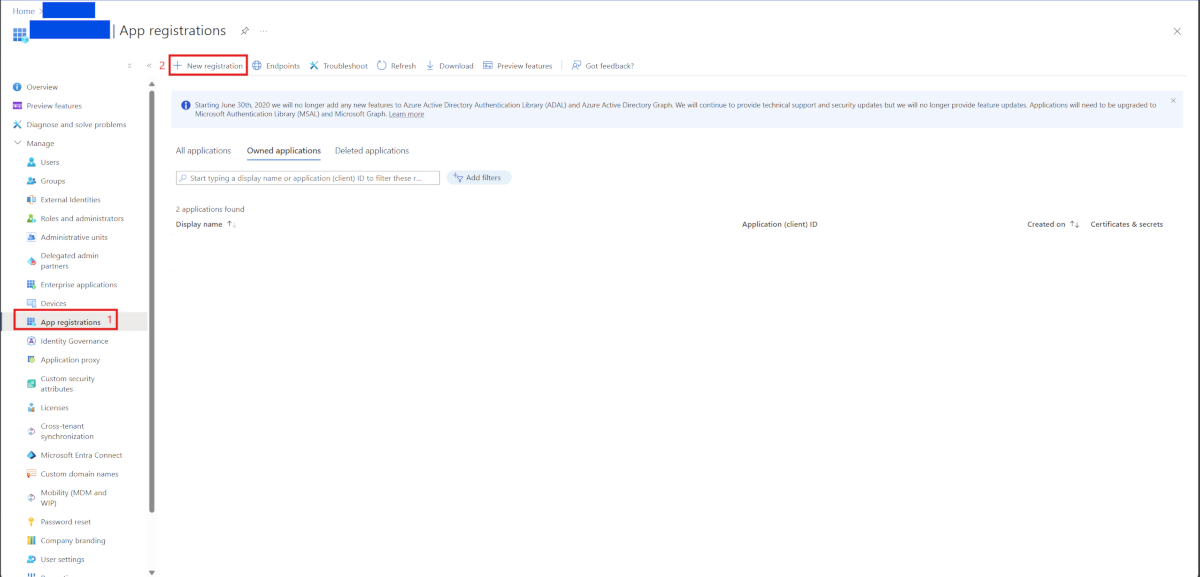
- In the navigation menu, select Manage > App registrations, followed by + New registration.
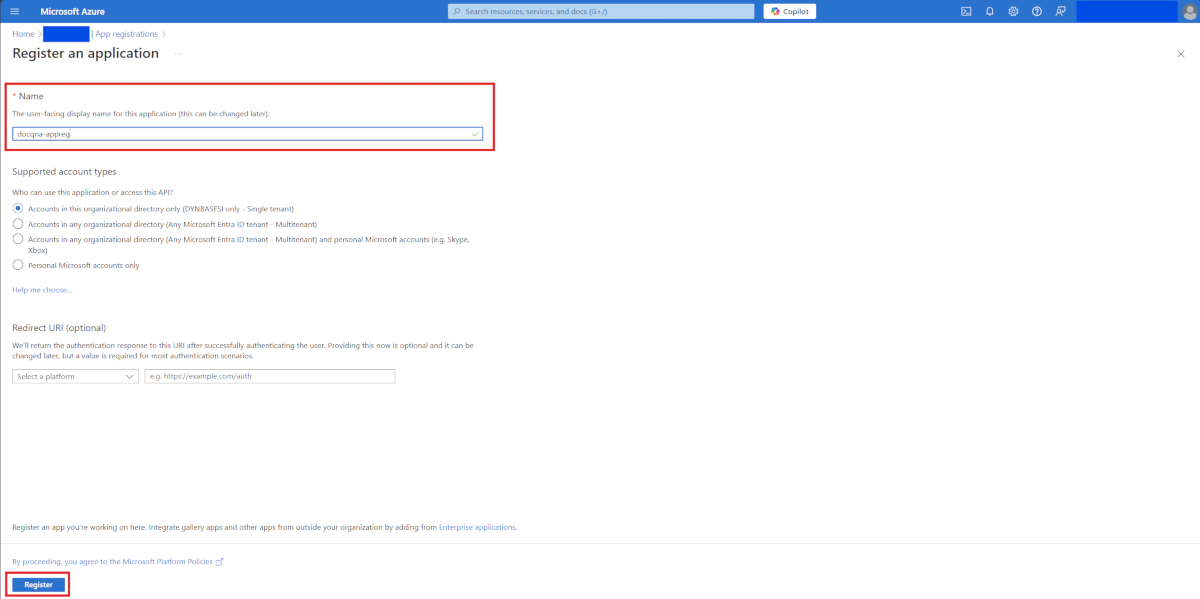
- Enter a unique name for the app and then select Register.
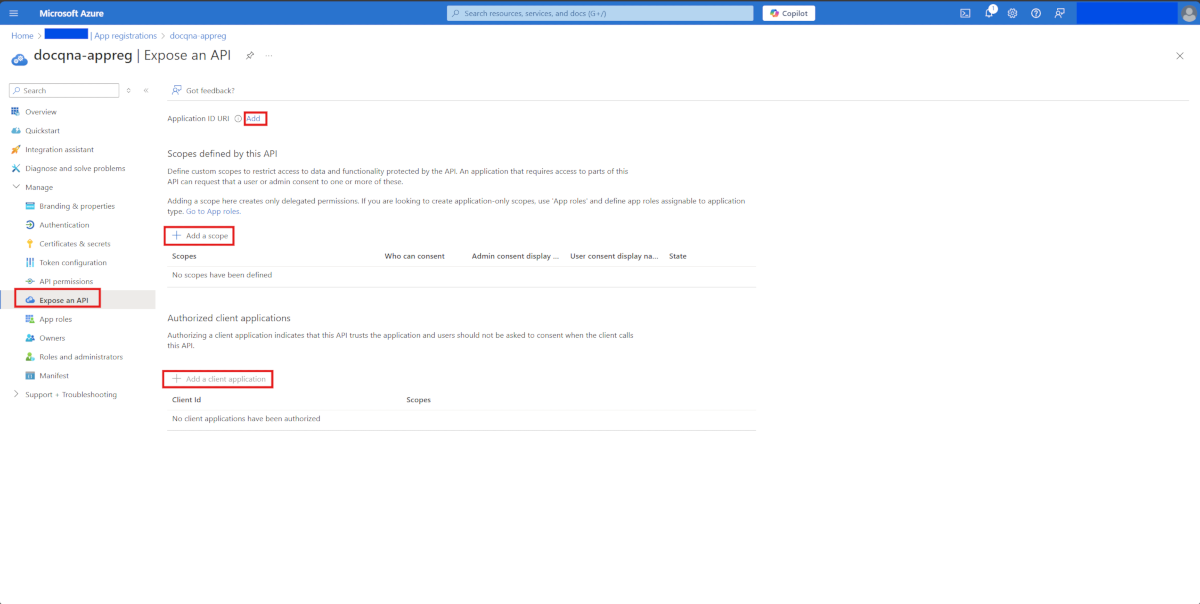
- Go to the App registrations page for the app that you registered and select Expose an API.
Select + Add a Scope, and add DocQnA.Users. This value is case-sensitive.
Select Add a client application, enter 04b07795-8ddb-461a-bbee-02f9e1bf7b46 as the Client id, and select the checkbox under Authorized scopes. The Client id is the Application ID of the Azure CLI.
Note
You also need to add the client ID of your back-end app if you want the app to receive the token on behalf of a user.
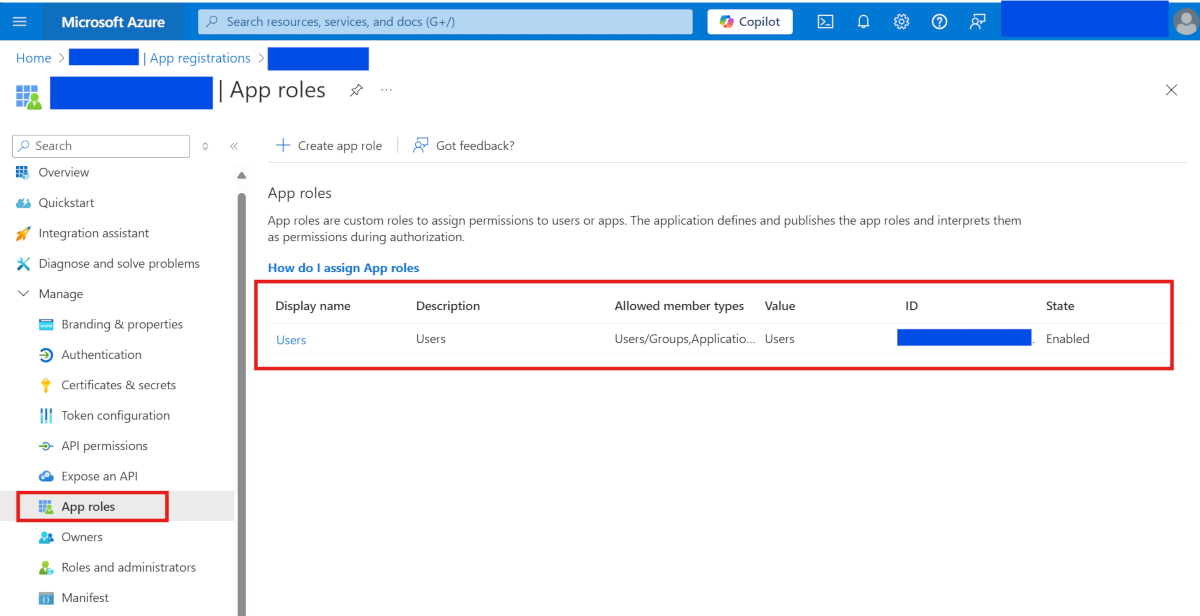
Select App roles and add the Users role. This role is critical to access the Document insights API.
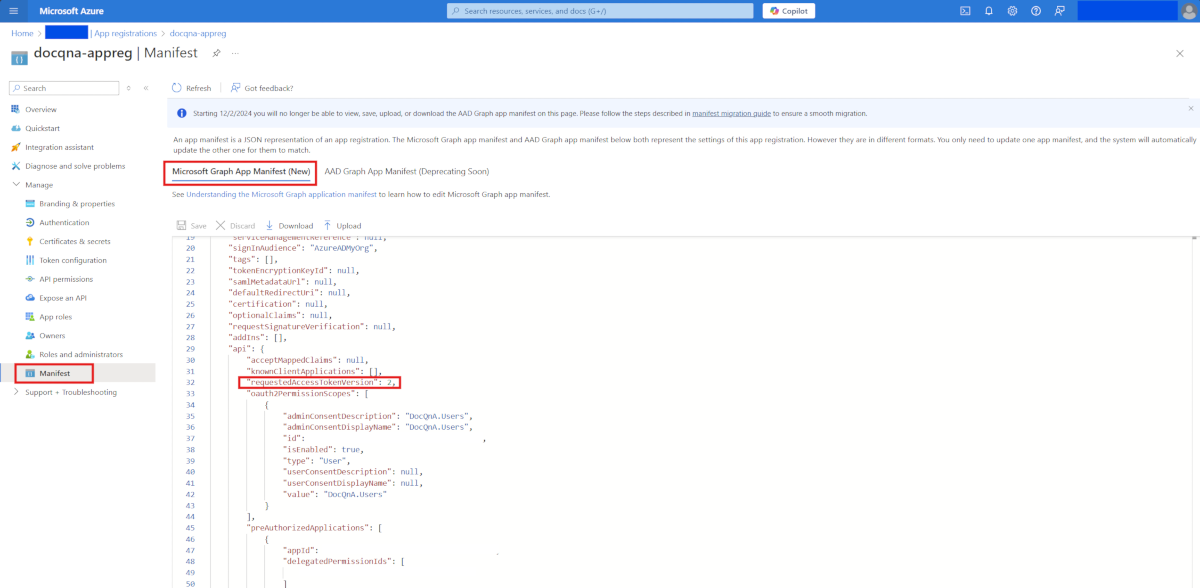
- In the navigation menu, select Manage > Manifest and change the
requestedAccessTokenVersionvalue in the manifest file to 2.
- Return to the Overview page and select Managed application in the local directory to provide users and groups with permissions to use the app registration.
- Add the users and the groups that need permissions to access the API.
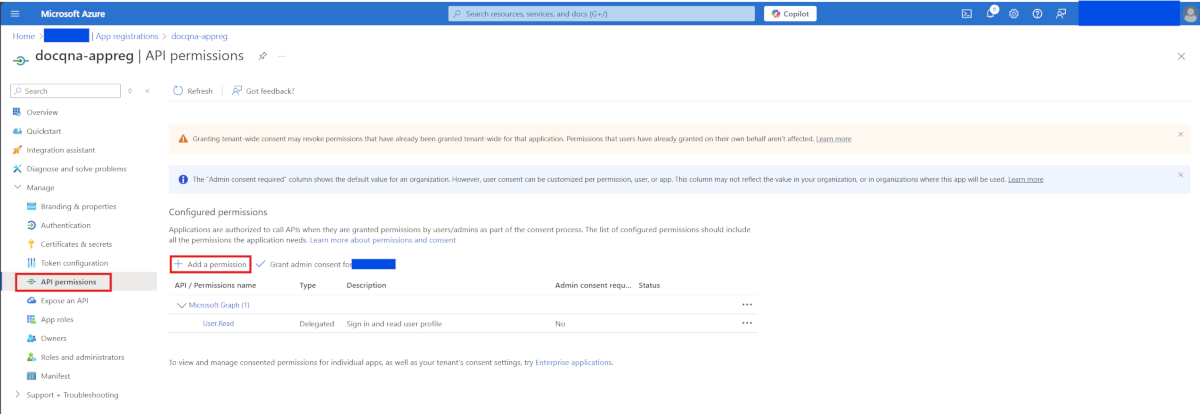
- For application permissions, you need to provide the API permissions and add the application with the relevant permission.

