Add a Fabric activator destination to an eventstream (preview)
This article shows you how to add an activator destination to an eventstream.
Prerequisites
- Access to a workspace in the Fabric capacity license mode (or) the Trial license mode with Contributor or higher permissions.
- If you already have an activator you want to use, access to the workspace where your activator is located with Contributor or higher permissions.
Note
The maximum number of sources and destinations for one eventstream is 11.
Add activator as a destination
To add an activator destination to a default stream or derived stream, follow these steps.
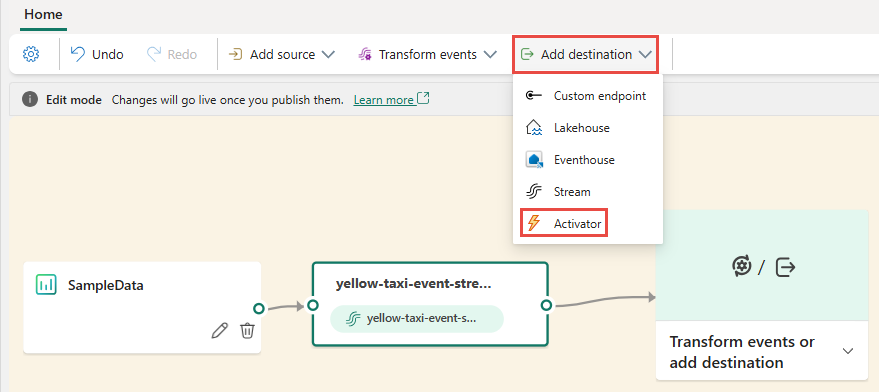
In Edit mode for your eventstream, select Add destination on the ribbon and select Activator from the dropdown list.

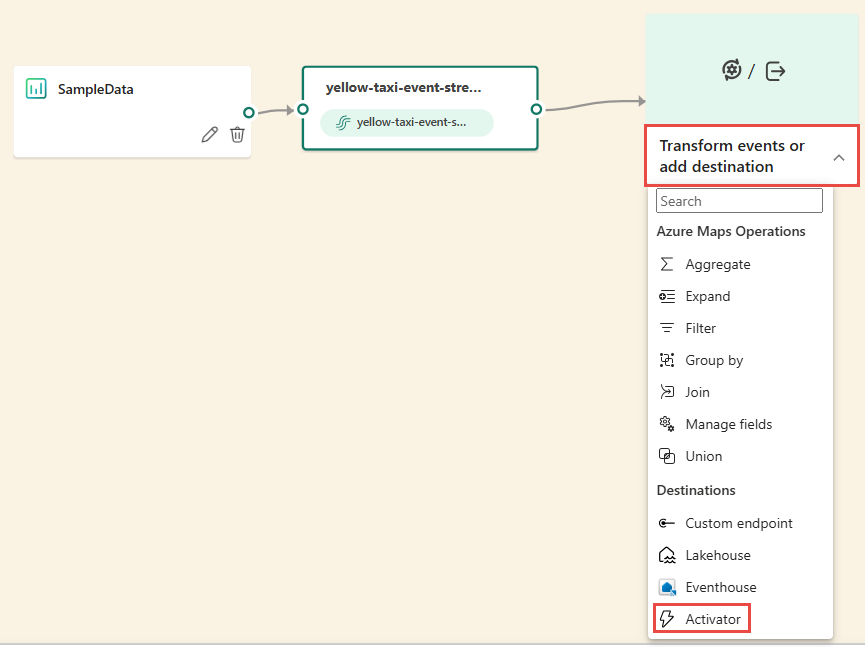
You can also select Transform events or add destination tile on the canvas, and select Activator from the drop-down list.

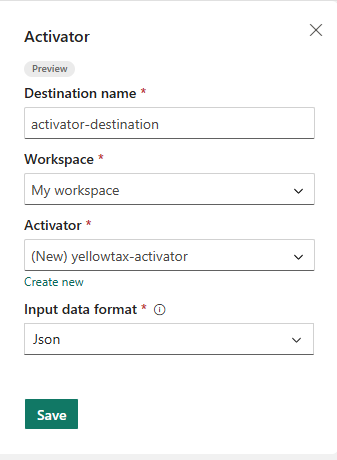
On the Activator screen, enter a Destination name, select a Workspace, and select an existing Activator or select Create new to create a new one.

Select Save.
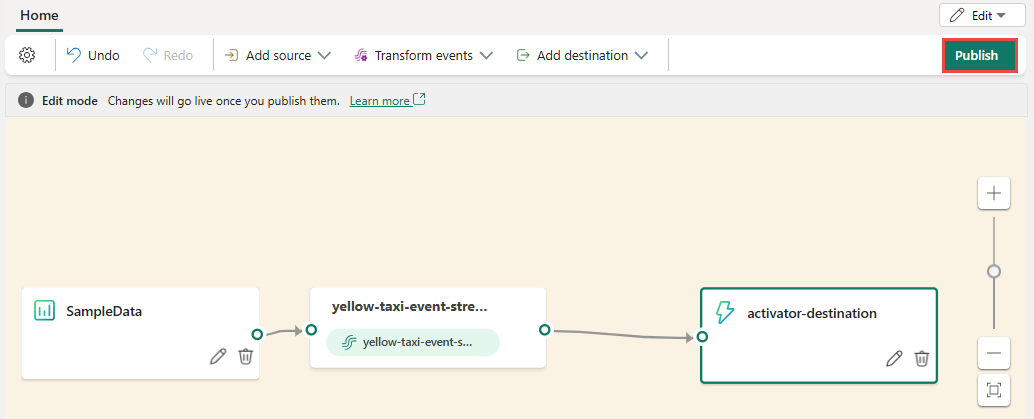
To implement the newly added activator destination, select Publish.

Once you complete these steps, the activator destination is available for visualization in Live view. Select Edit to switch to the Edit mode to make more changes to the eventstream.

Related content
To learn how to add other destinations to an eventstream, see the following articles: