Create Activator alerts from a KQL Queryset
This article explains how to create Fabric Activator alerts from a KQL Queryset. For more information, see What is Activator. You can use Activator on a KQL Queryset to trigger notifications in two modes:
- when a scheduled KQL query returns results
- when a scheduled KQL query returns results that contain a visualization that meets a defined set of conditions.
Send alert notifications either to yourself, or to others in your organization. Notifications can be sent by email or Microsoft Teams message.
Sample scenarios
Here are some ways you can use Activator alerts with KQL queries:
- Suppose you have a KQL database and are storing application logs.
- You receive an alert when any records from the last five minutes contain the string
authorization errorin the table’s message column.
- You receive an alert when any records from the last five minutes contain the string
- In a different scenario, you have streaming data for available bicycles in different neighborhoods. A KQL query is created to render a pie chart for the number of available bicycles per neighborhood.
- You receive an alert when the number of available bicycles in any neighborhood falls below an acceptable number.
Prerequisites
- A workspace with a Microsoft Fabric-enabled capacity
- A KQL database with data
- A KQL Queryset connected to the KQL database. For more information, see Query data in a KQL queryset.
Important
Only queries against KQL databases within an Eventhouse are supported. If your KQL queryset is connected to an external Azure Data Explorer cluster, creating an alert is not supported.
The following steps show you how to create an alert on a query that creates a visualization, or on a query that doesn't create a visualization.
Choose the tab that corresponds to your desired workflow.
Set alert on a KQL Queryset
Important
Timechart visualizations are not supported in this scenario. They are supported in Create Activator alerts from a Real-Time Dashboard.
Open the workspace that contains your KQL Queryset.
Browse to your KQL Queryset and select it to open.
Run a query that returns a visualization.
Once the query returns results, select Set Alert on the top ribbon.
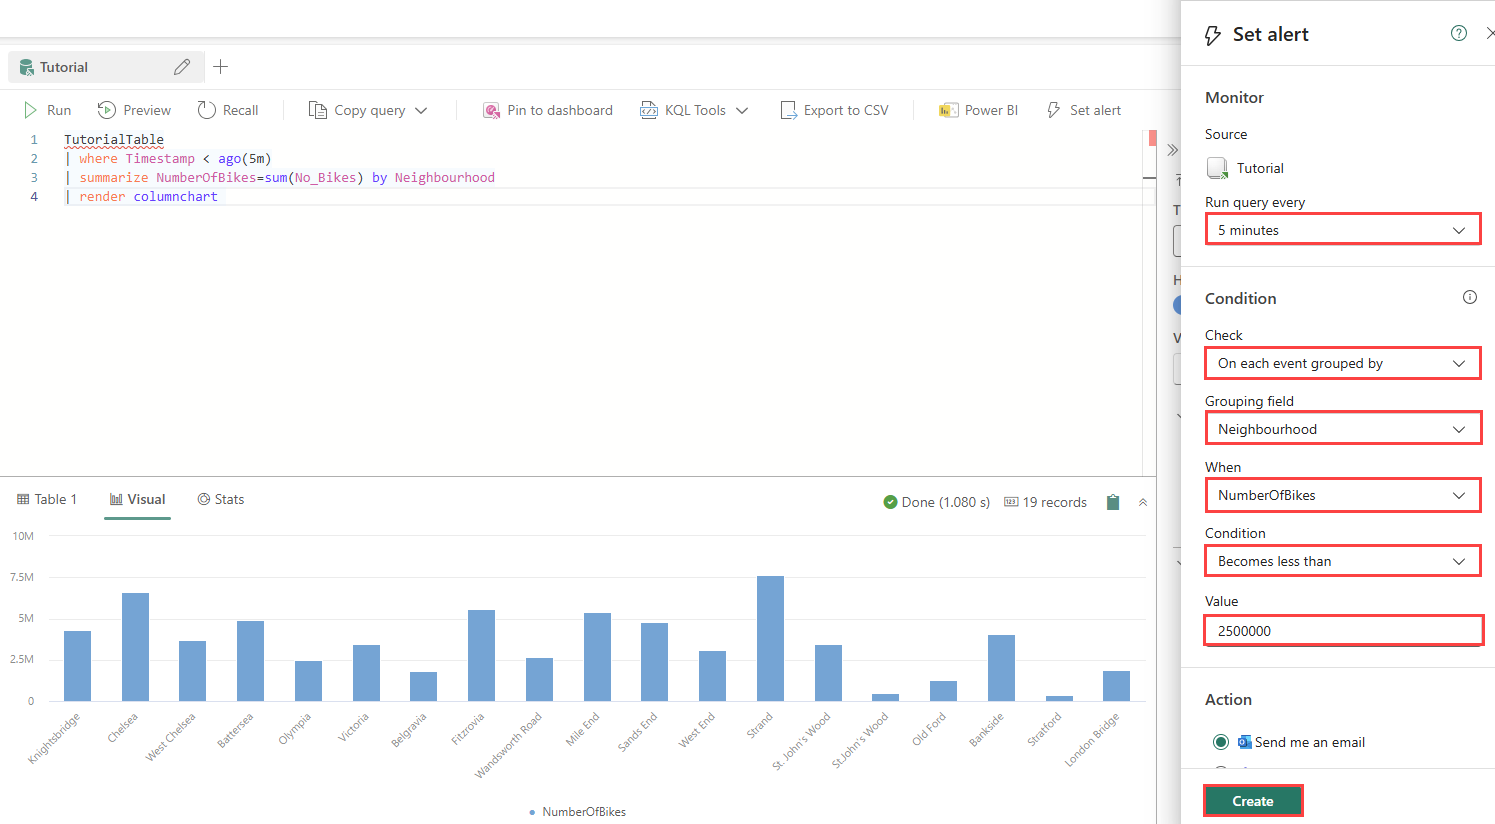
For example, the following query is based on the sample Bicycles data from the Real-Time Intelligence tutorial.
TutorialTable
| where Timestamp < ago(5m)
| summarize NumberOfBikes=sum(No_Bikes) by Neighbourhood
| render columnchart
The query returns a column chart that shows the number of bikes available in each neighborhood. Use this chart to set alert conditions.
Define alert conditions
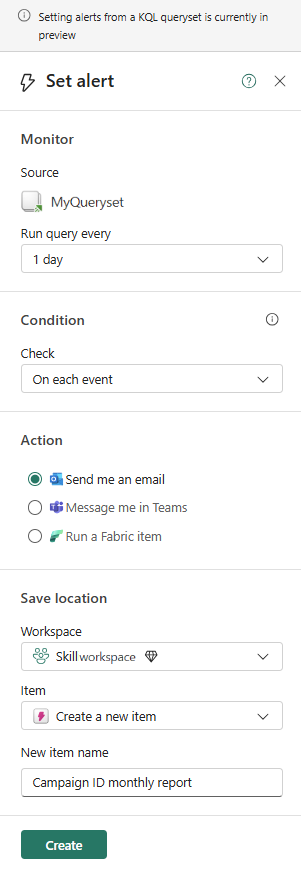
Set a time frequency for how often the query is run. The default is five minutes.
In Conditions, specify your alert conditions as follows:
- If your visualization has no dimensions, you can select the On each event when condition to monitor changes in the data stream by choosing a specific field to monitor.
- If your visualization includes dimensions, you can select the On each event grouped by condition to monitor changes in the data stream by selecting a field for grouping, which divides the data into distinct groups
- In the When dropdown, set the value to be evaluated.
- In the Condition dropdown, set the condition to be evaluated. For more information, see Conditions.
- In the Value field, set the value to compare against.
In Action, specify whether you want your alert via email or Microsoft Teams. In the side pane, you can configure notifications that are sent to yourself. To send notifications to a different user, see Optional: Edit your rule in Activator.
In Save location, specify where to save your Activator alert. Choose an existing workspace, and save either in an existing activator or a new one.
Select Create to create your Activator rule.

Optional: Edit your rule in Activator
When your activator is saved, the side pane displays a link to your item. Select the link to further edit in Activator. This step can be useful if you want to do one of the following actions:
- Add other recipients to your alert.
- Change the content of the alert to reflect the specific data that triggered the alert.
- Define a more complex alert condition than is possible in the Set alert pane.
For information on how to edit rules in Activator, see Create Activator rules.
In the activator itself, you can also view the history of the query results and the history of the rule activations. For more information, see Create Activator rules.
