Tutorial: Analyze data in a notebook
Applies to: ✅ SQL analytics endpoint and Warehouse in Microsoft Fabric
In this tutorial, learn how to analyze data with notebooks in a Warehouse.
Note
This tutorial forms part of an end-to-end scenario. In order to complete this tutorial, you must first complete these tutorials:
Create a T-SQL notebook
In this task, learn how to create a T-SQL notebook.
Ensure that the workspace you created in the first tutorial is open.
On the Home ribbon, open the New SQL query dropdown, and then select New SQL query in notebook.

In the Explorer pane, select Warehouses to reveal the objects of the
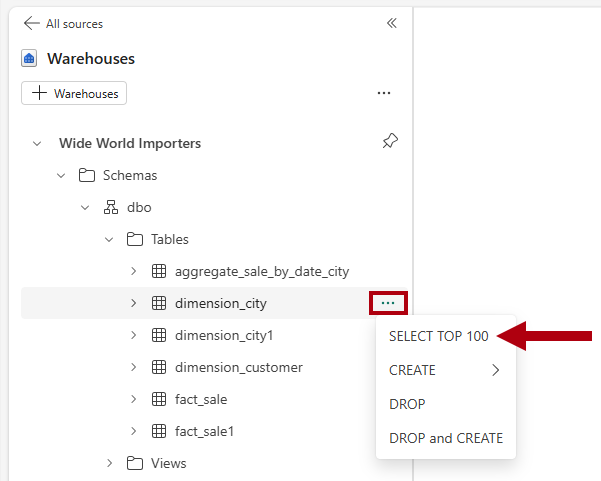
Wide World Importerswarehouse.To generate a SQL template to explore data, to the right of the
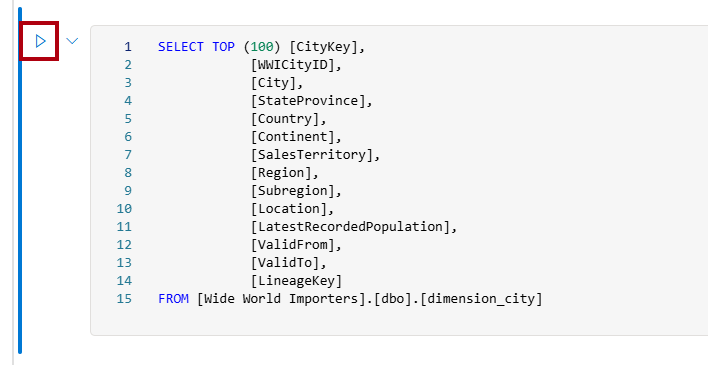
dimension_citytable, select the ellipsis (…), and then select SELECT TOP 100.To run the T-SQL code in this cell, select the Run cell button for the code cell.
Review the query result in the results pane.
Create a lakehouse shortcut and analyze data with a notebook
In this task, learn how to create a lakehouse shortcut and analyze data with a notebook.
Open the
Data Warehouse Tutorialworkspace landing page.Select + New Item to display the full list of available item types.
From the list, in the Store data section, select the Lakehouse item type.
In the New lakehouse window, enter the name
Shortcut_Exercise.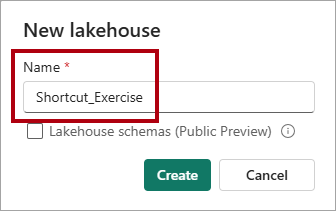
Select Create.
When the new lakehouse opens, in the landing page, select the New shortcut option.
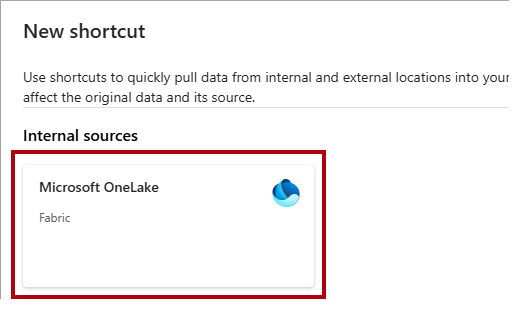
In the New shortcut window, select the Microsoft OneLake option.
In the Select a data source type window, select the
Wide World Importerswarehouse that you created in the Create a Warehouse tutorial, and then select Next.In the OneLake object browser, expand Tables, expand the
dboschema, and then select the checkbox for thedimension_customertable.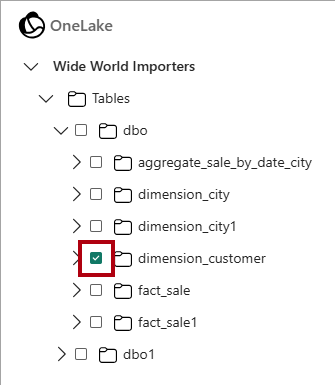
Select Next.
Select Create.
In the Explorer pane, select the
dimension_customertable to preview the data, and then review the data retrieved from thedimension_customertable in the warehouse.To create a notebook to query the
dimension_customertable, on the Home ribbon, in the Open notebook dropdown, select New notebook.
In the Explorer pane, select Lakehouses.
Drag the
dimension_customertable to the open notebook cell.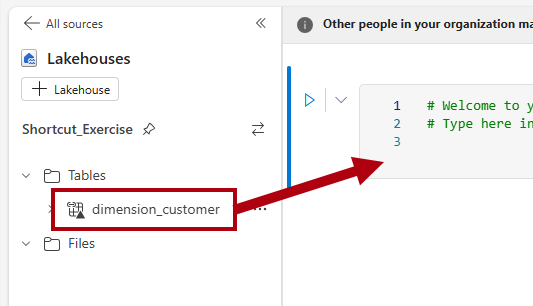
Notice the PySpark query that was added to the notebook cell. This query retrieves the first 1,000 rows from the
Shortcut_Exercise.dimension_customershortcut. This notebook experience is similar to Visual Studio Code Jupyter notebook experience. You can also open the notebook in VS Code.
On the Home ribbon, select the Run all button.

Review the query result in the results pane.
