Use the Semantic model refresh activity to refresh a Power BI Dataset (Preview)
This guide shows you how to use the Semantic model refresh activity to create connections to your Power BI semantic model datasets and refresh them from a data pipeline in Data Factory for Microsoft Fabric.
Important
The Semantic model refresh activity in Data Factory for Microsoft Fabric is currently in preview. This information relates to a prerelease product that may be substantially modified before it's released. Microsoft makes no warranties, expressed or implied, with respect to the information provided here.
Prerequisites
To get started, you must complete the following prerequisites:
- A tenant account with an active subscription. Create an account for free.
- A workspace is created.
Add a Semantic model refresh activity to a pipeline with UI
To use a Semantic model refresh activity in a pipeline, complete the following steps:
Create the activity
Create a new pipeline in your workspace.
Before you use the Semantic model refresh activity, you need a connection to your Power BI datasets.
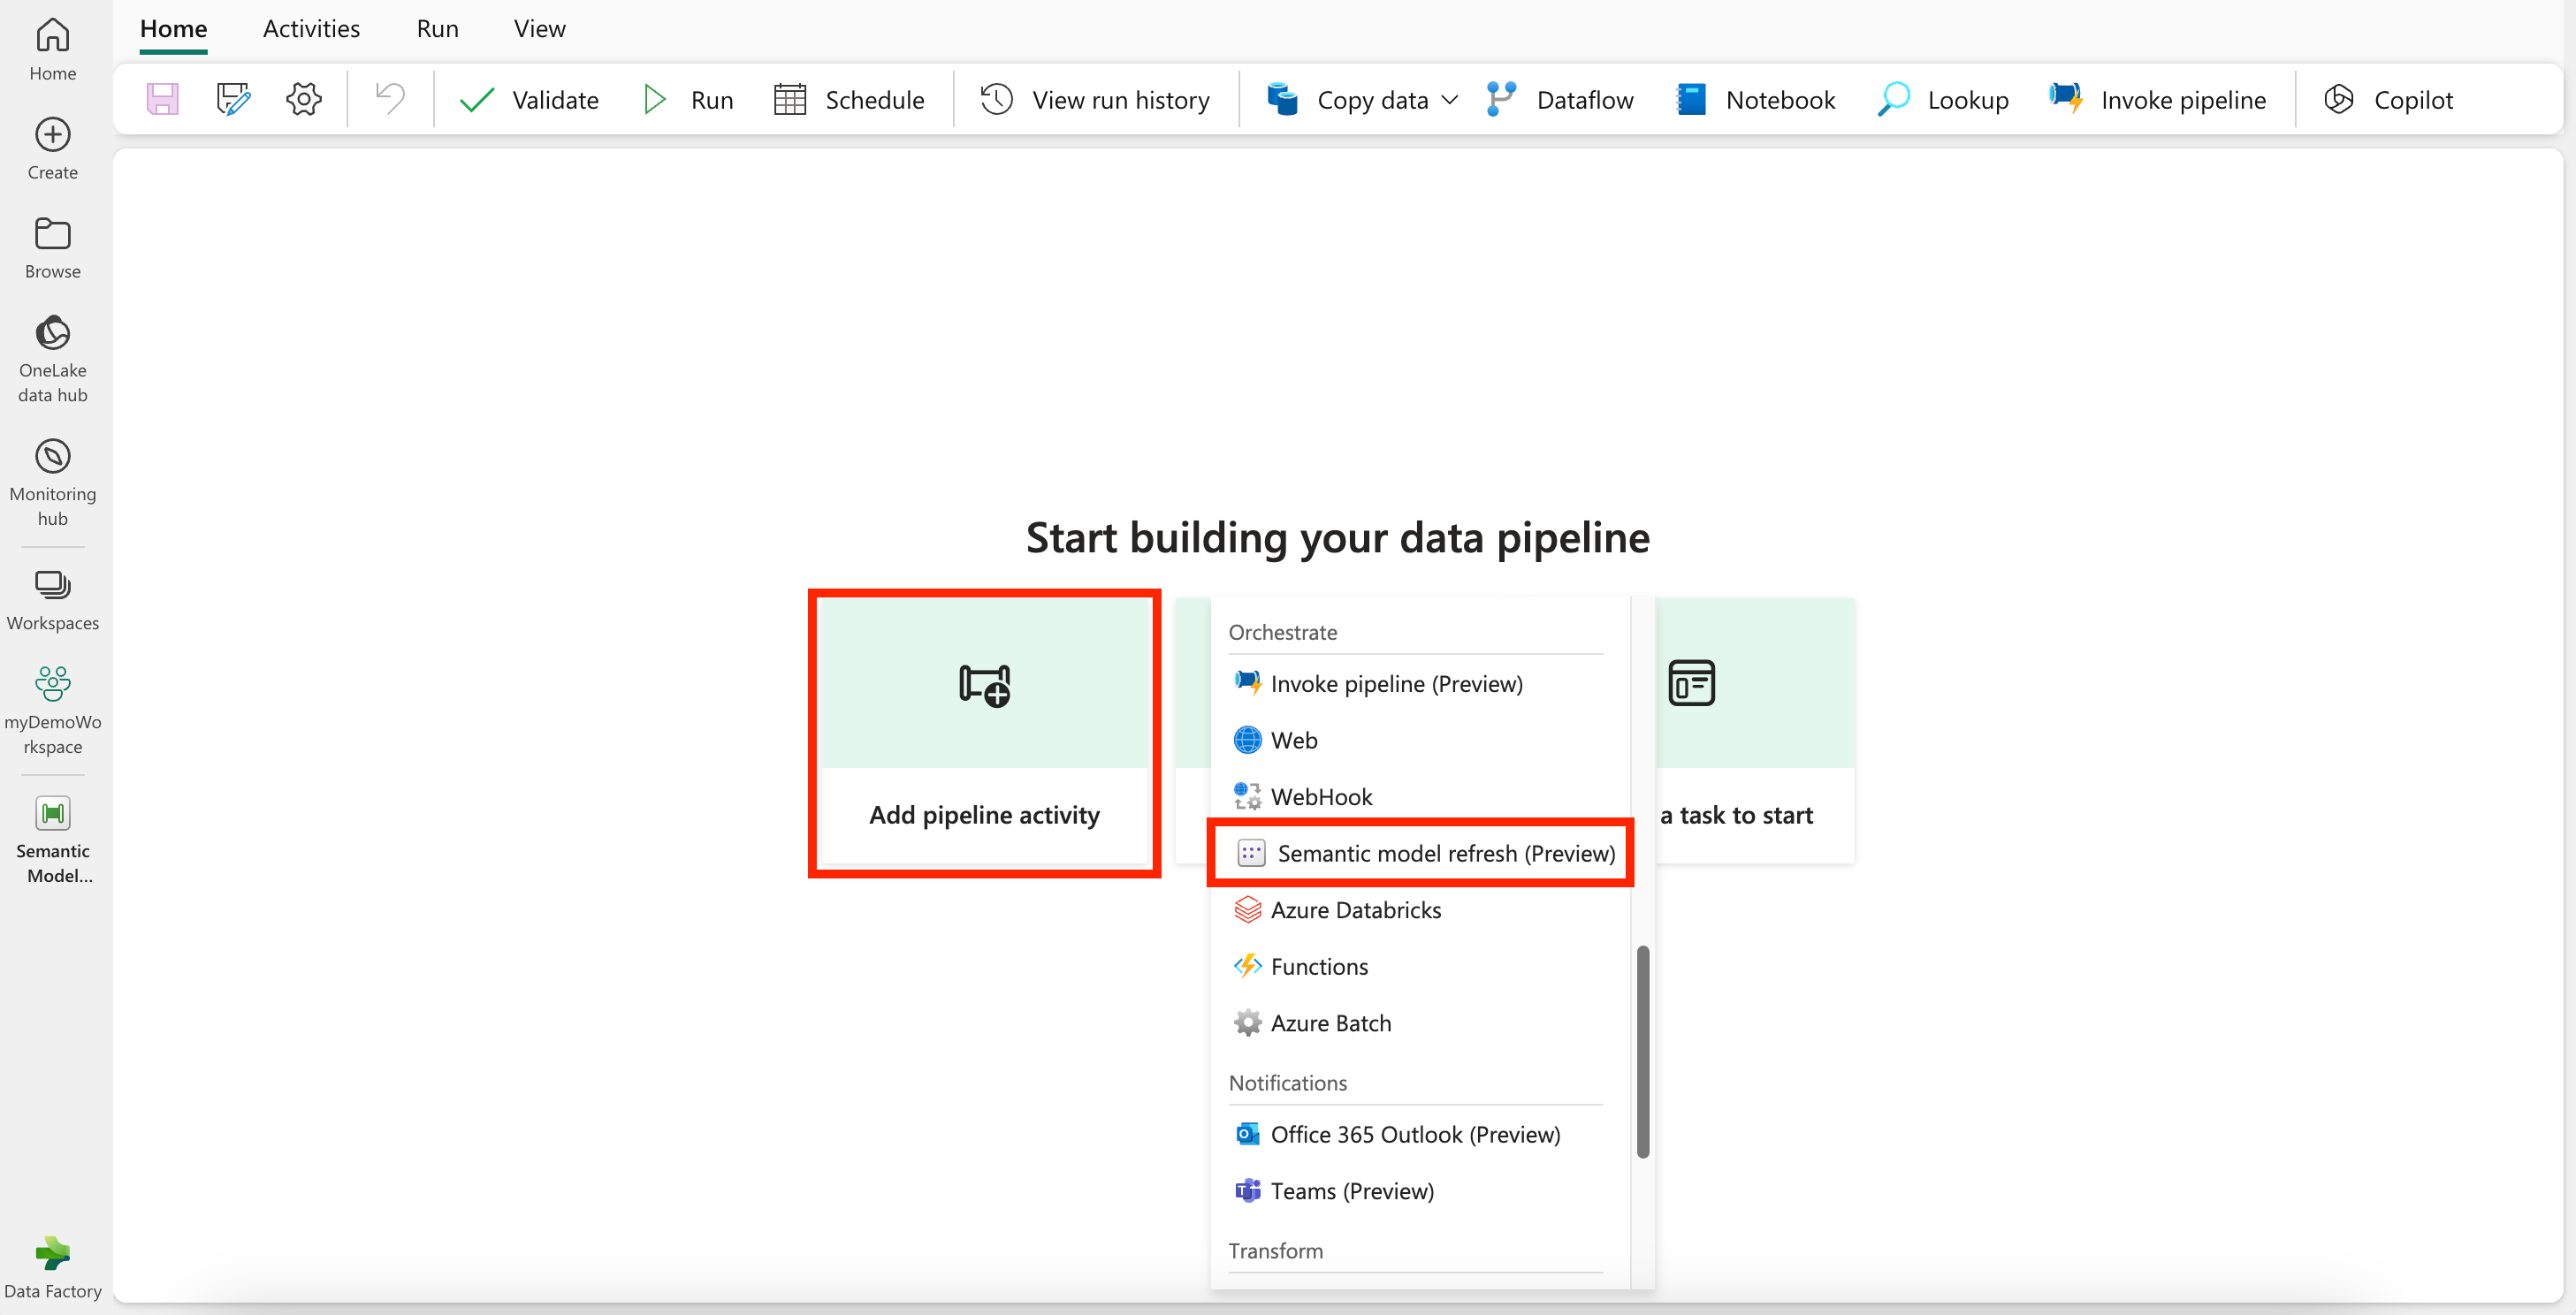
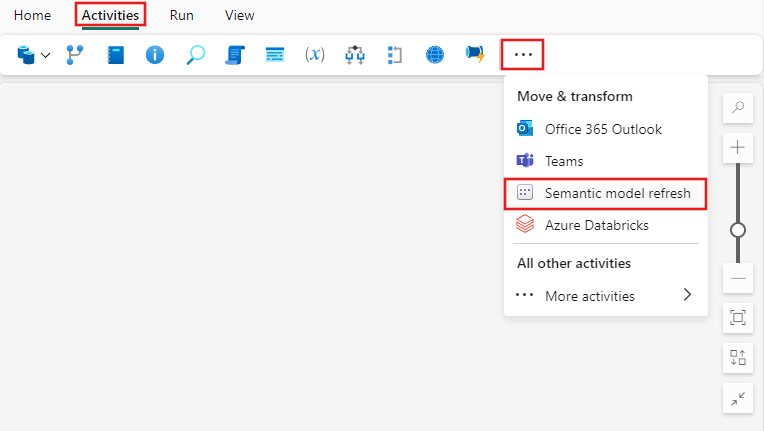
Search for Semantic model refresh from the home screen card and select it, or select the activity from the Activities bar to add it to the pipeline canvas.
Creating the activity from the home screen card:
Creating the activity from the Activities bar:
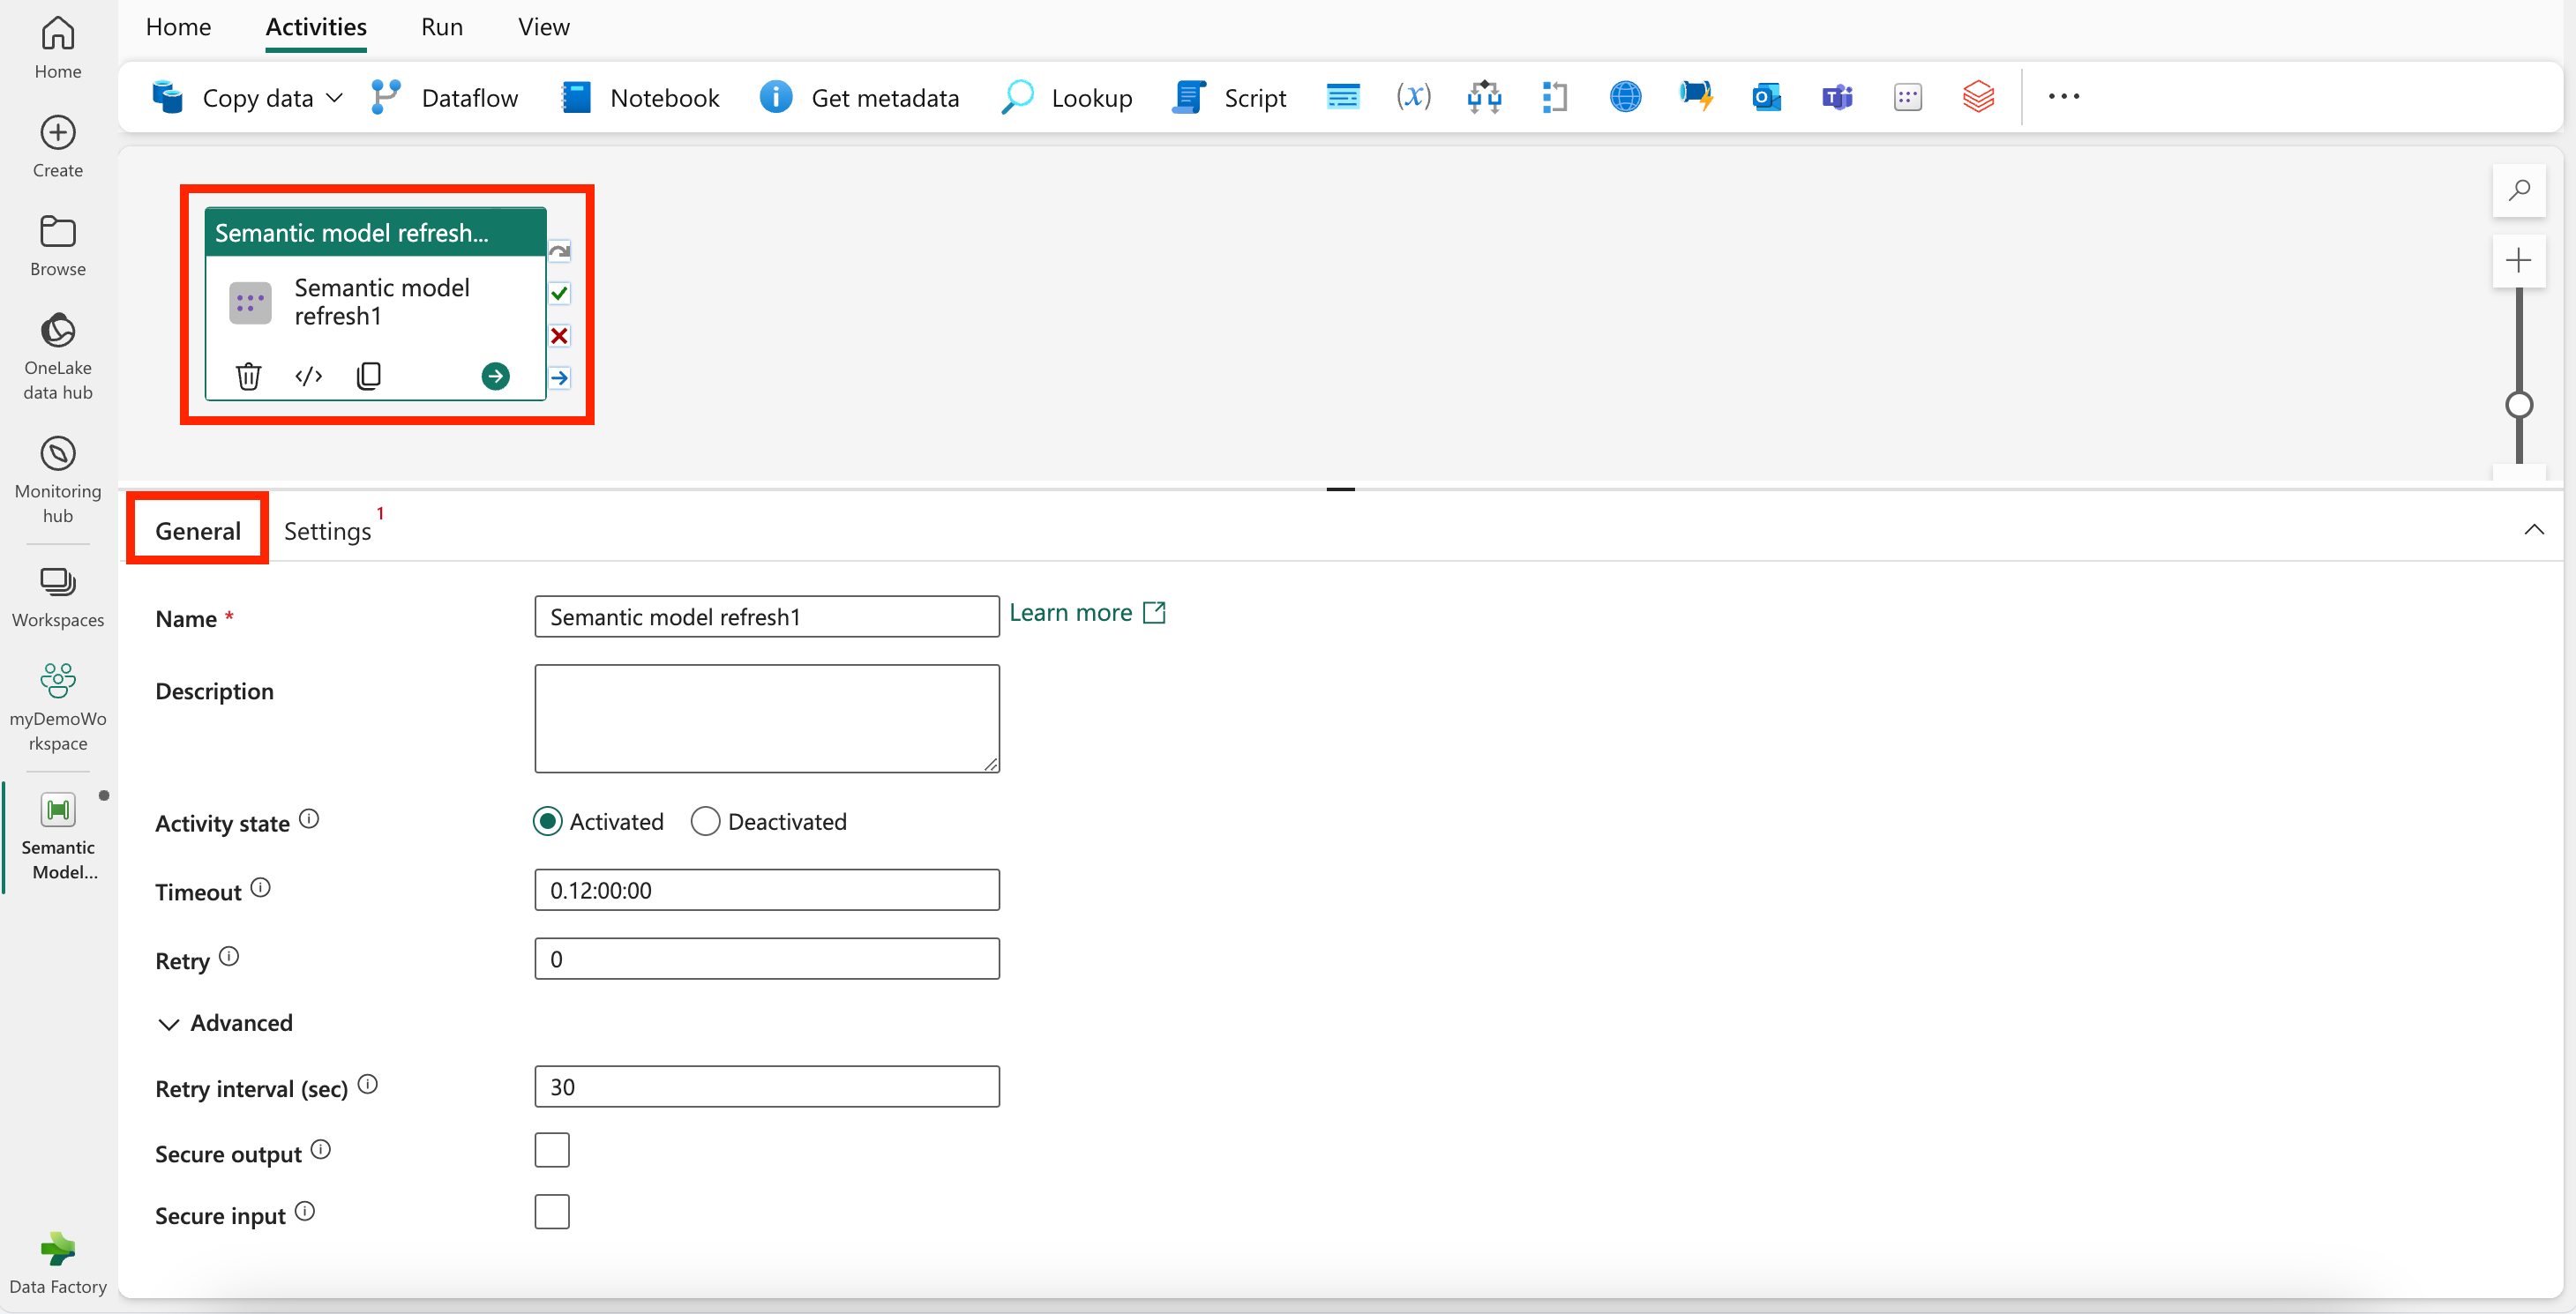
Select the new Semantic model refresh activity on the pipeline editor canvas if it isn't already selected.
Refer to the General settings guidance to configure the options found on this tab.
Semantic model refresh activity settings
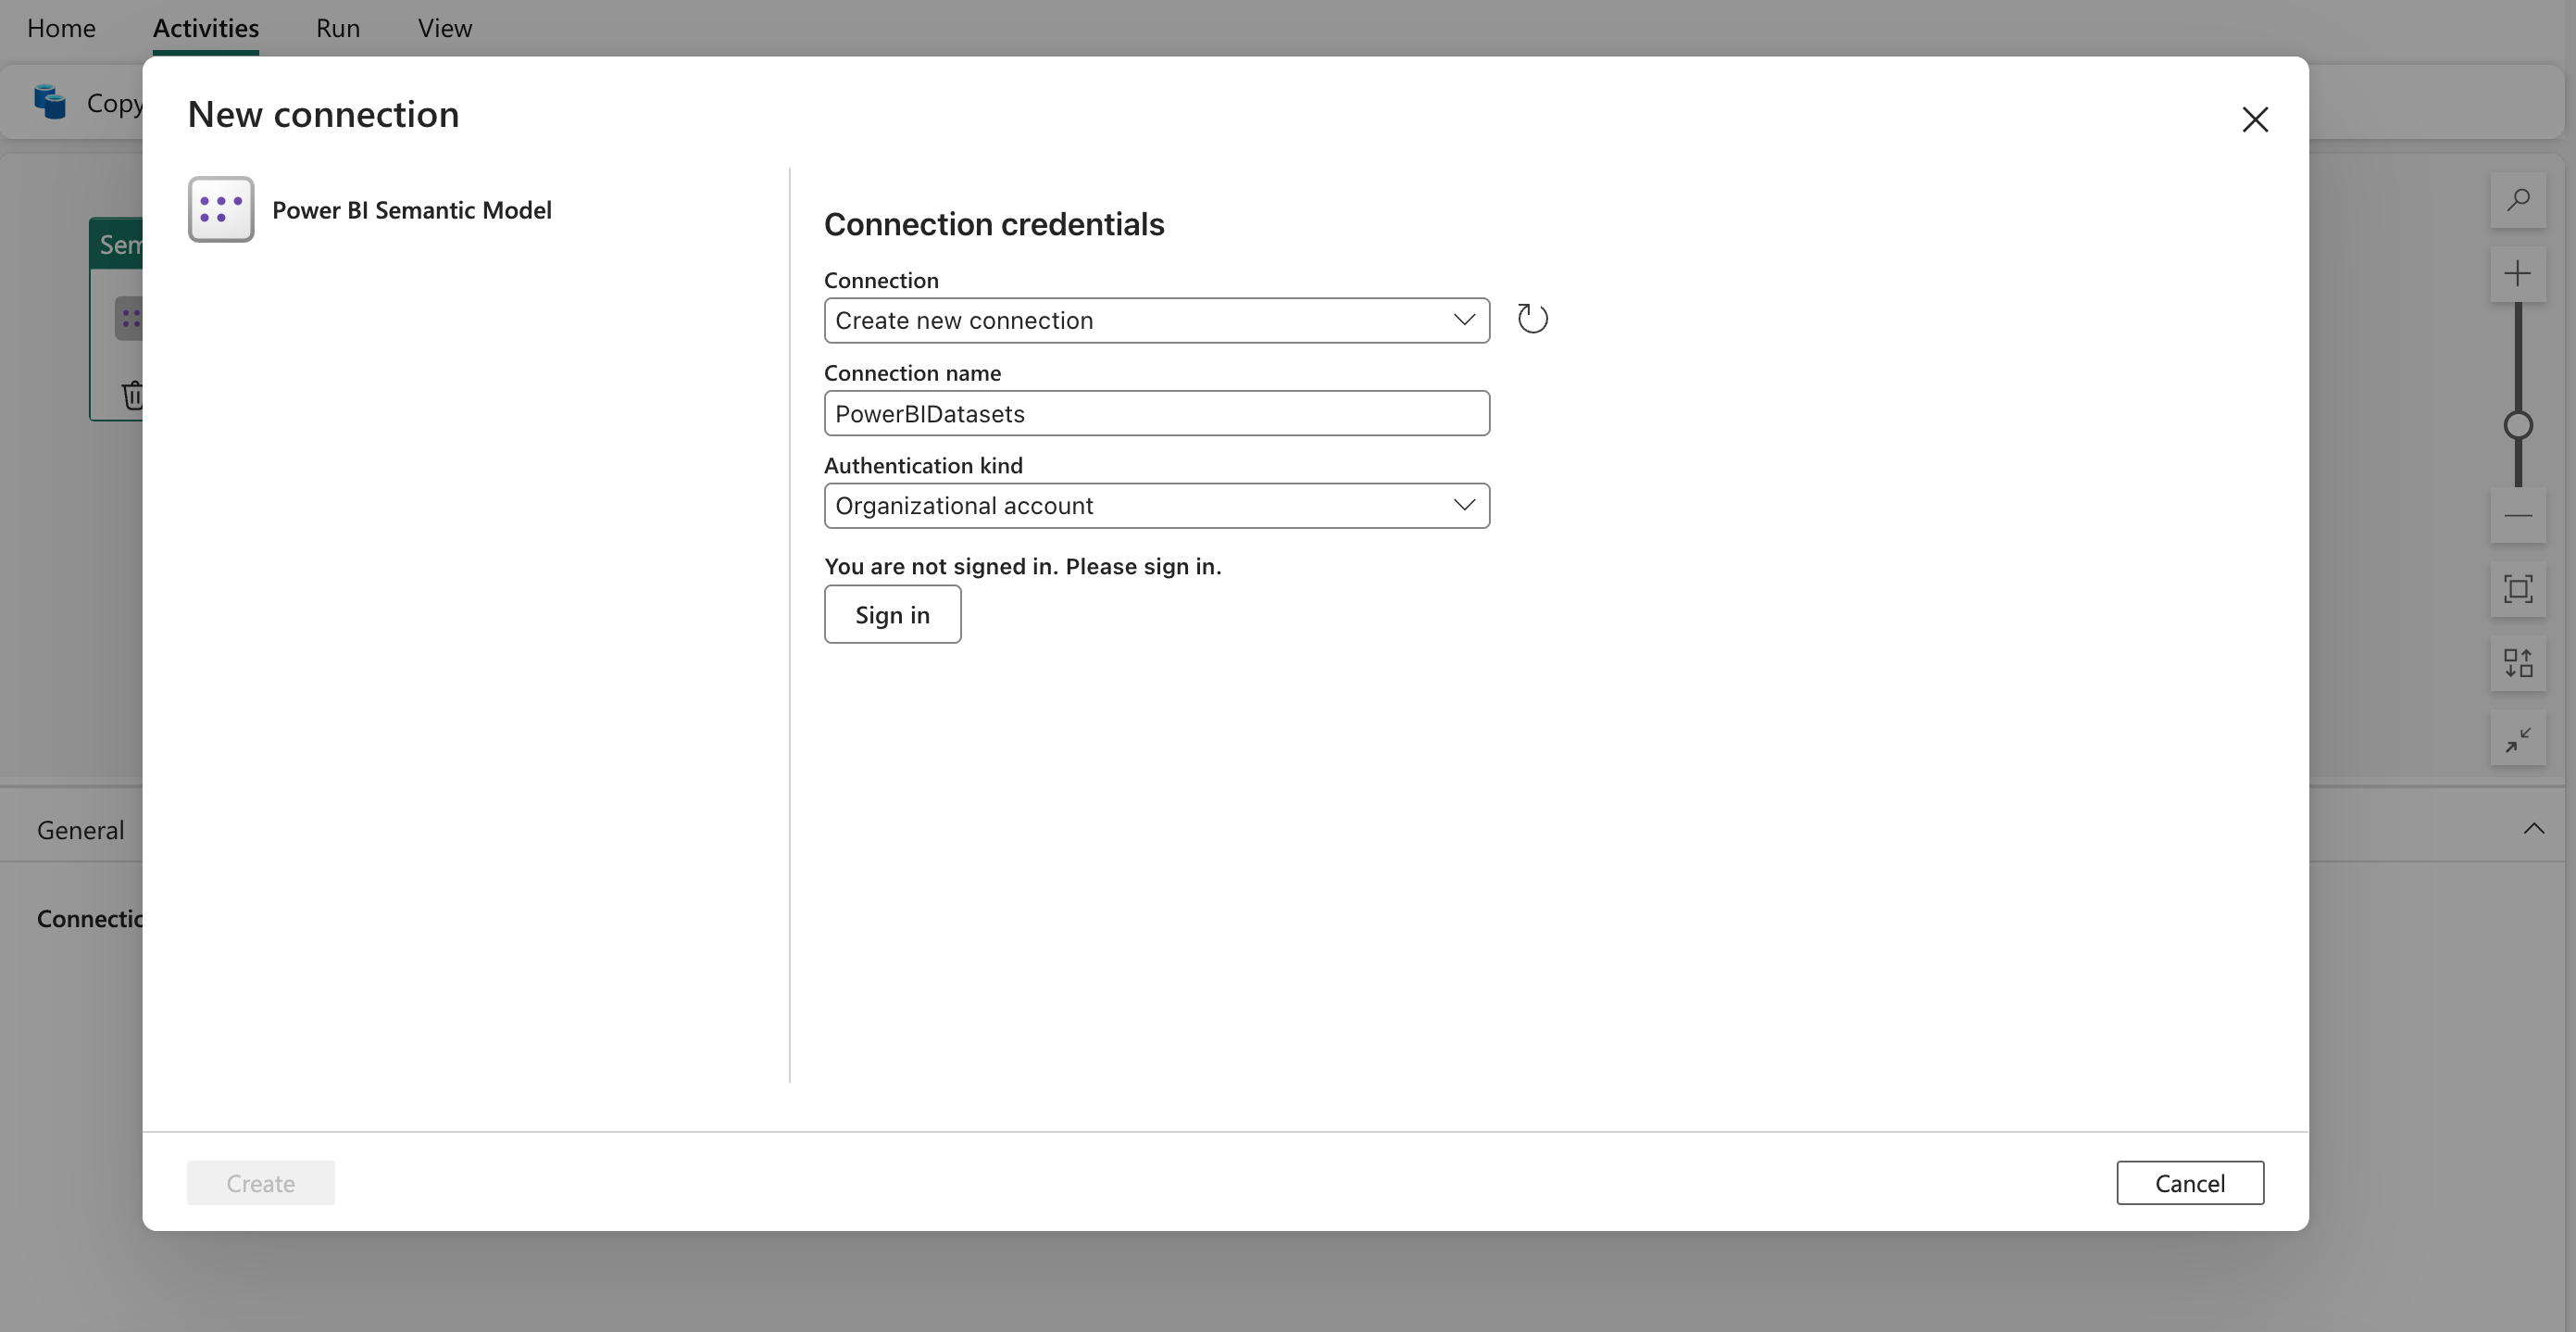
Select the Settings tab in the activity properties pane, then use the Connection dropdown to select an existing connection, or create and configure a new connection to Power BI.
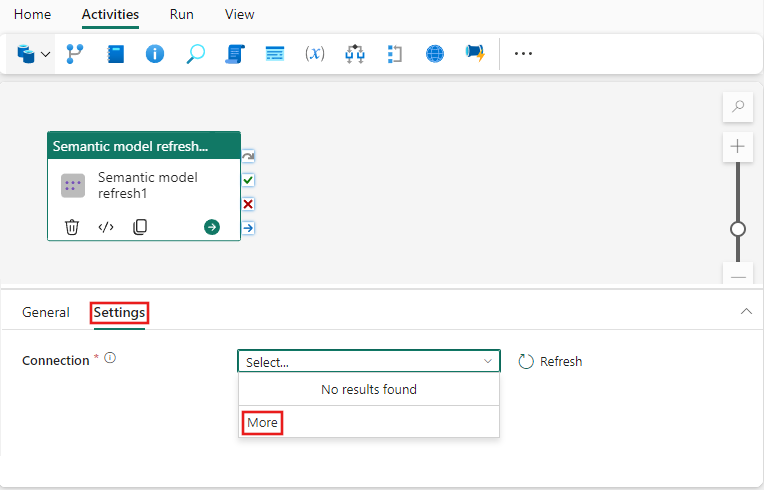
When you choose + New to create a new connection, you see the connection creation dialog where you can provide the Connection name and credentials for the Authorization kind that you choose.
After you create a connection, you can find it in the dropdown menu. If you don't see it, select Refresh. Then select your connection.
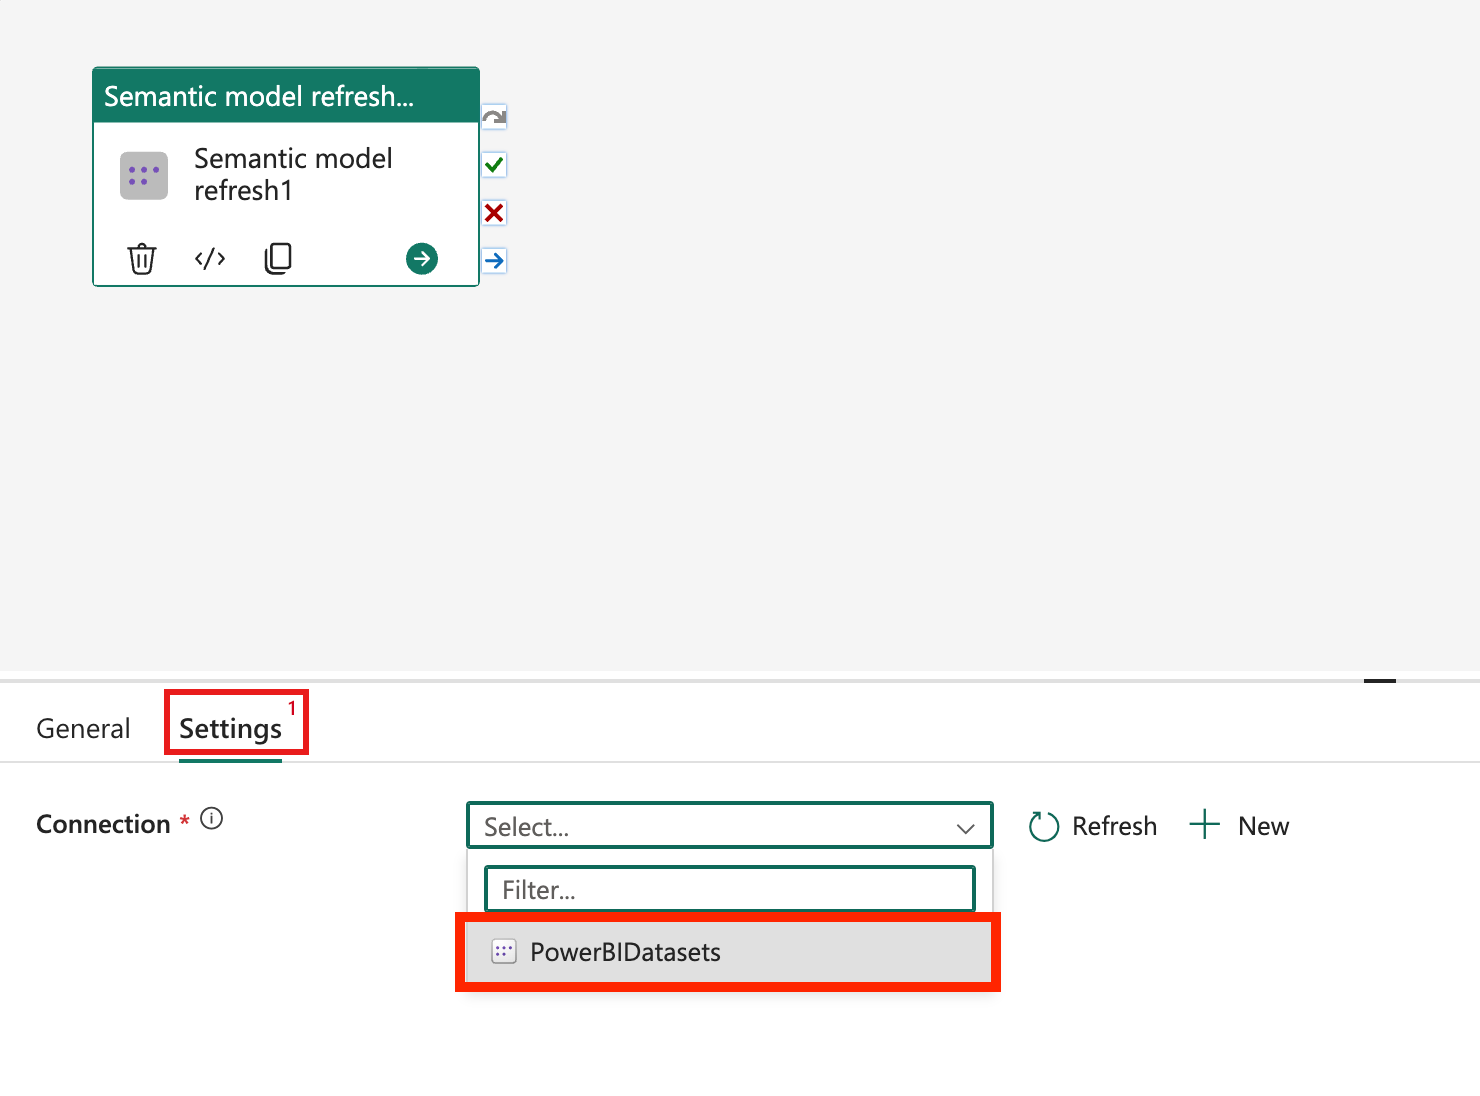
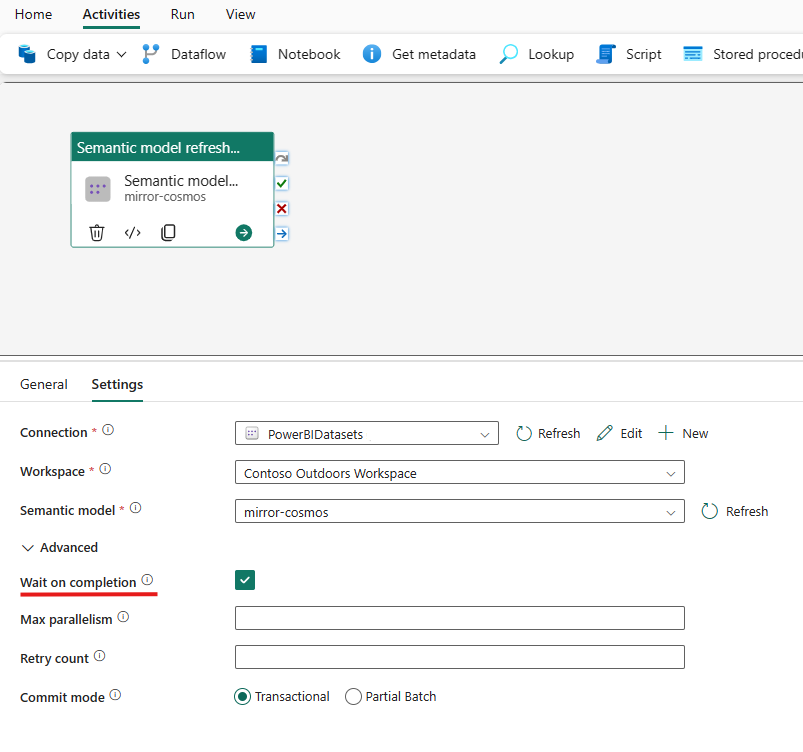
Select your Workspace and Dataset to configure the rest of the activity. Find more configuration options under Advanced.
- Under Advanced, you have the option to select Wait on completion, that by default is turned on. Users can choose this option where we will poll for the completion of the process, allowing to wait for the completion of the refresh before proceeding.
- You can also input values for Max parallelism and Retry Count, whether to commit the refreshes when the complete (Transactional) or in batches Partial Batch.
Note
By default, when you run the semantic model refresh activity, the behavior of the refresh type from the pipeline activity is set to "full".
Choose tables and partitions to refresh
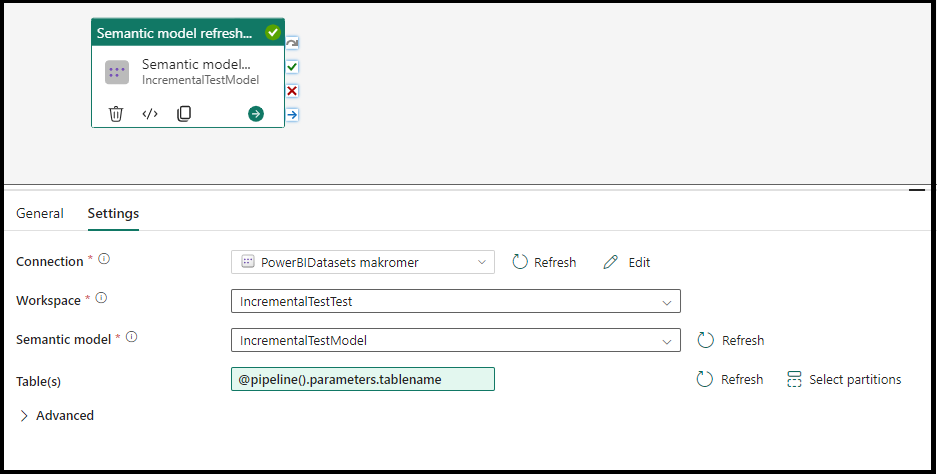
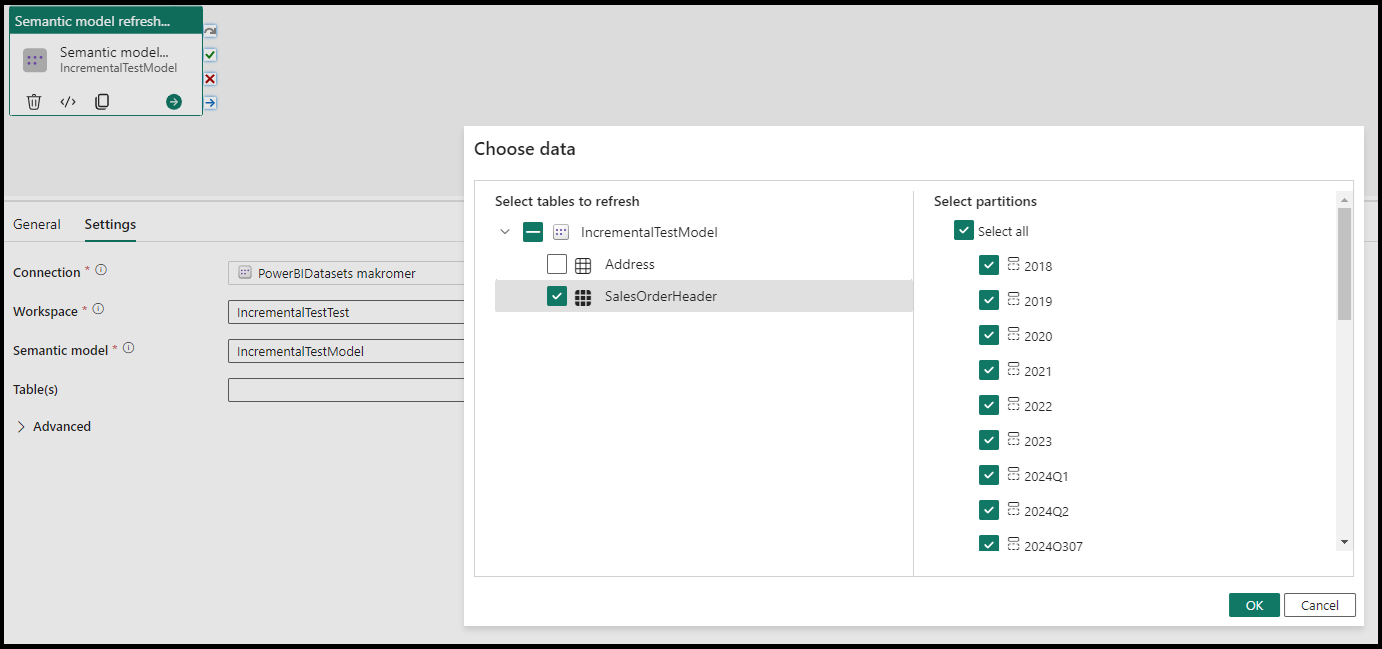
Optionally, you can optimize your semantic model refresh by choosing just the tables and the partitions in those tables that you wish to refresh as opposed to a full model refresh. You will find the settings to choose optional table and partition refresh under settings. Each of these properties supports parameterization using the pipeline expression builder.
Save and run or schedule the pipeline
Although the Semantic model refresh activity is typically used with other activities, it can be run directly as is. After you configure any other activities required for your pipeline, switch to the Home tab at the top of the pipeline editor, and select the save button to save your pipeline. Select Run to run it directly, or Schedule to schedule it. You can also view the run history here or configure other settings.

