Use the Livy API to submit and execute Livy batch jobs
Note
The Livy API for Fabric Data Engineering is in preview.
Applies to: ✅ Data Engineering and Data Science in Microsoft Fabric
Submit Spark batch jobs using the Livy API for Fabric Data Engineering.
Prerequisites
Fabric Premium or Trial capacity with a Lakehouse.
A remote client such as Visual Studio Code with Jupyter Notebooks, PySpark, and the Microsoft Authentication Library (MSAL) for Python.
A Microsoft Entra app token is required to access the Fabric Rest API. Register an application with the Microsoft identity platform.
Some data in your lakehouse, this example uses NYC Taxi & Limousine Commission green_tripdata_2022_08 a parquet file loaded to the lakehouse.
The Livy API defines a unified endpoint for operations. Replace the placeholders {Entra_TenantID}, {Entra_ClientID}, {Fabric_WorkspaceID}, and {Fabric_LakehouseID} with your appropriate values when you follow the examples in this article.
Configure Visual Studio Code for your Livy API Batch
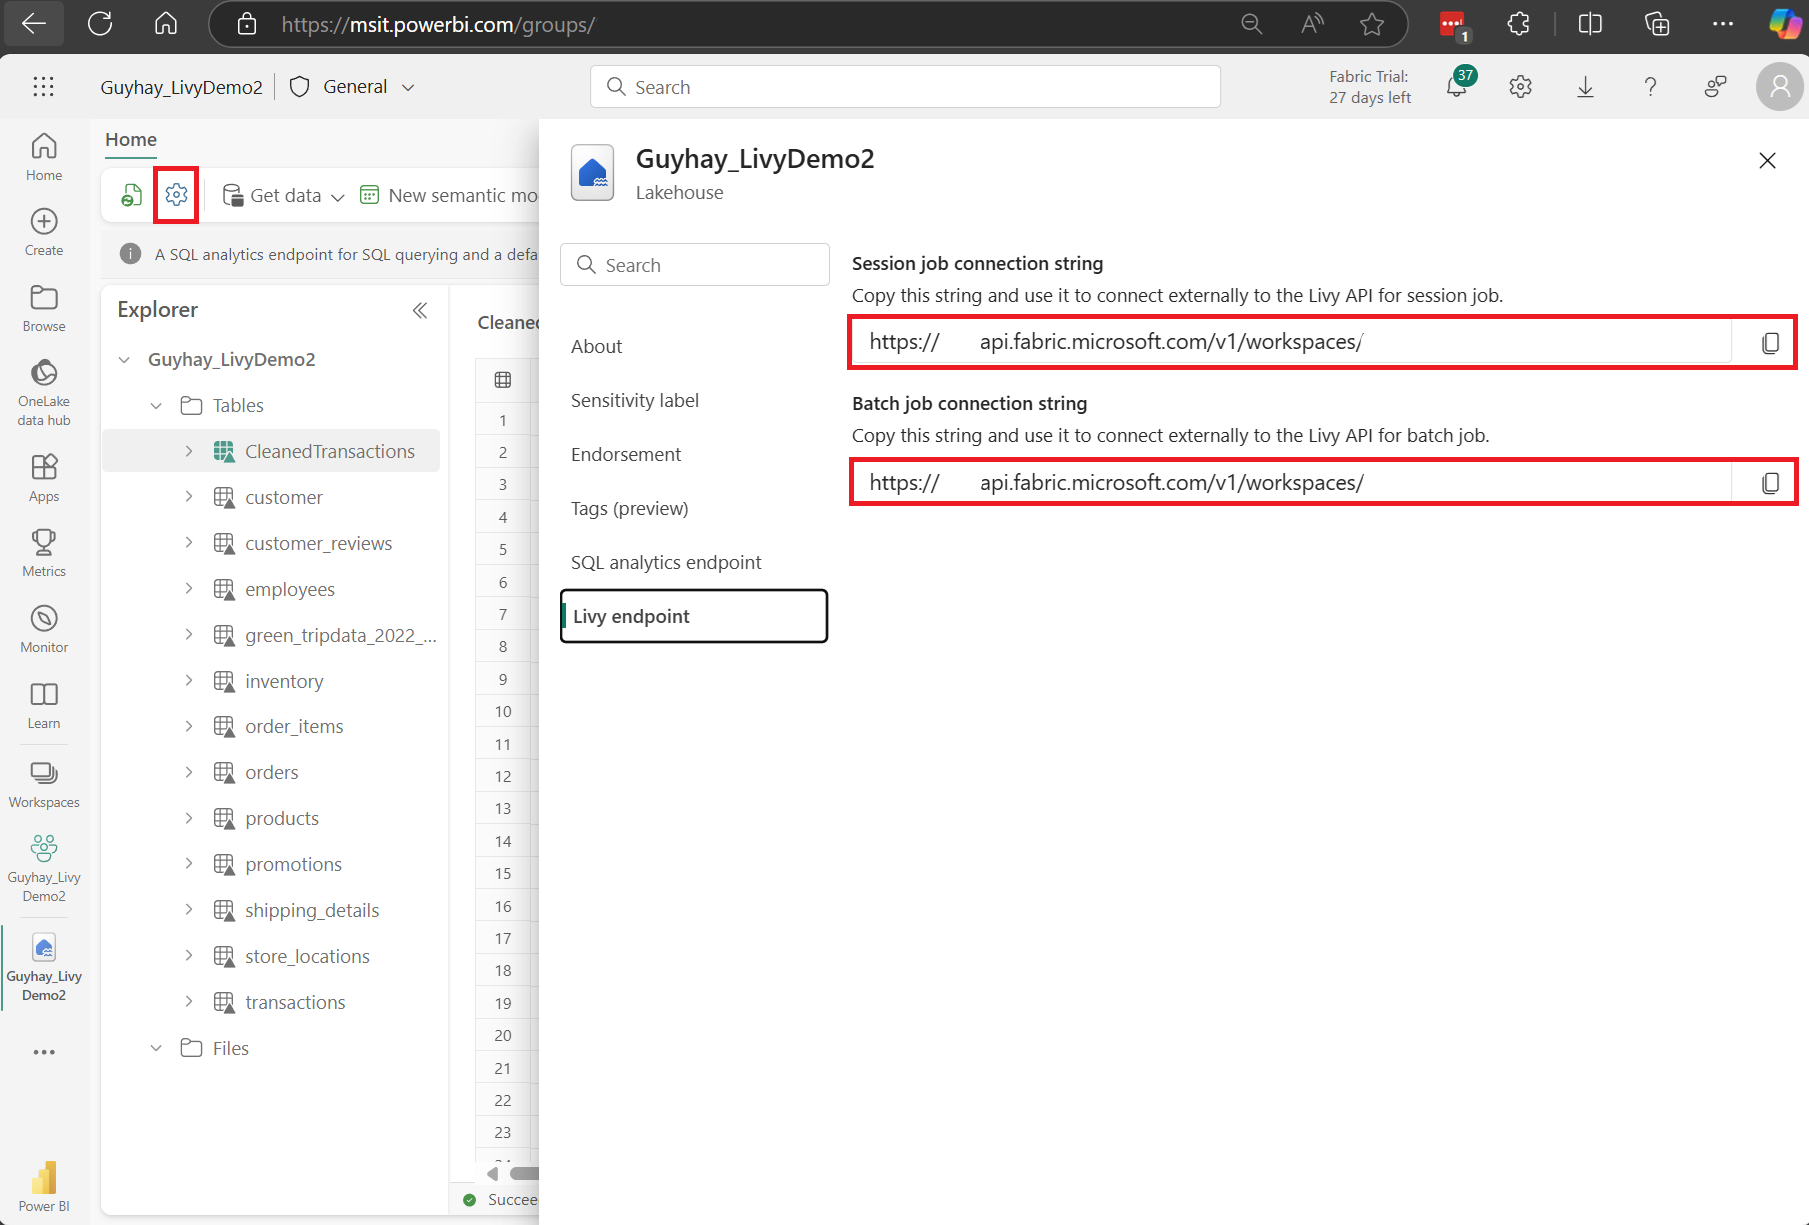
Select Lakehouse Settings in your Fabric Lakehouse.
Navigate to the Livy endpoint section.
Copy the Batch job connection string (second red box in the image) to your code.
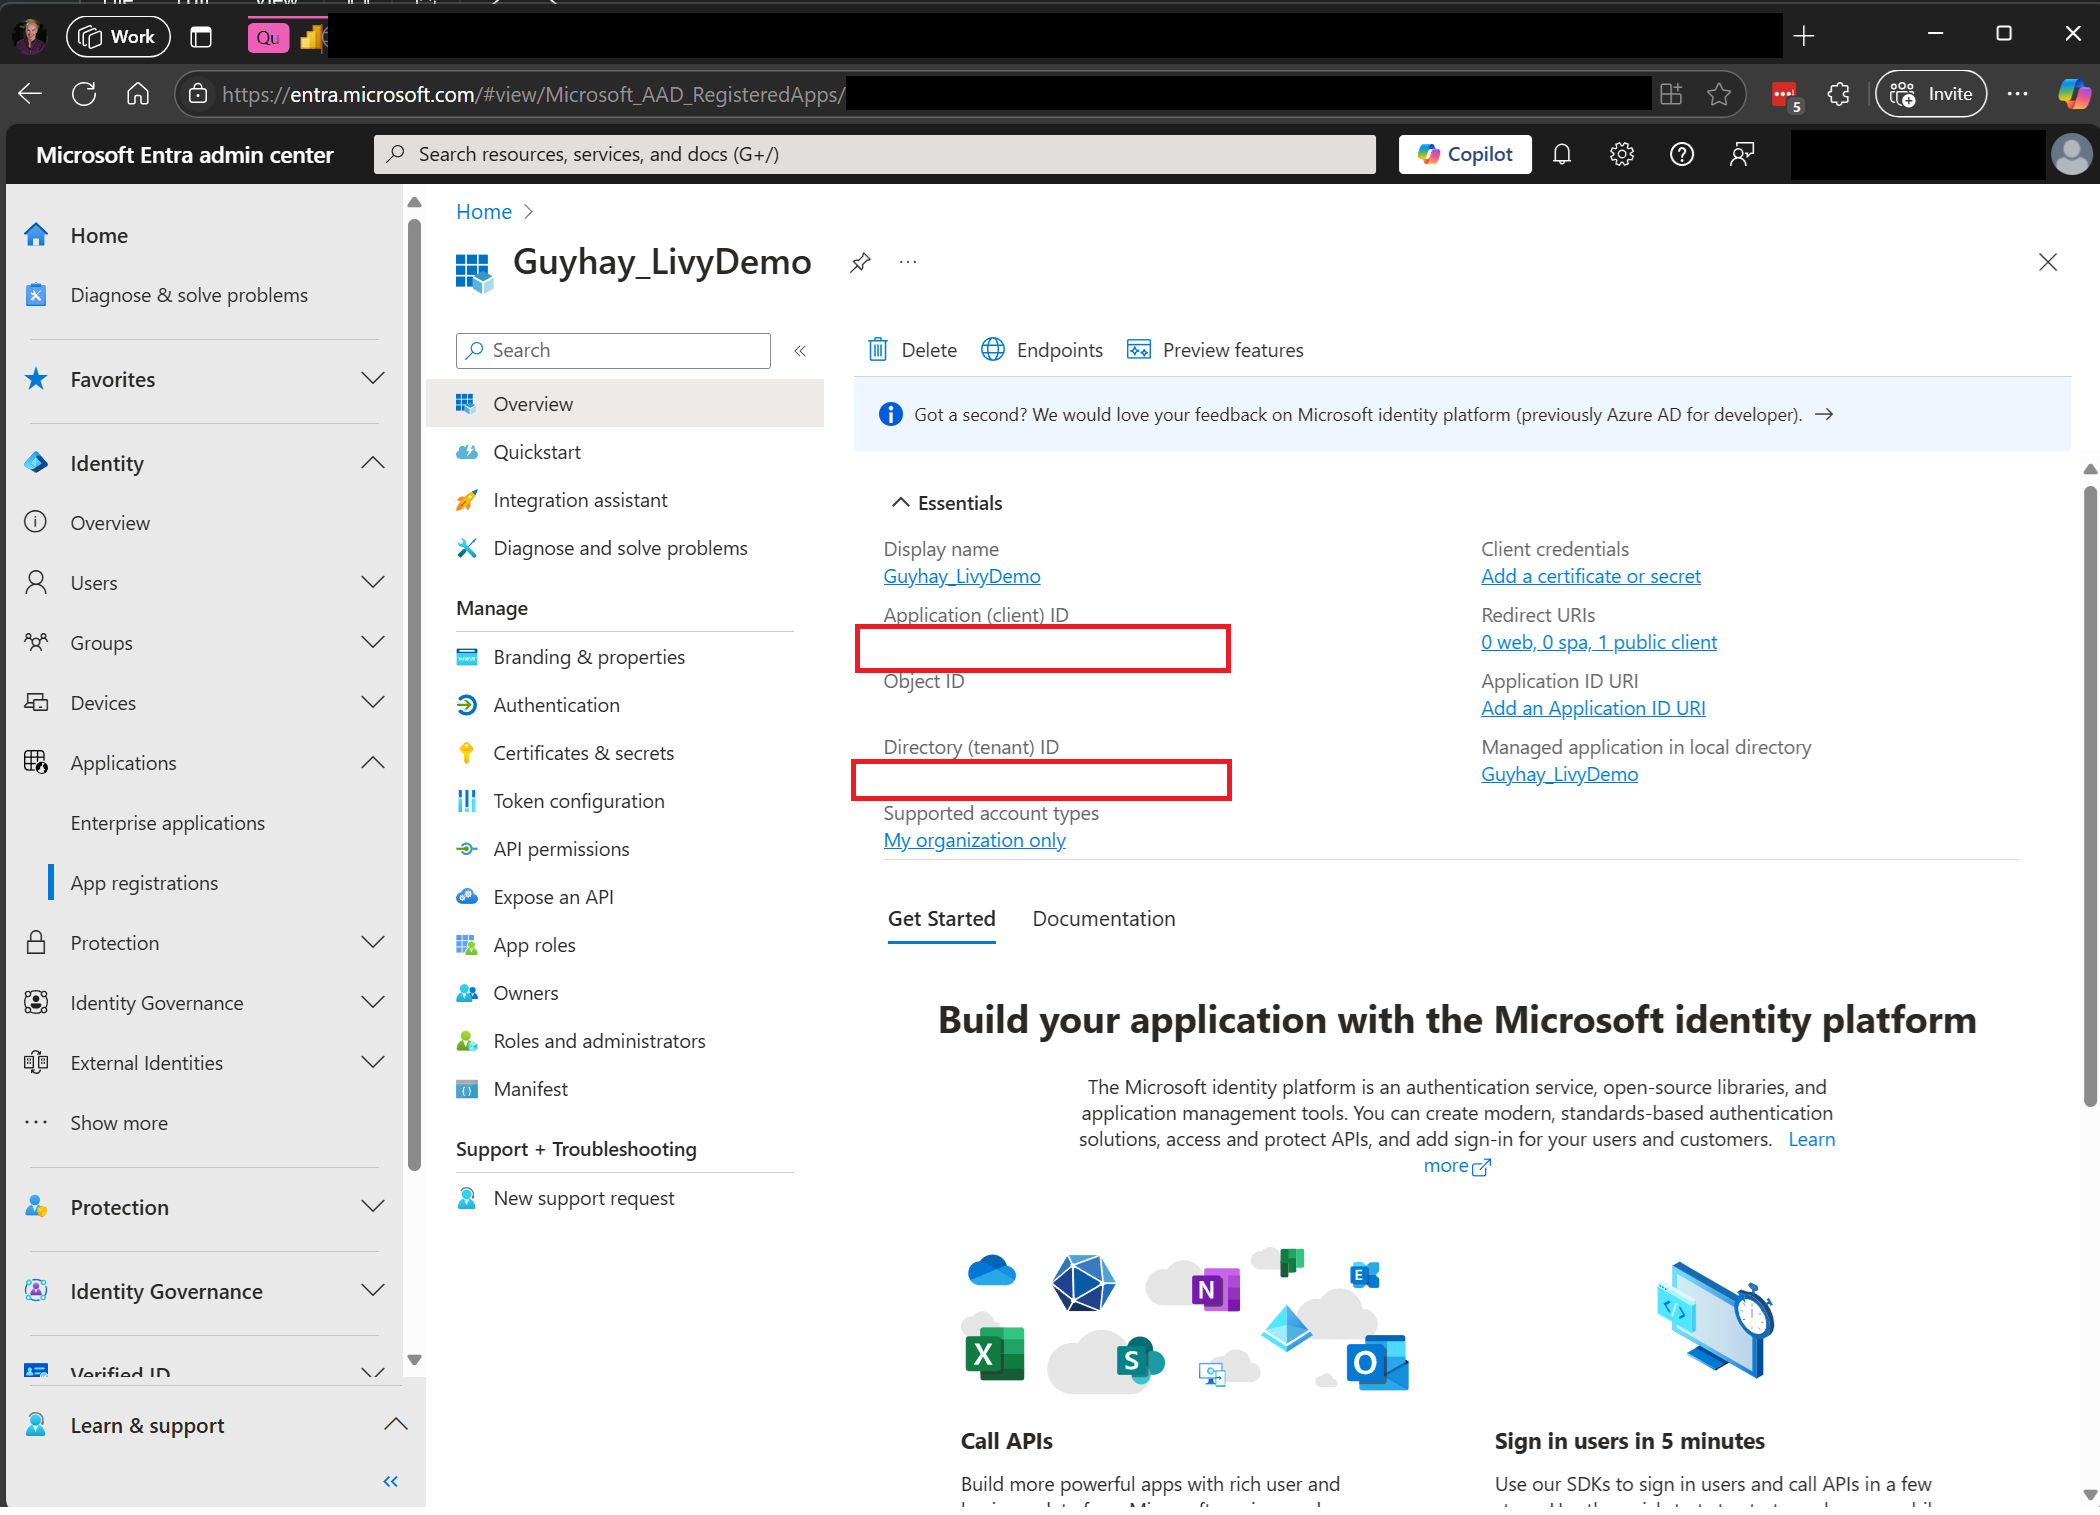
Navigate to Microsoft Entra admin center and copy both the Application (client) ID and Directory (tenant) ID to your code.
Create a Spark payload and upload to your Lakehouse
Create an
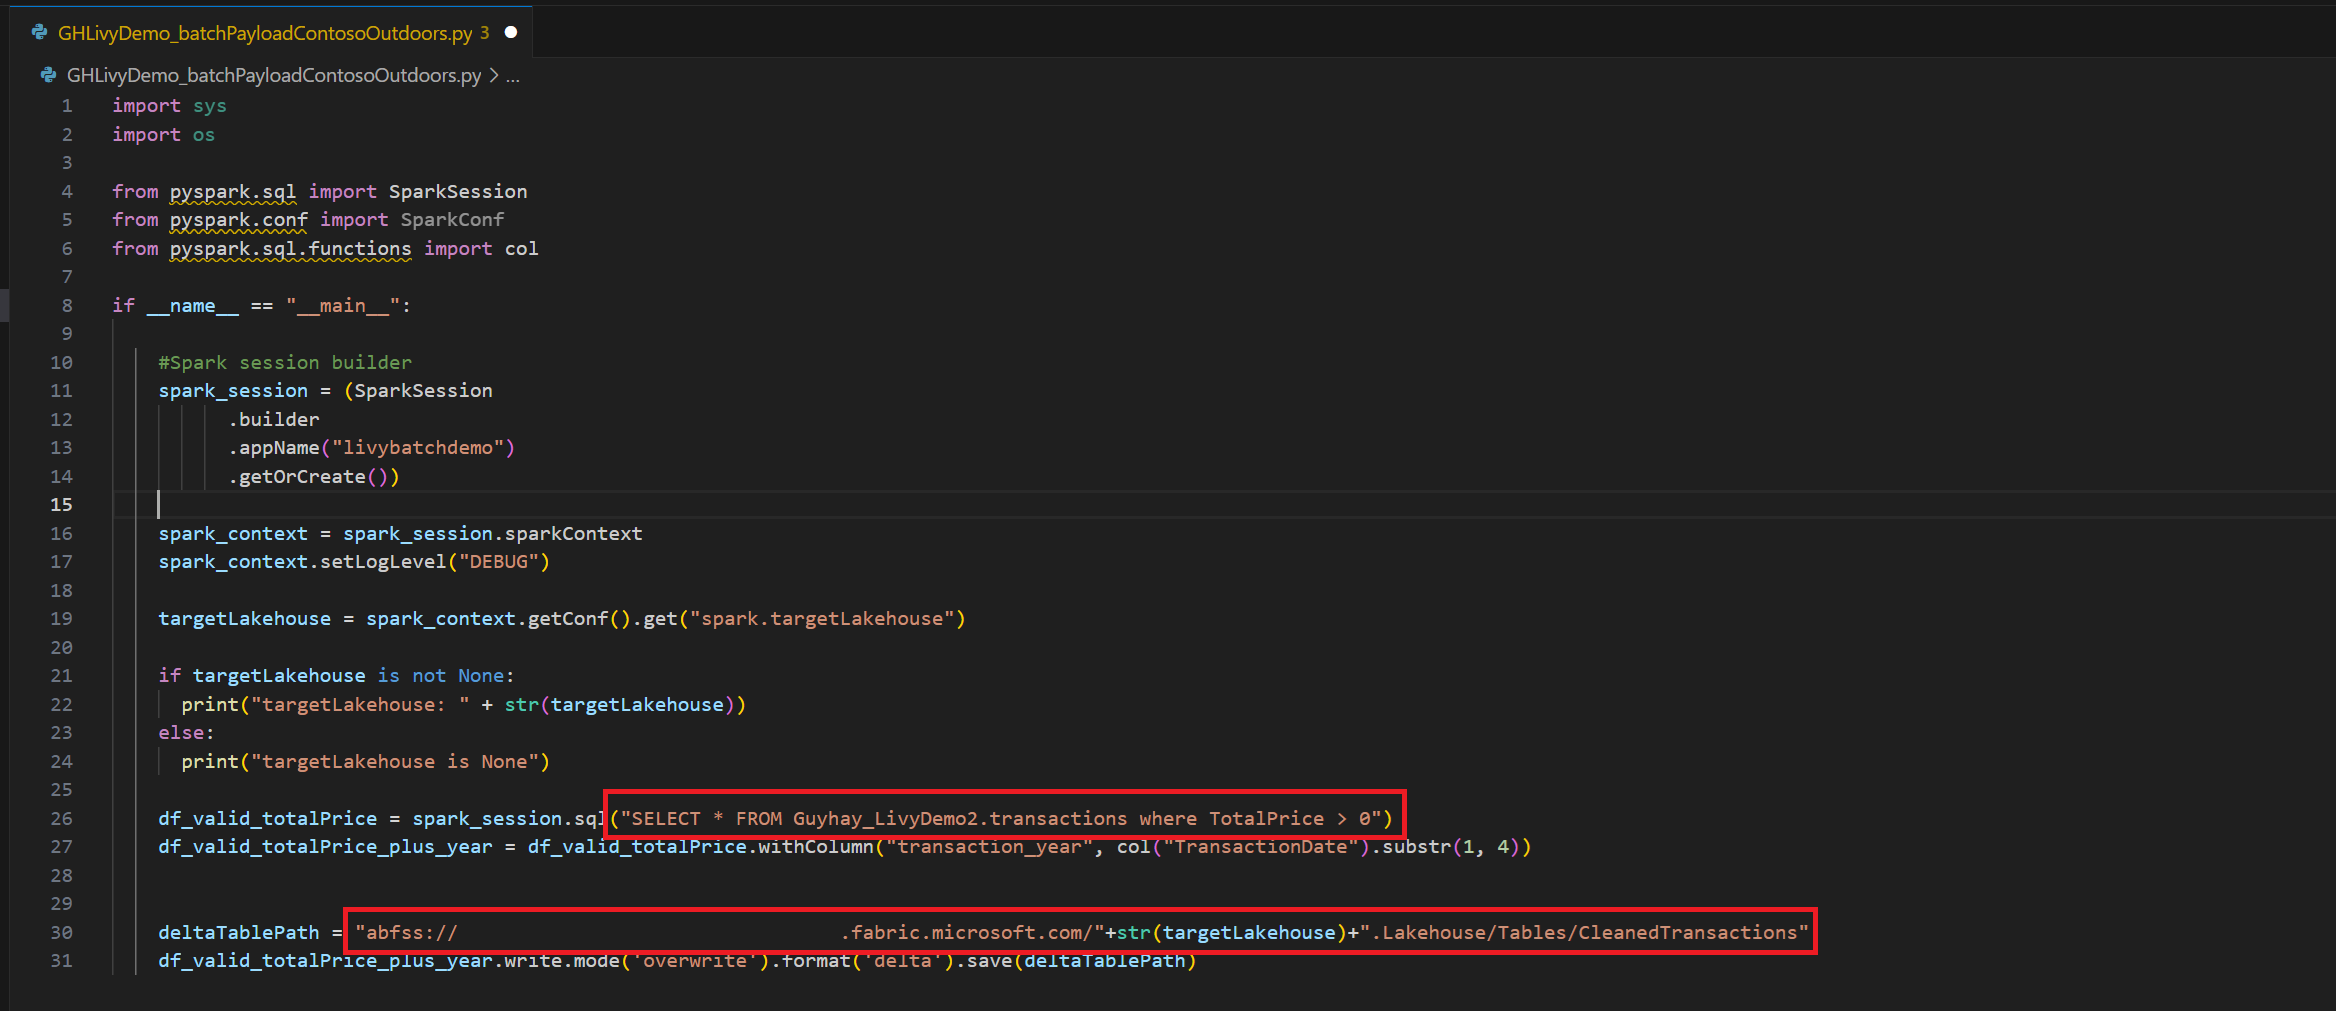
.ipynbnotebook in Visual Studio Code and insert the following codeimport sys import os from pyspark.sql import SparkSession from pyspark.conf import SparkConf from pyspark.sql.functions import col if __name__ == "__main__": #Spark session builder spark_session = (SparkSession .builder .appName("livybatchdemo") .getOrCreate()) spark_context = spark_session.sparkContext spark_context.setLogLevel("DEBUG") targetLakehouse = spark_context.getConf().get("spark.targetLakehouse") if targetLakehouse is not None: print("targetLakehouse: " + str(targetLakehouse)) else: print("targetLakehouse is None") df_valid_totalPrice = spark_session.sql("SELECT * FROM <YourLakeHouseDataTableName>.transactions where TotalPrice > 0") df_valid_totalPrice_plus_year = df_valid_totalPrice.withColumn("transaction_year", col("TransactionDate").substr(1, 4)) deltaTablePath = "abfss:<YourABFSSpath>"+str(targetLakehouse)+".Lakehouse/Tables/CleanedTransactions" df_valid_totalPrice_plus_year.write.mode('overwrite').format('delta').save(deltaTablePath)Save the Python file locally. This Python code payload contains two Spark statements that work on data in a Lakehouse and needs to be uploaded to your Lakehouse. You'll need the ABFS path of the payload to reference in your Livy API batch job in Visual Studio Code and your Lakehouse table name in the Select SQL statement..
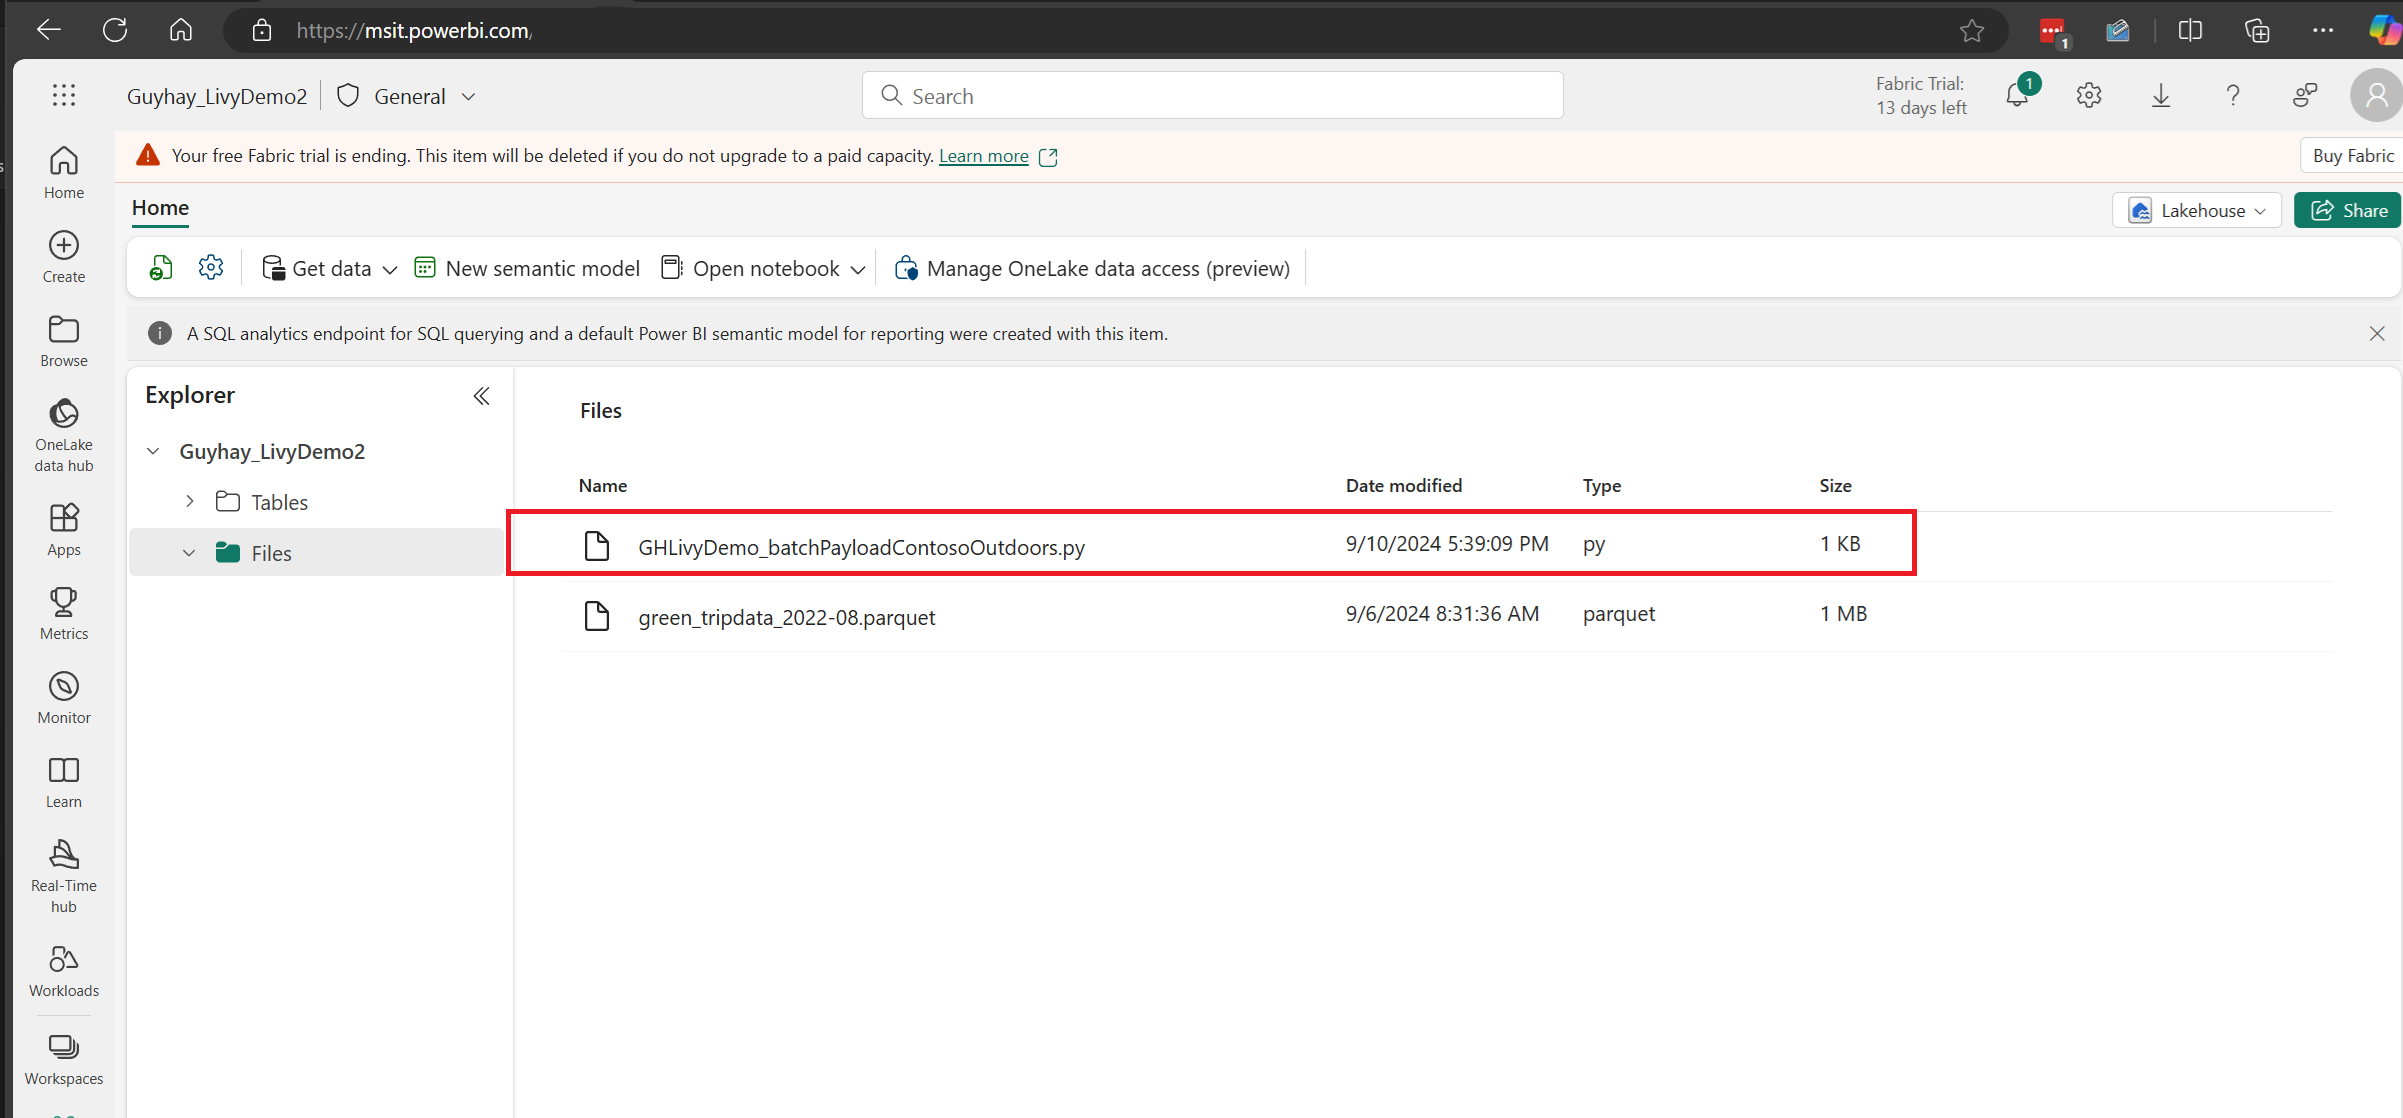
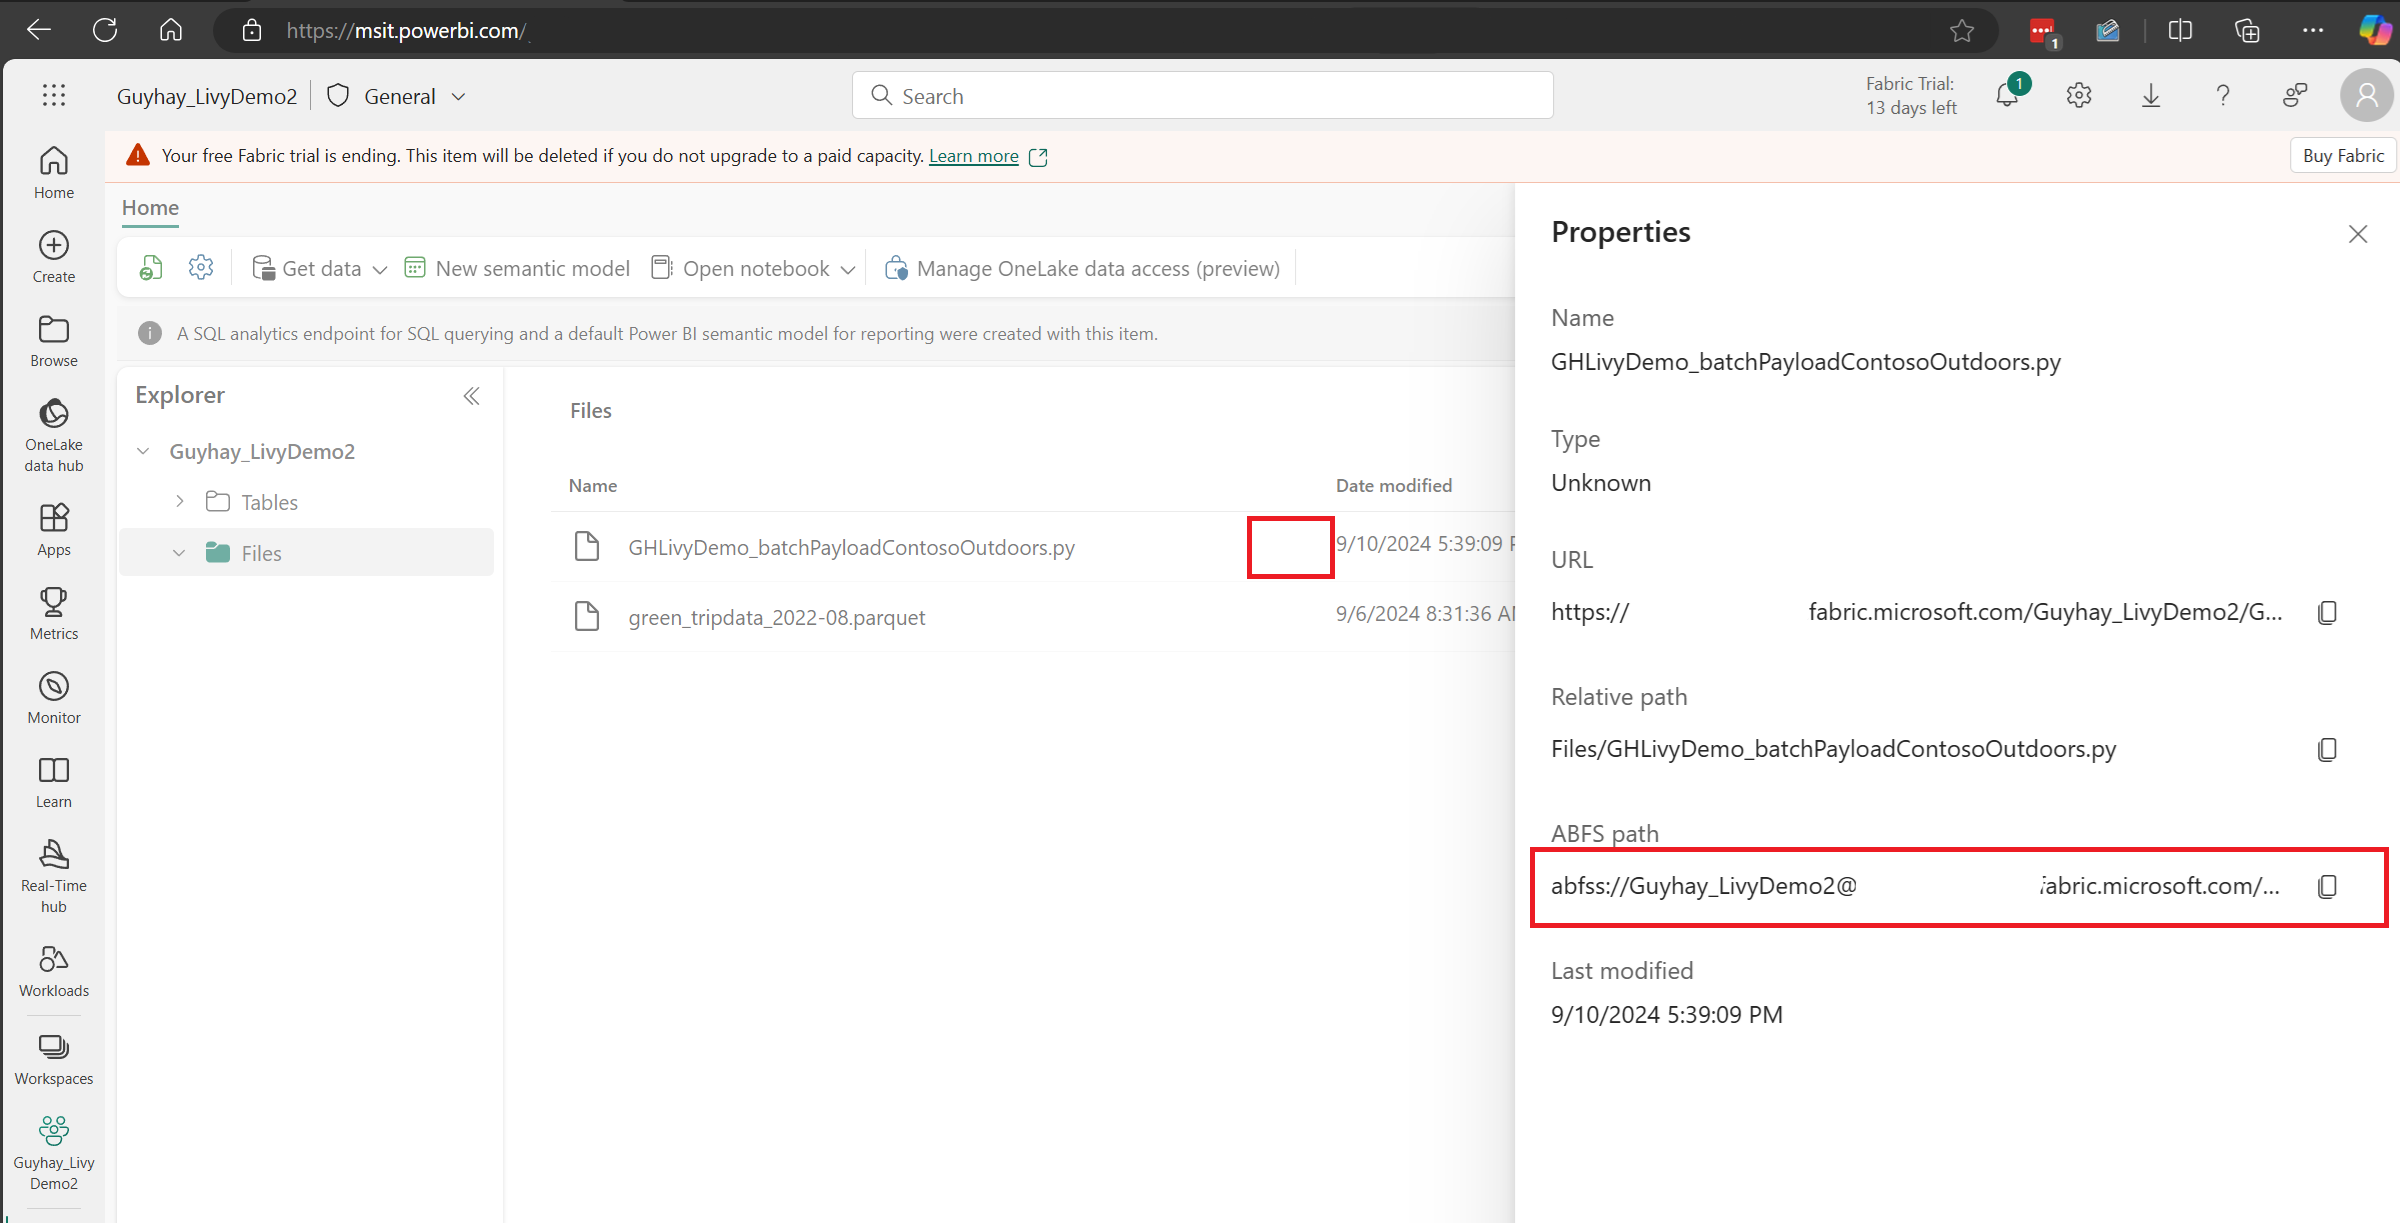
Upload the Python payload to the files section of your Lakehouse. > Get data > Upload files > click in the Files/ input box.
After the file is in the Files section of your Lakehouse, click on the three dots to the right of your payload filename and select Properties.
Copy this ABFS path to your Notebook cell in step 1.
Create a Livy API Spark batch session
Create an
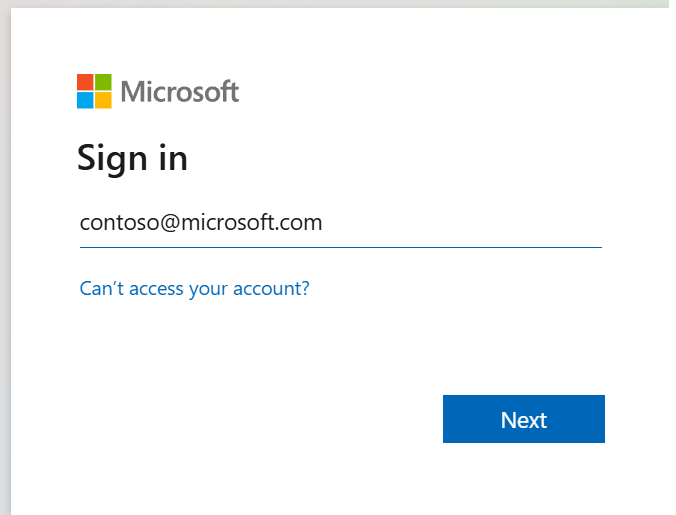
.ipynbnotebook in Visual Studio Code and insert the following code.from msal import PublicClientApplication import requests import time tenant_id = "<Entra_TenantID>" client_id = "<Entra_ClientID>" workspace_id = "<Fabric_WorkspaceID>" lakehouse_id = "<Fabric_LakehouseID>" app = PublicClientApplication( client_id, authority="https://login.microsoftonline.com/43a26159-4e8e-442a-9f9c-cb7a13481d48" ) result = None # If no cached tokens or user interaction needed, acquire tokens interactively if not result: result = app.acquire_token_interactive(scopes=["https://api.fabric.microsoft.com/Lakehouse.Execute.All", "https://api.fabric.microsoft.com/Lakehouse.Read.All", "https://api.fabric.microsoft.com/Item.ReadWrite.All", "https://api.fabric.microsoft.com/Workspace.ReadWrite.All", "https://api.fabric.microsoft.com/Code.AccessStorage.All", "https://api.fabric.microsoft.com/Code.AccessAzureKeyvault.All", "https://api.fabric.microsoft.com/Code.AccessAzureDataExplorer.All", "https://api.fabric.microsoft.com/Code.AccessAzureDataLake.All", "https://api.fabric.microsoft.com/Code.AccessFabric.All"]) # Print the access token (you can use it to call APIs) if "access_token" in result: print(f"Access token: {result['access_token']}") else: print("Authentication failed or no access token obtained.") if "access_token" in result: access_token = result['access_token'] api_base_url_mist='https://api.fabric.microsoft.com/v1' livy_base_url = api_base_url_mist + "/workspaces/"+workspace_id+"/lakehouses/"+lakehouse_id +"/livyApi/versions/2023-12-01/batches" headers = {"Authorization": "Bearer " + access_token}Run the notebook cell, a popup should appear in your browser allowing you to choose the identity to sign-in with.
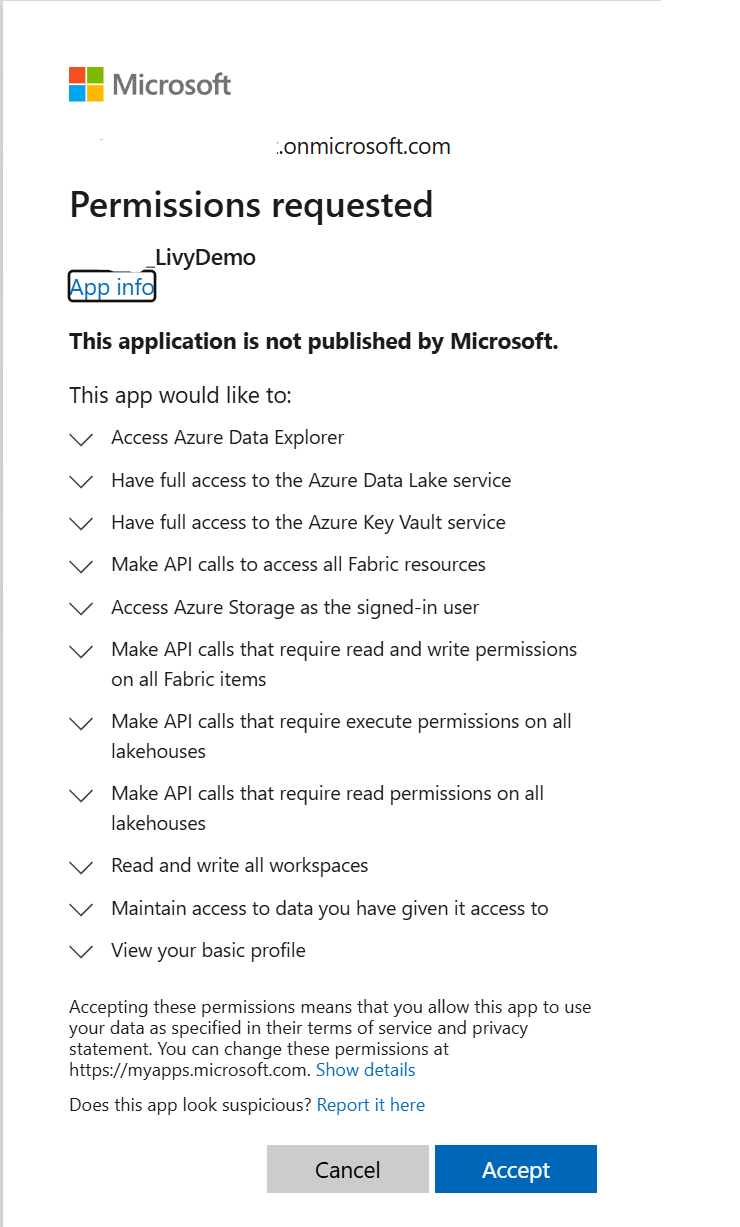
After you choose the identity to sign-in with, you'll also be asked to approve the Microsoft Entra app registration API permissions.
Close the browser window after completing authentication.
In Visual Studio Code you should see the Microsoft Entra token returned.
Add another notebook cell and insert this code.
# call get batch API

get_livy_get_batch = livy_base_url
get_batch_response = requests.get(get_livy_get_batch, headers=headers)
if get_batch_response.status_code == 200:
   print("API call successful")
   print(get_batch_response.json())
else:
   print(f"API call failed with status code: {get_batch_response.status_code}")
   print(get_batch_response.text)
Run the notebook cell, you should see two lines printed as the Livy batch job is created.
Submit a spark.sql statement using the Livy API batch session
Add another notebook cell and insert this code.
# submit payload to existing batch session

print('Submit a spark job via the livy batch API to ')

newlakehouseName = "YourNewLakehouseName"
create_lakehouse = api_base_url_mist + "/workspaces/" + workspace_id + "/items"
create_lakehouse_payload = {
   "displayName": newlakehouseName,
   "type": 'Lakehouse'
}

create_lakehouse_response = requests.post(create_lakehouse, headers=headers, json=create_lakehouse_payload)
print(create_lakehouse_response.json())

payload_data = {
   "name":"livybatchdemo_with"+ newlakehouseName,
   "file":"abfss://YourABFSPathToYourPayload.py",
   "conf": {
     "spark.targetLakehouse": "Fabric_LakehouseID"
   }
}
get_batch_response = requests.post(get_livy_get_batch, headers=headers, json=payload_data)

print("The Livy batch job submitted successful")
print(get_batch_response.json())
Run the notebook cell, you should see several lines printed as the Livy Batch job is created and run.
Navigate back to your Lakehouse to see the changes.
View your jobs in the Monitoring hub
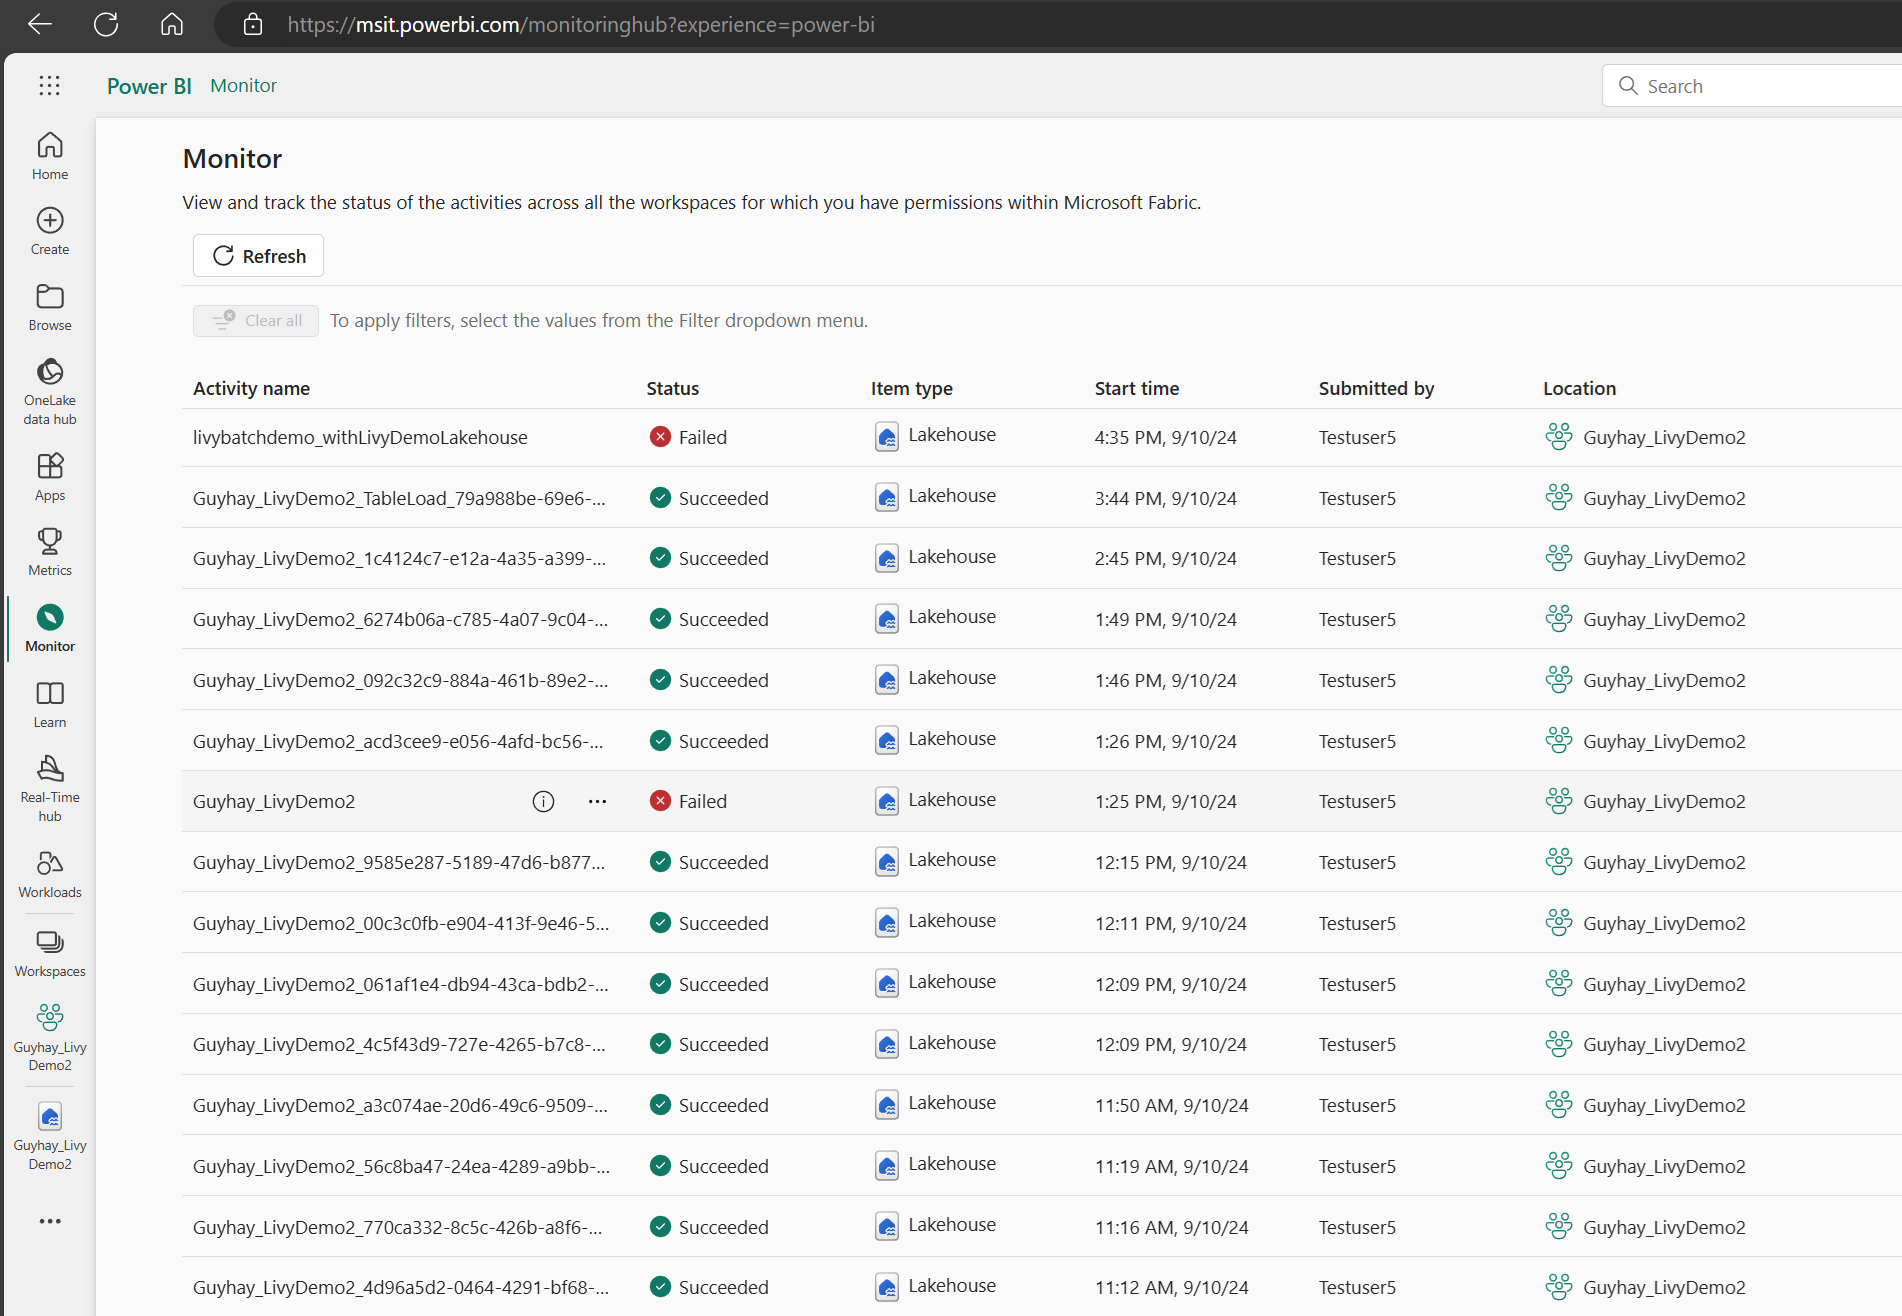
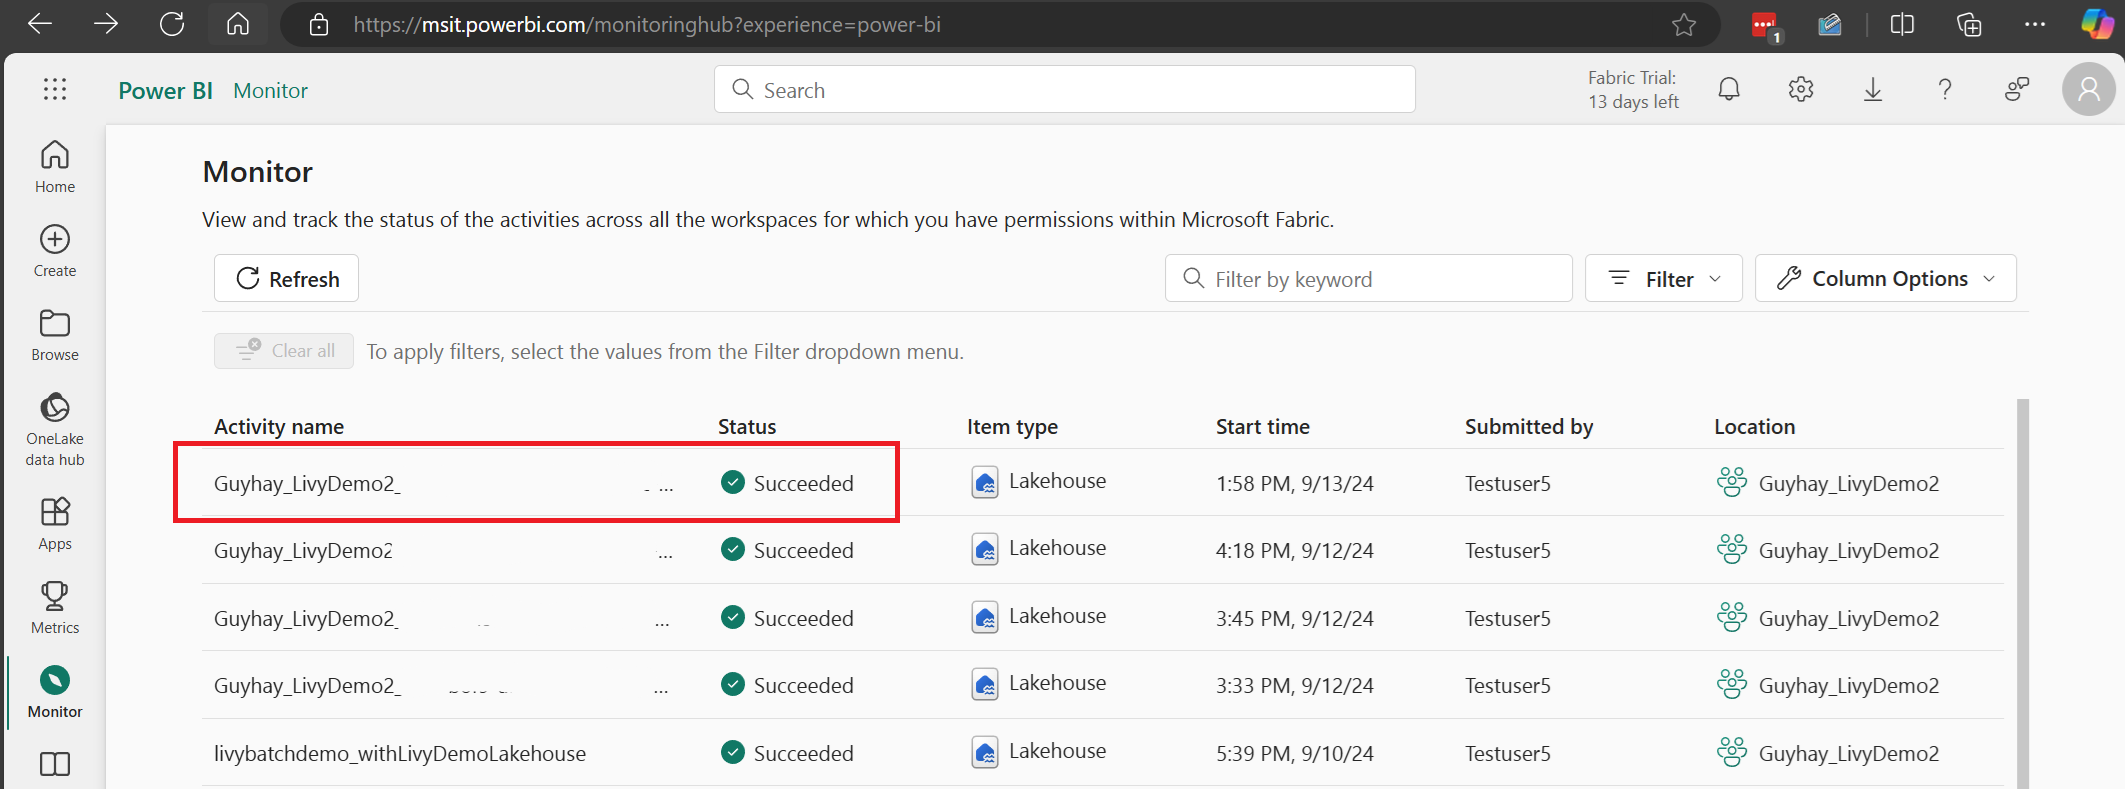
You can access the Monitoring hub to view various Apache Spark activities by selecting Monitor in the left-side navigation links.
When the batch job is completed state, you can view the session status by navigating to Monitor.
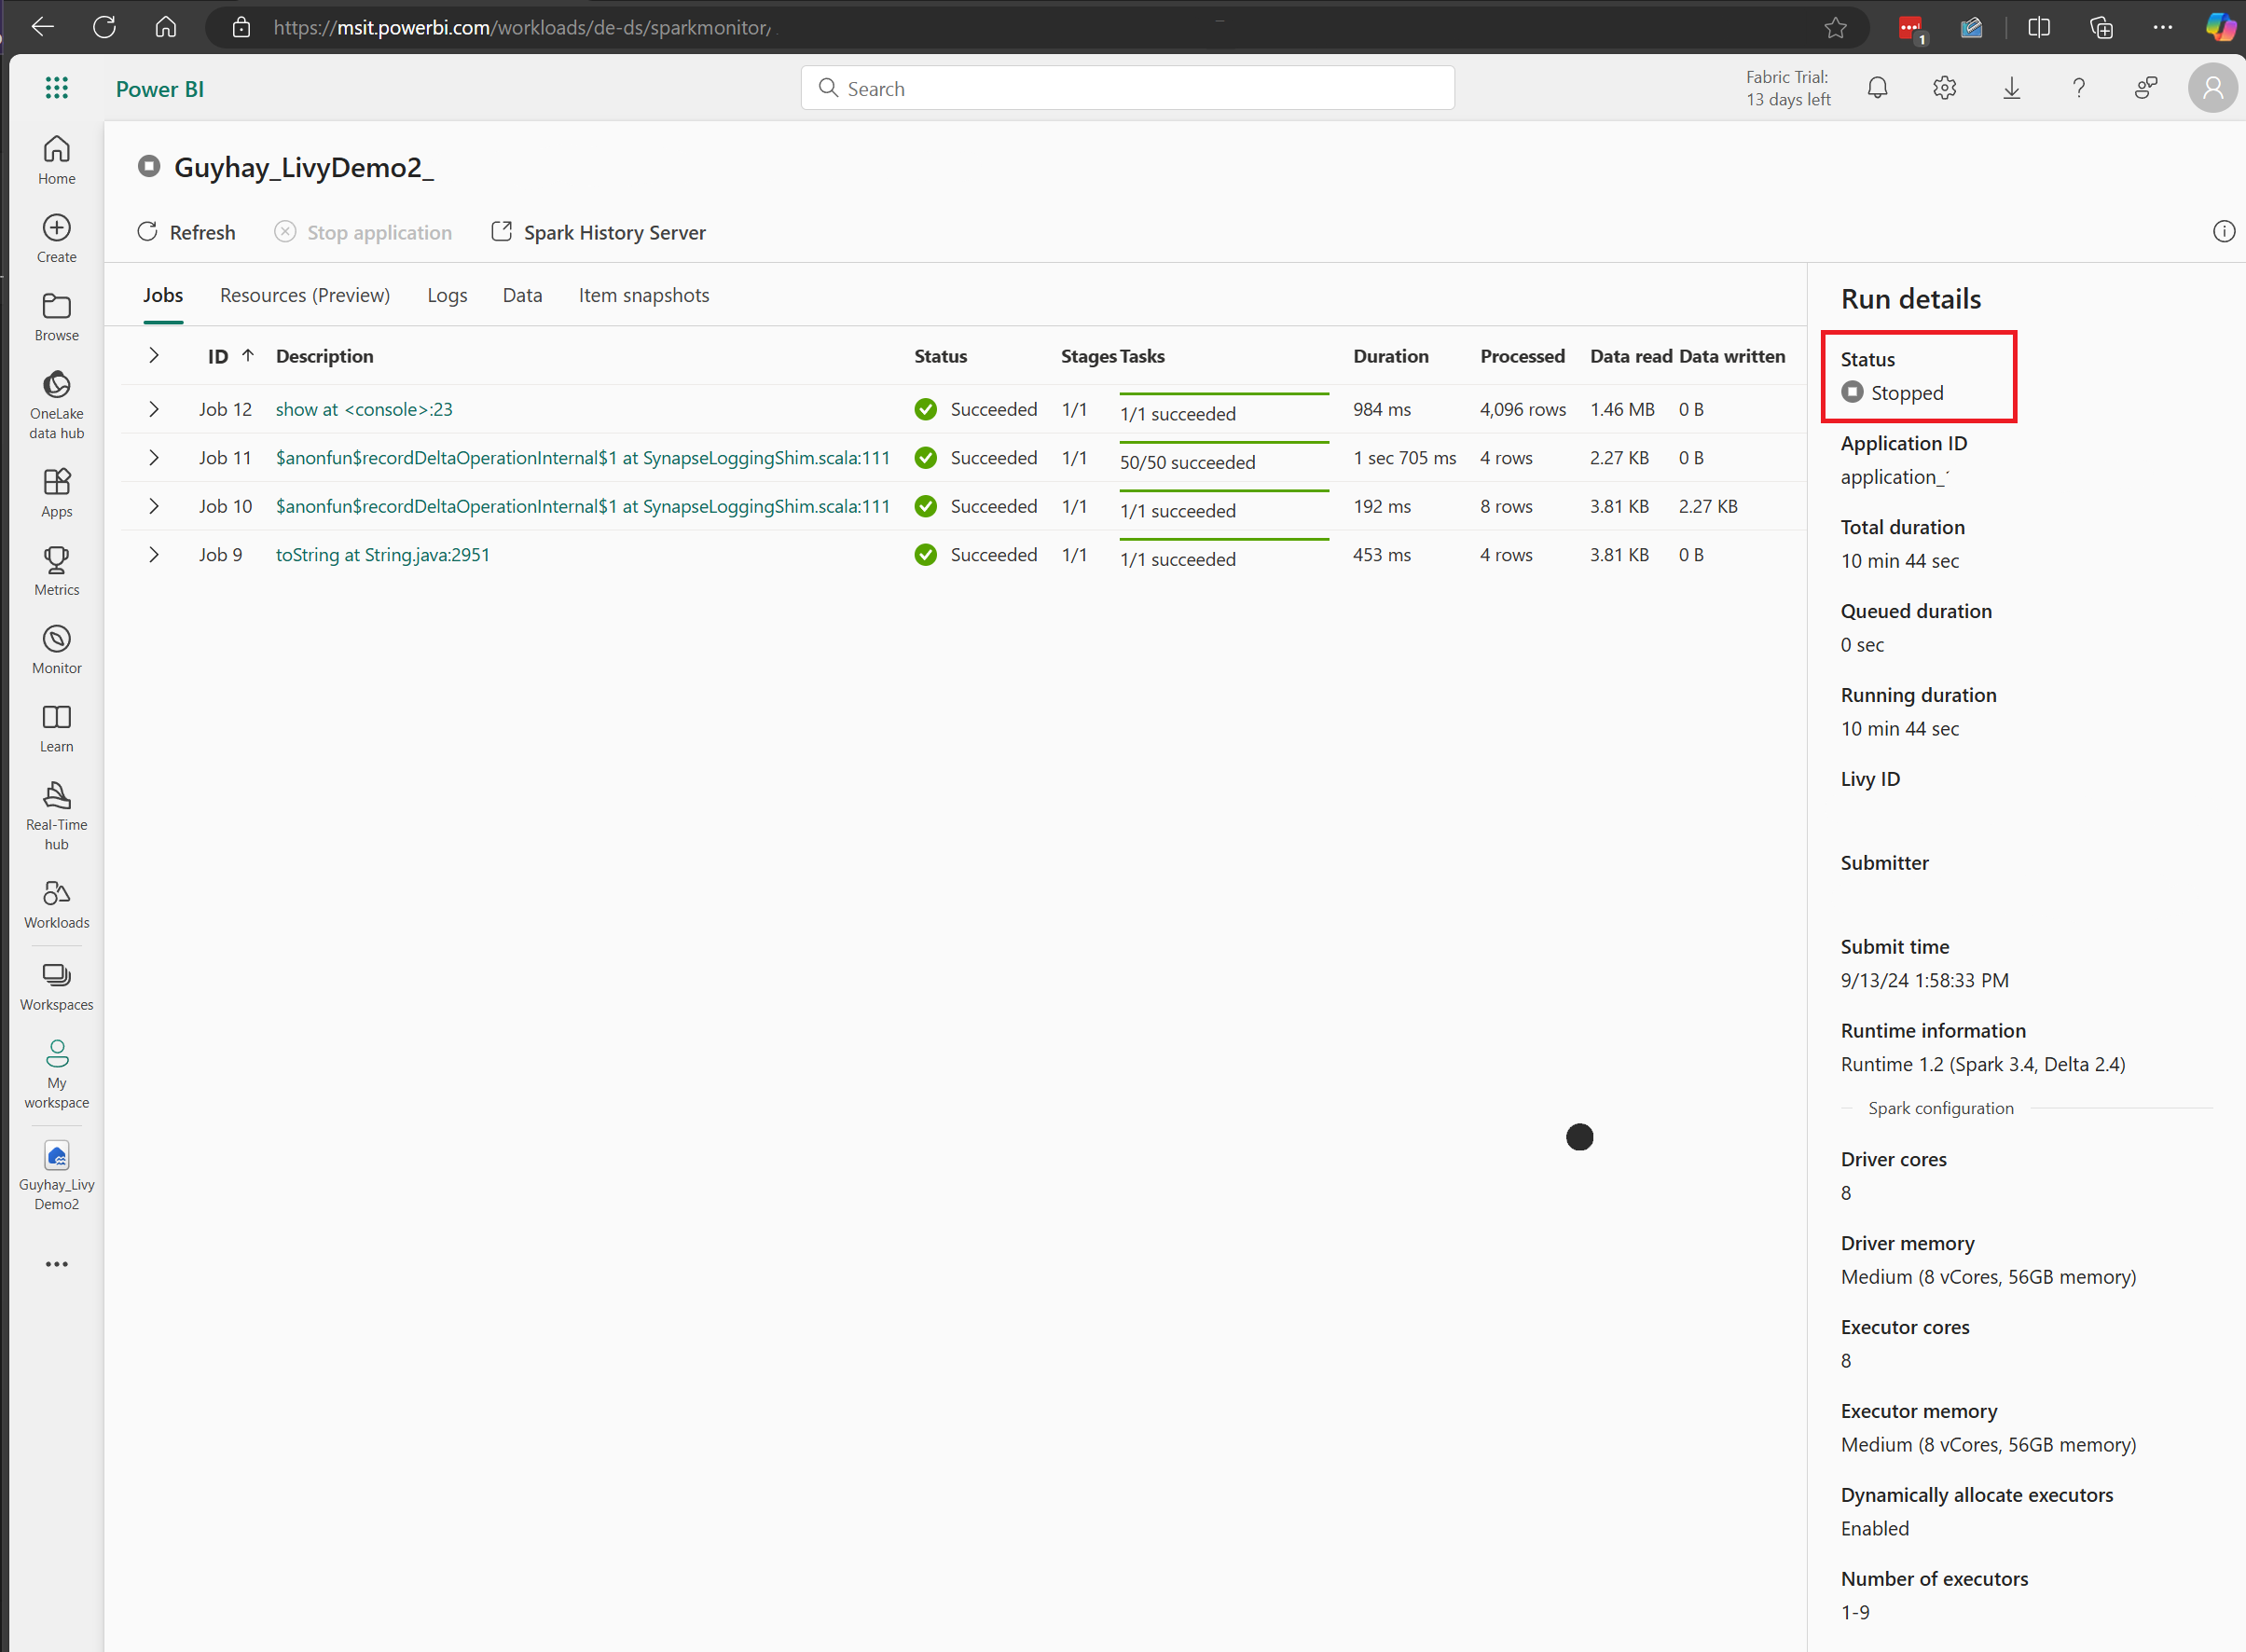
Select and open most recent activity name.
In this Livy API session case, you can see your previous batch submission, run details, Spark versions, and configuration. Notice the stopped status on the top right.
To recap the whole process, you need a remote client such as Visual Studio Code, a Microsoft Entra app token, Livy API endpoint URL, authentication against your Lakehouse, a Spark payload in your Lakehouse, and finally a batch Livy API session.

