Send email using the enhanced email experience
The enhanced email experience in customer engagement apps allows users to compose an email without leaving the record they're working on.
What can I do with email experience?
Using the enhanced email experience, you can:
- Navigate to different pages without losing the email content.
- Minimize the email window to get back to the records you were working on.
- Expand the email editor pop-up window to see more email options.
- Simultaneously open three email compose pop-up windows.
- Search for and apply a predefined template to an email you're composing.
- Insert attachments to email.
Note
- System administrators must enable the enhanced email experience before you can use it.
- The enhanced email experience is available only for email activities created from the Timeline section of any customer engagement app.
- The enhanced email pop-up window opens only when the height and width of your screen size is at least 400 x 650 pixels or greater. If lower, you will be taken to the standard form instead of the enhanced email experience.
- If you try to navigate to a record (by selecting a record in the lookup field) while working in the Enhanced Email form, an error message is displayed. You cannot navigate to another record from within the Enhanced Email form.
Compose an email using the enhanced experience
In the Timeline section of the account, contact, lead, or opportunity records, select + and then under Activities, select Email.
A new email pop-up window opens.
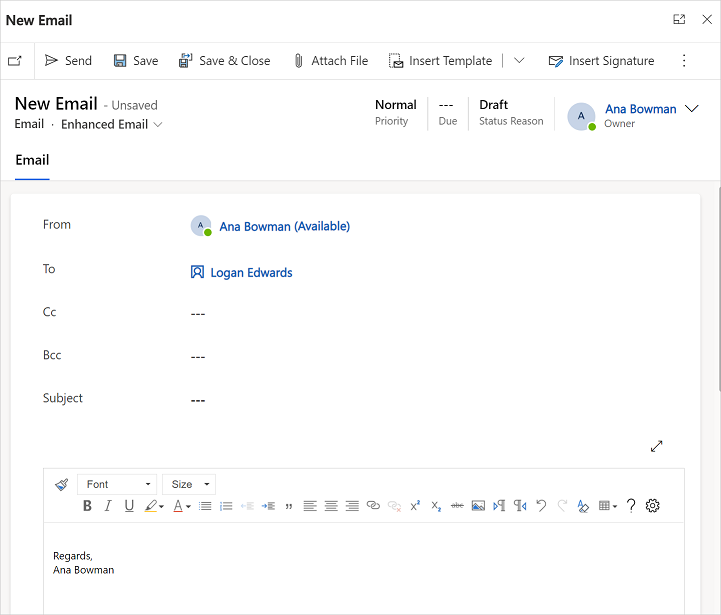
The From and To fields are automatically populated based on the user and the account and contact of the original record.
Write your email from scratch or select Insert Template to search for and apply a template.
Select Attach file if you want to add attachments.
Select Insert signature to search for and add your signature.
When you're done, select Send.
For more information about the email functionality, see Understand the email experience.
Set default font and size
Set the default font and size so that every email you create uses that font setting. For more information about setting the default font and size, see Set the default font and font size.
Can't find the feature in your app?
There are a few possibilities:
- You don't have the necessary license to use this feature. Check out the comparison table and the licensing guide to see which features are available with your license.
- You don't have the necessary security role to use this feature.
- To configure or setup a feature, you need to have the Administration and customization roles
- To use sales-related features, you need to have the Primary sales roles
- Some tasks require specific Functional roles.
- Your administrator hasn't turned on the feature.
- Your organization is using a custom app. Check with your administrator for exact steps. The steps described in this article are specific to the out-of-the-box Sales Hub and Sales Professional apps.