View and understand the Ongoing conversation report in Omnichannel real-time analytics
Omnichannel for Customer Service offers a suite of capabilities that extend the power of Dynamics 365 Customer Service Enterprise to enable organizations to instantly connect and engage with their customers across digital messaging channels. An additional license is required to access Omnichannel for Customer Service. For more information, see the Dynamics 365 Customer Service pricing overview and Dynamics 365 Customer Service pricing plan pages.
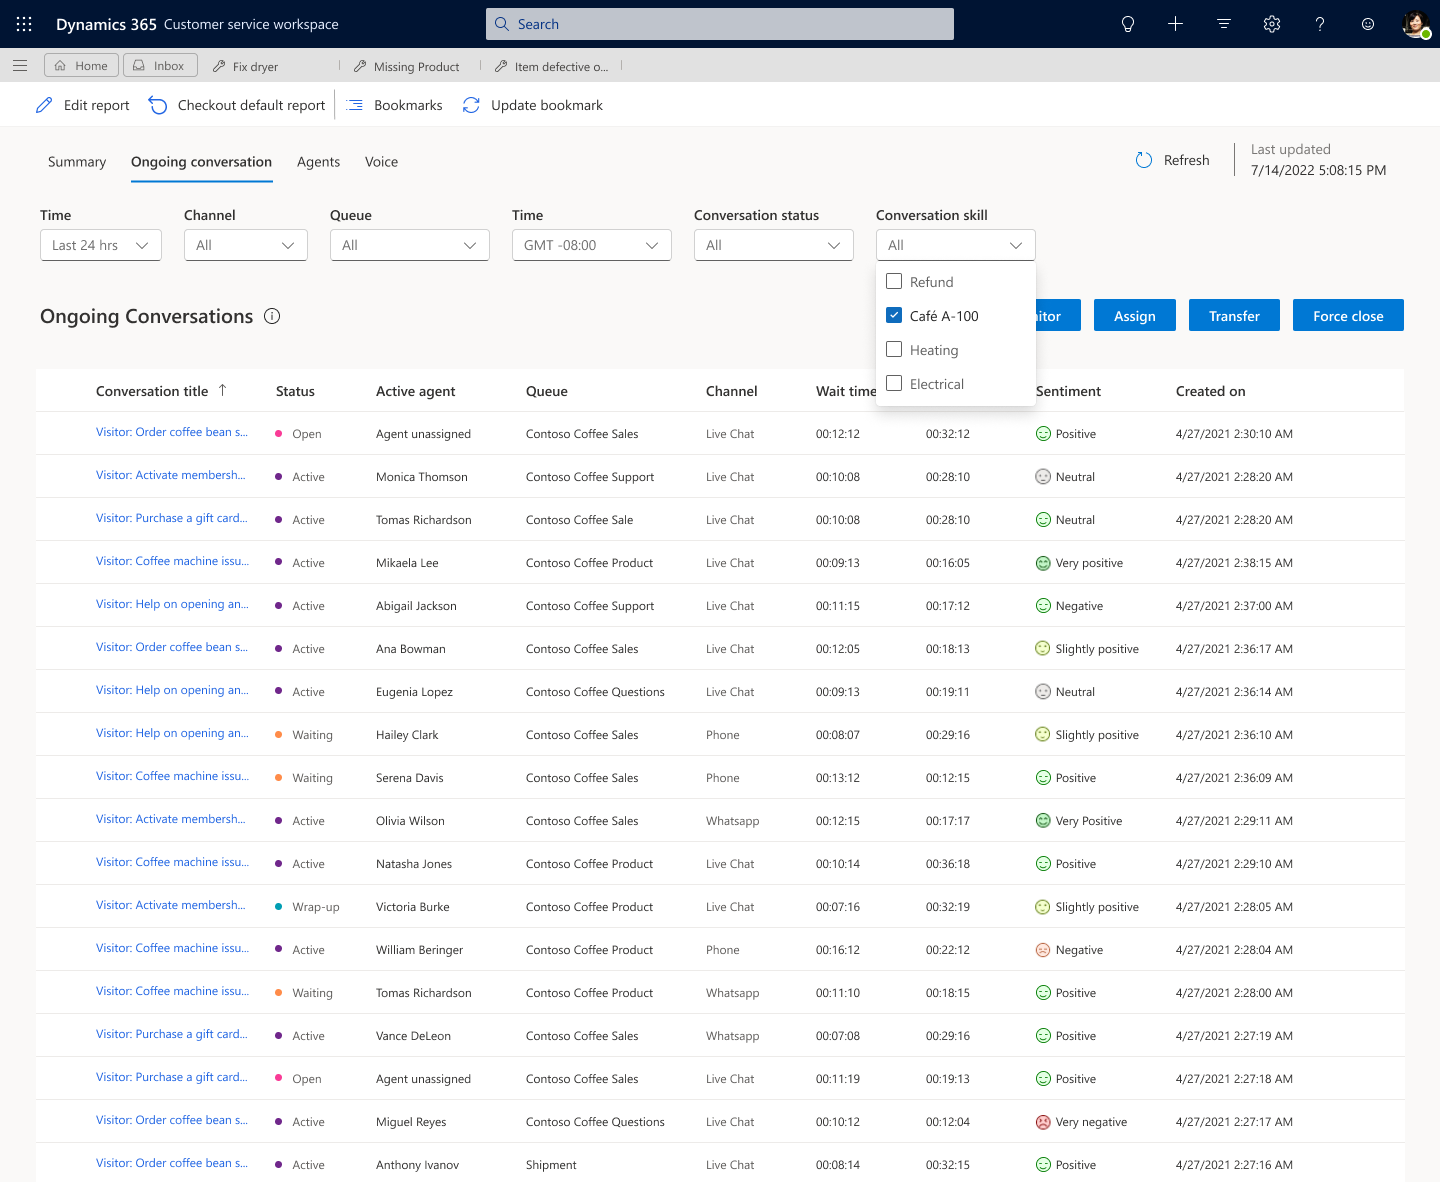
The Ongoing conversation report shows ongoing conversations from the last 24 hours that are currently being handled by customer service representatives (service representatives) in your organization and that aren't yet closed. The report displays those conversations that have the open, active, wrap-up, or waiting status. Learn more in Understand conversation states.
This report provides a holistic view of the conversations in real time. It includes details about subject, status, active service representative details, queue, channel, wait time, handle time, and customer sentiment. Learn more in Overview of Omnichannel real-time analytics dashboards.
Note
- Only digital messaging, chat, and voice channels are supported. Record routing isn't supported.
- The reports are prefiltered based on the queues you are logged in to as a supervisor. So you'll see metrics and conversations relevant to the assigned queues only.
Learn more about the metrics that are shown on the Ongoing conversation report.

You can perform different actions, such as assign or transfer a conversation, as described in the following sections.
Assign or transfer conversations
You can view service representative skills and proficiency, availability, and available capacity. These insights help you effectively manage and allocate resources. You can assign or transfer conversations to service representatives who are part of the current queue only. You can manage the queues for service representatives. Learn more in Manage users.
Refer to the following table to see when assign and transfer are enabled, depending on the various conversation states.
| Type | Conversation state | Assign | Transfer |
|---|---|---|---|
| Record | Open | Assign to queue | Not enabled |
| Record | Open | Assign to agent | Not enabled |
| Record | Active | Not enabled | Transfer to agent |
| Record | Wrap-up | Not enabled | Not enabled |
Assign conversations
In the Contact Center workspace or Customer Service workspace app, go to the dashboard view selector, and then select the Ongoing Conversations report.
Select a conversation in an Open state, and then select Assign.
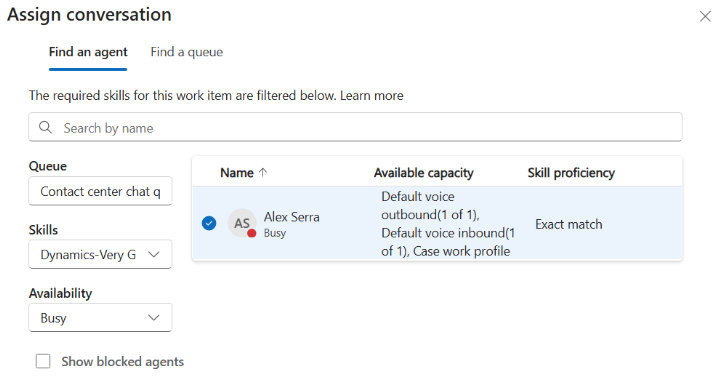
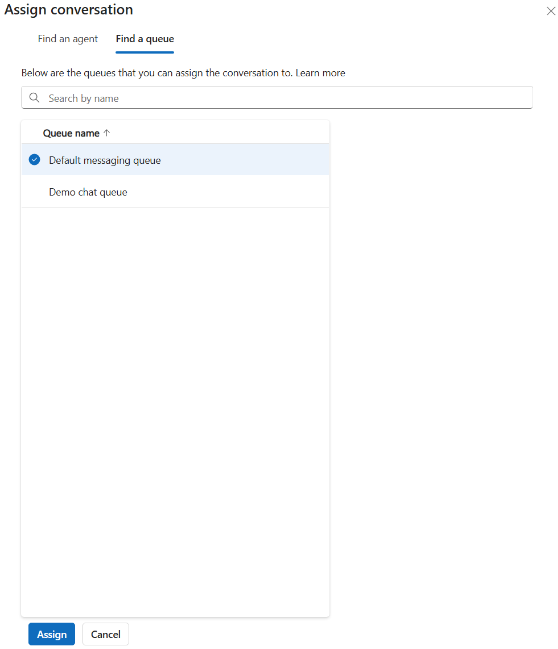
In the Assign conversations dialog, select Find an agent or Find a queue. If you select Find an agent, only those service representatives whose presence matches with one of the allowed presence values in the workstream configuration are displayed.

If you select Find a queue, all other queues—except the one to which the conversation is currently assigned—are displayed.

Select Assign.
Transfer conversations
Once a conversation is assigned to an agent, it's in the Active state. You can select the conversation and transfer it.
Select a conversation in the Active state, and then select Transfer.
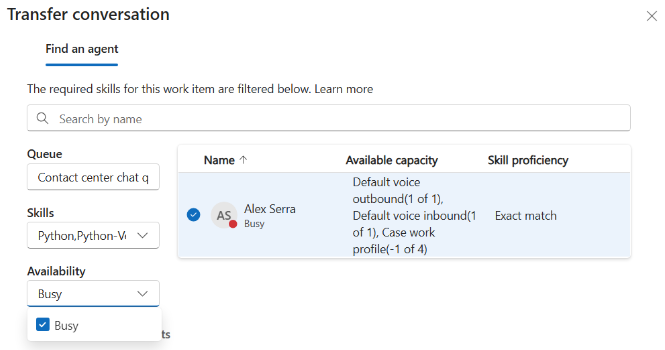
In the Transfer conversation dialog, select an agent from the list of service representatives that appears. A list of service representatives belonging to the same queue and whose presence matches with one of the allowed presence values in the workstream configuration is displayed.

Select Transfer. The system transfers the selected conversation to the agent.
Monitor conversations
Listen to an ongoing conversation. When you select Monitor, you receive a message that indicates that monitoring started. This action is applicable to active conversations that the service representative accepted, conversations that are in a wrap-up state, and conversations that are in a waiting state only. If you have the agent app open in multiple tabs or browsers, the monitored conversation opens in the one where you select Monitor. Other browsers remain as-is.
From the dashboard view selector, select the Ongoing Conversations report. The list of conversations that your service representatives are currently handling appears.
Select a conversation that you want to monitor, and then select Monitor. The conversation page opens.
Optionally, to join a conversation, select Join chat in the communication panel.
Both the service representative and the customer receive notifications when you join a conversation. Depending on your requirements, you can consult with the service representative and customer. Learn more in View communication panel.
Force close conversations
Caution
We recommend that you use the Force close option cautiously.
Forcibly close a conversation by closing the work item. When you select Force close, a confirmation message appears. You must select Proceed to close the work item. When you forcibly close a conversation, the conversation immediately ends for the customer too.
From the dashboard view selector, select the Ongoing Conversations report.
Select a conversation and then select Force Close.
The participants receive a notification that a supervisor ended their conversation.
Assign, transfer, monitor, or force close conversations in customized reports
To be able to perform the actions on your customized reports, you must complete the following prerequisites:
- Enable all of the customizations in data model customization, including step 4 Step 4: Embed customized reports back to Dynamics 365.
- Create reports using the out-of-the-box data model in your custom reports.
- Make sure appropriate roles exist for viewing and embedding reports. Learn more in Configure analytics and insights dashboards.
In Customer Service workspace, go to Customized reports > Ongoing conversations report, and then select the conversation that needs to be updated.
When the Agent Name doesn't exist, the following options are enabled.
- Assign: You can assign an agent by queue for the conversation.
- Force close: You can force close the conversation if necessary.

When the Agent Name exists, the following options are enabled.
- Transfer: You can transfer the conversation from one agent to another in the same queue.
- Monitor: You can open the conversation dialog to monitor the chat.
- Force close: You can force close the conversation if necessary.

Refer to the following table to see the actions that are enabled, depending on the various conversation states.
| Type | Conversation state | Assign | Transfer | Monitor | Force close |
|---|---|---|---|---|---|
| Record | Open | Assign to queue | Not enabled | Not enabled | Enabled |
| Record | Open | Assign to agent | Transfer to agent | Not enabled | Enabled |
| Record | Active | Assign to agent | Transfer to agent | Not enabled | Enabled |
| Record | Wrap-up | Not enabled | Not enabled | Enabled | Enabled |
After you assign or transfer conversations, manually refresh the report to view the latest status.
Related information
Use report metrics
Manage real-time analytics reports in Omnichannel for Customer Service
Overview of Omnichannel real-time analytics dashboard
View and understand the Voice report in Omnichannel real-time analytics
View and understand the Agents report in Omnichannel real-time analytics
View and understand the Summary report in Omnichannel real-time analytics