Accessibility and keyboard shortcuts
General accessibility for Dynamics 365 applications
Dynamics 365 Customer Insights - Journeys supports most (but not all) of the same keyboard shortcuts and accessibility features provided for other model-driven apps in Dynamics 365. For details, see the following help topics:
Important
If you're working on an iOS device and using an attached keyboard, then use option+tab to move between user-interface elements (such as links, buttons, and tabs). The standard keyboard navigation technique for this is to use tab alone, but because Dynamics 365 Customer Insights - Journeys sometimes uses specialized HTML constructs to create its feature (especially for the content and pipeline designers), some buttons and links will be skipped if you use tab alone. But if you use option+tab, you'll be able to navigate to everything.
Accessibility and keyboard shortcuts for content designers
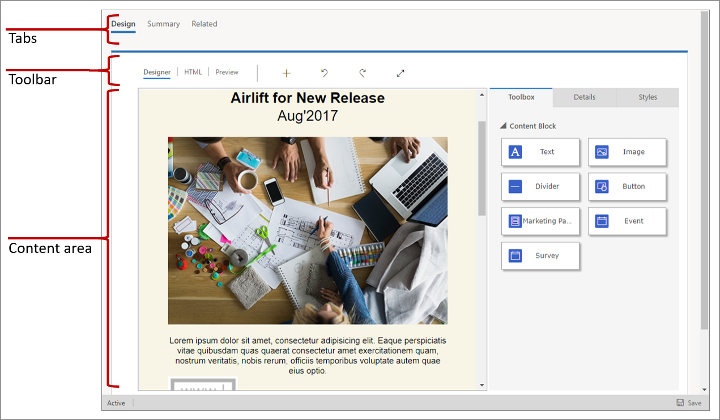
Dynamics 365 Customer Insights - Journeys provides advanced digital-content designers for creating, styling, and previewing the various types of digital content that you can produce and manage with the system. This section lists keyboard shortcuts and accessibility features that are available for working with the designers for marketing email messages, marketing pages, and marketing forms.

More information: Design your digital content
Important
For keyboard shortcuts that include a number, you usually need to use the standard number keys, not the number pad.
General keyboard commands and accessibility
- Alt+0: Opens the Accessibility Instructions dialog box.
- Alt+F10: Enters the toolbar or the tab list of the currently open dialog box for editors other than the email editor.
- Alt+F9: Enters the toolbar or the tab list of the currently open dialog box (email editor only).
- Tab: Moves to the next toolbar button group, context menu sub-option, elements path element, dialog box element, or dialog box tab while in the tab list.
- Right arrow: Moves to the next toolbar button within the group, context menu sub-option, elements path element, dialog box element, or dialog box tab while in the tab list.
- Tab or Down arrow: Moves to the next drop-down list or context menu option.
- Shift+Tab: Moves to the previous toolbar button group, context menu parent option, elements path element, dialog box element, or dialog box tab while in the tab list.
- Left arrow: Moves to the previous toolbar button within the group, context menu parent option, elements path element, dialog box element, or dialog box tab while in the tab list.
- Shift+Tab or Up Arrow: Moves to the previous drop-down list or context menu option.
- Spacebar or Enter: Activates a toolbar button, a context menu option, a drop-down list option, an elements path element, or a dialog box tab after it is selected. Also activates a context menu sub-menu, if one is available.
Getting around in the designer
- Alt+Ctrl+0: Go to the menu bar.
- Alt+Ctrl+1: Open the desktop preview.
- Alt+Ctrl+2: Open the tablet portrait preview.
- Alt+Ctrl+3: Open the tablet landscape preview.
- Alt+Ctrl+4: Open the mobile portrait preview.
- Alt+Ctrl+5: Open the mobile landscape preview.
- Alt+1: Open the Designer editor tab.
- Alt+2: Open the HTML editor tab.
- Alt+3: Open the Preview tab.
- Alt+11: Toggle the full screen view of the design editor.
Manipulate design elements
- Alt+M: Move the selected element.
- Alt+Shift+C: Clone the selected element.
- Alt+Shift+D: Delete the selected element.
- Alt+4: Open the Toolbox panel.
- Alt+5: Open the Properties panel.
- Alt+6: Open the Styles panel.
- Alt+X: Go back to the active element (for example, from the Properties panel).
Working with text element content
When a text element is selected, you are able to enter and style text within that element. The keyboard shortcuts listed in the following subsections are active while you are working with a text element.

Navigating within a text element
- Home: Goes to the beginning of the line.
- Ctrl+Home: Goes to the beginning of the text element.
- End: Goes to the end of the line.
- Ctrl+End: Goes to the end of the text element.
- Page down: Scrolls down the text element, by approximately the length of the editing area.
- Page up: Scrolls up the text element, by approximately the length of the editing area.
Writing in a text element
- Enter (Return): Ends a paragraph and starts a new one.
- Shift+Enter: Adds a line break.
- Shift+Ctrl+3: Enables entering content (by adding a new paragraph) before a problematic element such as an image, table or <div> element that starts or ends a document, list, or even adjacent horizontal lines.
- Shift+Ctrl+4: Enables entering content (by adding a new paragraph) after a problematic element such as an image, table or <div> element that starts or ends a document, list, or even adjacent horizontal lines.
- Backspace or Del: Deletes a character.
- Ctrl+Backspace or Ctrl+Del: Deletes a word.
Undo and redo
- Ctrl+Z: Performs the undo operation.
- Ctrl+Y or Shift+Ctrl+Z: Performs the redo operation.
Cut, copy, and paste
- Ctrl+X or Shift+Del: Cuts a text fragment to the clipboard.
- Ctrl+C: Copies a text fragment to the clipboard.
- Ctrl+V or Shift+Insert: Pastes a text fragment from the clipboard.
- Shift+Ctrl+V: Pastes content from the clipboard as plain text.
Selecting text
- Ctrl+A: Selects all the contents of the current text element.
- Shift+Arrow: Selects a text fragment by letters.
- Ctrl+Shift+Arrow: Selects a text fragment by words.
- Shift+Home: Selects a text fragment from the cursor to the beginning of the line.
- Shift+End: Selects a text fragment from the cursor to the end of the line.
- Ctrl+Shift+Home: Selects a text fragment from the cursor to the beginning of the text element.
- Ctrl+Shift+End: Selects a text fragment from the cursor to the end of the text element.
- Shift+Page down: Selects a text fragment of approximately the length of the editing area starting from the cursor and going down.
- Shift+Page up: Selects a text fragment of approximately the length of the editing area starting from the cursor and going up.
Text styling
- Ctrl+B: Applies bold formatting to the selected text.
- Ctrl+I: Applies italics formatting to the selected text.
- Ctrl+U: Applies underline formatting to the selected text.
- Tab: Indents a list.
- Shift+Tab: Outdents a list.
Copy formatting
- Ctrl+Shift+C: Copies the inline formatting from to the selected text and enables sticky mode.
- Ctrl+Shift+V: Applies the previously copied inline formatting to the selected text.
- Esc: Disables sticky mode.
Links and assist edit
- Ctrl+L: Opens the Link dialog box.
- Alt+Down-Arrow: Open assist edit inside a text element.
- Alt+Down-Arrow or Down-Arrow: Open assist edit inside the link field (or any field that supports assist edit).
Keyboard shortcuts for customer journeys and lead scoring models
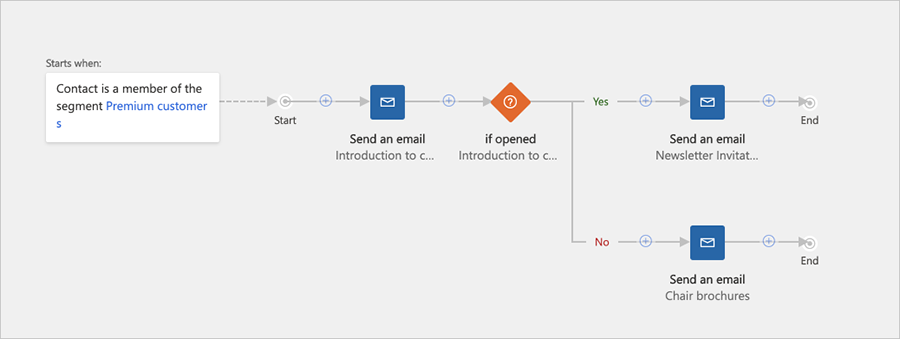
Most of the standard navigation and selection keyboard commands also work when you are designing a customer journey or lead scoring model. In addition, some special assistance is provided to let you work with the tiles and arrange them on the canvas.

Navigate to and within the side panel
The journey and scoring-model designers include a side panel that provides up to three tabs: a Toolbox of tiles that you can add to your design, Properties for configuring a tile selected on the canvas, and Grades for setting grade thresholds (lead-scoring only). When one of these tabs is open, you can navigate to and among its settings using the tab and arrow keys on your keyboard.
To navigate the side panel:
- Press tab until you've selected the side panel, where one tab is currently active.
- Use the arrow keys to switch the active side-panel tab. The tab is activated as soon as you select it.
- Press tab to move between the active (editable) settings available in the current side-panel tab, or eventually to navigate away from the side-panel tab.
- If you're using a screen reader and would like to read values for read-only (inactive) settings, then use arrow keys to navigate between the display values.
Place a new tile
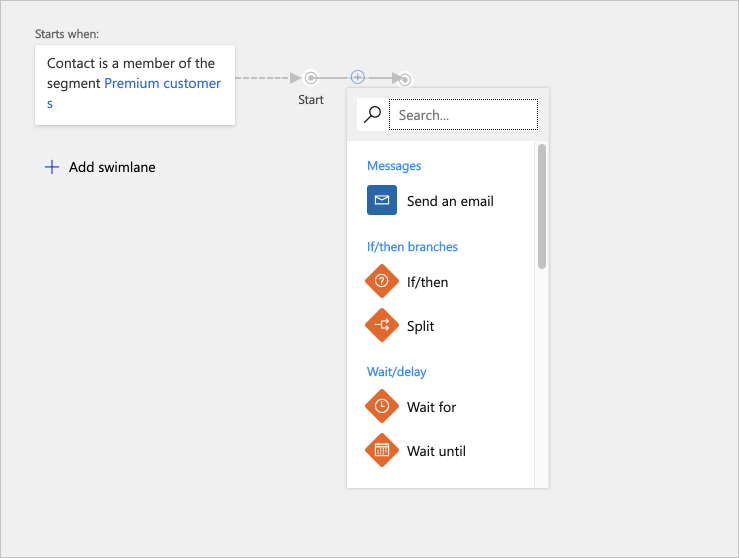
- Press tab until you've selected the Add button in the canvas toolbar.
- Press space to open the Add menu.
- Use the arrow keys to select a tile type from the Add menu.
- Press space to choose the tile type currently selected in the Add menu.

- Use the arrow keys to select where you want to insert the new tile in the pipeline. Select a new-tile position to place the tile in a new position, or select an existing tile to place the tile as a child of that tile.
- Press space to place the tile in the selected position.
Delete a tile
- Press tab until you've selected the canvas.
- Use the arrow keys to select the target tile.
- Press delete to delete the selected tile.
Copy (or cut) and paste a tile
- Press tab until you've selected the canvas.
- Use the arrow keys to select the tile you want to cut or copy.
- Press Ctrl+C to copy or Ctrl+X to cut.
- Press Ctrl+V to activate paste mode.
- Use the arrow keys to select where you want to insert the copied tile in the pipeline.
- Press space to place the tile in the selected position.
Expand a tile with child tiles
- Press tab until you've selected the canvas.
- Use the arrow keys to select the tile you want to expand.
- Press space to expand the tile.
- Use the arrow keys to move among the exposed child tiles.
Set tile properties
- Make sure the Properties canvas tab is active as described in Move between canvas tabs.
- Press tab until you've selected the canvas.
- Use the arrow keys to select the tile you want to configure.
- Press enter to open the selected tile's settings in the Properties canvas tab.
- Press tab until you've selected the property you want to set in the Properties canvas tab.
- Use the standard keyboard shortcuts to enter or choose values as needed.
Quick navigation shortcuts
To move quickly between the main areas of the customer journey and lead-scoring model designers, you can use the following shortcuts.
- Alt+1: Go to canvas toolbar.
- Alt+2: Go to first tile on the canvas.
- Alt+3: Go to Toolbox/Properties panel.
- Ctrl+Alt+D: Go to the selected tile.
Keyboard shortcuts for the marketing calendar
Most of the standard navigation and selection keyboard commands function as usual when you are working with the marketing calendar. In addition, the following calendar-specific shortcuts are provided:
- Ctrl + F6: Remove focus from the calendar (for when you want to leave the calendar).
- Ctrl + Shift + G: Open the date picker (for when you want to change the date/time settings for any calendar item).