Create a landing page with a form
Important
This article only applies to outbound marketing, which will be removed from the product on June 30, 2025. To avoid interruptions, transition to real-time journeys before this date. More information: Transition overview
A landing page is a webpage that functions as a customer touchpoint for one of your marketing initiatives. For example, you might send out an email message that invites recipients to sign up for a free white paper download. To get the download, message recipients must select a link that opens a webpage with a form where they enter information (which is saved directly in your Dynamics 365 Customer Insights - Journeys database), and then they receive an email with the download link. The same landing page can also be made available to unknown visitors of your website, who will add themselves as new contacts in your database when they request the download.
In Dynamics 365 Customer Insights - Journeys, a landing page is a type of marketing page. Other types of marketing pages include subscription centers and forward-to-a-friend forms, both of which support email marketing and are more specialized in purpose.
Note
This tutorial describes how to create and publish a landing page when you are using a Power Apps portal to host your landing pages. However, Power Apps portals are an optional add-on for Dynamics 365 Customer Insights - Journeys, so if you don't have a portal, then you must publish your landing pages and other interactive features for Dynamics 365 Customer Insights - Journeys on your own webserver or CMS system. More information: Create interactive features with or without portals and Integrate Customer Insights - Journeys with a CMS system or Power Apps portal
To create a landing page and go live:
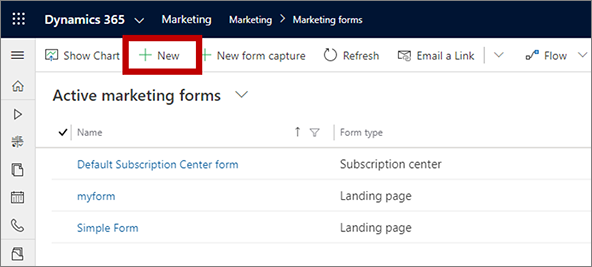
Most landing pages include an input form that people can use to submit information, so you'll start by creating the form itself. Go to Outbound marketing > Internet Marketing > Marketing Forms and then select New on the command bar.
Tip
Forms are standalone records, and each of them can be used on any number of marketing pages. In day-to-day work, you'll often reuse existing forms rather than create a new one for each landing page. But for this exercise, you'll create a new one.
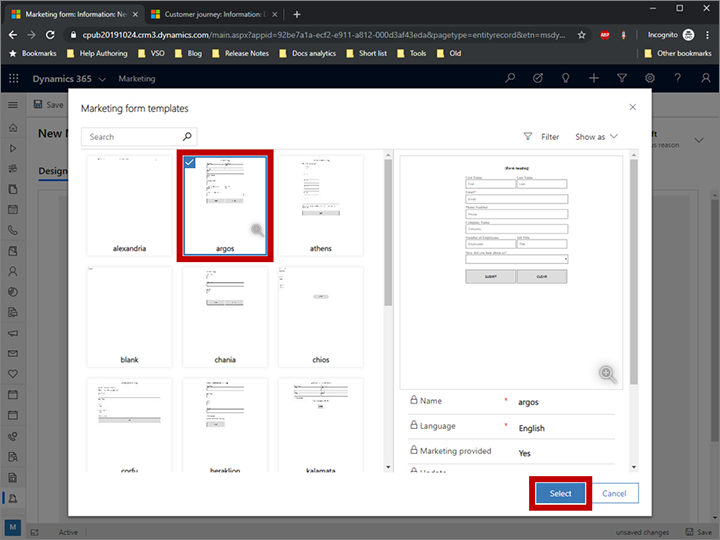
The New Marketing Form page opens with the Select a Form Template dialog box shown. This is similar to the template dialog box presented for marketing emails (as you saw in Create a marketing email and go live). Choose a template, and then choose Select. The template dialog box closes, and your selected template is copied to your new form.
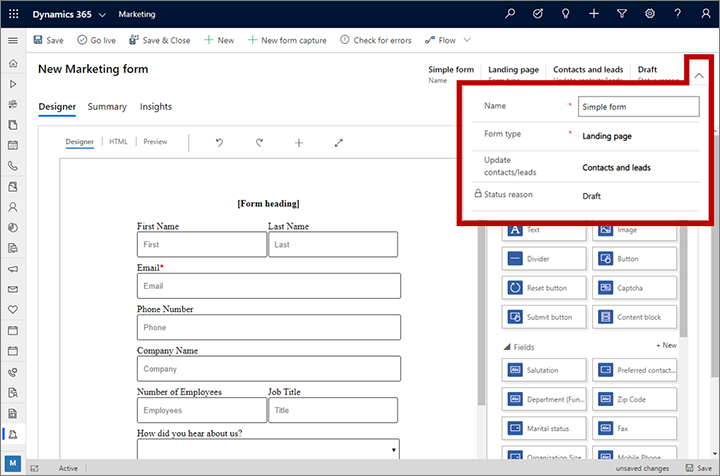
Now you're looking at the form designer, which works like the email designer but provides different tools in the Toolbox. Start by selecting the More header fields button in the header to open a drop-down dialog and then make the following settings:
- Name: This is an internal name for your form. This is the name you'll see when adding the form to a page or referencing it in a customer journey.
- Form Type: Different types of marketing pages require different types of forms. You're making a landing page, so set this to Landing Page.
- Update Contacts/Leads: Set this to Contacts and Leads. This means that Dynamics 365 Customer Insights - Journeys looks for existing contacts and leads that match submissions from this form and will update any existing contacts and leads, or create new ones.
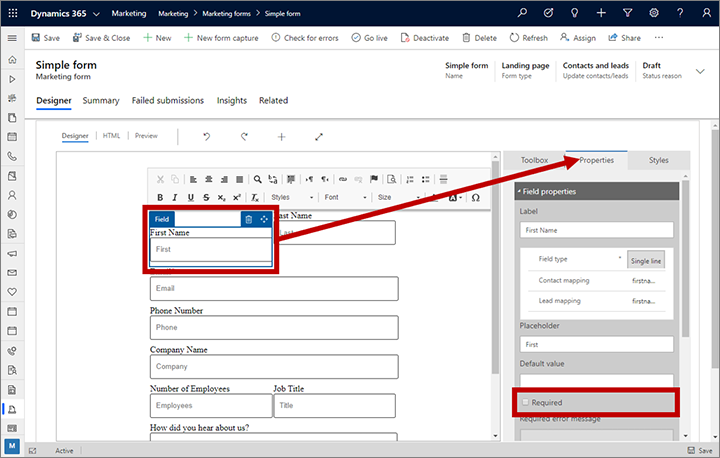
Because we started with a template, the form already contains the fields we need, but we want the first name, last name, and email to be required (which means that contacts must supply values for these fields to submit the form). Each required field shows a red asterisk on the form. Select the First Name field to open the Properties panel for that field. Make sure the Required check box is selected. Consider also adding a reminder message (such as "First name is required") in the Required error message field. Note that the red asterisk now appears next to the First Name field label to mark it as a required field. Make sure that the first name, last name, and email fields are all marked as required.
Go back to the Toolbox tab and find the Country element under the Fields heading . Drag the Country element (or other available field) to your form, but don't make it required.
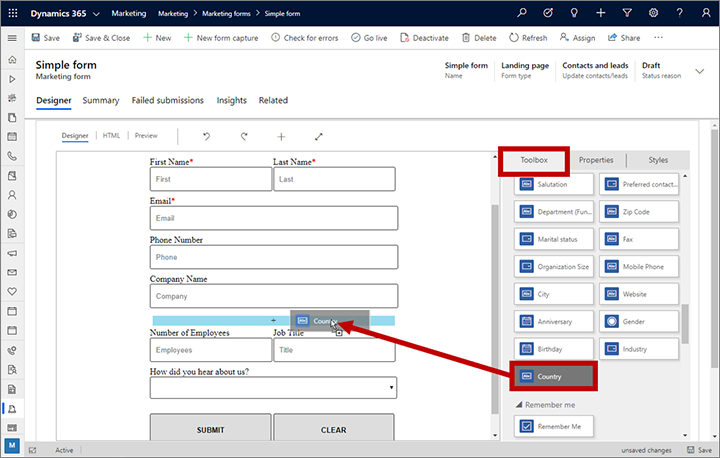
On the command bar, select Check for Errors, and then fix any problems that are reported just as you did with the email message and customer journey.
On the command bar, select Save to save your form and then select Go Live to make your form available for use on a marketing page.
Now you're ready to use your new form on a landing page. Go to Outbound marketing > Internet Marketing > Marketing Pages, and then select New on the command bar. The New Marketing Page page opens with the Select a Template dialog box shown. Find and select a template that you like, but make sure the one you choose shows a Type of Landing page. Select the Select button to load your chosen template.
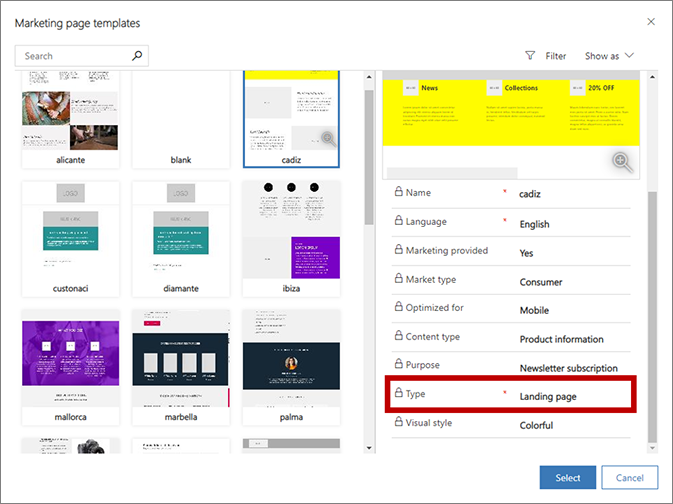
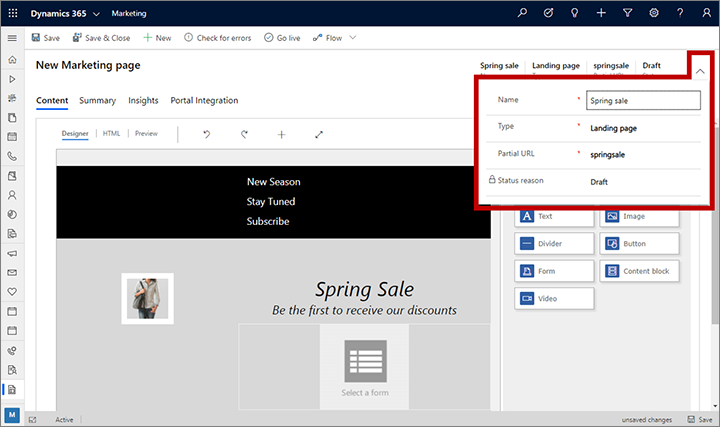
The Select a Template dialog box closes, and the content from your selected template is copied to your design. As with the form designer, there are required fields at the top of the page. Open the drop-down dialog in the header and enter the following:
- Name: Enter a name for the page that you can easily recognize later. This name is internal-only.
- Type: Make sure this is set to Landing page.
- Partial URL: When you publish the page, this value becomes part of its URL. The page will be published on your Power Apps portal, so the final URL for the page will have the form: https://<YourOrg>.microsoftcrmportals.com/<PartialURL>. Enter a suitable partial URL (note that contacts might notice this text when they load your page).
You are now in the page designer, which resembles the form and email designers. Your page already includes lots of content that came from the template you chose, including placeholder images, sample text, and more. Most of these are placed by using standard Toolbox items like Text elements and Image elements, though some layout features are hard-coded in HTML as part of the template. As with email messages, you can add new design elements, edit text directly on the canvas, and configure design elements by selecting them and using the Properties tab. You can also set global page styles by using the Styles tab. In a real project, you would spend time now working with all these settings to create and style your content.
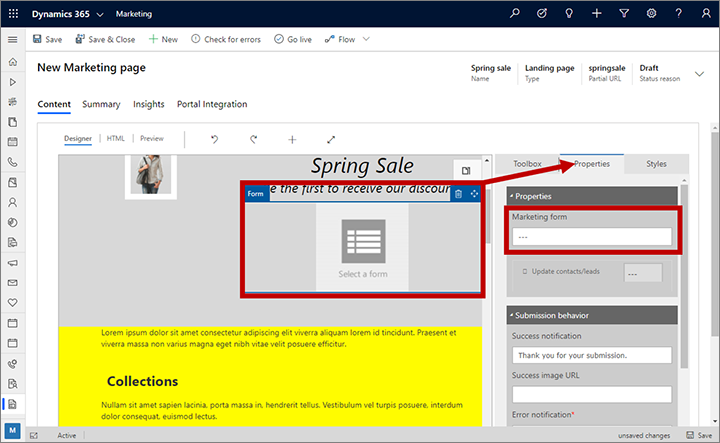
Most landing page templates already include an unconfigured Form element that shows a placeholder with the text Select a form. Find and select it on the page (or add a new Form element from the Toolbox tab if needed). The Properties tab opens when you select the Form element. Set the Marketing Form field to the name of the form that you created earlier in this procedure. Your form design is then loaded onto the page.
Tip
Forms are imported by reference—they are not copied to your page. That means that if you go back and edit the form, any changes you make there will be seen on all existing pages that use that form, so be careful when editing forms!
As you did with the other items you created, select Save on the command bar. Then select Check for Errors and read the results in the notification area. Address any issues, and recheck until your design passes. Finally, choose Go Live. If the command is successful, your page will then be published and available on the internet.
Go to the Summary tab. Here you'll find information about your page, a Timeline where you can add notes and track its development, and links to various related records. You'll also find the Full Page URL in the Content section. Select the preview button
 at the right side of the Full Page URL field to open the page. Then enter and submit some information through the page.
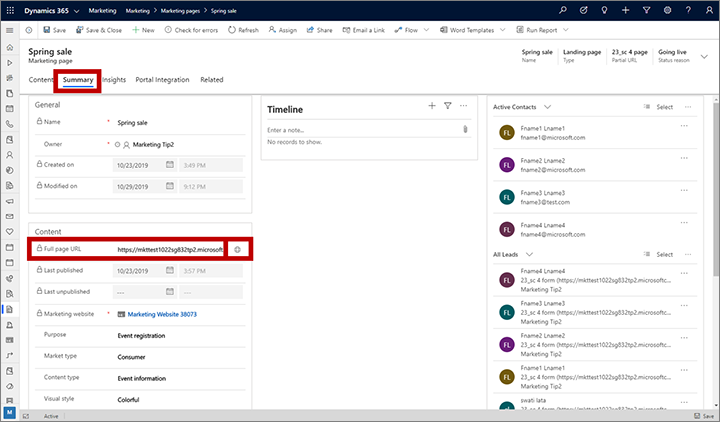
Tip
Many entities in Dynamics 365 Customer Insights - Journeys have a Summary tab like this one, where you can see general settings, a timeline, and related records. For some entities, this page is called General.
As people interact with your page, information will become available in the Insights tab of the page record, including lists of contacts who visited and submitted the form on the page and analytics about its performance. You should be able to see your test submission on the Submissions panel of the Insights tab. Similar insights are provided for form records.
Important
Many countries/regions (including the European Union) require that you get consent before setting a cookie on a user's machine. It is your organization's responsibility to be aware of, and conform to, all relevant laws and regulations in the markets where you operate, including consent to set cookies. You can read more about the EU regulations at ec.europa.eu/ipg/basics/legal/cookies/. Dynamics 365 Customer Insights - Journeys uses cookies in the following ways:
- Marketing pages created and hosted by Customer Insights - Journeys use cookies to enable the pre-fill feature for known contacts, and to log when any contact opens a marketing page. Customer Insights - Journeys pages and page templates do not include a cookie-consent feature, so you must add it. One way to do this is by adding JavaScript to the
<head>section of your pages using the HTML editor of the page designer. You could develop your own JavaScript or use one of the many free or licensed solutions already available. You could also use the built-in privacy statement for marketing pages to announce your use of cookies; however, this might not be sufficient in all jurisdictions because it won't stop the server from setting the cookie—it just informs visitors that cookies are being used (for more information about this feature, see Configure landing pages. More information: Create and deploy marketing pages - The websites feature uses cookies to log visits to any web page where you place the tracking script. Cookies work together with the marketing-pages feature to identify contacts by matching the visitor IDs to landing-page submissions. If your website already uses cookies and includes a consent feature, then it probably covers the Customer Insights - Journeys website script. However, if you don't have cookie consent built into your website, you must add it before adding the website script to pages that market to residents of relevant countries/regions. More information: Register link clicks and website visits
- The event portal uses a session cookie to enable contacts to sign in and register for events. More information: Set up the event portal. Additionally, it uses cookies to store the user's language.
More information: How Customer Insights - Journeys uses cookies