Use one-select ingestion to create an Event Hubs data connection for Azure Synapse Data Explorer (Preview)
Azure Synapse Data Explorer offers ingestion (data loading) from Event Hubs, a big data streaming platform and event ingestion service. Event Hubs can process millions of events per second in near real-time. In this article, you connect an Event Hubs to a table in Azure Synapse Data Explorer using the one-select ingestion experience.
Prerequisites
An Azure subscription. Create a free Azure account.
Create a Data Explorer pool using Synapse Studio or the Azure portal
Create a Data Explorer database.
In Synapse Studio, on the left-side pane, select Data.
Select + (Add new resource) > Data Explorer pool, and use the following information:
Setting Suggested value Description Pool name contosodataexplorer The name of the Data Explorer pool to use Name TestDatabase The database name must be unique within the cluster. Default retention period 365 The time span (in days) for which it's guaranteed that the data is kept available to query. The time span is measured from the time that data is ingested. Default cache period 31 The time span (in days) for which to keep frequently queried data available in SSD storage or RAM, rather than in longer-term storage. Select Create to create the database. Creation typically takes less than a minute.
Note
Ingesting data from an Event Hub into Data Explorer pools will not work if your Synapse workspace uses a managed virtual network with data exfiltration protection enabled.
Ingest new data
In Synapse Studio, on the left-side pane, select Data.
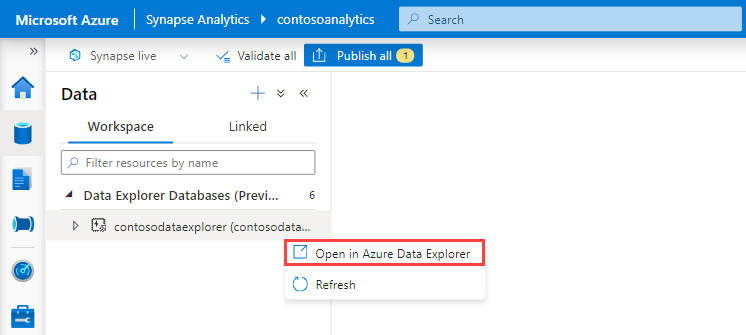
Under Data Explorer Databases, right-click the relevant database, and then select Open in Azure Data Explorer.
In the left menu of the Web UI, select the Data tab.
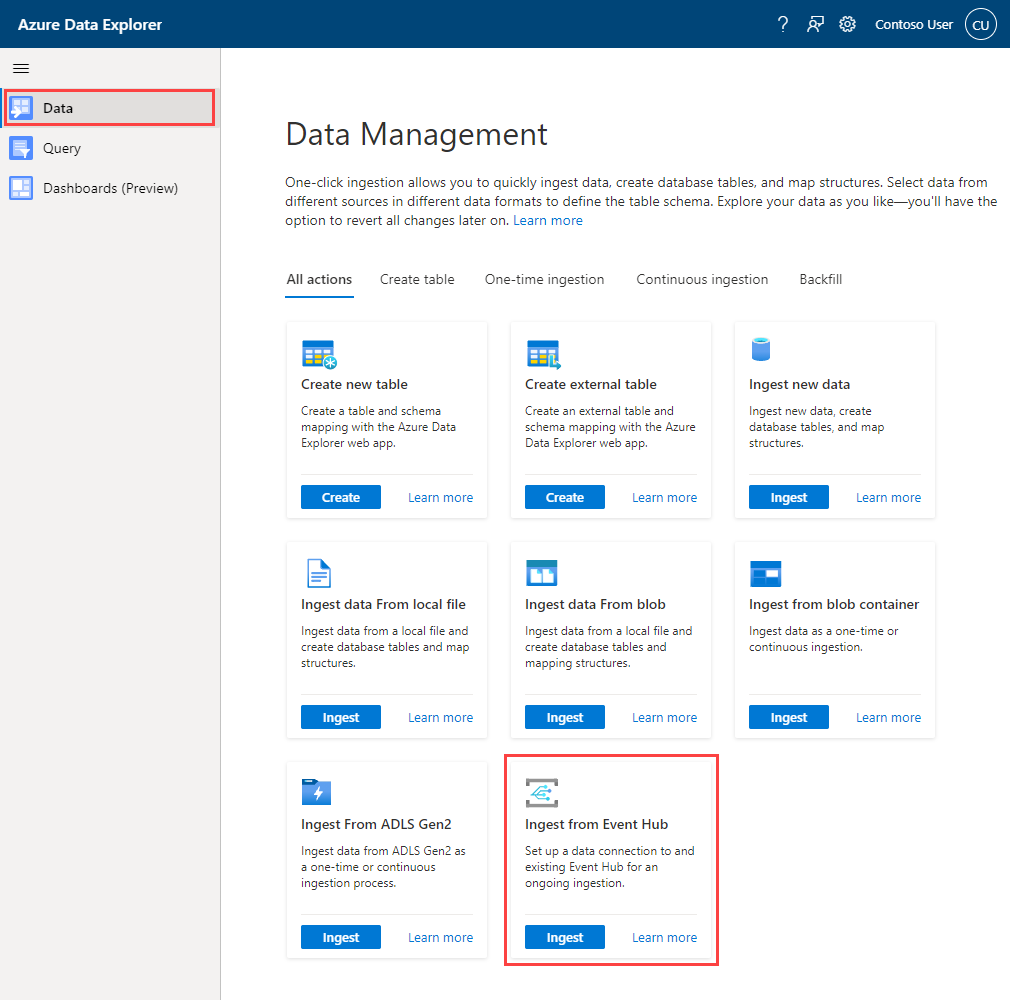
In the Ingest data from Event Hub card, select Ingest.
The Ingest new data window opens with the Destination tab selected.
Destination tab
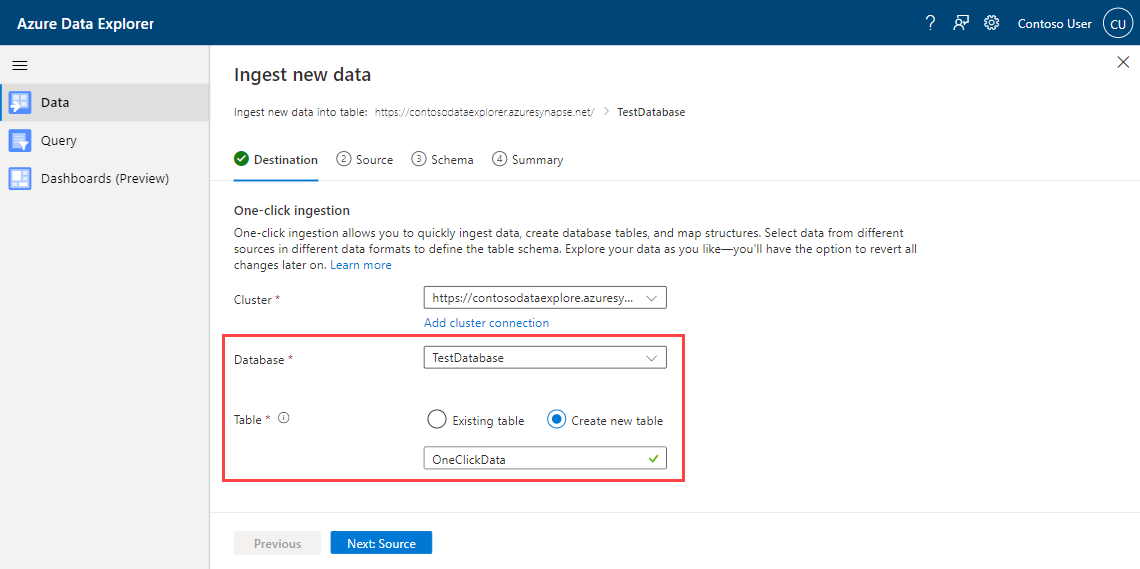
The Cluster and Database fields are auto-populated. You may select a different cluster or database from the drop-down menus.
Under Table, select Create new table and enter a name for the new table. Alternatively, use an existing table.
Note
Table names must be between 1 and 1024 characters. You can use alphanumeric, hyphens, and underscores. Special characters aren't supported.
Select Next: Source.
Source tab
Under Source type, select Event Hub.
Under Data Connection, fill in the following fields:
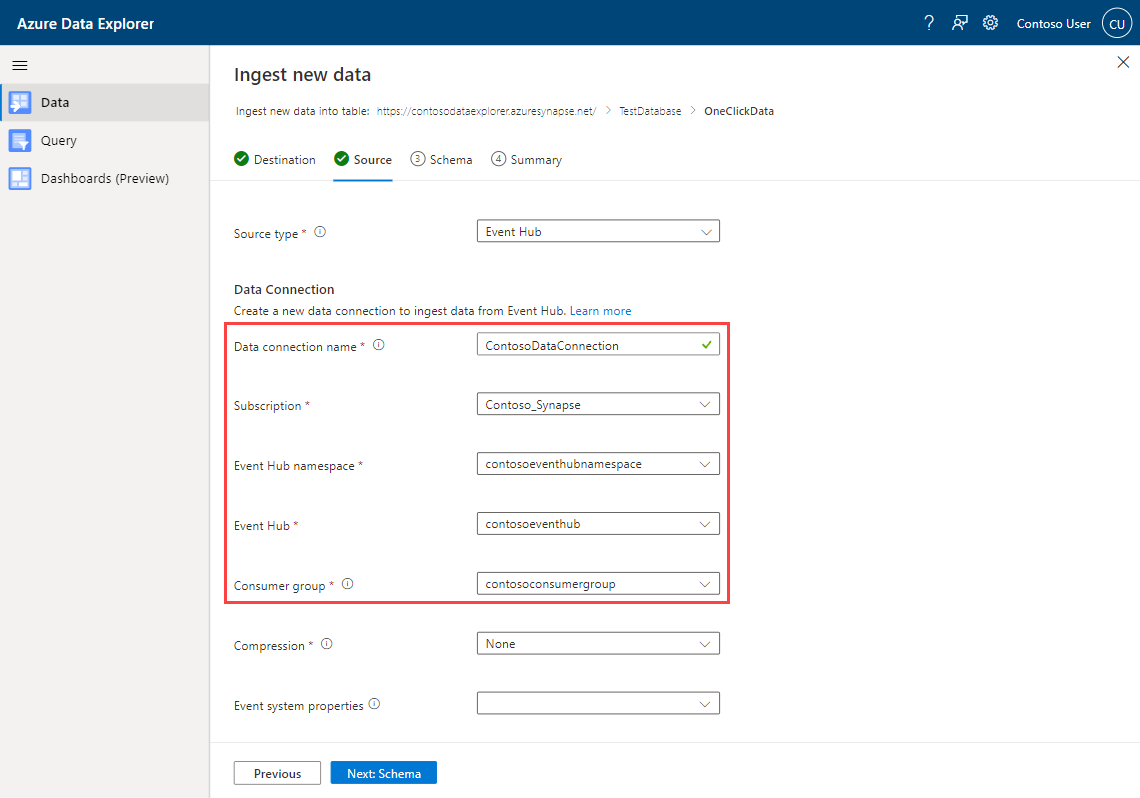
Setting Suggested value Field description Data connection name ContosoDataConnection The name that identifies your data connection. Subscription The subscription ID where the Event Hubs resource is located. Event Hubs namespace The name that identifies your namespace. Event Hubs The Event Hubs you wish to use. Consumer group The consumer group defined in your Event Hubs. Event system properties Select relevant properties The Event Hubs system properties. If there are multiple records per event message, the system properties will be added to the first one. When adding system properties, create or update table schema and mapping to include the selected properties. Select Next: Schema.
Schema tab
Data is read from the Event Hubs in form of EventData objects. Supported formats are CSV, JSON, PSV, SCsv, SOHsv TSV, TXT, and TSVE.
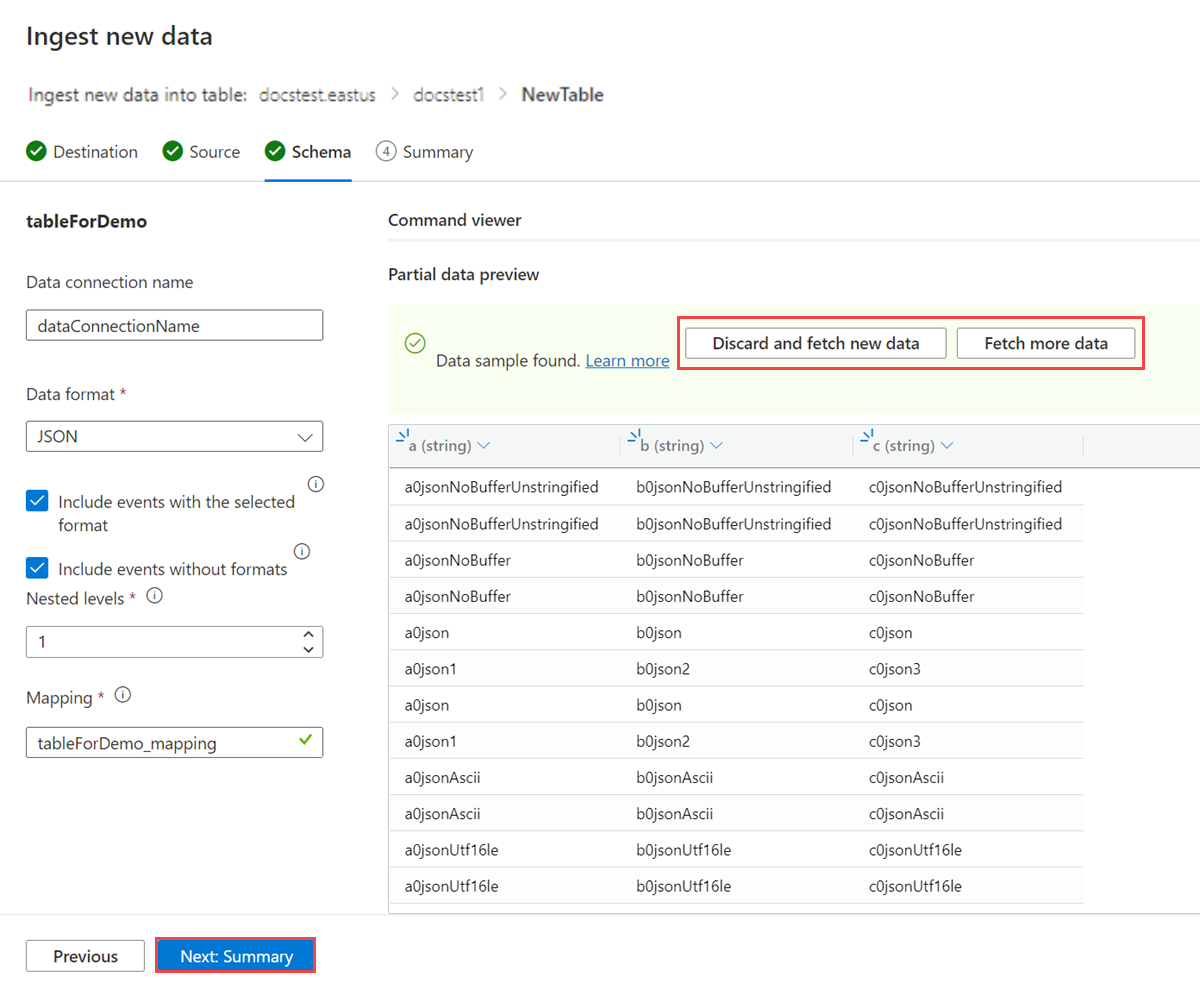
If the data you see in the preview window isn't complete, you may need more data to create a table with all necessary data fields. Use the following commands to fetch new data from your Event Hubs:
- Discard and fetch new data: discards the data presented and searches for new events.
- Fetch more data: Searches for more events in addition to the events already found.
Note
To see a preview of your data, your Event Hub must be sending events.
Select Next: Summary.
Continuous ingestion from Event Hubs
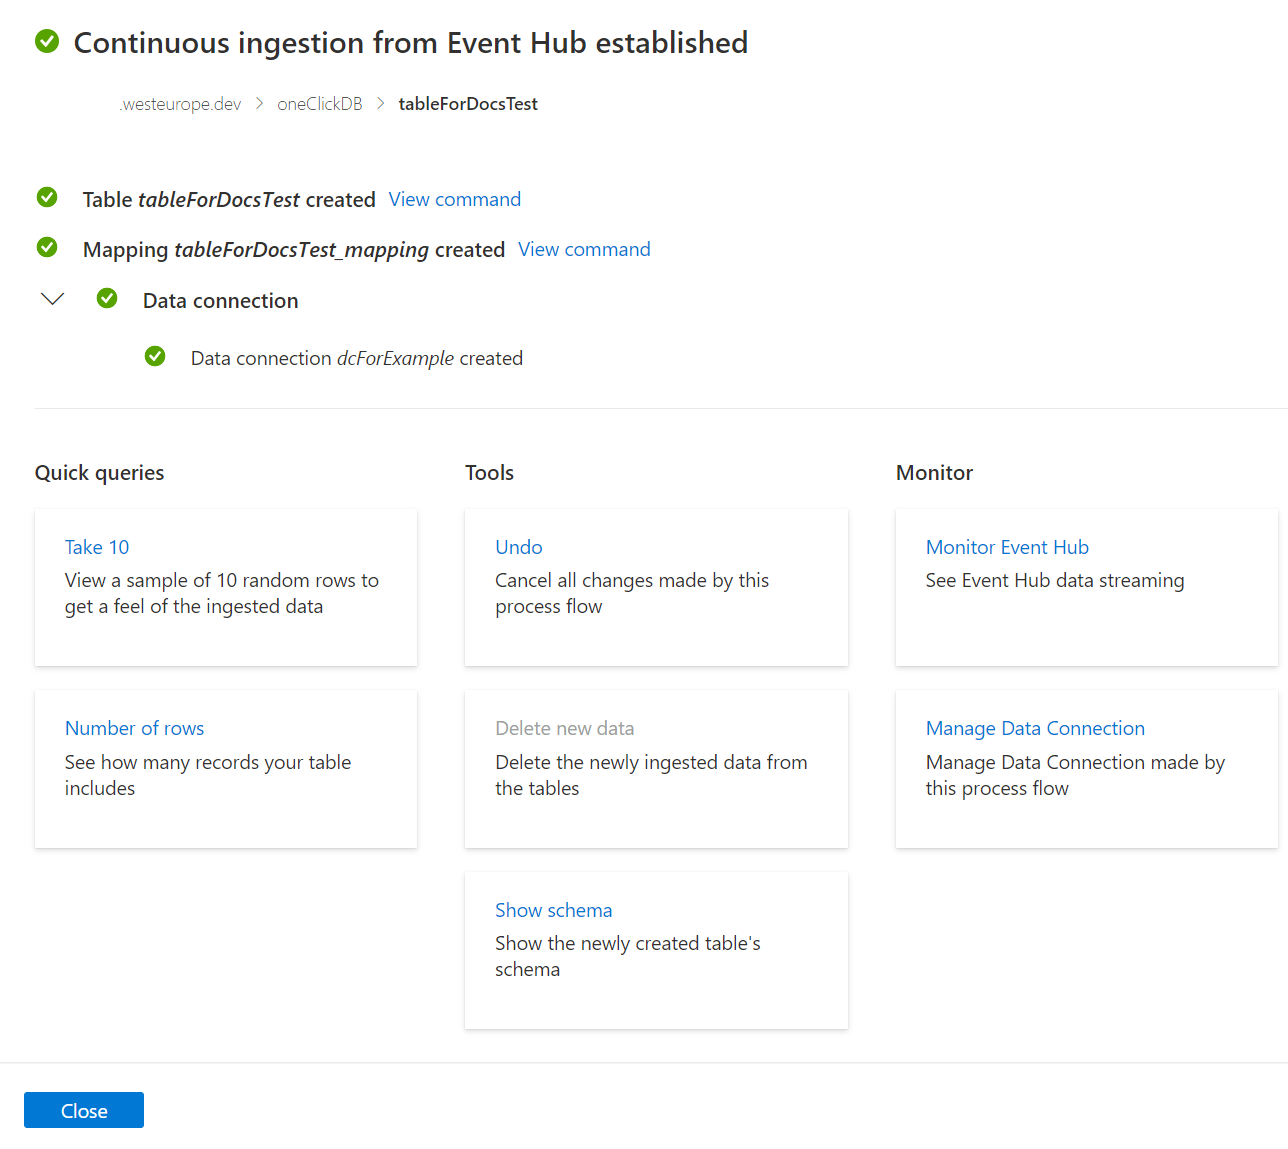
In the Continuous ingestion from Event Hub established window, all steps will be marked with green check marks when establishment finishes successfully. The cards below these steps give you options to explore your data with Quick queries, undo changes made using Tools, or Monitor the Event Hubs connections and data.
