Add indicators in bulk to Microsoft Sentinel threat intelligence from a CSV or JSON file
In this article, you add indicators from a CSV or JSON file into Microsoft Sentinel threat intelligence. Threat intelligence sharing still happens across emails and other informal channels during an ongoing investigation. You have the ability to import indicators directly into Microsoft Sentinel threat intelligence so that you can quickly relay emerging threats to your team. You make the threats available to power other analytics, such as producing security alerts, incidents, and automated responses.
Important
This feature is currently in preview. See the Supplemental Terms of Use for Microsoft Azure Previews for more legal terms that apply to Azure features that are in beta, preview, or otherwise not yet released into general availability.
Microsoft Sentinel is generally available within Microsoft's unified security operations platform in the Microsoft Defender portal. For preview, Microsoft Sentinel is available in the Defender portal without Microsoft Defender XDR or an E5 license. For more information, see Microsoft Sentinel in the Microsoft Defender portal.
Prerequisites
You must have read and write permissions to the Microsoft Sentinel workspace to store your threat indicators.
Select an import template for your indicators
Add multiple indicators to your threat intelligence with a specially crafted CSV or JSON file. Download the file templates to get familiar with the fields and how they map to the data you have. Review the required fields for each template type to validate your data before you import it.
For Microsoft Sentinel in the Azure portal, under Threat management, select Threat intelligence.
For Microsoft Sentinel in the Defender portal, select Microsoft Sentinel > Threat management > Threat intelligence.
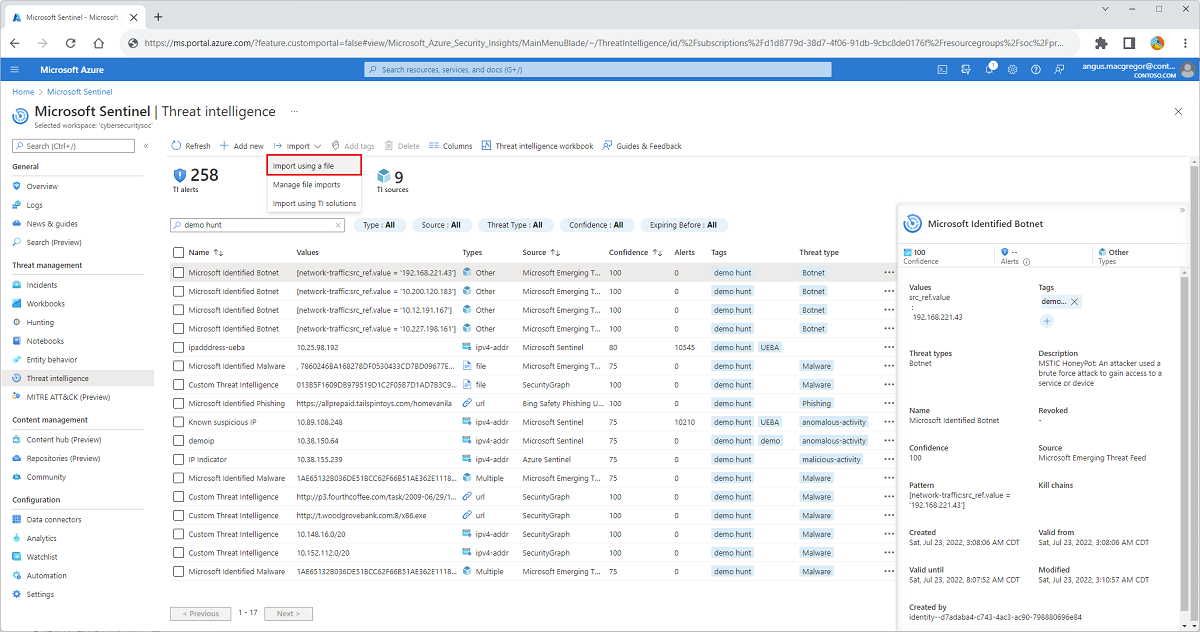
Select Import > Import using a file.
On the File format dropdown menu, select CSV or JSON.
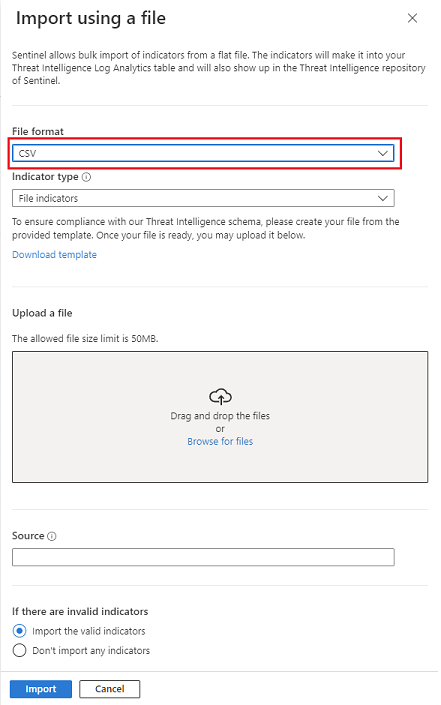
After you choose a bulk upload template, select the Download template link.
Consider grouping your indicators by source because each file upload requires one.
The templates provide all the fields you need to create a single valid indicator, including required fields and validation parameters. Replicate that structure to populate more indicators in one file. For more information on the templates, see Understand the import templates.
Upload the indicator file
Change the file name from the template default, but keep the file extension as .csv or .json. When you create a unique file name, it's easier to monitor your imports from the Manage file imports pane.
Drag your indicators file to the Upload a file section, or browse for the file by using the link.
Enter a source for the indicators in the Source text box. This value is stamped on all the indicators included in that file. View this property as the
SourceSystemfield. The source is also displayed in the Manage file imports pane. For more information, see Work with threat indicators.Choose how you want Microsoft Sentinel to handle invalid indicator entries by selecting one of the buttons at the bottom of the Import using a file pane:
- Import only the valid indicators and leave aside any invalid indicators from the file.
- Don't import any indicators if a single indicator in the file is invalid.
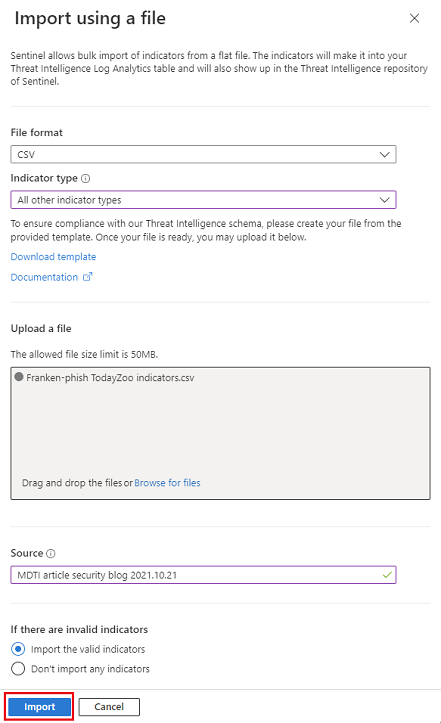
Select Import.
Manage file imports
Monitor your imports and view error reports for partially imported or failed imports.
Select Import > Manage file imports.
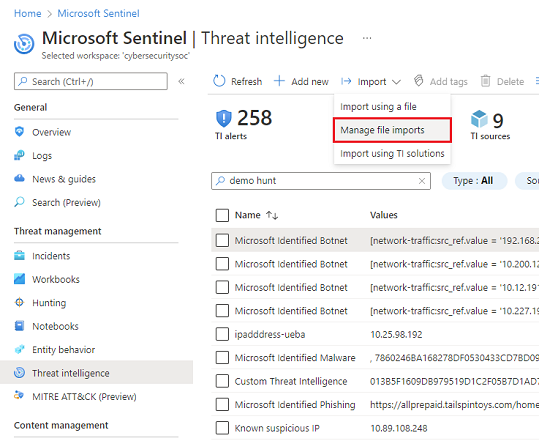
Review the status of imported files and the number of invalid indicator entries. The valid indicator count is updated after the file is processed. Wait for the import to finish to get the updated count of valid indicators.
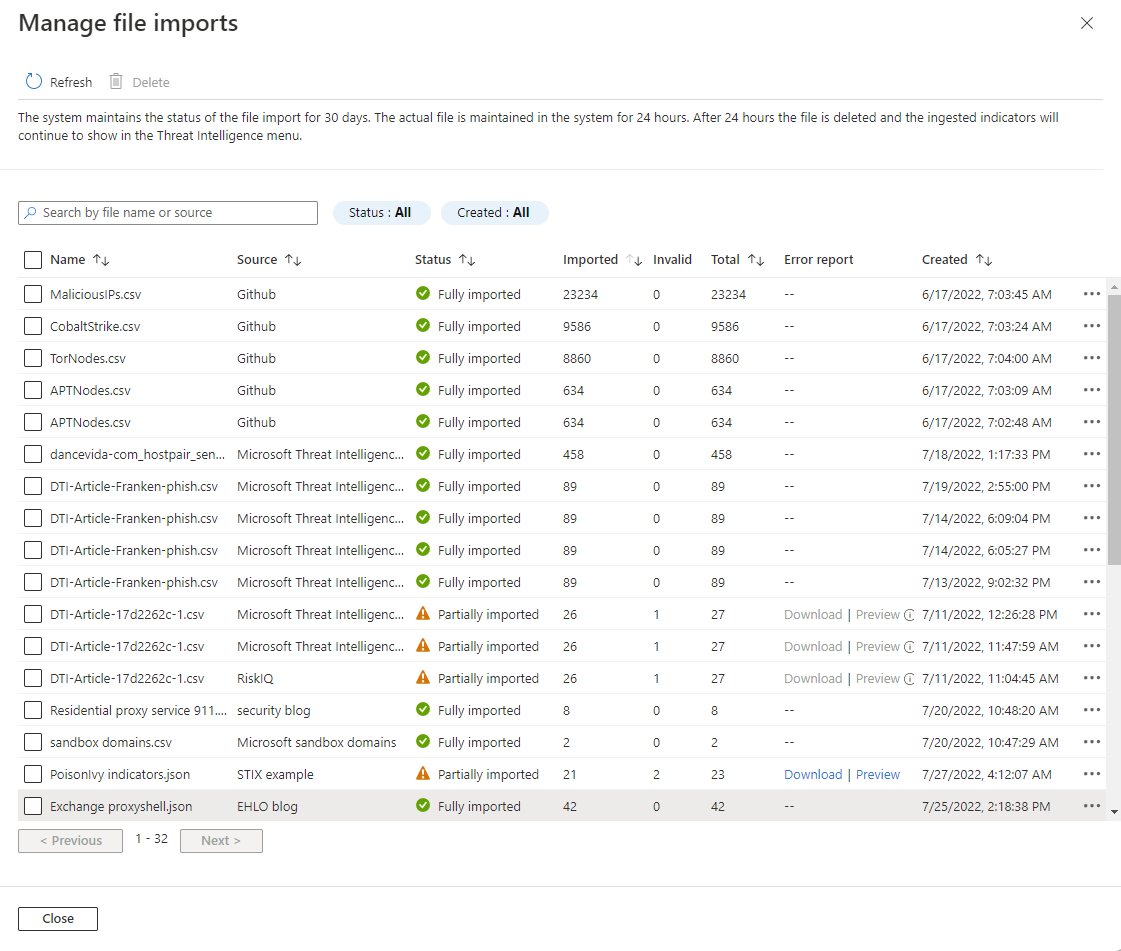
View and sort imports by selecting Source, the indicator file Name, the number Imported, the Total number of indicators in each file, or the Created date.
Select the preview of the error file or download the error file that contains the errors about invalid indicators.
Microsoft Sentinel maintains the status of the file import for 30 days. The actual file and the associated error file are maintained in the system for 24 hours. After 24 hours, the file and the error file are deleted, but any ingested indicators continue to show in threat intelligence.
Understand the import templates
Review each template to ensure that your indicators are imported successfully. Be sure to reference the instructions in the template file and the following supplemental guidance.
CSV template structure
On the Indicator type dropdown menu, select CSV. Then choose between the File indicators or All other indicator types options.
The CSV template needs multiple columns to accommodate the file indicator type because file indicators can have multiple hash types like MD5 and SHA256. All other indicator types like IP addresses only require the observable type and the observable value.
The column headings for the CSV All other indicator types template include fields such as
threatTypes, single or multipletags,confidence, andtlpLevel. Traffic Light Protocol (TLP) is a sensitivity designation to help make decisions on threat intelligence sharing.Only the
validFrom,observableType, andobservableValuefields are required.Delete the entire first row from the template to remove the comments before upload.
The maximum file size for a CSV file import is 50 MB.
Here's an example domain-name indicator that uses the CSV template:
threatTypes,tags,name,description,confidence,revoked,validFrom,validUntil,tlpLevel,severity,observableType,observableValue
Phishing,"demo, csv",MDTI article - Franken-Phish domainname,Entity appears in MDTI article Franken-phish,100,,2022-07-18T12:00:00.000Z,,white,5,domain-name,1776769042.tailspintoys.com
JSON template structure
There's only one JSON template for all indicator types. The JSON template is based on the STIX 2.1 format.
The
patternelement supports indicator types offile,ipv4-addr,ipv6-addr,domain-name,url,user-account,email-addr, andwindows-registry-key.Remove the template comments before upload.
Close the last indicator in the array by using the
}without a comma.The maximum file size for a JSON file import is 250 MB.
Here's an example ipv4-addr indicator that uses the JSON template:
[
    {
      "type": "indicator",
      "id": "indicator--dbc48d87-b5e9-4380-85ae-e1184abf5ff4",
      "spec_version": "2.1",
      "pattern": "[ipv4-addr:value = '198.168.100.5']",
      "pattern_type": "stix",
      "created": "2022-07-27T12:00:00.000Z",
      "modified": "2022-07-27T12:00:00.000Z",
      "valid_from": "2016-07-20T12:00:00.000Z",
      "name": "Sample IPv4 indicator",
      "description": "This indicator implements an observation expression.",
      "indicator_types": [
	    "anonymization",
        "malicious-activity"
      ],
      "kill_chain_phases": [
          {
            "kill_chain_name": "mandiant-attack-lifecycle-model",
            "phase_name": "establish-foothold"
          }
      ],
      "labels": ["proxy","demo"],
      "confidence": "95",
      "lang": "",
      "external_references": [],
      "object_marking_refs": [],
      "granular_markings": []
    }
]
Related content
In this article, you learned how to manually bolster your threat intelligence by importing indicators gathered in flat files. To learn more about how indicators power other analytics in Microsoft Sentinel, see the following articles:
