The steps in this article run the Azure PowerShell cmdlets interactively in Azure Cloud Shell. To run the cmdlets in the Cloud Shell, select Open Cloud Shell at the upper-right corner of a code block. Select Copy to copy the code and then paste it into Cloud Shell to run it. You can also run the Cloud Shell from within the Azure portal.
The steps in this article run the Azure CLI commands interactively in Azure Cloud Shell. To run the commands in the Cloud Shell, select Open Cloud Shell at the upper-right corner of a code block. Select Copy to copy the code, and paste it into Cloud Shell to run it. You can also run the Cloud Shell from within the Azure portal.
You can also install Azure CLI locally to run the commands. If you run Azure CLI locally, sign in to Azure using the az login command.
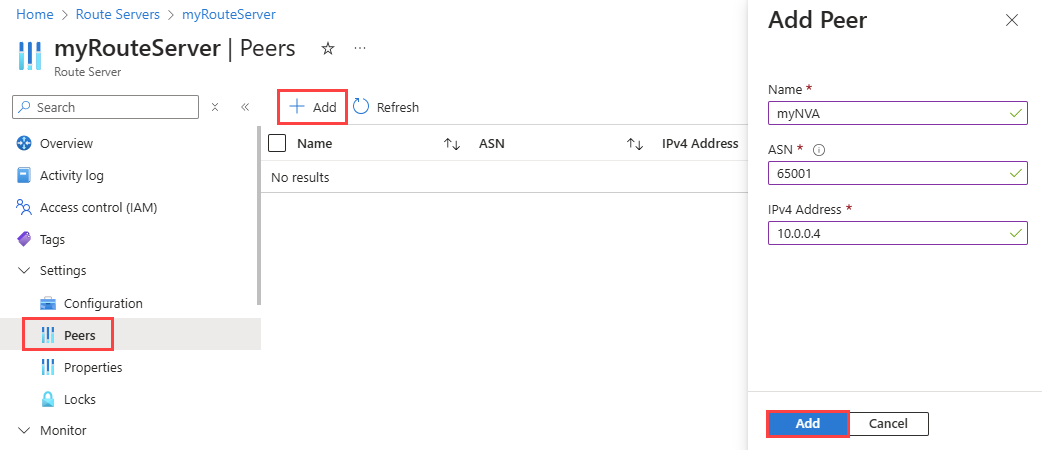
Add a peer
In this section, you learn how to add a BGP peering to your route server to peer with a network virtual appliance (NVA).
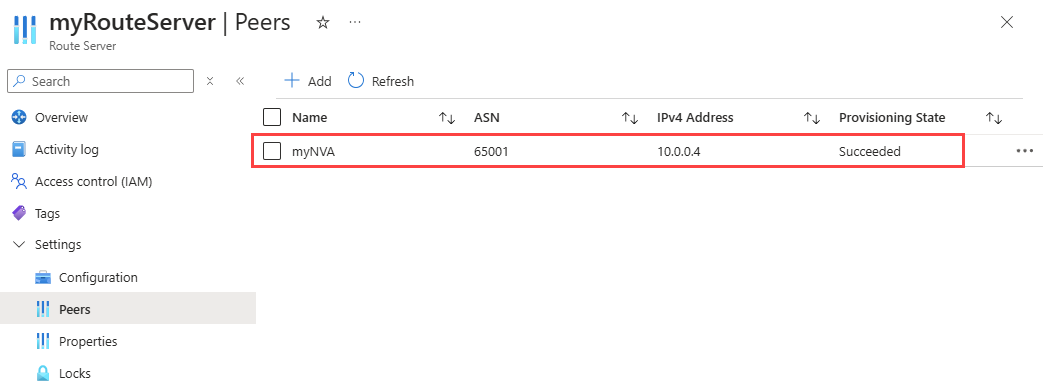
Once the peer NVA is successfully added, you can see it in the list of peers with a Succeeded provisioning state.
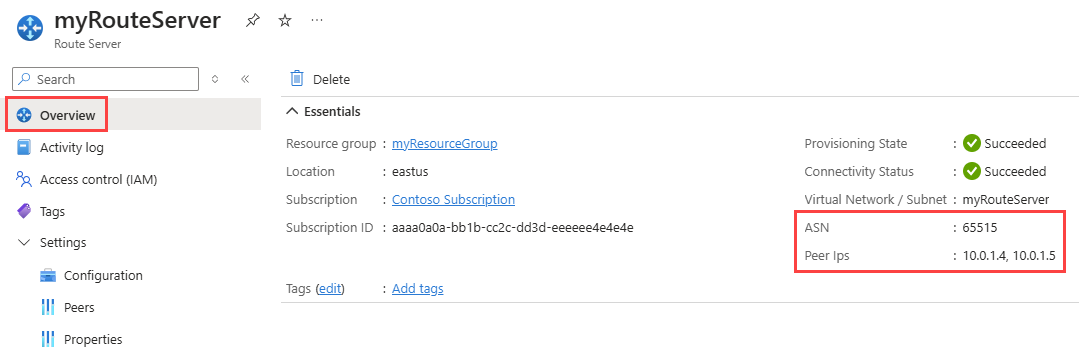
To complete the peering setup, you must configure the NVA to establish a BGP session with the route server using its IP addresses and ASN. You can find the route server's IP addresses and ASN in the Overview page:
Important
We recommend peering each NVA with both route server instances to ensure that virtual network routes are advertised over the NVA connections and achieve high availability.
The route server name. This parameter is required when there are more than one route server in the same resource group.
After you successfully add the peer NVA, you must configure the NVA to establish a BGP session with the route server's peer IPs and ASN. Use Get-AzRouteServer cmdlet to find the route server's peer IPs and ASN:
The route server name. You need this parameter when there are more than one route server in the same resource group.
Important
We recommend peering each NVA with both route server instances to ensure that virtual network routes are advertised over the NVA connections and achieve high availability.
After you successfully add the peer NVA, you must configure the NVA to establish a BGP session with the route server's peer IPs and ASN. Use az network routeserver show command to find the route server's peer IPs and ASN:
az network routeserver show --name 'myRouteServer' --resource-group 'myResourceGroup'
Parameter
Value
--name
The route server name.
--resource-group
The resource group name of your route server.
Important
We recommend peering each NVA with both route server instances to ensure that virtual network routes are advertised over the NVA connections and achieve high availability.
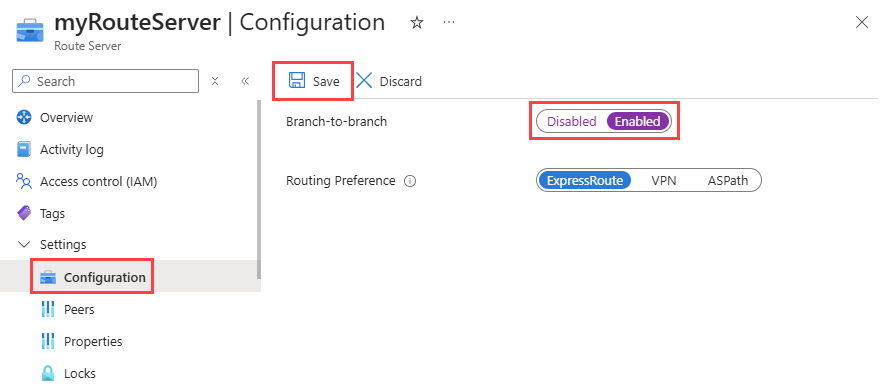
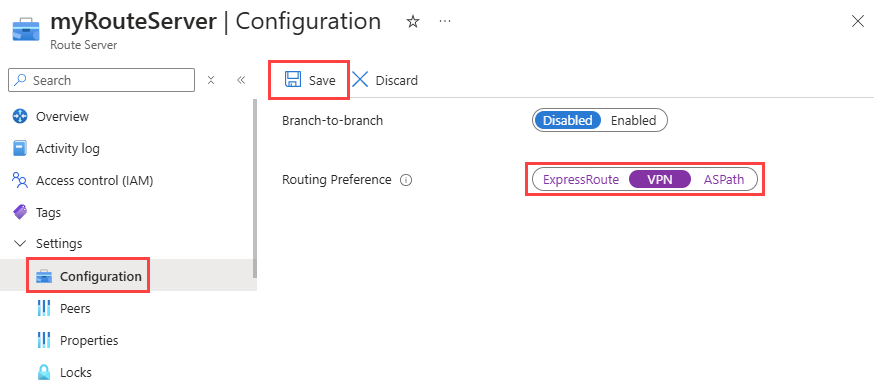
Configure route exchange
In this section, you learn how to enable exchanging routes between your route server and the virtual network gateway (ExpressRoute or VPN) that exists in the same virtual network.
Important
The Azure VPN gateway must be configured in active-active mode and have the ASN set to 65515. It's not a requirement to have BGP enabled on the VPN gateway to communicate with the route server.
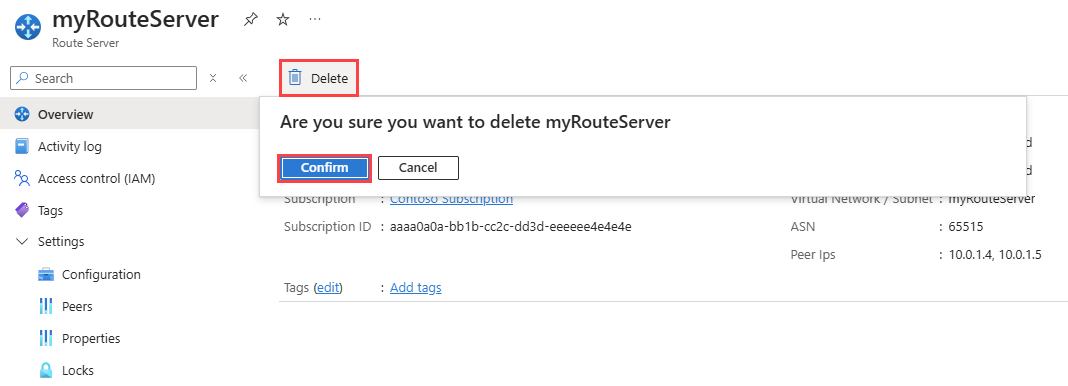
Warning
When you create or delete a route server in a virtual network that contains a virtual network gateway (ExpressRoute or VPN), expect downtime until the operation is complete. If you have an ExpressRoute circuit connected to the virtual network where you're creating or deleting the route server, the downtime doesn't affect the ExpressRoute circuit or its connections to other virtual networks.