Using Azure Redis as session cache for WebSphere Liberty or Open Liberty
This article describes how to use Azure Redis as the HTTP session cache for WebSphere Liberty or Open Liberty.
In this guide, you'll:
- Create an Azure Managed Redis instance as session cache.
- Prepare a sample application that enables persistence of HTTP sessions.
- Run the sample application locally.
This article is intended to help you quickly get to deployment. Before going to production, you should explore Tuning Liberty.
If you're interested in providing feedback or working closely on your migration scenarios with the engineering team developing WebSphere on Azure solutions, fill out this short survey on WebSphere migration and include your contact information. The team of program managers, architects, and engineers will promptly get in touch with you to initiate close collaboration.
Prerequisites
- An Azure subscription. If you don't have an Azure subscription, create a free account before you begin.
- Prepare a local machine with Unix-like operating system installed - for example, Ubuntu, macOS, or Windows Subsystem for Linux.
- Install a Java Standard Edition (SE) implementation version 17 or later - for example, Microsoft build of OpenJDK.
- Install Maven 3.9.8 or higher.
- Ensure that Git is installed.
Create an Azure Managed Redis instance
Azure Managed Redis provides an in-memory data store based on the Redis Enterprise software. Use the following steps to create an Azure Managed Redis instance, and then note down its connection information. You use this information later to configure the sample application.
Create an Azure Managed Redis instance by following the steps in Quickstart: Create an Azure Managed Redis Instance. Carefully note the following differences:
At step 3 of the section Create a Redis instance, where you're on the Basics tab, select a Cache SKU that supports Azure Managed Redis. For this guide, select Balanced (For general purpose workloads with typical performance requirements). For more information, see Choosing the right tier.
At step 4 of the section Create a Redis instance, where you're on the Networking tab, for the Connectivity option, select Public Endpoint. This option is the best choice for simplicity when using this guide. For production, you should consider using Private Endpoint for better security.
At step 5 of the section Create a Redis instance, where you're on the Advanced tab, configure the following settings:
For Authentication, enable Access Keys Authentication. This option is the best choice for simplicity when using this guide. For optimal security, we recommend using Microsoft Entra ID with managed identities to authorize requests against your cache, if possible. Authorization by using Microsoft Entra ID and managed identities provides superior security and ease of use over shared access key authorization. For more information about using managed identities with your cache, see Use Microsoft Entra ID for cache authentication.
Set Clustering policy to Enterprise for a nonclustered cache, which works for this guide where single node configuration is used. For more information, see Clustering on Enterprise.
After the deployment completes, select Go to resource if you're on the Deployment page. Otherwise, navigate to the Azure portal, find, and select your Azure Managed Redis instance.
On the Overview page, note down the Endpoint value. You use this value in the
REDIS_CACHE_ADDRESSenvironment variable later.Select Settings > Authentication. Select Access keys and note down the Primary value. You use this value as the
REDIS_CACHE_KEYenvironment variable later.Use the following command to export the environment variables
REDIS_CACHE_ADDRESSandREDIS_CACHE_KEY:export REDIS_CACHE_ADDRESS=rediss://<your-redis-cache-endpoint> export REDIS_CACHE_KEY=<your-primary-access-key>
Prepare the sample application
WebSphere Liberty and Open Liberty provide a session cache feature that enables you to store HTTP session data in an external cache. In this guide, you use the JCache Session Persistence feature to store the session data in the Azure Managed Redis instance.
Use the following commands to clone the sample code for this guide. The sample is in the open-liberty-on-aks repository on GitHub. There are a few samples in the repository. This article uses java-app-jcache.
git clone https://github.com/Azure-Samples/open-liberty-on-aks.git
cd open-liberty-on-aks
git checkout 20250228
cd java-app-jcache
If you see a message about being in detached HEAD state, this message is safe to ignore. It just means you checked out a tag.
The application has the following file structure:
java-app-jcache/
├── pom.xml
├── pom-redisson.xml
└── src
    └── main
        ├── docker
        │   ├── Dockerfile
        │   └── Dockerfile-wlp
        ├── java
        ├── liberty
        │   └── config
        │       └── server.xml
        ├── redisson
        │   └── redisson-config.yaml
        ├── resources
        └── webapp
The pom.xml file is the Maven project file that contains the dependencies and plugins for the sample application.
The pom-redisson.xml file is used to copy dependencies for the Redisson client library to the shared resources directory of the Liberty server later.
The java, resources, and webapp directories contain the source code of the sample application.
In the liberty/config directory, the server.xml file is used to configure the HTTP session cache for Open Liberty and WebSphere Liberty.
In the redisson directory, the redisson-config.yaml file is used to configure the connection to the Azure Managed Redis instance.
The docker directory contains two Dockerfiles. Dockerfile is used to build an image with Open Liberty and Dockerfile-wlp is used to build an image with WebSphere Liberty.
Run the sample application locally
Use the following steps to build and run your sample application locally. These steps use Maven and the liberty-maven-plugin. For more information about the liberty-maven-plugin, see Building a web application with Maven.
Verify the current working directory is java-app-jcache in your local clone.
Run the Maven command
mvn clean packageand package the application.Run
mvn -Predisson validateto copy the Redisson configuration file to the correct target location. This step also inserts the values of the environment variablesREDIS_CACHE_ADDRESSandREDIS_CACHE_KEYinto the redisson-config.yaml file, which is referenced by the server.xml file.Run
mvn dependency:copy-dependencies -f pom-redisson.xml -DoutputDirectory=target/liberty/wlp/usr/shared/resourcesto copy the Redisson client library and its dependencies to the shared resources directory of the Liberty server.Run the Maven command
mvn liberty:devand start the application. If the application is successfully started, you should seeThe defaultServer server is ready to run a smarter planet.in the command output.You should see output similar to the following if the Redis connection is successful.
[INFO] [err] [Default Executor-thread-3] INFO org.redisson.Version - Redisson 3.23.4
[INFO] [err] [redisson-netty-2-7] INFO org.redisson.connection.pool.MasterPubSubConnectionPool - 1 connections initialized for redacted.<region>.redis.azure.net/<ip_address>:10000
[INFO] [err] [redisson-netty-2-20] INFO org.redisson.connection.pool.MasterConnectionPool - 24 connections initialized for redacted.<region>.redis.azure.net/<ip_address>:10000
Test the application
Open a web browser to http://localhost:9080 and you should see the application home page.
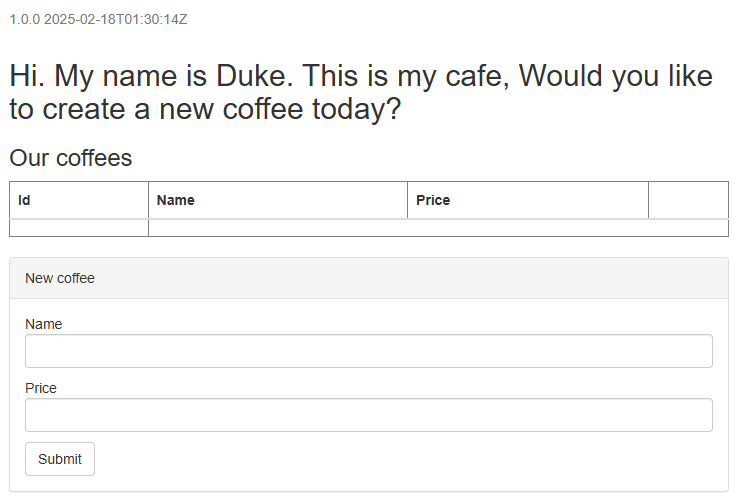
In the New coffee form, set values for the fields Name and Price, and then select Submit. The application creates a new coffee, persists it, and also stores the HTTP session in the Azure Managed Redis instance.
After a few seconds, you see the new coffee displayed in the table Our coffees.
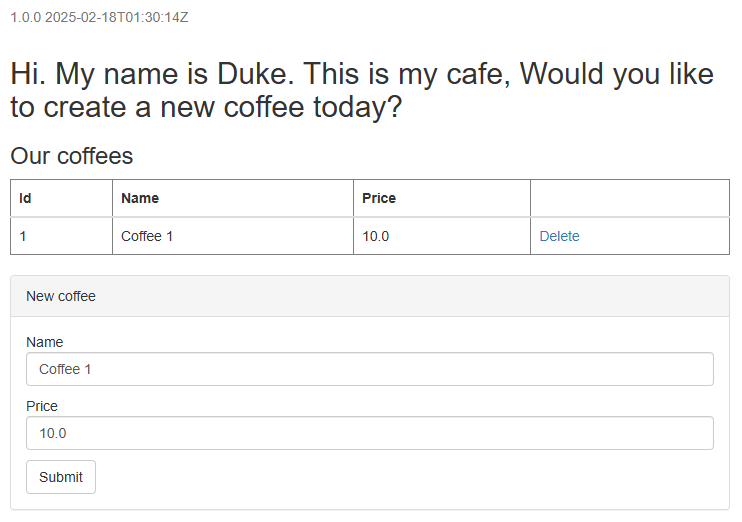
To demonstrate that the session data can be retrieved from Redis, use Ctrl+C to stop the application and restart it with the mvn liberty:dev command.
Then, refresh the application home page. You should see the same session data displayed in the section New coffee. Stop the application when you're done testing.
Containerize the application
Optionally, you can package and run the application in a container by using the following steps. The sample application provides two Dockerfiles for Open Liberty and WebSphere Liberty. This guide uses the Dockerfile for Open Liberty, but you can use the Dockerfile for WebSphere Liberty by following similar steps.
Install Docker for your OS. For more information, see Get Docker.
Use the following command to build the Docker image:
docker build -t javaee-cafe-jcache:v1 -f src/main/docker/Dockerfile .Use the following command to start the Docker container:
docker run -it --rm \
   -p 9080:9080 \
   -e REDIS_CACHE_ADDRESS=${REDIS_CACHE_ADDRESS} \
   -e REDIS_CACHE_KEY=${REDIS_CACHE_KEY} \
   --mount type=bind,source=$(pwd)/target/liberty/wlp/usr/servers/defaultServer/redisson-config.yaml,target=/config/redisson-config.yaml \
   javaee-cafe-jcache:v1
After the container starts, you can test it by using steps similar to the ones you use to run the application locally without Docker.
Clean up resources
To avoid Azure charges, you should clean up unnecessary resources. When the Azure Managed Redis instance is no longer needed, find its resource group name and delete it from the Azure portal.
For more information, see Delete resource groups.
Next steps
You can learn more from references used in this guide:
- Configuring Liberty session persistence with JCache
- JCache support of Redisson
- Open Liberty Server Configuration
If you want to deploy the sample application to Azure, reference the following articles:
- Deploy a Java application with Open Liberty or WebSphere Liberty on an Azure Kubernetes Service (AKS) cluster
- Deploy WebSphere Liberty and Open Liberty on Azure Red Hat OpenShift
- Deploy a Java application with Open Liberty on Azure Container Apps
To explore options to run WebSphere products on Azure, see What are solutions to run the WebSphere family of products on Azure?