Quickstart: Launch your first Java microservice application with managed Java components in Azure Container Apps
In this quickstart, you learn how to deploy an application in Azure Container Apps that uses Java components to handle configuration management, service discovery, and health and metrics. The sample application used in this example is the Java PetClinic, which uses the microservice architecture pattern. The following diagram depicts the architecture of the PetClinic application on Azure Container Apps:

The PetClinic application includes the following features:
- The front end is a standalone Node.js web app hosted on the API gateway app.
- The API gateway routes requests to back-end service apps.
- Back-end apps are built with Spring Boot.
- Each back-end app uses a HyperSQL database as the persistent store.
- The apps use managed Java components on Azure Container Apps, including a service registry, config server, and admin server.
- The config server reads data from a Git repository.
- A Log Analytics workspace logs server data.
In this tutorial, you:
- Create a config server, Eureka server, admin server, and admin components
- Create a series of microservice apps
- Bind the server components to your microservices apps
- Deploy the collection of apps
- Review the deployed apps
By the end of this article, you deploy one web application and three back-end applications that are configured to work with three different Java components. You can then manage each component via the Azure portal.
Prerequisites
- Azure account: If you don't have an Azure account, create one for free. You need the Contributor or Owner permission on the Azure subscription to use this quickstart. For more information, see Assign Azure roles using the Azure portal.
- Azure CLI: Install the Azure CLI.
- Azure Container Apps CLI extension. Use version 0.3.47 or higher. Use the
az extension add --name containerapp --upgrade --allow-previewcommand to install the latest version.
Setup
To create environment variables, a resource group, and an Azure Container Apps environment, use the following steps:
The environment variables contain your custom values, so replace the placeholder values surrounded by
<>with your own values before you run the following commands:export RESOURCE_GROUP=<RESOURCE_GROUP> export LOCATION=<LOCATION> export CONTAINER_APP_ENVIRONMENT=<CONTAINER_APPS_ENVIRONMENT>Now you create more environment variables that contain the settings for your microservices app. These values are used to define the names and configurations of the Java components and the Azure Container Apps that you use to deploy the microservices. Create these environment variables by using the following commands:
export CONFIG_SERVER_COMPONENT=configserver
export ADMIN_SERVER_COMPONENT=admin
export EUREKA_SERVER_COMPONENT=eureka
export CONFIG_SERVER_URI=https://github.com/spring-petclinic/spring-petclinic-microservices-config.git
export CUSTOMERS_SERVICE=customers-service
export VETS_SERVICE=vets-service
export VISITS_SERVICE=visits-service
export API_GATEWAY=api-gateway
export CUSTOMERS_SERVICE_IMAGE=ghcr.io/azure-samples/javaaccelerator/spring-petclinic-customers-service
export VETS_SERVICE_IMAGE=ghcr.io/azure-samples/javaaccelerator/spring-petclinic-vets-service
export VISITS_SERVICE_IMAGE=ghcr.io/azure-samples/javaaccelerator/spring-petclinic-visits-service
export API_GATEWAY_IMAGE=ghcr.io/azure-samples/javaaccelerator/spring-petclinic-api-gateway
Sign in to the Azure CLI and choose your active subscription by using the following command:
az loginCreate a resource group to organize your Azure services by using the following command:
az group create \
    --name $RESOURCE_GROUP \
    --location $LOCATION
Create your Azure Container Apps environment, which hosts both the Java components and your container apps, using the following command:
az containerapp env create \
    --resource-group $RESOURCE_GROUP \
    --name $CONTAINER_APP_ENVIRONMENT \
    --location $LOCATION
Create Java components
Now you create the following Java components that support your app:
- Config server. Used to manage configuration settings for your microservices apps.
- Eureka server. Used to manage service registry and discovery.
- Admin server. Used to monitor and manage the health and metrics of your microservices apps.
To create these server components, use the following steps:
Create the config server for your Java components by using the following command:
az containerapp env java-component config-server-for-spring create \
    --resource-group $RESOURCE_GROUP \
    --name $CONFIG_SERVER_COMPONENT \
    --environment $CONTAINER_APP_ENVIRONMENT \
    --configuration spring.cloud.config.server.git.uri=$CONFIG_SERVER_URI
Create the Eureka server for your Java components by using the following command:
az containerapp env java-component eureka-server-for-spring create \
    --resource-group $RESOURCE_GROUP \
    --name $EUREKA_SERVER_COMPONENT
    --environment $CONTAINER_APP_ENVIRONMENT \
Create the admin server for your Java components by using the following command:
az containerapp env java-component admin-for-spring create \
    --resource-group $RESOURCE_GROUP \
    --name $ADMIN_SERVER_COMPONENT
    --environment $CONTAINER_APP_ENVIRONMENT \
Deploy the microservice apps
To deploy the Java microservice apps to Azure Container Apps using the prebuilt container images, use the following steps:
Note
In this article, you use a series of built images for the Spring Petclinic microservice apps. You also have the option to customize the sample code and use your own images. For more information, see the azure-container-apps-java-samples GitHub repository.
Create the customer data app by using the following command:
az containerapp create \
    --resource-group $RESOURCE_GROUP \
    --name $CUSTOMERS_SERVICE \
    --environment $CONTAINER_APP_ENVIRONMENT \
    --image $CUSTOMERS_SERVICE_IMAGE
Create the vet app by using the following command:
az containerapp create \
    --resource-group $RESOURCE_GROUP \
    --name $VETS_SERVICE \
    --environment $CONTAINER_APP_ENVIRONMENT \
    --image $VETS_SERVICE_IMAGE
Create the visits app by using the following command:
az containerapp create \
    --resource-group $RESOURCE_GROUP \
    --name $VISITS_SERVICE \
    --environment $CONTAINER_APP_ENVIRONMENT \
    --image $VISITS_SERVICE_IMAGE
Create the API gateway app by using the following command:
az containerapp create \
    --resource-group $RESOURCE_GROUP \
    --name $API_GATEWAY \
    --environment $CONTAINER_APP_ENVIRONMENT \
    --image $API_GATEWAY_IMAGE \
    --ingress external \
    --target-port 8080 \
    --query properties.configuration.ingress.fqdn
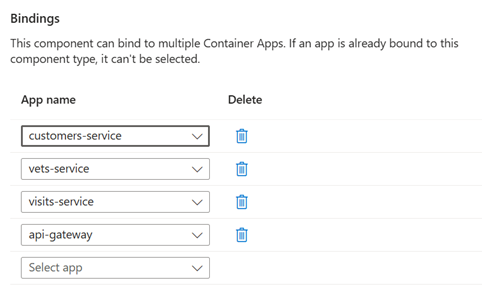
Bind container apps to Java components
Next, bind the Java components to your container apps. The bindings that you create in this section provide the following functionality:
- Inject configuration data into each app from the managed config server on startup.
- Register the app with the managed Eureka server for service discovery.
- Enable the admin server to monitor the app.
Use the containerapp update command to create bindings for each app by using the following steps:
Add bindings to the customer data app by using the following command:
az containerapp update \
    --resource-group $RESOURCE_GROUP \
    --name $CUSTOMERS_SERVICE \
    --bind $CONFIG_SERVER_COMPONENT $EUREKA_SERVER_COMPONENT $ADMIN_SERVER_COMPONENT
Add bindings to the vet service by using the following command:
az containerapp update \
    --resource-group $RESOURCE_GROUP \
    --name $VETS_SERVICE \
    --bind $CONFIG_SERVER_COMPONENT $EUREKA_SERVER_COMPONENT $ADMIN_SERVER_COMPONENT
Add bindings to the visits service by using the following command:
az containerapp update \
    --resource-group $RESOURCE_GROUP \
    --name $VISITS_SERVICE \
    --bind $CONFIG_SERVER_COMPONENT $EUREKA_SERVER_COMPONENT $ADMIN_SERVER_COMPONENT
Add bindings to the API gateway. Use the following command to return the URL of the front-end application, and then open this location in your browser:
az containerapp update \
    --resource-group $RESOURCE_GROUP \
    --name $API_GATEWAY \
    --bind $CONFIG_SERVER_COMPONENT $EUREKA_SERVER_COMPONENT $ADMIN_SERVER_COMPONENT \
    --query properties.configuration.ingress.fqdn
Verify app status
Use the following steps to verify the app status:
Using the URL returned from the API gateway's
az containerapp updatecommand, view the front-end application in your browser. The application should resemble the following screenshot: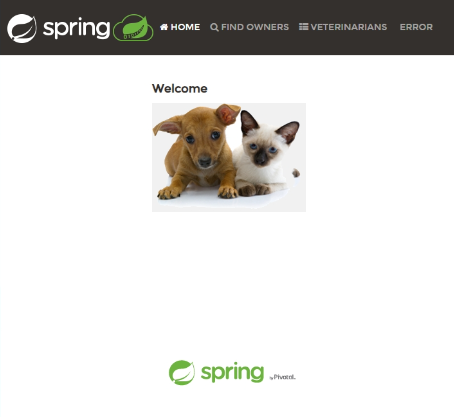
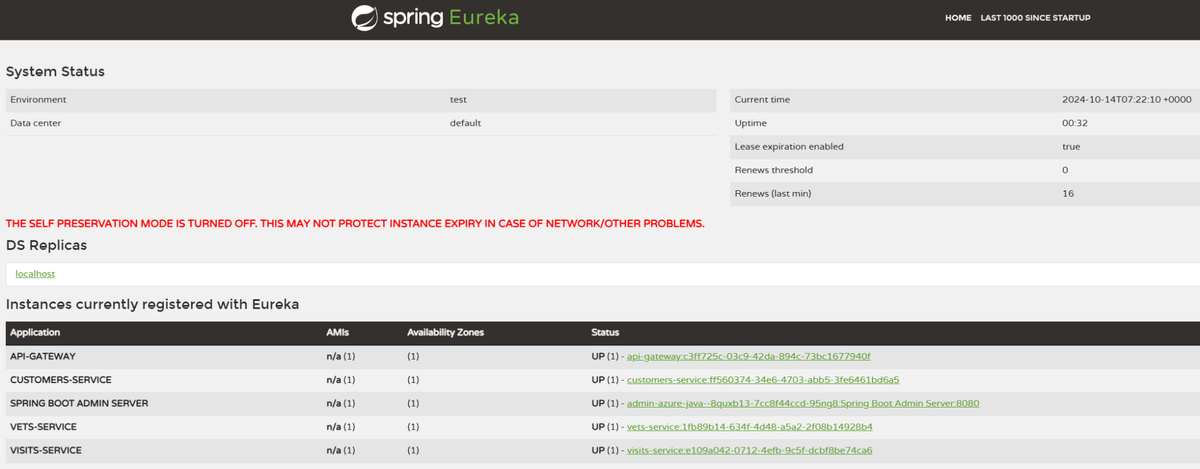
View the Eureka server dashboard by using the following steps:
Important
To view the Eureka Server dashboard and Admin for Spring dashboard, you need to have at least the
Microsoft.App/managedEnvironments/writerole assigned to your account on the managed environment resource. You can explicitly assign theOwnerorContributorrole on the resource. You can also follow the steps to create a custom role definition and assign it to your account.Run the following command to return the dashboard URL:
az containerapp env java-component eureka-server-for-spring show \
    --resource-group $RESOURCE_GROUP \
    --name $EUREKA_SERVER_COMPONENT \
    --environment $CONTAINER_APP_ENVIRONMENT \
    --query properties.ingress.fqdn
Open the URL in your browser. You should see an application that resembles the following screenshot:
View the Admin for Spring dashboard by using the following steps:
Use the following command to return the dashboard URL:
az containerapp env java-component admin-for-spring show \
    --resource-group $RESOURCE_GROUP \
    --name $ADMIN_SERVER_COMPONENT \
    --environment $CONTAINER_APP_ENVIRONMENT \
    --query properties.ingress.fqdn
Open the URL in your browser. You should see an application that resembles the following screenshot:


Optional: Configure Java components
You can configure the Java components created in this quickstart through the Azure portal by using the Configurations section.

For more information on configuring the three Java components you created in this quickstart, see the following links:
Clean up resources
The resources created in this quickstart have an effect on your Azure bill. If you aren't going to use these services long-term, use the following command to remove everything created in this quickstart:
az group delete --resource-group $RESOURCE_GROUP