SharePoint Framework: Consume Graph API using MSGraphClient
Introduction
Consuming of Microsoft Graph API is now a typical business scenario. In this Article, it is explained, how MS Graph API can be consumed.
After the upgrade of SPFx version 1.6, consuming of GRAPH API has become easy.
The article comprises of two section mentioned below
- Creating an SPFx webpart
- Consuming MS Graph API using MS GraphClient
Purpose
To explain in detail on how to consume MS Graph API in SharePoint framework solutions using MSGraphClient.
Create a SPFx Webpart
Prerequisite
Kindly refer this  article to know the prerequisite for creating SPFx webpart.
Getting Started
Create SharePoint Framework Solution
Step 1) Open Windows Powershell.
Step 2) Create a folder inside a directory by entering the below command, here for example
md SPFxMSGraph
Step 3) Go Inside the folder by entering the command
cd SPFxMSGraph
Step 4) Create a webpart by entering below command
yo @microsoft/sharepoint --skip-installation
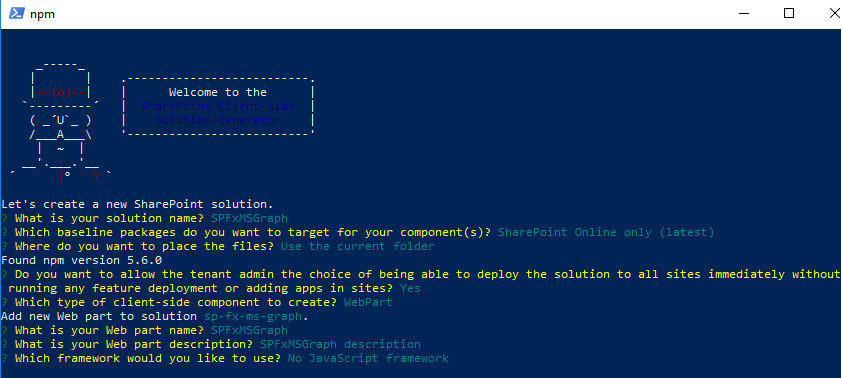
Specify the following :
- Solution Name - SPFxMSGraph
- Target - SharePoint Online only
- File Location - Use the current folder
- Allow tenant admin to deploy the solution to all Site Immediately without running any feature deployment or adding apps in sites -** Yes**
- Which client -side component- Webpart
- WebpartName - SPFxMSGraph
- A description -
- Framework- No Javascript framework
In the next section, How to consume Graph API is explained.
Consuming MS Graph API using MSGraphClient
In this example, Consuming of MS Graph API using MSGraphclient in SPFX is explained. An example of sending email has been taken.
Send Email via Graph API using MSGraphClient
Open the Solution in Visual Studio Code
Open the solution created in the previous section in Visual Studio Code by running the below command in Windows Powershell.
Code .
Change the UI of SPFx Webpart
Replace the existing UI present in the render function of SPFxMSGraphWebPart.ts located under Solution -> src -> webparts .
this.domElement.innerHTML = `
      <div class="${ styles.spFxMsGraph }">
        <div class="${ styles.container }">
            <div class="${ styles.row }">
              <div class="ms-Grid-col ms-u-sm12 block">
               <label class="ms-Label ms-Grid-col ms-u-sm4 block">To</label>
               <input id="emailID" class="ms-TextField-field  ms-Grid-col ms-u-sm8 block" type="text" value="" placeholder="">
               </div>
            </div>

            <div class="${ styles.row }">
              <div class="ms-Grid-col ms-u-sm12 block">
              <label class="ms-Label ms-Grid-col ms-u-sm4 block">Subject</label>
              <input id="oSubjt" class="ms-TextField-field ms-Grid-col ms-u-sm8 block" type="text" value="" placeholder="">
              </div>
            </div>

           <div class="${ styles.row }">
              <div class="ms-Grid-col ms-u-sm12 block">
              <label class="ms-Label ms-Grid-col ms-u-sm4 block">Email Content</label>
              <textarea id="emailContent" class="ms-TextField-field  ms-Grid-col ms-u-sm8 block"></textarea>
              </div>
              </div>
           <div class="${ styles.row }">

              <button class="${styles.button} sendEmail-Button ms-Grid-col ms-u-sm12 block">
                <span class="${styles.label}">Send Email</span>
              </button>
            </div>
        </div>
      </div>`;
Calling the Graph API
Import the MSGraphClient by including the below code.
import { AadHttpClient, MSGraphClient } from "@microsoft/sp-http";
Include below function in the same SPFxMSGrapgh.ts file as performed in the previous section.
private sendEmail():void{
   var emailID : string = (<HTMLInputElement>document.getElementById("emailID")).value;
   var oSubject : string = (<HTMLInputElement>document.getElementById("oSubjt")).value;
   var oBody : string = (<HTMLInputElement>document.getElementById("emailContent")).value;

   const mail = {
     subject: oSubject,
     toRecipients: [{
         emailAddress: {
             address: emailID
         }
     }],
     body: {
         content: oBody,
         contentType: "html"
     }
 };

   this.context.msGraphClientFactory.getClient().then((client: MSGraphClient): void => {
     client
     .api('/users/me/sendMail')
     .post({message: mail}, (err, res) => {
         alert("Email Sent");
     });

   });
 }
Explanation
there is a method this.context.msGraphClientFactory.getClient() which provides object to call get, post & fetch request. Behind the scene MSGraphClient calls AadclientHttp which performs the respective operation.
Open the package-solution.json file present under config folder.
Add the below key value under solution file.
"webApiPermissionRequests": [
      {
        "resource": "Microsoft Graph",
        "scope": "Mail.Send"
      }
    ]
Here by specifying the resource as Microsoft Graph and scope as Mail.Send. Where Mail.Send will allow the app to send email and resource which will be utilized is Microsoft Graph.
Package the solution & upload to app catalog
Build the package by running the below command in windows powershell and to check if there is no error.
gulp build
Run the below command to generate script required to run the webpart.
gulp bundle
Run the below command to create the solution package under SharePoint\Solution folder
gulp package-solution
Upload the sp-fx-ms-graph.sppkg package present under Project > SharePoint > Solution, to app catalog.
As soon as the package is uploaded, following message stating that the webpart needs Mail.Send permission which needs to be reviewed and approved by SharePoint or tenant admin.
Click on Deploy and check the column App Package error message if the package was deployed without any issues.
Grant Permission to Access MS Graph Resources
Go to SharePoint Admin Center (https://<<yourdomain>>-admin.sharepoint.com), click on the "Try the Preview" if it is a classic mode. Navigate to API Management. Register the Application by approving the requested resource.
**Important : Above activity can be performed by Tenant admin. Once approve, any custom script in the tenant can consume this resource.
**
Explanation
Behind the screen on clicking on approval, an app is registered in azure active directory which has necessary access to the resource with allow implicit flow value as true. This enables our SharePoint framework webpart to consume graph api.
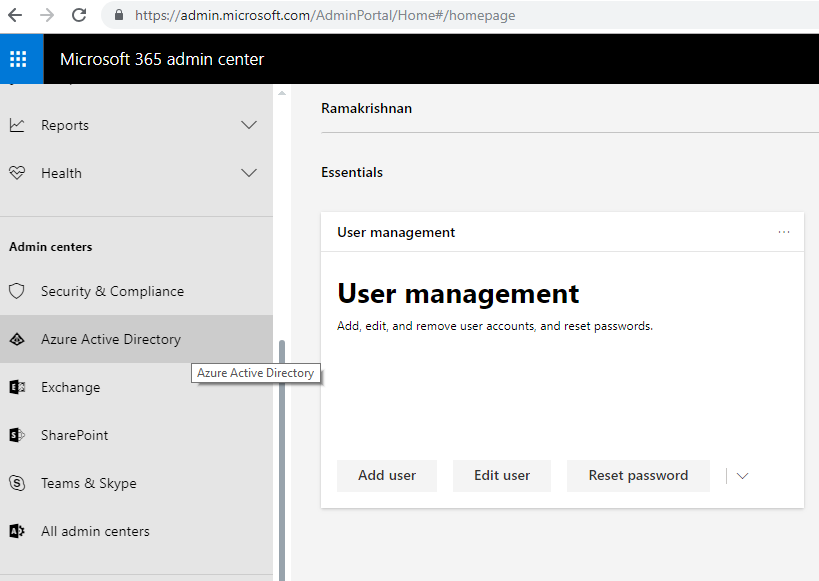
- To verify it, Navigate to Azure active directory admin center. (This can be view by navigating to the admin center in modern view)
- Click on Azure Active Directory
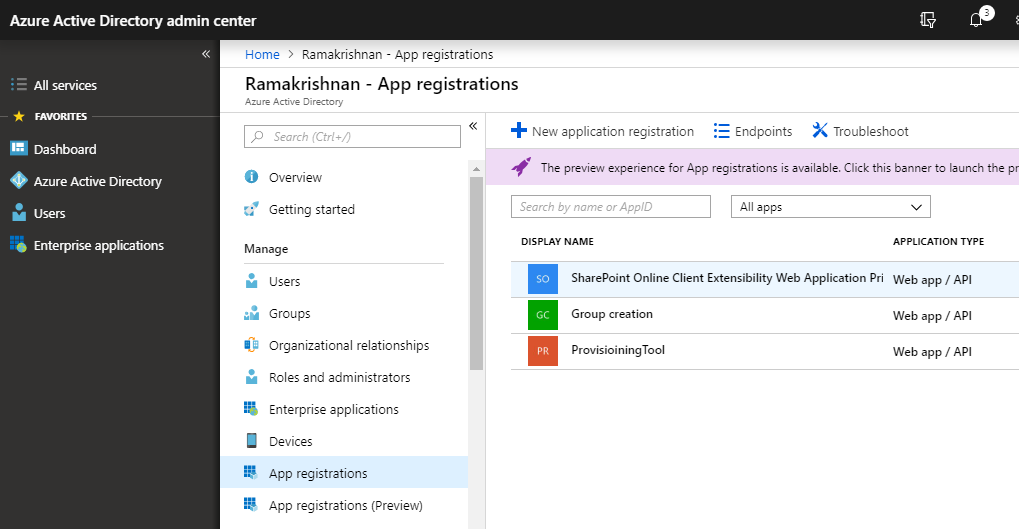
3) Click on Azure active directory -> App registrations -> SharePoint Online Client Extensibility Web Application Prinicple (Click on View all Application if it appears )
This app registration is created by default which has the required permission to access the resource.
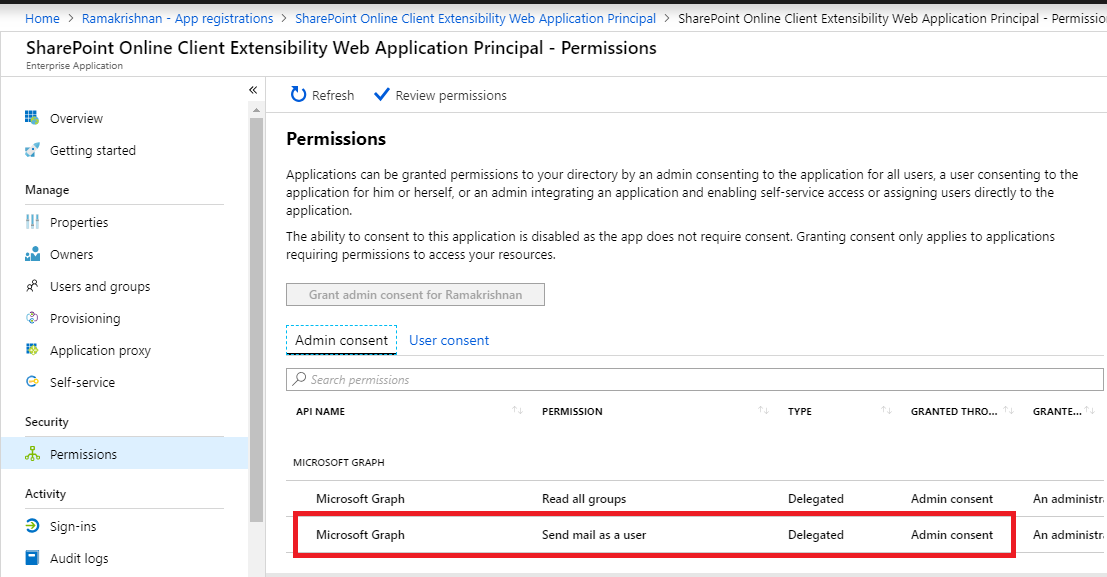
Click on the link appearing under Managed application under local directory section and then click on Permissions.
Under Admin consent, we can see all the permission that the app is registered with.
Add the app\add-in to respective site collection & add the webpart to the page.
Conclusion
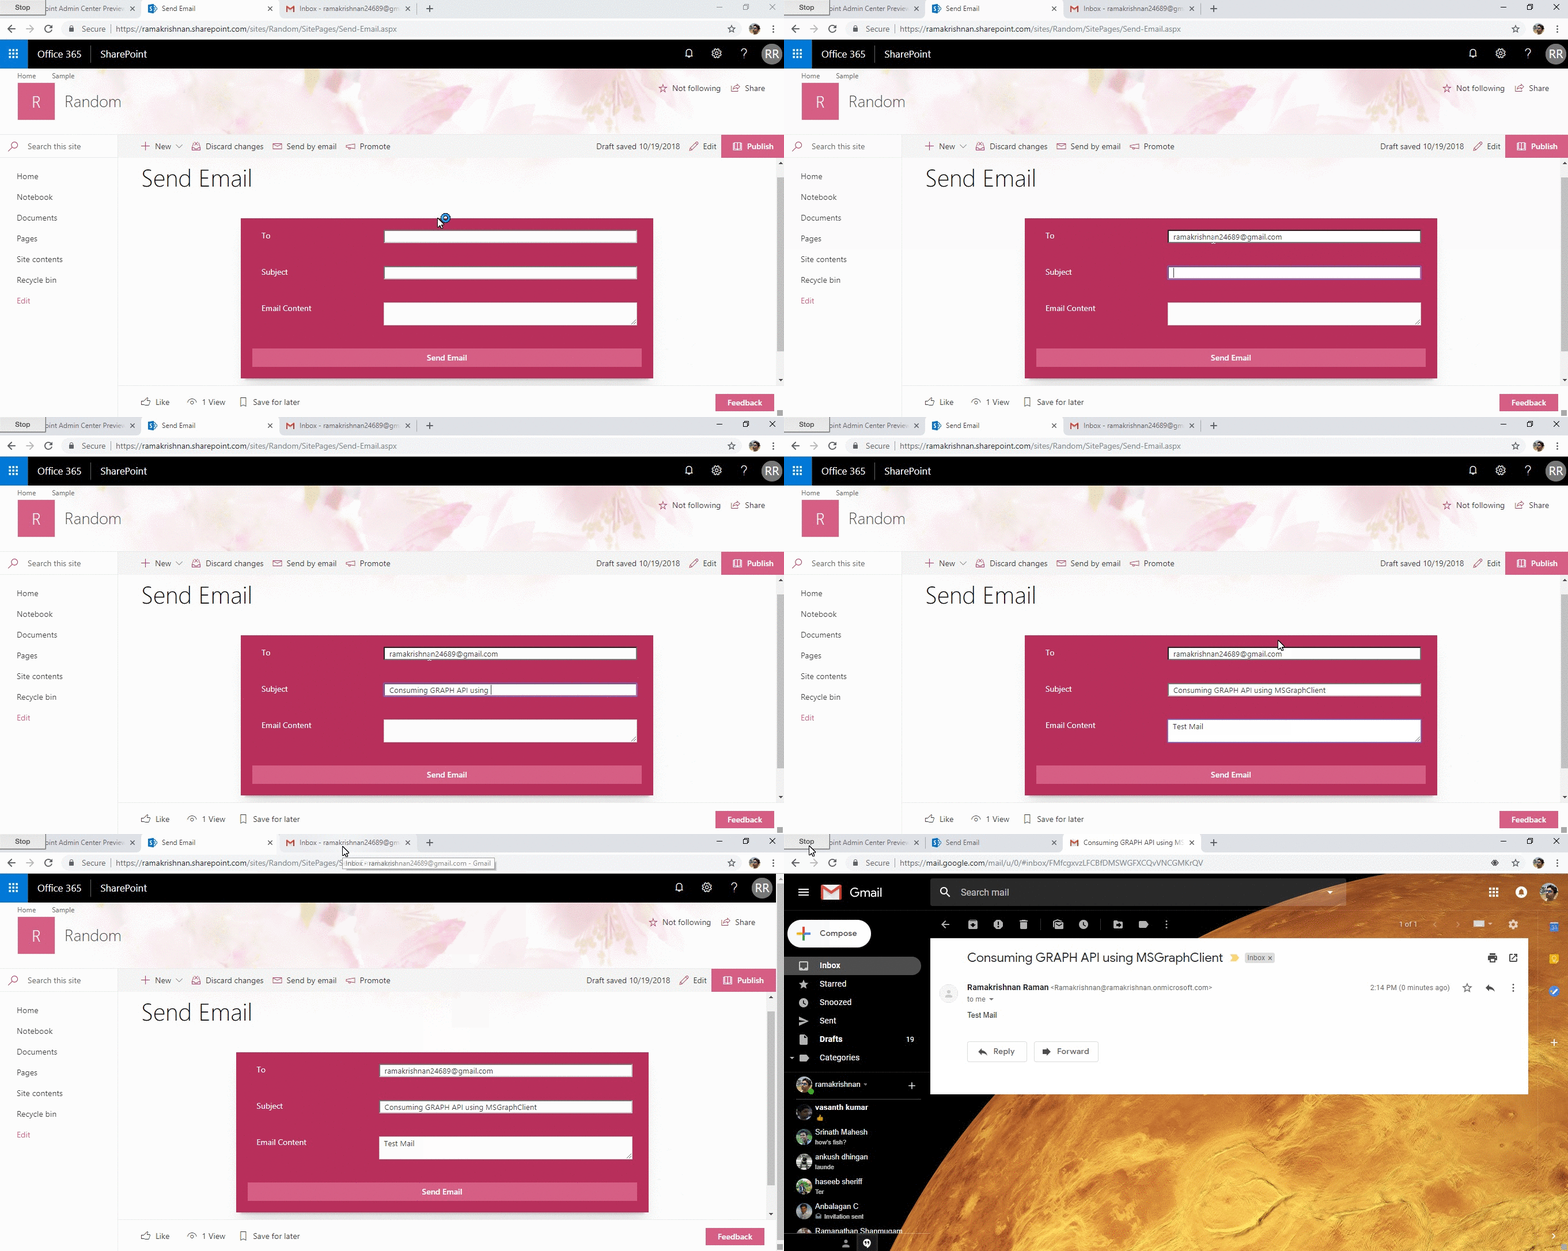
Once the webpart is added, enter email id of the person to whom an email need to be sent. Enter subject, email content & Click on Send Email Button.
Thus, In this article it is explained how MSGraph can be consumed in SPFx webpart.
Download this solution
Solution can be downloaded from technet gallery
