Load Balanced Test Bed Part 4-Configuring the Nodes
Configuring the Nodes
Part 4 of 5: For overall context, please see the introduction to this series
In this part of the procedure, we'll put the finishing touches on the node's operating system so that it is ready to become a cluster node. We'll name it, join it to the domain, name its network connections (to distinguish cluster traffic versus node direct traffic), make the cluster administrator domain user (created earlier) an administrator on the node, and assign a static IP address to the connection that will handle cluster traffic.
Join the Node to the Domain
Start the node VM
Connect to the node VM
The operating system will go through Sysprep’s mini-setup, which makes a unique machine without having to re-install the whole operating system. When this VM writes to its disk, it will be writing to the differencing disk that you connected it to.
Answer the questions in mini-setup (one of which will be to choose the administrator password).
When you finish mini-setup, log on to the VM with the local administrator user/password that you set.
Start Server Manager on the node VM
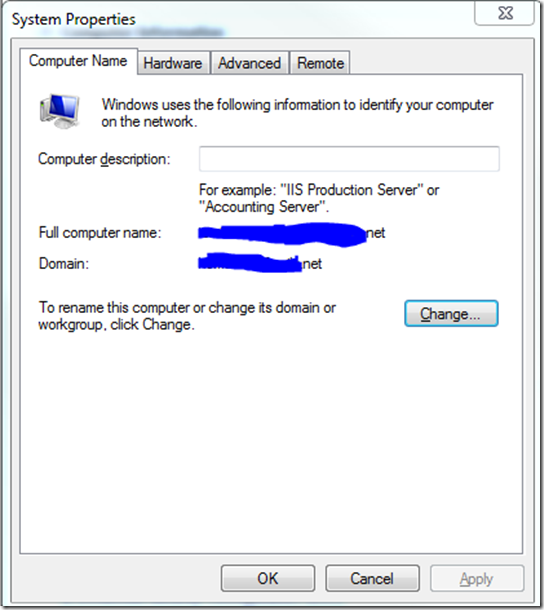
On the far right of the Computer Information section of Server Manager’s Server Summary, click “Change System Properties”
On the Computer Name tab, click the Change button…
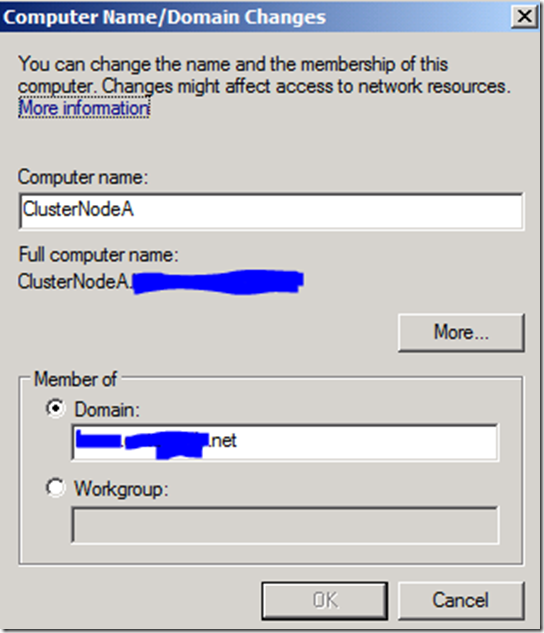
Name the node by changing the Computer Name text box to ClusterNodeA
Join it to your domain by clicking Domain under Member of, and typing your test domain name in the Domain text box
Click OK
You will be prompted to restart the VM, but don’t. Choose Restart Later.
Name the Public Network Connection
Later on we will be adding another network adapter to the VM. In order to avoid confusion, we will name the current adapter according to its purpose, which is to handle traffic directly to the machine.
Go to Server Manager on the VM and select the Server Manager root in the left navigation tree.
On the far right of the Computer Information section of Server Manager’s Server Summary, click “View Network Connections”
Select the network connection, and click Rename this connection. Name the network connection “Public”.
Make the Cluster Administrator Domain Account a Local Administrator
In Server Manager, expand the Configuration node, then expand Local Users and Groups in the left navigation tree.
Click the Groups folder
Double-click the Administrators group and add the cluster administrator domain user you created (in the Networking Setup section) to the local administrators group on the node.
Shutdown the node
Add a Second Network Adapter
Start Server Manager on the host machine. In the left side navigation tree, expand the Roles branch, Hyper-V branch, Hyper-V Manager branch, then click on your host machine’s name.
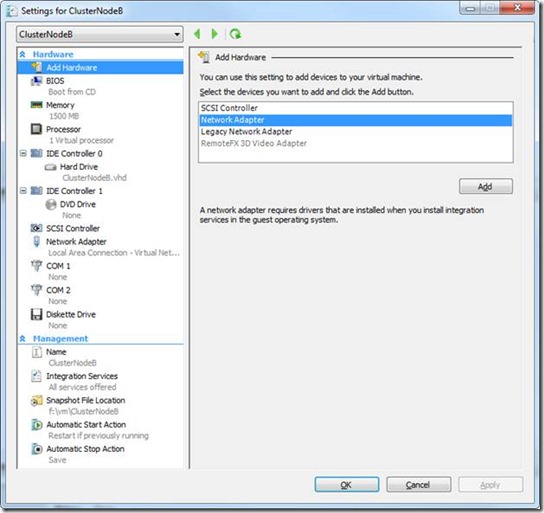
Right-click on your node Virtual Machine, and choose Settings…
Click on Add Hardware in the top left
Click on Network Adapter in the Add Hardware pane to the right, and click the Add button
You will be navigated to the Network Adapter settings for the new adapter. Select Local Area Connection – Virtual Network in the Network dropdown.
Very Important: Make sure the MAC Address is set to Dynamic and the Enable spoofing of MAC addresses is checked, as shown below:
Click OK
Name the Cluster Network Connection
Now that you've added the second adapter to the VM node, start the node
Log on as the cluster administrator domain user, which you added to the Administrators group on the node earlier
Start Server Manager on the VM node and select the Server Manager root in the left navigation tree
On the far right of the Computer Information section of Server Manager’s Server Summary, click “View Network Connections”
Select the network connection, and click Rename this connection. Name the network connection “Cluster”. This adapter will be dedicated to handling load-balanced cluster traffic.
Assign a static IP to your cluster adapter
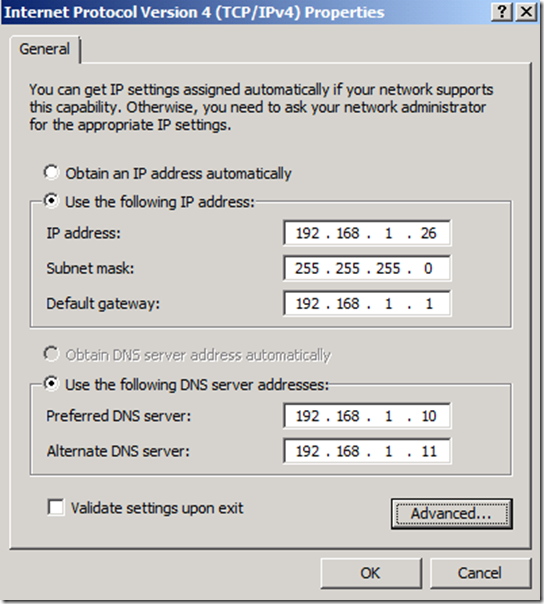
Earlier I assigned the cluster IP 192.168.1.25 by creating the static Host A DNS record. I’m going to assign the individual node’s cluster adapter the static IP address 192.168.1.26 (last octet one higher). For each successive node I add to the cluster, I continue adding one to the last octet. For example, I’d assign 192.168.1.27 if I was adding a second node, etc.
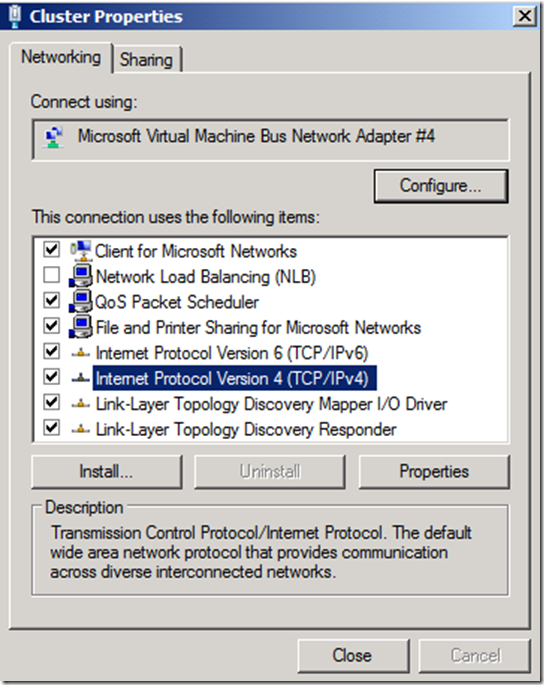
Right-click on the Cluster adapter and choose Properties
Select Internet Protocol Version 4, and click Properties
Choose Use the following IP address and type 192.168.1.26 (or whatever unassigned static IP you’ve decided on)
The subnet mask will default and you can leave it
You’ll need to assign your Default gateway and Preferred DNS servers according to how your network is set up. Most likely, your default gateway is your router address and the DNS servers are the domain controllers for your test domain.
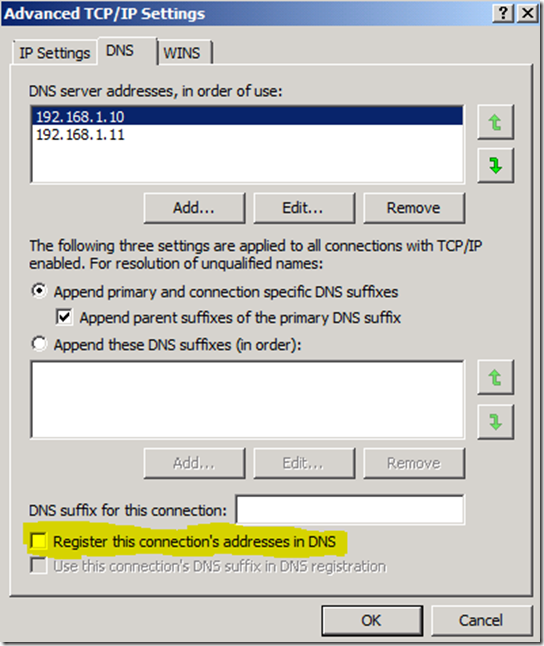
Click the Advanced button, then click the DNS tab
Clear the checkbox labeled Register this connection’s addresses in DNS (highlighted in yellow below).
This adapter will handle cluster traffic, not administrative traffic (not traffic directly to the machine). As a result, this adapter should not be given a DNS name as it will answer traffic to the cluster IP and cluster Host A DNS name that we set up earlier. In other words, in this example, we don’t want 192.168.1.26 to be associated with the ClusterNodeA machine name in DNS. The other adapter that we named “Public” will handle traffic directly to the machine name.
This node is now ready to become a cluster node, which is what we'll do next.
