How to change network settings from public to private?

healee 31 Reputation points
2020-08-22T02:00:02.85+00:00

I have a crossover cable connecting a Windows 10 and a Windows 7 system. They are connected but can't see each other. Both show public network. I would like to be able to copy files across using the connection. I don't have other network or router to use.

I don't seem to be able to find Open Start > Settings > Network & Internet, under Change your network settings, click Sharing options. As far as I know the system is up to date.

Windows 10 Version 2004 (OSBuild 19041.450)

Windows 10 Network
Windows 10 Network
Windows 10: A Microsoft operating system that runs on personal computers and tablets.Network: A group of devices that communicate either wirelessly or via a physical connection.
2,364 questions
{count} votes

6 answers

Sort by: Most helpful
  1. Gloria Gu 3,901 Reputation points
    2020-08-24T02:38:25.42+00:00

    Hi,

    In regards to your issue, here're my suggestions:

    You can use PowerShell command to change network settings from public to private: Run PS as administrater

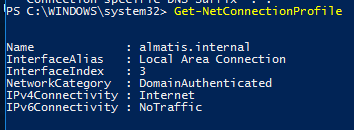
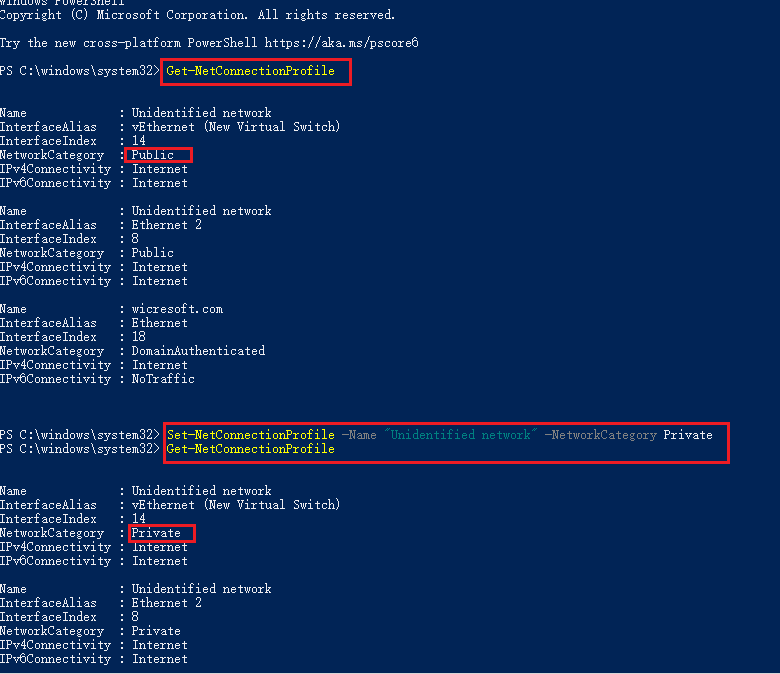
    1. Get-NetConnectionProfile and press Enter. Information is then shown about the active network connection.
    2. Set-NetConnectionProfile -Name "NetworkName" -NetworkCategory Private. Replace NetworkName with the value of the Name field shared by the previous command.
      To double check that the network location was changed, run the Get-NetConnectionProfile again and see the results. The NetworkCategory field should have a different value.

    19724-2.png

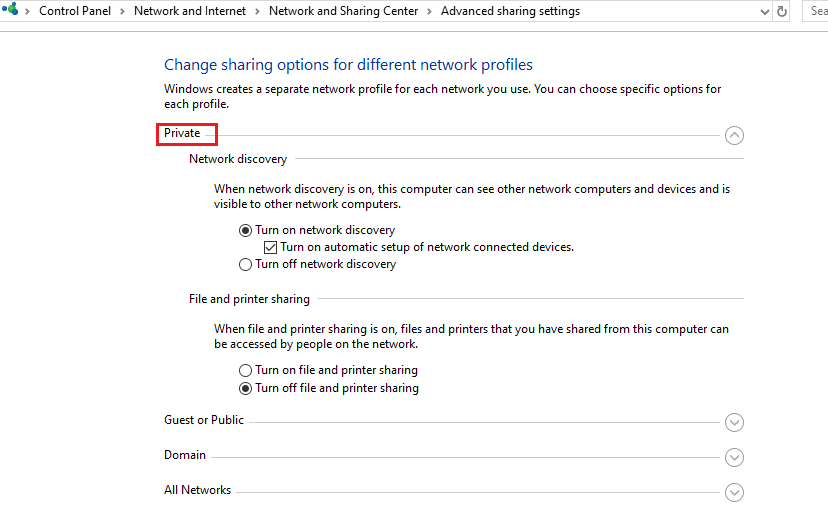
    1. You can open sharing options for different network profiles in Control Panel> Network and sharing center> Advanced sharing settings

    19742-3.png

    -------If my answer is helpful to you, please remember to mark them as answer. Thank you!------

    Regards
    Gloria

    34 people found this answer helpful.

  2. S.Sengupta 20,211 Reputation points MVP
    2020-08-22T03:46:00.313+00:00
    1. Open Settings.
    2. Click on the Network and Internet icon.
    3. As you are using a wired connection, click on Ethernet.
    4. Click on the connection name on the right. In my case, it is named just "Network".
    5. Turn on the desired option
    5 people found this answer helpful.

  3. Kapil Arya 8,251 Reputation points MVP
    2020-08-22T04:03:12.483+00:00

    Hello,

    See if this helps you:

    https://www.kapilarya.com/switch-network-from-public-to-private-and-domain-windows-10

    Hope this helps!

    Note: Included link in this reply refers to blog post by a trusted Microsoft MVP.


  4. Anas P V 1 Reputation point
    2021-07-06T12:50:44.46+00:00

    HI ,
    Try Changing this
    Control Panel\Network and Internet\Network and Sharing Center\Advanced sharing settings

    You can find all networks below as drop down menu

    Make sure IP's Configurations are proper .Both PC's IP should be on same network ,Automatically its not going to connect since you don't have router or switch
    1.Default gateway should be same for both PC's
    2.Ip's of systems should be on same network
    try to ping each other

    0 comments No comments

  5. Amy Baldwin 1 Reputation point
    2021-12-05T19:46:50.597+00:00

    I ran into this same problem today when using an Ethernet crossover cable to connect two Windows 10 PCs. After assigning a static IP address to the interface via the Control Panel, Windows assigned the interface to the "Unidentified network" profile, which is treated as a public network by default. There was no option to change the public/private value in the Settings Panel for the interface.

    I tried the PowerShell Set-NetConnectionProfile option (can also be done using secpol.msc on 10 Pro) to set the network profile to private, but there were two problems: one, it did not persist after a reboot and two, it creates a security issue if you ever connect to an unidentified public network.

    What I really wanted to do was create a new network profile, but I never found a way to do so using the Settings Panel, netsh, secpol.msc, or the like. Normally, Windows kicks off a wizard to set that up when it discovers a new network, but it wasn't doing that for me.

    While digging around, I noticed that the Settings Panel status page for the interface was showing "IP assignment" as DHCP and not Manual, even though I had it set manually in the IPv4 properties page in the Control Panel adapter settings. I used the old Control Panel method to set things because the Settings Panel method will reject a static assignment with the error "Can't save IP settings. Check one or more settings and try again" if you leave the default gateway blank.

    Just for kicks I put the static IP address of the other PC in that field so it would accept it. Upon hitting save, Windows created a new network profile called "Network 2" and assigned the interface to it. That allowed me to set the profile to private in the Settings Panel. Problem solved.

    Except I also have a second interface, a WiFi adapter, that is my connection to the Internet. It had a lower binding order than the Ethernet interface, so I also had to manually set a higher metric on the Ethernet interface to keep Windows from using the dummy gateway as its preferred route for 0.0.0.0.

    So there seem to be a couple of Windows bugs here. One is the gateway requirement for the Settings Panel manual IP entry. Another is that the Settings Panel doesn't like a manual static assignment configured elsewhere, like via Control Panel or netsh, without a gateway defined. And last is that you can be stuck with an "Unidentified network" association unless you make the Settings Panel happy (or maybe find a registry hack).
Your answer

Answers can be marked as Accepted Answers by the question author, which helps users to know the answer solved the author's problem.