Migrate a SQL Server TDE certificate to Azure SQL Managed Instance
Applies to: ![]() Azure SQL Managed Instance
Azure SQL Managed Instance
In this article, learn how to migrate the certificate before you migrate your TDE-protected SQL Server database to Azure SQL Managed Instance by using the native restore option.
When you migrate a database protected by Transparent Data Encryption (TDE) from SQL Server to Azure SQL Managed Instance using the native restore option, you must first migrate the corresponding certificate before you restore the database to SQL managed instance.
Alternatively, you can use the fully managed Azure Database Migration Service to seamlessly migrate both a TDE-protected database and the corresponding certificate.
This article focuses on migrating databases from SQL Server to Azure SQL Managed Instance. To move databases between SQL managed instances, review:
Prerequisites
To complete the steps in this article, you need the following prerequisites:
- Pvk2Pfx command-line tool installed on the on-premises server or other computer with access to the certificate exported as a file. The Pvk2Pfx tool is part of the Enterprise Windows Driver Kit, a self-contained command-line environment.
- Windows PowerShell version 5.0 or higher installed.
Make sure you have the following:
- Azure PowerShell module installed and updated.
- Az.Sql module.
Run the following commands in PowerShell to install/update the module:
Install-Module -Name Az.Sql
Update-Module -Name Az.Sql
Export the TDE certificate to a .pfx file
The certificate can be exported directly from the source SQL Server instance, or from the certificate store if it's being kept there.
Export the certificate from the source SQL Server instance
Use the following steps to export the certificate with SQL Server Management Studio and convert it into .pfx format. The generic names TDE_Cert and full_path are being used for certificate and file names and paths through the steps. They should be replaced with the actual names.
In SSMS, open a new query window and connect to the source SQL Server instance.
Use the following script to list TDE-protected databases and get the name of the certificate protecting encryption of the database to be migrated:
USE master
GO
SELECT db.name as [database_name], cer.name as [certificate_name]
FROM sys.dm_database_encryption_keys dek
LEFT JOIN sys.certificates cer
ON dek.encryptor_thumbprint = cer.thumbprint
INNER JOIN sys.databases db
ON dek.database_id = db.database_id
WHERE dek.encryption_state = 3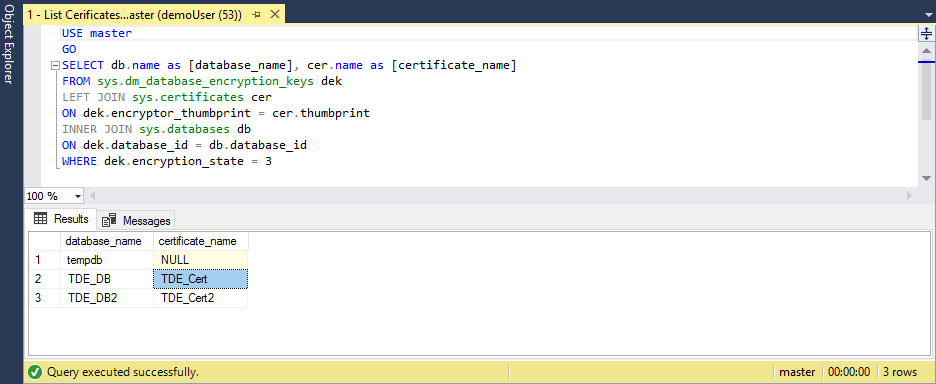
Execute the following script to export the certificate to a pair of files (.cer and .pvk), keeping the public and private key information:
USE master
GO
BACKUP CERTIFICATE TDE_Cert
TO FILE = 'c:\full_path\TDE_Cert.cer'
WITH PRIVATE KEY (
  FILE = 'c:\full_path\TDE_Cert.pvk',
  ENCRYPTION BY PASSWORD = '<SomeStrongPassword>'
)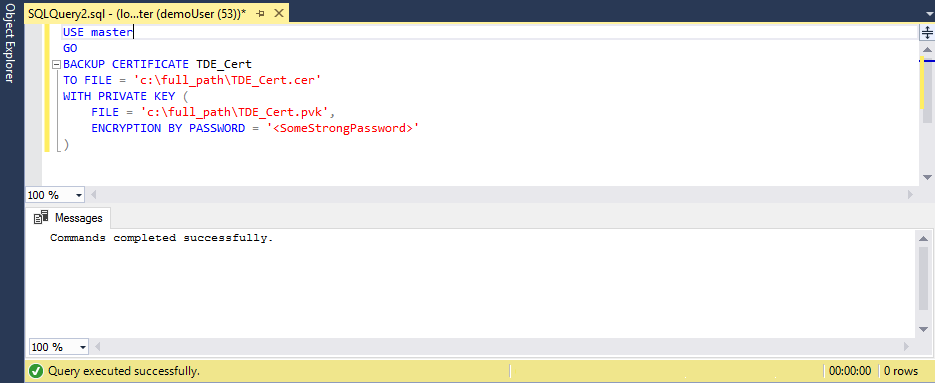
Use the PowerShell console to copy certificate information from a pair of newly created files to a .pfx file, using the Pvk2Pfx tool:
.\pvk2pfx -pvk c:/full_path/TDE_Cert.pvk -pi "<SomeStrongPassword>" -spc c:/full_path/TDE_Cert.cer -pfx c:/full_path/TDE_Cert.pfx
Export the certificate from a certificate store
If the certificate is kept in the SQL Server local machine certificate store, it can be exported using the following steps:
Open the PowerShell console and execute the following command to open the Certificates snap-in of Microsoft Management Console:
certlmIn the Certificates MMC snap-in, expand the path Personal > Certificates to see the list of certificates.
Right-click the certificate and click Export.
Follow the wizard to export the certificate and private key to a .pfx format.
Upload the certificate to Azure SQL Managed Instance using an Azure PowerShell cmdlet
Important
A migrated certificate is only used to restore the TDE-protected database. Shortly after the restore completes, the migrated certificate is replaced by a different protector, either a service-managed certificate or an asymmetric key from the key vault, depending on the type of TDE you set on the instance.
Start with preparation steps in PowerShell:
# import the module into the PowerShell session
Import-Module Az
# connect to Azure with an interactive dialog for sign-in
Connect-AzAccount
# list subscriptions available and copy id of the subscription target the managed instance belongs to
Get-AzSubscription
# set subscription for the session
Select-AzSubscription <subscriptionId>
Once all preparation steps are done, run the following commands to upload base-64 encoded certificate to the target managed instance:
# If you are using PowerShell 6.0 or higher, run this command:
$fileContentBytes = Get-Content 'C:/full_path/TDE_Cert.pfx' -AsByteStream
# If you are using PowerShell 5.x, uncomment and run this command instead of the one above:
# $fileContentBytes = Get-Content 'C:/full_path/TDE_Cert.pfx' -Encoding Byte
$base64EncodedCert = [System.Convert]::ToBase64String($fileContentBytes)
$securePrivateBlob = $base64EncodedCert  | ConvertTo-SecureString -AsPlainText -Force
$password = "<password>"
$securePassword = $password | ConvertTo-SecureString -AsPlainText -Force
Add-AzSqlManagedInstanceTransparentDataEncryptionCertificate -ResourceGroupName "<resourceGroupName>" `
    -ManagedInstanceName "<managedInstanceName>" -PrivateBlob $securePrivateBlob -Password $securePassword
The certificate is now available to the specified managed instance, and the backup of the corresponding TDE-protected database can be restored successfully.
Note
Uploaded certificate is not visible in the sys.certificates catalog view. To confirm successful upload of the certificate you can run RESTORE FILELISTONLY command.
Next steps
In this article, you learned how to migrate a certificate protecting the encryption key of a database with Transparent Data Encryption, from the on-premises or IaaS SQL Server instance to Azure SQL Managed Instance.
See Restore a database backup to an Azure SQL Managed Instance to learn how to restore a database backup to Azure SQL Managed Instance.