Create an alert in Power BI and fine tune in Fabric Activator
You can create an alert in Power BI, on dashboards and reports. When your alert is ready, you have the option to open it in Fabric Activator. Power BI alerts monitor a change to a value and either send a notification in email or Teams. After you create a Power BI alert, you can save it in an existing or new Activator. When you open that alert in Activator, you have almost endless possibilities for fine tuning and expanding the capabilities of that alert.
Note
In Activator, an "alert" is referred to as a "rule."
Get data for Activator from Power BI
You can get data for use in Activator from many sources. This article describes how to access Power BI report and dashboard alerts and refine those alerts in Activator.
Use Activator to fine tune your rule and set complex conditions that are more granular than is possible in Power BI. Another reason to use Activator is if you want to trigger a Power Automate flow when your rule is activated. Refer to Create rules for information on how to create and edit rules in Activator.
Prerequisites
- A workspace with a Microsoft Fabric-enabled capacity
- You need edit permissions to a Power BI report that is published online to a workspace.
Create an alert for a Power BI report visual
Start by creating an alert for a dashboard tile or a report visual. This example uses a report visual.
Open your Power BI report in editing view.
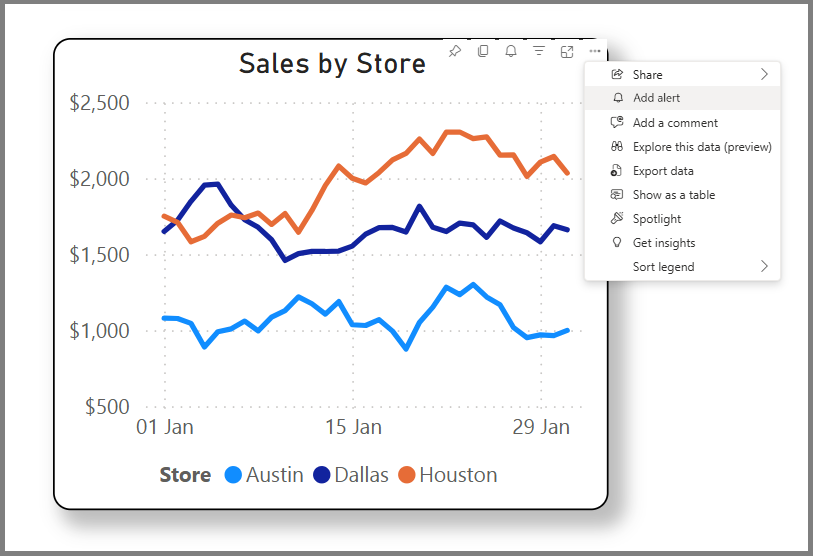
Choose a visual on the report to monitor, in the upper right corner of the visual select the ellipses (...) > Add alert. You can also select the bell icon in the visual.
The following image shows an example of how to set an alert from a visual that displays daily sales by store:

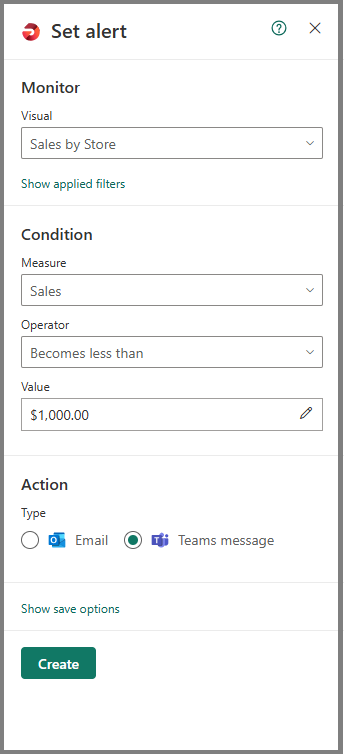
Enter the condition to monitor. For example, select Sales as the measure and set a rule to notify you via email when the value drops less than $1,000.
Power BI uses the filters in place at the time that you create your alert. Changing the filters on your visual after creating your alert has no effect on the alert logic. Select Show applied filters or the filter icon
 to see the filters on your visual.
When you're ready to save your alert, select Apply. Selecting Apply saves the alert condition in the active report and in an Activator item.
After you create your alert, Activator monitors the data in the visual once per hour. You receive an alert within one hour of your alert condition becoming true.

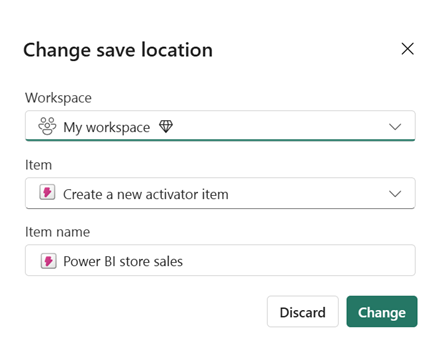
Optionally, change the default Activator location where the alert is saved. Select the ellipses (...) to the right of the Activator name at the bottom of the Alerts pane. Then select Create a new Activator item and give it a descriptive name.

To open the alert in Activator, select the ellipses (...) to the right of your new alert name and choose Open in Activator. You may have to close and reopen the Alerts pane for the link to work properly. Activator opens with your alert highlighted and the Definition pane open on the right side.
Limitations and considerations
- If your visual has multiple series, then Activator applies the alert rule to each series. In the example shown here, the visual shows sales per store, so the alert rule applies per store.
- If your visual has a time axis, then Activator uses the time axis in the alert logic. In the example shown here, the visual has a daily time axis, so Activator monitors sales per day. Activator checks each point on the time axis once. If the visual updates the value for a particular point in time after Activator checks it, then Activator ignores the updated value.
- You can create alerts on tables and matrix visuals. Activator applies the alert condition to each row in the table, or to each cell in the matrix. If your table or matrix has a column containing timestamps, then Activator interprets that column as a time axis.
- Activator uses the filters in place at the time that you create your alert. Changing the filters on your visual after creating your alert has no effect on the alert logic. Select Show applied filters to see the filters on your visual.