Tutorial: Conduct vector similarity search on Azure OpenAI embeddings using Azure Redis
In this tutorial, you walk through a basic vector similarity search use-case. You use embeddings generated by Azure OpenAI Service and the built-in vector search capabilities of the Enterprise tier of Azure Cache for Redis to query a dataset of movies to find the most relevant match.
The tutorial uses the Wikipedia Movie Plots dataset that features plot descriptions of over 35,000 movies from Wikipedia covering the years 1901 to 2017. The dataset includes a plot summary for each movie, plus metadata such as the year the film was released, the director(s), main cast, and genre. You follow the steps of the tutorial to generate embeddings based on the plot summary and use the other metadata to run hybrid queries.
In this tutorial, you learn how to:
- Create an Azure Cache for Redis instance configured for vector search
- Install Azure OpenAI and other required Python libraries.
- Download the movie dataset and prepare it for analysis.
- Use the text-embedding-ada-002 (Version 2) model to generate embeddings.
- Create a vector index in Azure Cache for Redis
- Use cosine similarity to rank search results.
- Use hybrid query functionality through RediSearch to prefilter the data and make the vector search even more powerful.
Important
This tutorial walks you through building a Jupyter Notebook. You can follow this tutorial with a Python code file (.py) and get similar results, but you need to add all of the code blocks in this tutorial into the .py file and execute once to see results. In other words, Jupyter Notebooks provides intermediate results as you execute cells, but this is not behavior you should expect when working in a Python code file.
Important
If you would like to follow along in a completed Jupyter notebook instead, download the Jupyter notebook file named tutorial.ipynb and save it into the new redis-vector folder.
Prerequisites
- An Azure subscription - Create one for free
- Access granted to Azure OpenAI in the desired Azure subscription. Currently, you must apply for access to Azure OpenAI. You can apply for access to Azure OpenAI by completing the form at https://aka.ms/oai/access.
- Python 3.8 or later version
- Jupyter Notebooks (optional)
- An Azure OpenAI resource with the text-embedding-ada-002 (Version 2) model deployed. This model is currently only available in certain regions. See the resource deployment guide for instructions on how to deploy the model.
Create an Azure Cache for Redis Instance
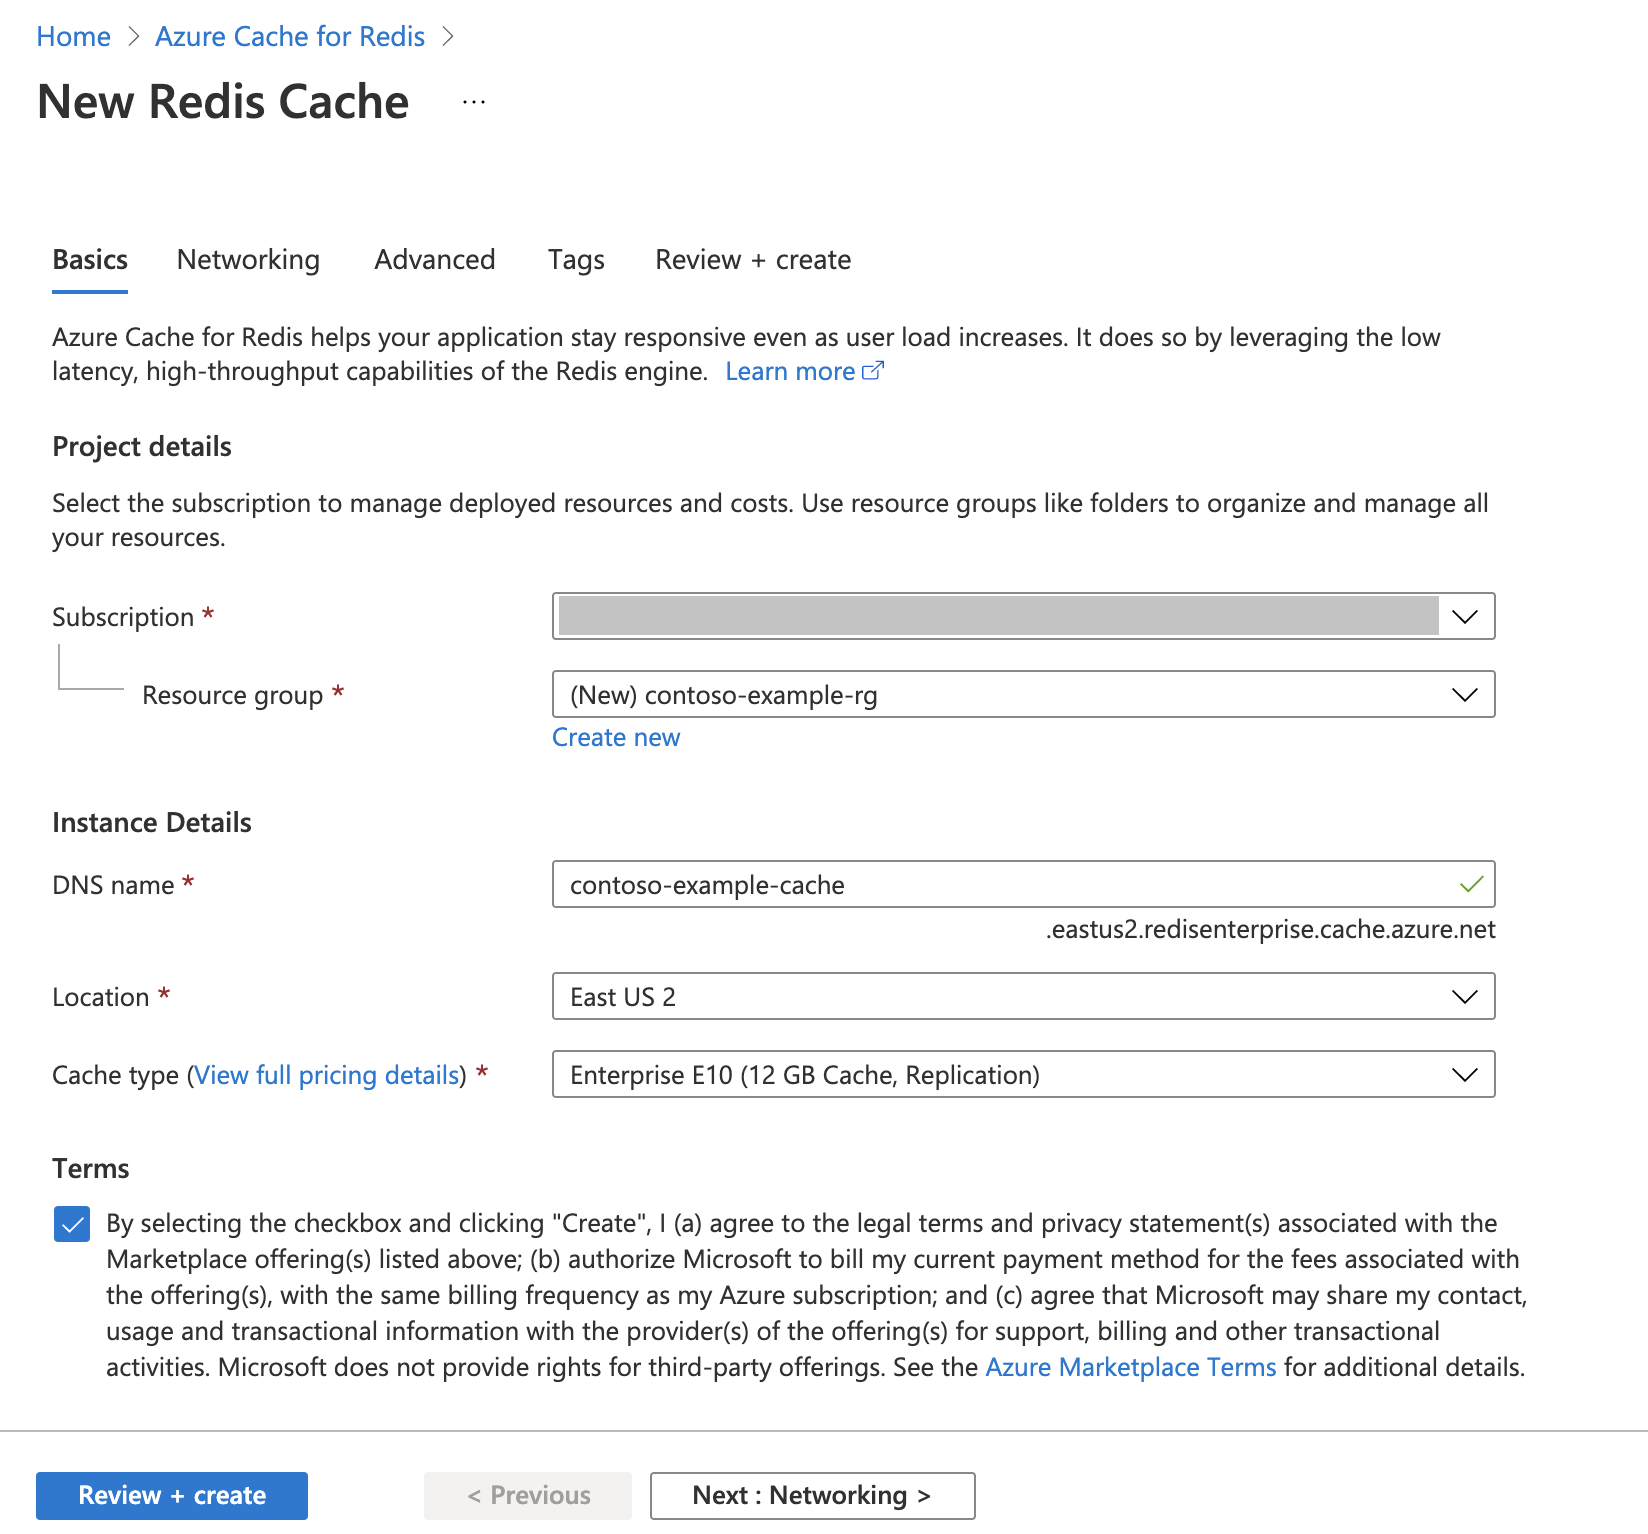
Follow the Quickstart: Create a Redis Enterprise cache guide, but make sure you add the RedisSearch module at create time.
On the Advanced page, make sure that you've added the RediSearch module and have chosen the Enterprise Cluster Policy. All other settings can match the default described in the quickstart.
It takes a few minutes for the cache to create. You can move on to the next step in the meantime.

Set up your development environment
Create a folder on your local computer named redis-vector in the location where you typically save your projects.
Create a new python file (tutorial.py) or Jupyter notebook (tutorial.ipynb) in the folder.
Install the required Python packages:
pip install "openai==1.6.1" num2words matplotlib plotly scipy scikit-learn pandas tiktoken redis langchain
Download the dataset
In a web browser, navigate to https://www.kaggle.com/datasets/jrobischon/wikipedia-movie-plots.
Sign in or register with Kaggle. Registration is required to download the file.
Select the Download link on Kaggle to download the archive.zip file.
Extract the archive.zip file and move the wiki_movie_plots_deduped.csv into the redis-vector folder.
Import libraries and set up connection information
To successfully make a call against Azure OpenAI, you need an endpoint and a key. You also need an endpoint and a key to connect to Azure Cache for Redis.
Go to your Azure OpenAI resource in the Azure portal.
Locate Endpoint and Keys in the Resource Management section. Copy your endpoint and access key as you'll need both for authenticating your API calls. An example endpoint is:
https://docs-test-001.openai.azure.com. You can use eitherKEY1orKEY2.Go to the Overview page of your Azure Cache for Redis resource in the Azure portal. Copy your endpoint.
Locate Access keys in the Settings section. Copy your access key. You can use either
PrimaryorSecondary.Add the following code to a new code cell:
# Code cell 2

import re
from num2words import num2words
import os
import pandas as pd
import tiktoken
from typing import List
from langchain.embeddings import AzureOpenAIEmbeddings
from langchain.vectorstores.redis import Redis as RedisVectorStore
from langchain.document_loaders import DataFrameLoader

API_KEY = "<your-azure-openai-key>"
RESOURCE_ENDPOINT = "<your-azure-openai-endpoint>"
DEPLOYMENT_NAME = "<name-of-your-model-deployment>"
MODEL_NAME = "text-embedding-ada-002"
REDIS_ENDPOINT = "<your-azure-redis-endpoint>"
REDIS_PASSWORD = "<your-azure-redis-password>"
Update the value of
API_KEYandRESOURCE_ENDPOINTwith the key and endpoint values from your Azure OpenAI deployment.DEPLOYMENT_NAMEshould be set to the name of your deployment using thetext-embedding-ada-002 (Version 2)embeddings model, andMODEL_NAMEshould be the specific embeddings model used.Update
REDIS_ENDPOINTandREDIS_PASSWORDwith the endpoint and key value from your Azure Cache for Redis instance.Important
We strongly recommend using environmental variables or a secret manager like Azure Key Vault to pass in the API key, endpoint, and deployment name information. These variables are set in plaintext here for the sake of simplicity.
Execute code cell 2.
Import dataset into pandas and process data
Next, you'll read the csv file into a pandas DataFrame.
Add the following code to a new code cell:
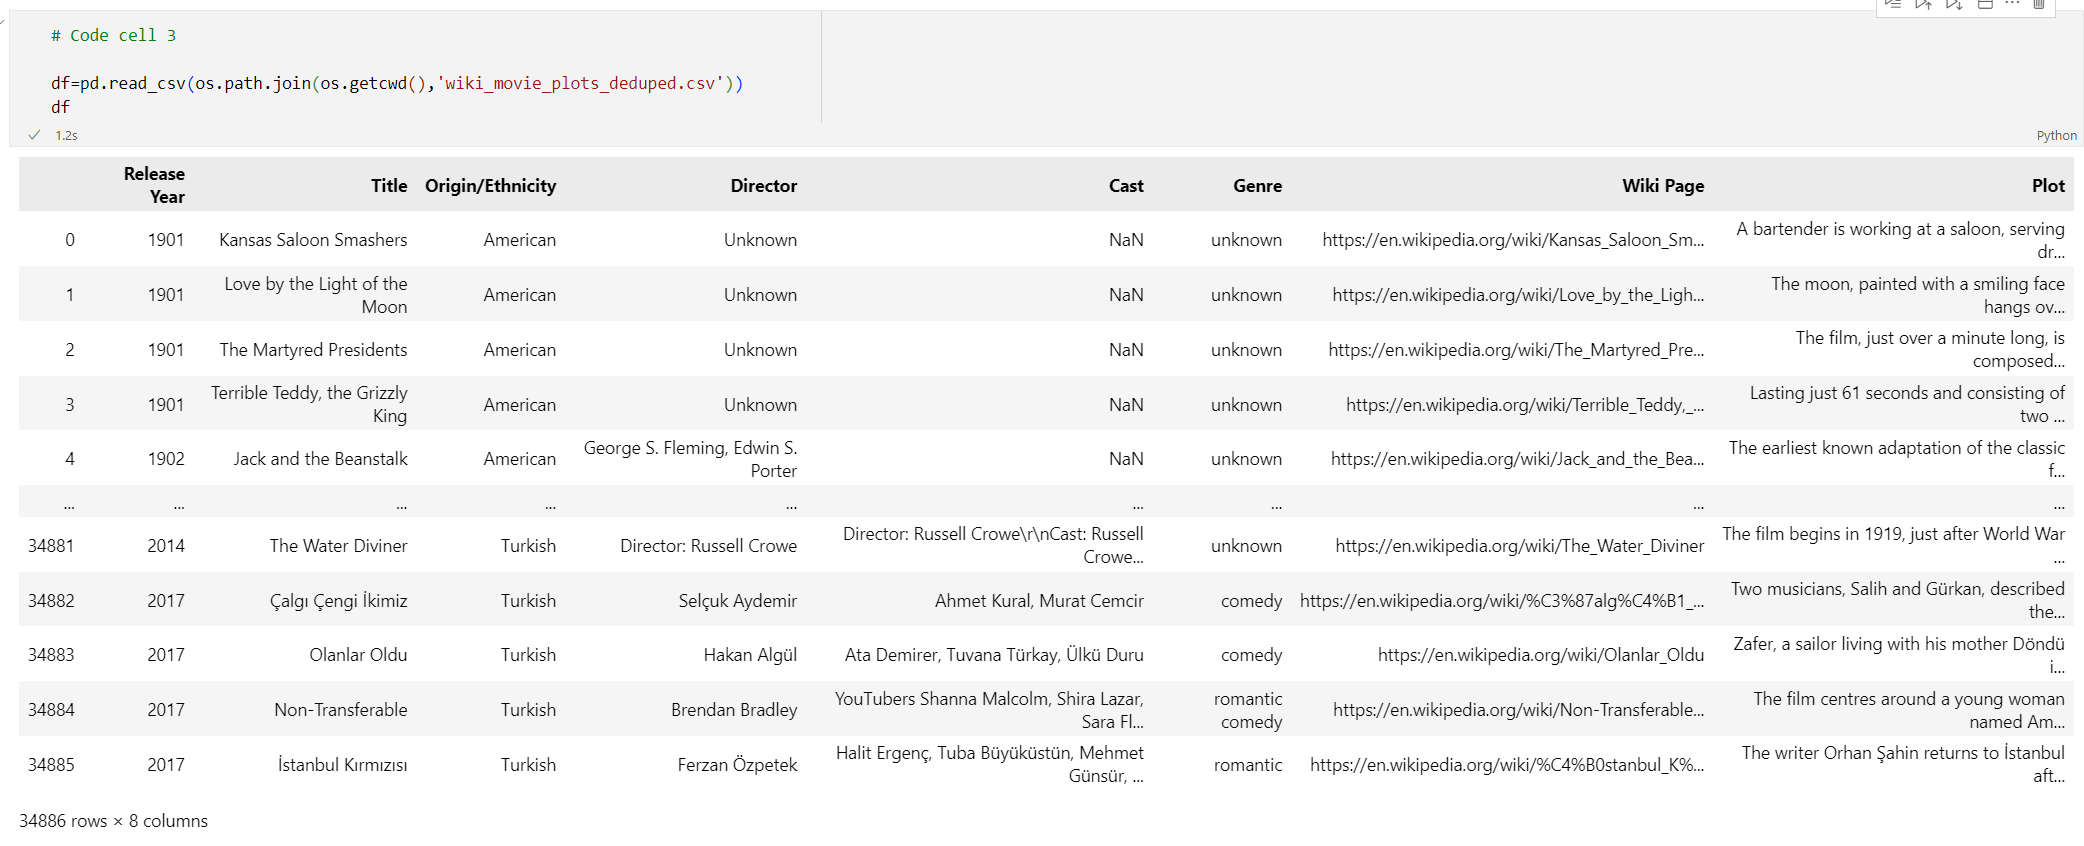
# Code cell 3

df=pd.read_csv(os.path.join(os.getcwd(),'wiki_movie_plots_deduped.csv'))
df
Execute code cell 3. You should see the following output:
Next, process the data by adding an
idindex, removing spaces from the column titles, and filters the movies to take only movies made after 1970 and from English speaking countries or regions. This filtering step reduces the number of movies in the dataset, which lowers the cost and time required to generate embeddings. You're free to change or remove the filter parameters based on your preferences.To filter the data, add the following code to a new code cell:
# Code cell 4

df.insert(0, 'id', range(0, len(df)))
df['year'] = df['Release Year'].astype(int)
df['origin'] = df['Origin/Ethnicity'].astype(str)
del df['Release Year']
del df['Origin/Ethnicity']
df = df[df.year > 1970] # only movies made after 1970
df = df[df.origin.isin(['American','British','Canadian'])] # only movies from English-speaking cinema
df
Execute code cell 4. You should see the following results:
Create a function to clean the data by removing whitespace and punctuation, then use it against the dataframe containing the plot.
Add the following code to a new code cell and execute it:
# Code cell 5

pd.options.mode.chained_assignment = None

# s is input text
def normalize_text(s, sep_token = " \n "):
    s = re.sub(r'\s+',  ' ', s).strip()
    s = re.sub(r". ,","",s)
    s = s.replace("..",".")
    s = s.replace(". .",".")
    s = s.replace("\n", "")
    s = s.strip()

    return s

df['Plot']= df['Plot'].apply(lambda x : normalize_text(x))
Finally, remove any entries that contain plot descriptions that are too long for the embeddings model. (In other words, they require more tokens than the 8192 token limit.) and then calculate the numbers of tokens required to generate embeddings. This also impacts pricing for embedding generation.
Add the following code to a new code cell:
# Code cell 6

tokenizer = tiktoken.get_encoding("cl100k_base")
df['n_tokens'] = df["Plot"].apply(lambda x: len(tokenizer.encode(x)))
df = df[df.n_tokens<8192]
print('Number of movies: ' + str(len(df)))
print('Number of tokens required:' + str(df['n_tokens'].sum()))
Execute code cell 6. You should see this output:
Number of movies: 11125
Number of tokens required:7044844
Important
Refer to Azure OpenAI Service pricing to calculate the cost of generating embeddings based on the number of tokens required.
Load DataFrame into LangChain
Load the DataFrame into LangChain using the DataFrameLoader class. Once the data is in LangChain documents, it's far easier to use LangChain libraries to generate embeddings and conduct similarity searches. Set Plot as the page_content_column so that embeddings are generated on this column.
Add the following code to a new code cell and execute it:
# Code cell 7

loader = DataFrameLoader(df, page_content_column="Plot" )
movie_list = loader.load()
Generate embeddings and load them into Redis
Now that the data has been filtered and loaded into LangChain, you'll create embeddings so you can query on the plot for each movie. The following code configures Azure OpenAI, generates embeddings, and loads the embeddings vectors into Azure Cache for Redis.
Add the following code a new code cell:
# Code cell 8

embedding = AzureOpenAIEmbeddings(
    deployment=DEPLOYMENT_NAME,
    model=MODEL_NAME,
    azure_endpoint=RESOURCE_ENDPOINT,
    openai_api_type="azure",
    openai_api_key=API_KEY,
    openai_api_version="2023-05-15",
    show_progress_bar=True,
    chunk_size=16 # current limit with Azure OpenAI service. This will likely increase in the future.
    )

# name of the Redis search index to create
index_name = "movieindex"

# create a connection string for the Redis Vector Store. Uses Redis-py format: https://redis-py.readthedocs.io/en/stable/connections.html#redis.Redis.from_url
# This example assumes TLS is enabled. If not, use "redis://" instead of "rediss://
redis_url = "rediss://:" + REDIS_PASSWORD + "@"+ REDIS_ENDPOINT

# create and load redis with documents
vectorstore = RedisVectorStore.from_documents(
    documents=movie_list,
    embedding=embedding,
    index_name=index_name,
    redis_url=redis_url
)

# save index schema so you can reload in the future without re-generating embeddings
vectorstore.write_schema("redis_schema.yaml")
Execute code cell 8. This can take over 30 minutes to complete. A
redis_schema.yamlfile is generated as well. This file is useful if you want to connect to your index in Azure Cache for Redis instance without re-generating embeddings.
Important
The speed at which embeddings are generated depends on the quota available to the Azure OpenAI Model. With a quota of 240k tokens per minute, it will take around 30 minutes to process the 7M tokens in the data set.
Run vector search queries
Now that your dataset, Azure OpenAI service API, and Redis instance are set up, you can search using vectors. In this example, the top 10 results for a given query are returned.
Add the following code to your Python code file:
# Code cell 9

query = "Spaceships, aliens, and heroes saving America"
results = vectorstore.similarity_search_with_score(query, k=10)

for i, j in enumerate(results):
    movie_title = str(results[i][0].metadata['Title'])
    similarity_score = str(round((1 - results[i][1]),4))
    print(movie_title + ' (Score: ' + similarity_score + ')')
Execute code cell 9. You should see the following output:
Independence Day (Score: 0.8348)
The Flying Machine (Score: 0.8332)
Remote Control (Score: 0.8301)
Bravestarr: The Legend (Score: 0.83)
Xenogenesis (Score: 0.8291)
Invaders from Mars (Score: 0.8291)
Apocalypse Earth (Score: 0.8287)
Invasion from Inner Earth (Score: 0.8287)
Thru the Moebius Strip (Score: 0.8283)
Solar Crisis (Score: 0.828)
The similarity score is returned along with the ordinal ranking of movies by similarity. Notice that more specific queries have similarity scores decrease faster down the list.
Hybrid searches
Since RediSearch also features rich search functionality on top of vector search, it's possible to filter results by the metadata in the data set, such as film genre, cast, release year, or director. In this case, filter based on the genre
comedy.Add the following code to a new code cell:
# Code cell 10

from langchain.vectorstores.redis import RedisText

query = "Spaceships, aliens, and heroes saving America"
genre_filter = RedisText("Genre") == "comedy"
results = vectorstore.similarity_search_with_score(query, filter=genre_filter, k=10)
for i, j in enumerate(results):
    movie_title = str(results[i][0].metadata['Title'])
    similarity_score = str(round((1 - results[i][1]),4))
    print(movie_title + ' (Score: ' + similarity_score + ')')
Execute code cell 10. You should see the following output:
Remote Control (Score: 0.8301)
Meet Dave (Score: 0.8236)
Elf-Man (Score: 0.8208)
Fifty/Fifty (Score: 0.8167)
Mars Attacks! (Score: 0.8165)
Strange Invaders (Score: 0.8143)
Amanda and the Alien (Score: 0.8136)
Suburban Commando (Score: 0.8129)
Coneheads (Score: 0.8129)
Morons from Outer Space (Score: 0.8121)
With Azure Cache for Redis and Azure OpenAI Service, you can use embeddings and vector search to add powerful search capabilities to your application.
Clean up resources
If you want to continue to use the resources you created in this article, keep the resource group.
Otherwise, if you're finished with the resources, you can delete the Azure resource group that you created to avoid charges.
Important
Deleting a resource group is irreversible. When you delete a resource group, all the resources in it are permanently deleted. Make sure that you do not accidentally delete the wrong resource group or resources. If you created the resources inside an existing resource group that contains resources you want to keep, you can delete each resource individually instead of deleting the resource group.
To delete a resource group
Sign in to the Azure portal, and then select Resource groups.
Select the resource group you want to delete.
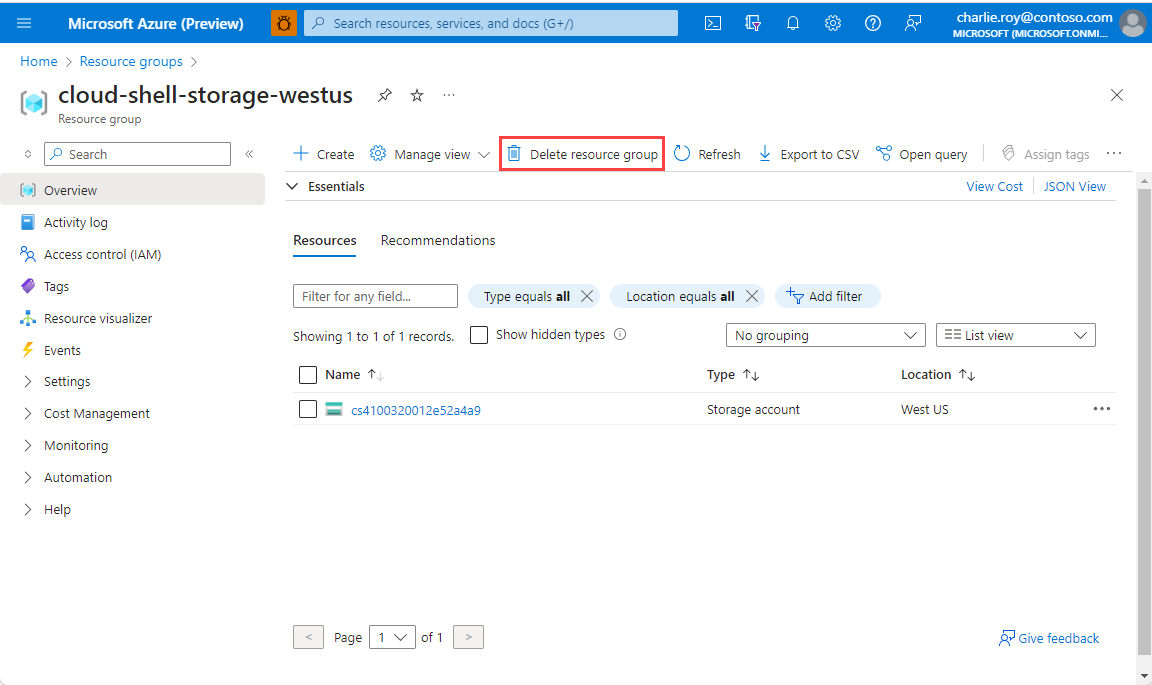
If there are many resource groups, use the Filter for any field... box, type the name of your resource group you created for this article. Select the resource group in the results list.

Select Delete resource group.
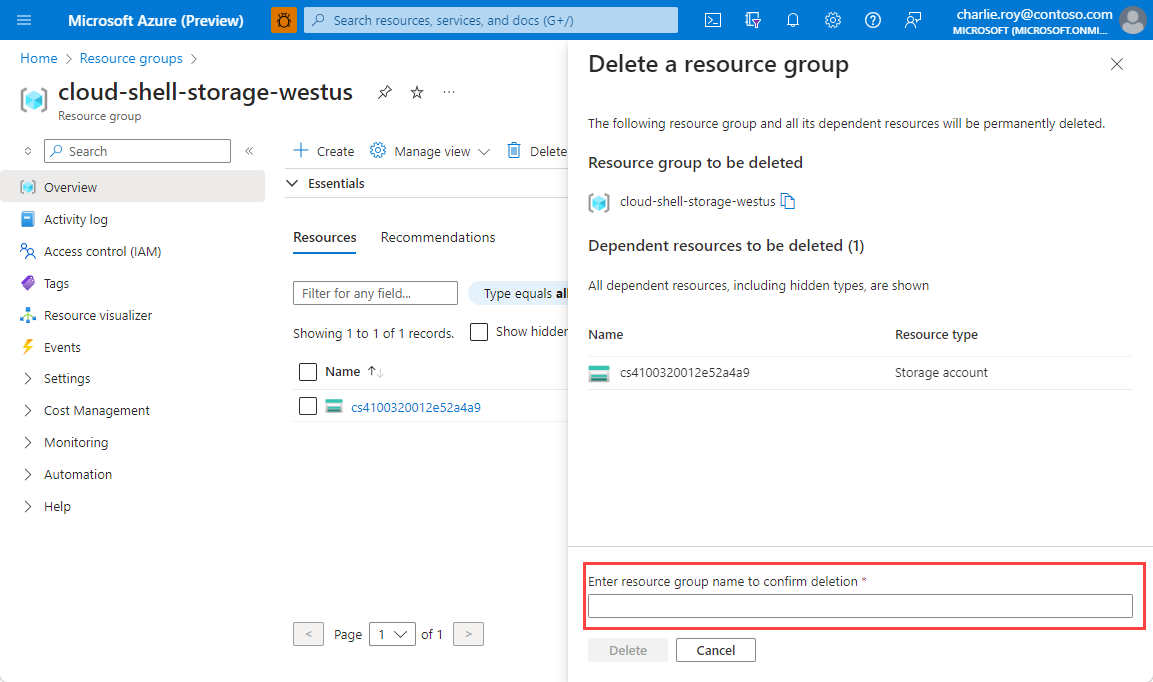
You're asked to confirm the deletion of the resource group. Type the name of your resource group to confirm, and then select Delete.

After a few moments, the resource group and all of its resources are deleted.
Related Content
- Learn more about Azure Cache for Redis
- Learn more about Azure Cache for Redis vector search capabilities
- Learn more about embeddings generated by Azure OpenAI Service
- Learn more about cosine similarity
- Read how to build an AI-powered app with OpenAI and Redis
- Build a Q&A app with semantic answers

