Configure SAP Cloud Identity Services for automatic user provisioning
This tutorial demonstrates the steps for configuring provisioning from Microsoft Entra ID to SAP Cloud Identity Services. The goal is to set up Microsoft Entra ID to automatically provision and deprovision users to SAP Cloud Identity Services, so that those users can authenticate to SAP Cloud Identity Services and have access to other SAP workloads. SAP Cloud Identity Services supports provisioning from its local identity directory to other SAP applications as target systems.
Note
This tutorial describes a connector built in the Microsoft Entra user provisioning service. For important details on what this service does, how it works, and frequently asked questions, see Automate user provisioning and deprovisioning to SaaS applications with Microsoft Entra ID. SAP Cloud Identity Services also has its own separate connector to read users and groups from Microsoft Entra ID. For more information, see SAP Cloud Identity Services - Identity Provisioning - Microsoft Entra ID as a source system.
Prerequisites
The scenario outlined in this tutorial assumes that you already have the following prerequisites:
- A Microsoft Entra tenant
- An SAP Cloud Identity Services tenant
- A user account in SAP Cloud Identity Services with Admin permissions.
Note
This integration is also available to use from the Microsoft Entra US Government Cloud environment. You can find this application in the Microsoft Entra US Government Cloud Application Gallery and configure it in the same way as you do from the public cloud environment.
If you do not yet have users in Microsoft Entra ID, then start with the tutorial plan deploying Microsoft Entra for user provisioning with SAP source and target apps. That tutorial illustrates how to connect Microsoft Entra with authoritative sources for the list of workers in an organization, such as SAP SuccessFactors. It also shows you how to use Microsoft Entra to set up identities for those workers, so they can sign in to one or more SAP applications, such as SAP ECC or SAP S/4HANA.
If you are configuring provisioning into SAP Cloud Identity Services in a production environment, where you will be governing access to SAP workloads using Microsoft Entra ID Governance, then review the prerequisites before configuring Microsoft Entra ID for identity governance before proceeding.
Set up SAP Cloud Identity Services for provisioning
Sign in to your SAP Cloud Identity Services Admin Console,
https://<tenantID>.accounts.ondemand.com/adminorhttps://<tenantID>.trial-accounts.ondemand.com/adminif a trial. Navigate to Users & Authorizations > Administrators.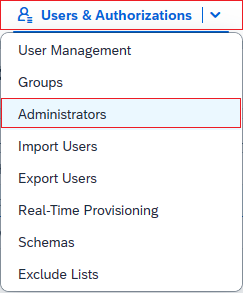
Press the +Add button on the left hand panel in order to add a new administrator to the list. Choose Add System and enter the name of the system.
Note
The administrator identity in SAP Cloud Identity Services must be of type System. An administrator user will not be able to authenticate to the SAP SCIM API when provisioning. SAP Cloud Identity Services does not allow the name of a system to be changed after it is created.
Under Configure Authorizations, switch on the toggle button against Manage Users. Then click Save to create the system.
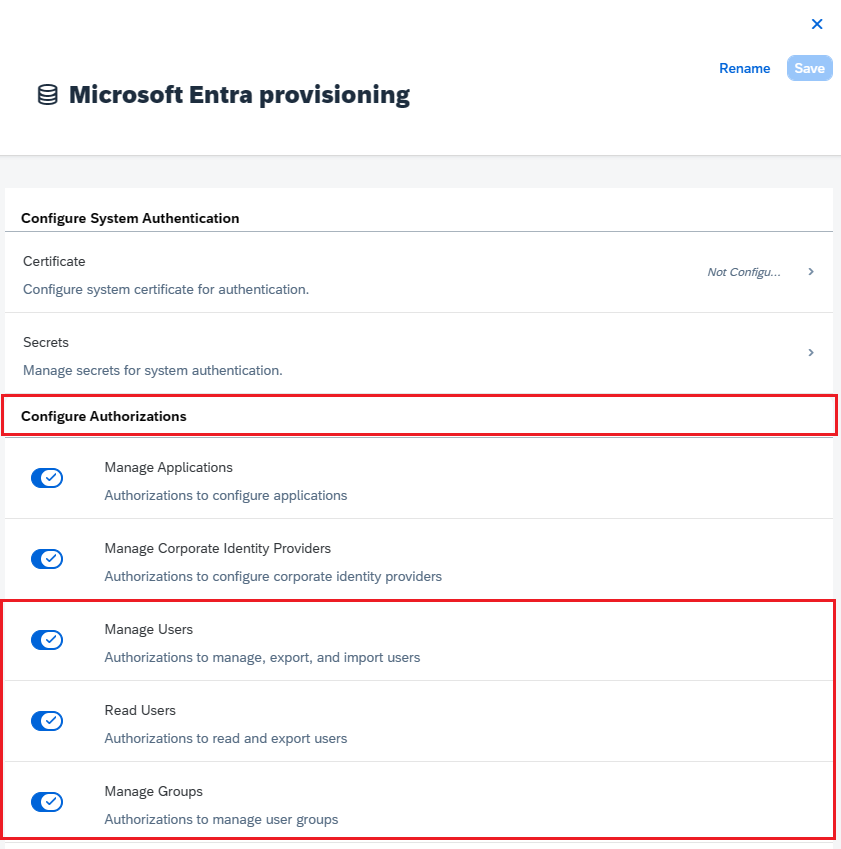
After the administrator system is created, add a new secret to that system.
Copy the Client ID and Client Secret that is generated by SAP. These values will be entered in the Admin Username and Admin Password fields respectively. This is done in the Provisioning tab of your SAP Cloud Identity Services application, which you'll set up in the next section.
SAP Cloud Identity Services may have mappings to one or more SAP applications as target systems. Check if there are any attributes on the users that those SAP applications require to be provisioned through SAP Cloud Identity Services. This tutorial assumes SAP Cloud Identity Services and downstream target systems require two attributes,
userNameandemails[type eq "work"].value. If your SAP target systems require other attributes, and those are not part of your Microsoft Entra ID user schema, then you may need to configure synching extension attributes.
Add SAP Cloud Identity Services from the gallery
Before configuring Microsoft Entra ID to have automatic user provisioning into SAP Cloud Identity Services, you need to add SAP Cloud Identity Services from the Microsoft Entra application gallery to your tenant's list of enterprise applications. You can do this step in the Microsoft Entra admin center, or via the Graph API.
If SAP Cloud Identity Services is already configured for single-sign on from Microsoft Entra, and an application is already present in your Microsoft Entra list of enterprise applications, then continue at the next section.
To add SAP Cloud Identity Services from the Microsoft Entra application gallery using the Microsoft Entra admin center, perform the following steps:
- Sign in to the Microsoft Entra admin center as at least a Cloud Application Administrator.
- Browse to Identity > Applications > Enterprise applications > New application.
- To add the app from the gallery, type SAP Cloud Identity Services in the search box.
- Select SAP Cloud Identity Services from results panel and then add the app. Wait a few seconds while the app is added to your tenant.
Configure automatic user provisioning to SAP Cloud Identity Services
This section guides you through the steps to configure the Microsoft Entra provisioning service to create, update, and disable users in SAP Cloud Identity Services based on user assignments to an application in Microsoft Entra ID.
To configure automatic user provisioning for SAP Cloud Identity Services in Microsoft Entra ID:
Sign in to the Microsoft Entra admin center as at least a Cloud Application Administrator.
Browse to Identity > Applications > Enterprise applications
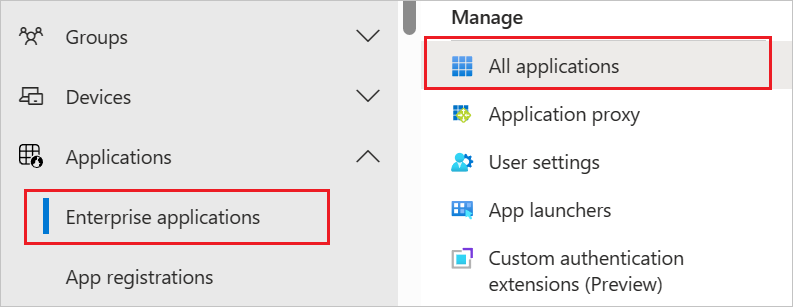
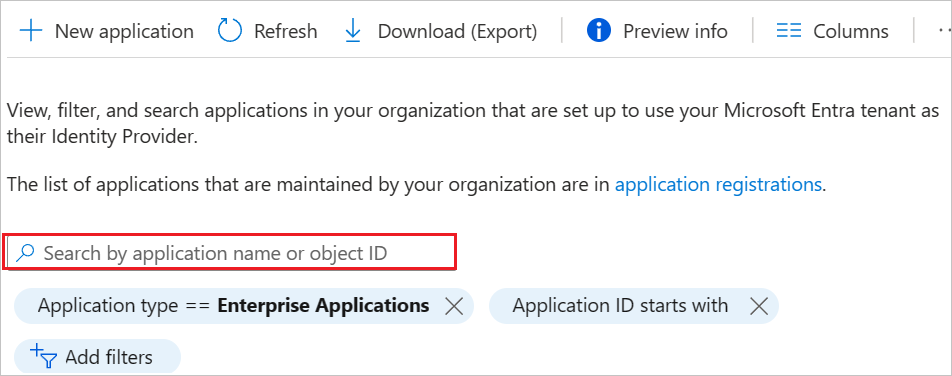
In the applications list, select the application, SAP Cloud Identity Services.
Select the Properties tab.
Verify that the Assignment required? option is set to Yes. If it's set to No, all users in your directory, including external identities, can access the application, and you can't review access to the application.
Select the Provisioning tab.
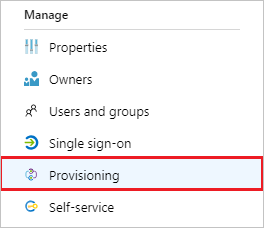
Set the Provisioning Mode to Automatic.

Under the Admin Credentials section, input
https://<tenantID>.accounts.ondemand.com/service/scim, orhttps://<tenantid>.trial-accounts.ondemand.com/service/scimif a trial, with the tenant ID of your SAP Cloud Identity Services in Tenant URL. Input the Client ID and Client Secret values retrieved earlier in Admin Username and Admin Password respectively. Click Test Connection to ensure Microsoft Entra ID can connect to SAP Cloud Identity Services. If the connection fails, ensure your SAP Cloud Identity Services system account has Admin permissions, the secret is still valid, and try again.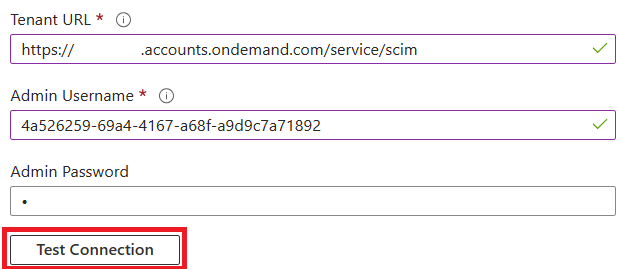
In the Notification Email field, enter the email address of a person or group who should receive the provisioning error notifications and check the checkbox - Send an email notification when a failure occurs.

Click Save.
Under the Mappings section, select Provision Microsoft Entra ID users.

Review the user attributes that are synchronized from Microsoft Entra ID to SAP Cloud Identity Services in the Attribute Mapping section. If you do not see the attributes in your SAP Cloud Identity Services available as a target for mapping, then select Show advanced options and select Edit attribute list for SAP Cloud Platform Identity Authentication Service to edit the list of supported attributes. Add the attributes of your SAP Cloud Identity Services tenant.
Review and record the source and target attributes selected as Matching properties, mappings that have a Matching precedence, as these attributes are used to match the user accounts in SAP Cloud Identity Services for the Microsoft Entra provisioning service to determine whether to create a new user or update an existing user. For more information on matching, see matching users in the source and target systems. In a subsequent step, you'll ensure that any users already in SAP Cloud Identity Services have the attributes selected as Matching properties populated, to prevent duplicate users from being created.
Confirm that there's an attribute mapping for
IsSoftDeleted, or a function containingIsSoftDeleted, mapped to an attribute of the application. When a user is unassigned from the application, soft-deleted in Microsoft Entra ID, or blocked from sign-in, the Microsoft Entra provisioning service will update the attribute mapped toisSoftDeleted. If no attribute is mapped, users who later are unassigned from the application role will continue to exist in the application's data store.Add any additional mappings that your SAP Cloud Identity Services, or downstream target SAP systems, require.
Select the Save button to commit any changes.
Attribute Type Supported for filtering Required by SAP Cloud Identity Services userNameString ✓ ✓ emails[type eq "work"].valueString ✓ activeBoolean displayNameString urn:ietf:params:scim:schemas:extension:enterprise:2.0:User:managerReference addresses[type eq "work"].countryString addresses[type eq "work"].localityString addresses[type eq "work"].postalCodeString addresses[type eq "work"].regionString addresses[type eq "work"].streetAddressString name.givenNameString name.familyNameString name.honorificPrefixString phoneNumbers[type eq "fax"].valueString phoneNumbers[type eq "mobile"].valueString phoneNumbers[type eq "work"].valueString urn:ietf:params:scim:schemas:extension:enterprise:2.0:User:costCenterString urn:ietf:params:scim:schemas:extension:enterprise:2.0:User:departmentString urn:ietf:params:scim:schemas:extension:enterprise:2.0:User:divisionString urn:ietf:params:scim:schemas:extension:enterprise:2.0:User:employeeNumberString urn:ietf:params:scim:schemas:extension:enterprise:2.0:User:organizationString localeString timezoneString userTypeString companyString urn:sap:cloud:scim:schemas:extension:custom:2.0:User:attributes:customAttribute1String urn:sap:cloud:scim:schemas:extension:custom:2.0:User:attributes:customAttribute2String urn:sap:cloud:scim:schemas:extension:custom:2.0:User:attributes:customAttribute3String urn:sap:cloud:scim:schemas:extension:custom:2.0:User:attributes:customAttribute4String urn:sap:cloud:scim:schemas:extension:custom:2.0:User:attributes:customAttribute5String urn:sap:cloud:scim:schemas:extension:custom:2.0:User:attributes:customAttribute6String urn:sap:cloud:scim:schemas:extension:custom:2.0:User:attributes:customAttribute7String urn:sap:cloud:scim:schemas:extension:custom:2.0:User:attributes:customAttribute8String urn:sap:cloud:scim:schemas:extension:custom:2.0:User:attributes:customAttribute9String urn:sap:cloud:scim:schemas:extension:custom:2.0:User:attributes:customAttribute10String sendMailString mailVerifiedString To configure scoping filters, refer to the following instructions provided in the Scoping filter tutorial.
To enable the Microsoft Entra provisioning service for SAP Cloud Identity Services, change the Provisioning Status to On in the Settings section.

For the value of Scope in the Settings section, select Sync only assigned users and groups.

When you're ready to provision, click Save.

This operation starts the initial synchronization of all users defined in Scope in the Settings section. If you have the scope set to Sync only assigned users and groups and no users or groups have been assigned to the application, then no synchronization will occur, until users are assigned to the application.
Provision a new test user from Microsoft Entra ID to SAP Cloud Identity Services
It's recommended that a single new Microsoft Entra test user is assigned to SAP Cloud Identity Services to test the automatic user provisioning configuration.
- Sign in to the Microsoft Entra admin center as at least a Cloud Application Administrator and a User Administrator.
- Browse to Identity > Users > All users.
- Select New user > Create new user.
- Type in the User principal name and Display Name of the new test user. The user principal name must be unique and not the same of any current or previous Microsoft Entra user or SAP Cloud Identity Services user. Select Review + create and Create.
- Once the test user is created, browse to Identity > Applications > Enterprise Applications.
- Select the SAP Cloud Identity Services application.
- Select Users and groups and then select Add user/group.
- In the Users and groups , select None Selected, and in text box, type the user principal name of the test user.
- Select Select, and then Assign.
- Select Provisioning and then select Provision on demand.
- In the Select a user or group text box, type the user principal name of the test user.
- Click Provision.
- Wait for the provisioning to complete. If successful, you will see the message
Modified attributes (successful).
You can also optionally verify what the Microsoft Entra provisioning service will provision when a user goes out of scope of the application.
- Select Users and groups.
- Select the test user, then select Remove.
- After the test user is removed, select Provisioning and then select Provision on demand.
- In the Select a user or group text box, type the user principal name of the test user just de-assigned.
- Click Provision.
- Wait for the provisioning to complete.
Finally, you can remove the test user from Microsoft Entra ID.
- Browse to Identity > Users > All users.
- Select the test user, select Delete, and select OK. This action soft-deletes the test user from Microsoft Entra ID.
You can also then remove the test user from SAP Cloud Identity Services.
Ensure existing SAP Cloud Identity Services users have the necessary matching attributes
Before assigning non-test users to the SAP Cloud Identity Services application in Microsoft Entra ID, you should ensure that any users already in SAP Cloud Identity Services that represent the same people as the users in Microsoft Entra ID, have the mapping attributes populated in SAP Cloud Identity services.
In the provisioning mapping, the attributes selected as Matching properties are used to match the user accounts in Microsoft Entra ID with the user accounts in SAP Cloud Identity Services. If there is a user in Microsoft Entra ID with no match in SAP Cloud Identity Services, then the Microsoft Entra provisioning service will attempt to create a new user. If there is a user in Microsoft Entra ID and a match in SAP Cloud Identity Services, then the Microsoft Entra provisioning service will update that SAP Cloud Identity Services user. For this reason, you should ensure that any users already in SAP Cloud Identity Services have the attributes selected as Matching properties populated, otherwise duplicate users may be created. If you need to change the matching attribute in your Microsoft Entra application attribute mapping, see matching users in the source and target systems.
Sign in to your SAP Cloud Identity Services Admin Console,
https://<tenantID>.accounts.ondemand.com/adminorhttps://<tenantID>.trial-accounts.ondemand.com/adminif a trial.Navigate to Users & Authorizations > Export Users.
Select all attributes required for matching Microsoft Entra users with those in SAP. These attributes include the
SCIM ID,userName,emails, and other attributes you may be using in your SAP systems as identifiers.Select Export and wait for the browser to download the CSV file.
Open a PowerShell window.
Type the following script into an editor. In line one, if you selected a different matching attribute other than
userName, change the value of thesapScimUserNameFieldvariable to the name of the SAP Cloud Identity Services attribute. In line two, change the argument to the filename of the exported CSV file fromUsers-exported-from-sap.csvto the name of your downloaded file.$sapScimUserNameField = "userName" $existingSapUsers = import-csv -Path ".\Users-exported-from-sap.csv" -Encoding UTF8 $count = 0 $warn = 0 foreach ($u in $existingSapUsers) { $id = $u.id if (($null -eq $id) -or ($id.length -eq 0)) { write-error "Exported CSV file does not contain the id attribute of SAP Cloud Identity Services users." throw "id attribute not available, re-export" return } $count++ $userName = $u.$sapScimUserNameField if (($null -eq $userName) -or ($userName.length -eq 0)) { write-warning "SAP Cloud Identity Services user $id does not have a $sapScimUserNameField attribute populated" $warn++ } } write-output "$warn of $count users in SAP Cloud Identity Services did not have the $sapScimUserNameFIeld attribute populated."Run the script. When the script completes, if there were one or more users that were lacking the required matching attribute, then look up those users in the exported CSV file or in the SAP Cloud Identity Services Admin Console. If those users are also present in Microsoft Entra, then you will need to first update the SAP Cloud Identity Services representation of those users so that they have the matching attribute populated.
Once you have updated the attributes of those users in SAP Cloud Identity Services, then re-export the users from SAP Cloud Identity Services, as described in steps 2-5, and PowerShell steps in this section, to confirm no users in SAP Cloud Identity Services are lacking the matching attributes that would prevent provisioning to those users.
Now that you have a list of all the users obtained from SAP Cloud Identity Services, you'll match those users from the application's data store, with users already in Microsoft Entra ID, to determine which users should be in scope for provisioning.
Retrieve the IDs of the users in Microsoft Entra ID
This section shows how to interact with Microsoft Entra ID by using Microsoft Graph PowerShell cmdlets.
The first time your organization uses these cmdlets for this scenario, you need to be in a Global Administrator role to allow Microsoft Graph PowerShell to be used in your tenant. Subsequent interactions can use a lower-privileged role, such as:
- User Administrator, if you anticipate creating new users.
- Application Administrator or Identity Governance Administrator, if you're just managing application role assignments.
Open PowerShell.
If you don't have the Microsoft Graph PowerShell modules already installed, install the
Microsoft.Graph.Usersmodule and others by using this command:Install-Module Microsoft.GraphIf you already have the modules installed, ensure that you're using a recent version:
Update-Module microsoft.graph.users,microsoft.graph.identity.governance,microsoft.graph.applicationsConnect to Microsoft Entra ID:
$msg = Connect-MgGraph -ContextScope Process -Scopes "User.ReadWrite.All,Application.ReadWrite.All,AppRoleAssignment.ReadWrite.All,EntitlementManagement.ReadWrite.All"If this is the first time you have used this command, you may need to consent to allow the Microsoft Graph Command Line tools to have these permissions.
Read the list of users obtained from the application's data store into the PowerShell session. If the list of users was in a CSV file, you can use the PowerShell cmdlet
Import-Csvand provide the name of the file from the previous section as an argument.For example, if the file obtained from SAP Cloud Identity Services is named Users-exported-from-sap.csv and is located in the current directory, enter this command.
$filename = ".\Users-exported-from-sap.csv"
$dbusers = Import-Csv -Path $filename -Encoding UTF8
For another example if you are using a database or directory, if the file is named users.csv and located in the current directory, enter this command:
$filename = ".\users.csv"
$dbusers = Import-Csv -Path $filename -Encoding UTF8
Choose the column of the users.csv file that will match with an attribute of a user in Microsoft Entra ID.
If you are using SAP Cloud Identity Services, then the default mapping is the SAP SCIM attribute
userNamewith the Microsoft Entra ID attributeuserPrincipalName:$db_match_column_name = "userName" $azuread_match_attr_name = "userPrincipalName"For another example if you are using a database or directory, you might have users in a database where the value in the column named
EMailis the same value as in the Microsoft Entra attributeuserPrincipalName:$db_match_column_name = "EMail" $azuread_match_attr_name = "userPrincipalName"Retrieve the IDs of those users in Microsoft Entra ID.
The following PowerShell script uses the
$dbusers,$db_match_column_name, and$azuread_match_attr_namevalues specified earlier. It will query Microsoft Entra ID to locate a user that has an attribute with a matching value for each record in the source file. If there are many users in the file obtained from the source SAP Cloud Identity Services, database, or directory, this script might take several minutes to finish. If you don't have an attribute in Microsoft Entra ID that has the value, and need to use acontainsor other filter expression, then you will need to customize this script and that in step 11 below to use a different filter expression.$dbu_not_queried_list = @() $dbu_not_matched_list = @() $dbu_match_ambiguous_list = @() $dbu_query_failed_list = @() $azuread_match_id_list = @() $azuread_not_enabled_list = @() $dbu_values = @() $dbu_duplicate_list = @() foreach ($dbu in $dbusers) { if ($null -ne $dbu.$db_match_column_name -and $dbu.$db_match_column_name.Length -gt 0) { $val = $dbu.$db_match_column_name $escval = $val -replace "'","''" if ($dbu_values -contains $escval) { $dbu_duplicate_list += $dbu; continue } else { $dbu_values += $escval } $filter = $azuread_match_attr_name + " eq '" + $escval + "'" try { $ul = @(Get-MgUser -Filter $filter -All -Property Id,accountEnabled -ErrorAction Stop) if ($ul.length -eq 0) { $dbu_not_matched_list += $dbu; } elseif ($ul.length -gt 1) {$dbu_match_ambiguous_list += $dbu } else { $id = $ul[0].id; $azuread_match_id_list += $id; if ($ul[0].accountEnabled -eq $false) {$azuread_not_enabled_list += $id } } } catch { $dbu_query_failed_list += $dbu } } else { $dbu_not_queried_list += $dbu } }View the results of the previous queries. See if any of the users in SAP Cloud Identity Services, the database, or directory couldn't be located in Microsoft Entra ID, because of errors or missing matches.
The following PowerShell script will display the counts of records that weren't located:
$dbu_not_queried_count = $dbu_not_queried_list.Count if ($dbu_not_queried_count -ne 0) { Write-Error "Unable to query for $dbu_not_queried_count records as rows lacked values for $db_match_column_name." } $dbu_duplicate_count = $dbu_duplicate_list.Count if ($dbu_duplicate_count -ne 0) { Write-Error "Unable to locate Microsoft Entra ID users for $dbu_duplicate_count rows as multiple rows have the same value" } $dbu_not_matched_count = $dbu_not_matched_list.Count if ($dbu_not_matched_count -ne 0) { Write-Error "Unable to locate $dbu_not_matched_count records in Microsoft Entra ID by querying for $db_match_column_name values in $azuread_match_attr_name." } $dbu_match_ambiguous_count = $dbu_match_ambiguous_list.Count if ($dbu_match_ambiguous_count -ne 0) { Write-Error "Unable to locate $dbu_match_ambiguous_count records in Microsoft Entra ID as attribute match ambiguous." } $dbu_query_failed_count = $dbu_query_failed_list.Count if ($dbu_query_failed_count -ne 0) { Write-Error "Unable to locate $dbu_query_failed_count records in Microsoft Entra ID as queries returned errors." } $azuread_not_enabled_count = $azuread_not_enabled_list.Count if ($azuread_not_enabled_count -ne 0) { Write-Error "$azuread_not_enabled_count users in Microsoft Entra ID are blocked from sign-in." } if ($dbu_not_queried_count -ne 0 -or $dbu_duplicate_count -ne 0 -or $dbu_not_matched_count -ne 0 -or $dbu_match_ambiguous_count -ne 0 -or $dbu_query_failed_count -ne 0 -or $azuread_not_enabled_count) { Write-Output "You will need to resolve those issues before access of all existing users can be reviewed." } $azuread_match_count = $azuread_match_id_list.Count Write-Output "Users corresponding to $azuread_match_count records were located in Microsoft Entra ID."When the script finishes, it will indicate an error if any records from the data source weren't located in Microsoft Entra ID. If not all the records for users from the application's data store could be located as users in Microsoft Entra ID, you'll need to investigate which records didn't match and why.
For example, someone's email address and userPrincipalName might have been changed in Microsoft Entra ID without their corresponding
mailproperty being updated in the application's data source. Or, the user might have already left the organization but is still in the application's data source. Or there might be a vendor or super-admin account in the application's data source that does not correspond to any specific person in Microsoft Entra ID.If there were users who couldn't be located in Microsoft Entra ID, or weren't active and able to sign in, but you want to have their access reviewed or their attributes updated in SAP Cloud Identity Services, the database, or directory, you'll need to update the application, the matching rule, or update or create Microsoft Entra users for them. For more information on which change to make, see manage mappings and user accounts in applications that did not match to users in Microsoft Entra ID.
If you choose the option of creating users in Microsoft Entra ID, you can create users in bulk by using either:
- A CSV file, as described in Bulk create users in the Microsoft Entra admin center
- The New-MgUser cmdlet
Ensure that these new users are populated with the attributes required for Microsoft Entra ID to later match them to the existing users in the application, and the attributes required by Microsoft Entra ID, including
userPrincipalName,mailNicknameanddisplayName. TheuserPrincipalNamemust be unique among all the users in the directory.For example, you might have users in a database where the value in the column named
EMailis the value you want to use as the Microsoft Entra user principal Name, the value in the columnAliascontains the Microsoft Entra ID mail nickname, and the value in the columnFull namecontains the user's display name:$db_display_name_column_name = "Full name" $db_user_principal_name_column_name = "Email" $db_mail_nickname_column_name = "Alias"Then you can use this script to create Microsoft Entra users for those in SAP Cloud Identity Services, the database, or directory that didn't match with users in Microsoft Entra ID. Note that you may need to modify this script to add additional Microsoft Entra attributes needed in your organization, or if the
$azuread_match_attr_nameis neithermailNicknamenoruserPrincipalName, in order to supply that Microsoft Entra attribute.$dbu_missing_columns_list = @() $dbu_creation_failed_list = @() foreach ($dbu in $dbu_not_matched_list) { if (($null -ne $dbu.$db_display_name_column_name -and $dbu.$db_display_name_column_name.Length -gt 0) -and ($null -ne $dbu.$db_user_principal_name_column_name -and $dbu.$db_user_principal_name_column_name.Length -gt 0) -and ($null -ne $dbu.$db_mail_nickname_column_name -and $dbu.$db_mail_nickname_column_name.Length -gt 0)) { $params = @{ accountEnabled = $false displayName = $dbu.$db_display_name_column_name mailNickname = $dbu.$db_mail_nickname_column_name userPrincipalName = $dbu.$db_user_principal_name_column_name passwordProfile = @{ Password = -join (((48..90) + (96..122)) * 16 | Get-Random -Count 16 | % {[char]$_}) } } try { New-MgUser -BodyParameter $params } catch { $dbu_creation_failed_list += $dbu; throw } } else { $dbu_missing_columns_list += $dbu } }After you add any missing users to Microsoft Entra ID, run the script from step 7 again. Then run the script from step 8. Check that no errors are reported.
$dbu_not_queried_list = @() $dbu_not_matched_list = @() $dbu_match_ambiguous_list = @() $dbu_query_failed_list = @() $azuread_match_id_list = @() $azuread_not_enabled_list = @() $dbu_values = @() $dbu_duplicate_list = @() foreach ($dbu in $dbusers) { if ($null -ne $dbu.$db_match_column_name -and $dbu.$db_match_column_name.Length -gt 0) { $val = $dbu.$db_match_column_name $escval = $val -replace "'","''" if ($dbu_values -contains $escval) { $dbu_duplicate_list += $dbu; continue } else { $dbu_values += $escval } $filter = $azuread_match_attr_name + " eq '" + $escval + "'" try { $ul = @(Get-MgUser -Filter $filter -All -Property Id,accountEnabled -ErrorAction Stop) if ($ul.length -eq 0) { $dbu_not_matched_list += $dbu; } elseif ($ul.length -gt 1) {$dbu_match_ambiguous_list += $dbu } else { $id = $ul[0].id; $azuread_match_id_list += $id; if ($ul[0].accountEnabled -eq $false) {$azuread_not_enabled_list += $id } } } catch { $dbu_query_failed_list += $dbu } } else { $dbu_not_queried_list += $dbu } } $dbu_not_queried_count = $dbu_not_queried_list.Count if ($dbu_not_queried_count -ne 0) { Write-Error "Unable to query for $dbu_not_queried_count records as rows lacked values for $db_match_column_name." } $dbu_duplicate_count = $dbu_duplicate_list.Count if ($dbu_duplicate_count -ne 0) { Write-Error "Unable to locate Microsoft Entra ID users for $dbu_duplicate_count rows as multiple rows have the same value" } $dbu_not_matched_count = $dbu_not_matched_list.Count if ($dbu_not_matched_count -ne 0) { Write-Error "Unable to locate $dbu_not_matched_count records in Microsoft Entra ID by querying for $db_match_column_name values in $azuread_match_attr_name." } $dbu_match_ambiguous_count = $dbu_match_ambiguous_list.Count if ($dbu_match_ambiguous_count -ne 0) { Write-Error "Unable to locate $dbu_match_ambiguous_count records in Microsoft Entra ID as attribute match ambiguous." } $dbu_query_failed_count = $dbu_query_failed_list.Count if ($dbu_query_failed_count -ne 0) { Write-Error "Unable to locate $dbu_query_failed_count records in Microsoft Entra ID as queries returned errors." } $azuread_not_enabled_count = $azuread_not_enabled_list.Count if ($azuread_not_enabled_count -ne 0) { Write-Warning "$azuread_not_enabled_count users in Microsoft Entra ID are blocked from sign-in." } if ($dbu_not_queried_count -ne 0 -or $dbu_duplicate_count -ne 0 -or $dbu_not_matched_count -ne 0 -or $dbu_match_ambiguous_count -ne 0 -or $dbu_query_failed_count -ne 0 -or $azuread_not_enabled_count -ne 0) { Write-Output "You will need to resolve those issues before access of all existing users can be reviewed." } $azuread_match_count = $azuread_match_id_list.Count Write-Output "Users corresponding to $azuread_match_count records were located in Microsoft Entra ID."
Ensure existing Microsoft Entra users have the necessary attributes
Before enabling automatic user provisioning, you must decide which users in Microsoft Entra ID need access to SAP Cloud Identity Services, and then you need to check to make sure that those users have the necessary attributes in Microsoft Entra ID, and those attributes are mapped to the expected schema of SAP Cloud Identity Services.
- By default, the value of the Microsoft Entra user
userPrincipalNameattribute is mapped to both theuserNameandemails[type eq "work"].valueattributes of SAP Cloud Identity Services. If user's email addresses are different from their user principal names, then you may need to change this mapping. - SAP Cloud Identity Services may ignore values of the
postalCodeattribute if the format of Company ZIP/postal code does not match the company country or region. - By default, the Microsoft Entra attribute
departmentis mapped to the SAP Cloud Identity Servicesurn:ietf:params:scim:schemas:extension:enterprise:2.0:User:departmentattribute. If Microsoft Entra users have values of thedepartmentattribute, those values must match those departments already configured in SAP Cloud Identity Services, otherwise creation, or update, of the user will fail. If thedepartmentvalues in your Microsoft Entra users are not consistent with those in your SAP environment, then remove the mapping prior to assigning users. - SAP Cloud Identity Services's SCIM endpoint requires certain attributes to be of specific format. You can know more about these attributes and their specific format here.
Assign users to the SAP Cloud Identity Services application in Microsoft Entra ID
Microsoft Entra ID uses a concept called assignments to determine which users should receive access to selected apps. In the context of automatic user provisioning, if the Settings value of Scope is Sync only assigned users and groups, then only the users and groups that have been assigned to an application role of that application in Microsoft Entra ID are synchronized with SAP Cloud Identity Services. When assigning a user to SAP Cloud Identity Services, you must select any valid application-specific role (if available) in the assignment dialog. Users with the Default Access role are excluded from provisioning. Currently the only available role for SAP Cloud Identity Services is User.
If provisioning has already been enabled for the application, check that the application provisioning is not in quarantine before assigning more users to the application. Resolve any issues that are causing the quarantine, before you proceed.
Check for users who are present in SAP Cloud Identity Services and are not already assigned to the application in Microsoft Entra ID
The previous steps have evaluated whether the users in SAP Cloud Identity Services also exist as users in Microsoft Entra ID. However, they might not all currently be assigned to the application's roles in Microsoft Entra ID. So the next steps are to see which users don't have assignments to application roles.
Using PowerShell, look up the service principal ID for the application's service principal.
For example, if the enterprise application is named
SAP Cloud Identity Services, enter the following commands:$azuread_app_name = "SAP Cloud Identity Services" $azuread_sp_filter = "displayName eq '" + ($azuread_app_name -replace "'","''") + "'" $azuread_sp = Get-MgServicePrincipal -Filter $azuread_sp_filter -AllRetrieve the users who currently have assignments to the application in Microsoft Entra ID.
This builds upon the
$azuread_spvariable set in the previous command.$azuread_existing_assignments = @(Get-MgServicePrincipalAppRoleAssignedTo -ServicePrincipalId $azuread_sp.Id -All)Compare the list of user IDs of the users already in both SAP Cloud Identity Services and Microsoft Entra ID to those users currently assigned to the application in Microsoft Entra ID. This script builds upon the
$azuread_match_id_listvariable set in the previous sections:$azuread_not_in_role_list = @() foreach ($id in $azuread_match_id_list) { $found = $false foreach ($existing in $azuread_existing_assignments) { if ($existing.principalId -eq $id) { $found = $true; break; } } if ($found -eq $false) { $azuread_not_in_role_list += $id } } $azuread_not_in_role_count = $azuread_not_in_role_list.Count Write-Output "$azuread_not_in_role_count users in the application's data store are not assigned to the application roles."If zero users are not assigned to application roles, indicating that all users are assigned to application roles, then this indicates that there were no users in common across Microsoft Entra ID and SAP Cloud Identity Services, so no changes are needed. However, if one or more users already in SAP Cloud Identity Services aren't currently assigned to the application roles, you'll need to continue the procedure and add them to one of the application's roles.
Select the
Userrole of the application service principal.$azuread_app_role_name = "User" $azuread_app_role_id = ($azuread_sp.AppRoles | where-object {$_.AllowedMemberTypes -contains "User" -and $_.DisplayName -eq "User"}).Id if ($null -eq $azuread_app_role_id) { write-error "role $azuread_app_role_name not located in application manifest"}Create application role assignments for users who are already present in SAP Cloud Identity Services and Microsoft Entra, and don't currently have role assignments to the application:
foreach ($u in $azuread_not_in_role_list) {
   $res = New-MgServicePrincipalAppRoleAssignedTo -ServicePrincipalId $azuread_sp.Id -AppRoleId $azuread_app_role_id -PrincipalId $u -ResourceId $azuread_sp.Id
}
Wait one minute for changes to propagate within Microsoft Entra ID.
On the next Microsoft Entra provisioning cycle, the Microsoft Entra provisioning service will compare the representation of those users assigned to the application, with the representation in SAP Cloud Identity Services, and update SAP Cloud Identity Services users to have the attributes from Microsoft Entra ID.
Assign remaining users and monitor initial sync
Once the testing is complete, a user is successfully provisioned to SAP Cloud Identity Services, and any existing SAP Cloud Identity Services users are assigned to the application role, you can assign any additional authorized users to the SAP Cloud Identity Services application by following one of the instructions here:
- You can assign each individual user to the application in the Microsoft Entra admin center,
- You can assign individual users to the application via PowerShell cmdlet
New-MgServicePrincipalAppRoleAssignedToas shown in the previous section, or - if your organization has a license for Microsoft Entra ID Governance, you can also deploy entitlement management policies for automating access assignment.
Once users are assigned to the application role and are in scope for provisioning, then the Microsoft Entra provisioning service will provision them to SAP Cloud Identity Services. Note that the initial sync takes longer to perform than subsequent syncs, which occur approximately every 40 minutes as long as the Microsoft Entra provisioning service is running.
If you don't see users being provisioned, review the steps in the troubleshooting guide for no users being provisioned. Then, check the provisioning log through the Microsoft Entra admin center or Graph APIs. Filter the log to the status Failure. If there are failures with an ErrorCode of DuplicateTargetEntries, this indicates an ambiguity in your provisioning matching rules, and you'll need to update the Microsoft Entra users or the mappings that are used for matching to ensure each Microsoft Entra user matches one application user. Then filter the log to the action Create and status Skipped. If users were skipped with the SkipReason code of NotEffectivelyEntitled, this may indicate that the user accounts in Microsoft Entra ID were not matched because the user account status was Disabled.
Configure single-sign on
You may also choose to enable SAML-based single sign-on for SAP Cloud Identity Services, following the instructions provided in the SAP Cloud Identity Services Single sign-on tutorial. Single sign-on can be configured independently of automatic user provisioning, though these two features complement each other.
Monitor provisioning
You can use the Synchronization Details section to monitor progress and follow links to provisioning activity report, which describes all actions performed by the Microsoft Entra provisioning service on SAP Cloud Identity Services. You can also monitor the provisioning project via the Microsoft Graph APIs.
For more information on how to read the Microsoft Entra provisioning logs, see Reporting on automatic user account provisioning.
Maintain application role assignments
As users that are in assigned to the application are updated in Microsoft Entra ID, those changes will be automatically provisioned to SAP Cloud Identity Services.
If you have Microsoft Entra ID Governance, you can automate changes to the application role assignments for SAP Cloud Identity Services in Microsoft Entra ID, to add or remove assignments as people join the organization, or leave or change roles.
- You can perform a one-time or recurring access review of the application role assignments.
- You can create an entitlement management access package for this application. You can have policies for users to be assigned access, either when they request, by an administrator, automatically based on rules, or through lifecycle workflows.
More resources
- Managing user account provisioning for Enterprise Apps
- What is application access and single sign-on with Microsoft Entra ID?
- Manage access to your SAP applications
- Govern access for applications in your environment