Connect to Oracle E-Business Suite in Visual Studio using Add Adapter Metadata Wizard
The Oracle E-Business adapter is also exposed as a BizTalk adapter and, therefore, you can use the Add Adapter Metadata Wizard to generate schema for the operations you want to perform on Oracle E-Business Suite using the adapter.
Connecting to Oracle E-Business Suite Using the Add Adapter Metadata Wizard
Perform the following steps to connect to Oracle E-Business Suite using the Add Adapter Metadata Wizard.
To connect to Oracle E-Business Suite
To connect using the Add Adapter Metadata Wizard in a BizTalk solution:
Create a BizTalk project using Visual Studio.
Right-click the project in Solution Explorer, point to Add, and then click Add Generated Items.
In the Add Generated Items dialog box, do the following:
Use this To do this Categories Click Add Adapter. Templates Click Add Adapter Metadata. Click Add. The Add Adapter Metadata Wizard opens.
In the Add Adapter Metadata Wizard, select WCF-OracleEBS. Select the computer on which BizTalk Server is installed and the name of the BizTalk database.
Important
If you already have a WCF-OracleEBS port configured in BizTalk, select the port from the Port list.
Click Next.
From the Select a binding drop-down list, select oracleEBSBinding and click Configure.
In the Configure Adapter dialog box, click the Security tab, and from the Client credential type drop-down list box, select Username and specify the user name and password to connect to the Oracle E-Business Suite.
Use this To do this To connect using Oracle database credentials Specify the ClientCredentialType binding property to Database and specify database credentials for User name and Password text boxes. To connect using Oracle E-Business Suite credentials Specify the ClientCredentialType binding property to EBusiness and specify Oracle E-Business Suite credentials for User name and Password text boxes. In this case, you must also specify Oracle database credentials for OracleUserName and OraclePassword binding properties. To connect using Windows Authentication if ClientCredentialType is set to “Database” Specify a “/” for the User name text box and leave the Password text box blank. To connect using Windows Authentication if ClientCredentialType is set to “EBusiness” Specify Oracle E-Business Suite credentials for User name and Password text boxes. You must also specify a “/” for the OracleUserName binding property and leave the OraclePassword binding property blank. Click the URI Properties tab, and specify values for the connection parameters. For more information about the connection URI for the Oracle E-Business adapter, see Create the Oracle E-Business Suite connection URI).
Note
If the connection parameters contain any reserved characters, you must specify them as-is in the URI Properties tab, that is, without using any escape characters. However, if you specify the URI directly in the Configure a URI field and the connection parameters contain reserved characters, you must specify the connection parameters using proper escape characters.
Click the Binding Properties tab, and then specify values for the binding properties, if any, required by the operations you want to target. For more information about binding properties, see Read about the BizTalk Adapter for Oracle E-Business Suite binding properties.
Note
If you are generating metadata using Add Adapter Metadata Wizard and you selected an existing WCF-OracleEBS send port, you need not specify the binding properties. The binding properties are picked from the send port configuration. However, you may choose to specify the binding properties that are required at design-time, if any. In such case, the new values for binding properties will be used at design-time while generating the metadata. However, at run-time the values specified for binding properties in the send port configuration will be applicable.
Click OK.
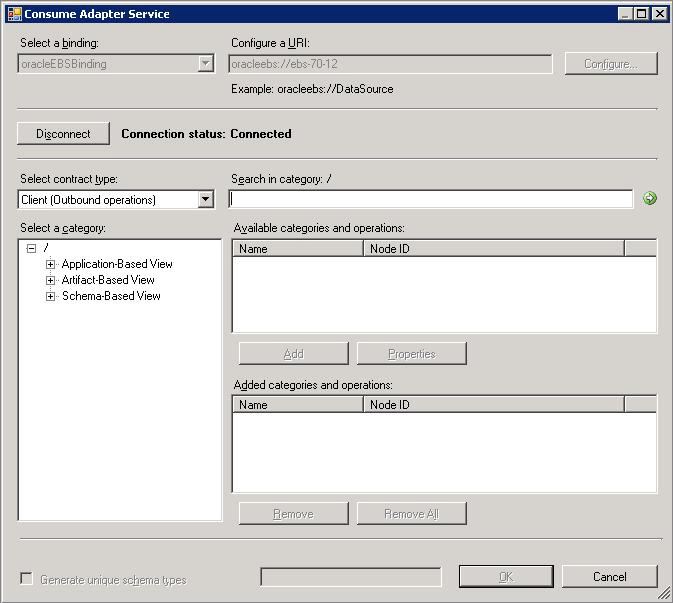
Click Connect. After the connection is established, the connection status is shown as Connected.
The following figure shows the Consume Adapter Service Add-in immediately after the connection is established.

The Consume Adapter Service Add-in displays different nodes containing various operations that can be performed on the Oracle E-Business Suite and the Oracle database. For more information on how the metadata is categorized under the various nodes, see Connect to Oracle E-Business Suite in Visual Studio using Add Adapter Metadata Wizard.
See Also
Connect to the Oracle E-Business Suite in Visual Studio
Connect to Oracle E-Business Suite using Windows Authentication