Manage sensors from the on-premises management console (Legacy)
Important
Defender for IoT now recommends using Microsoft cloud services or existing IT infrastructure for central monitoring and sensor management, and plans to retire the on-premises management console on January 1st, 2025.
For more information, see Deploy hybrid or air-gapped OT sensor management.
This article describes how you can manage OT sensors from an on-premises management console, such as pushing system settings to OT sensors across your network.
Prerequisites
To perform the procedures in this article, make sure you have:
One or more OT network sensors installed, activated, and connected to your on-premises management console
Access to the on-premises management console as an Admin user. For more information, see On-premises users and roles for OT monitoring with Defender for IoT.
Update sensors from an on-premises management console
This procedure describes how to update several OT sensors simultaneously from a legacy on-premises management console.
Important
If you're updating multiple, locally-managed OT sensors, make sure to update the on-premises management console before you update any connected sensors.
The software version on your on-premises management console must be equal to that of your most up-to-date sensor version. Each on-premises management console version is backwards compatible to older, supported sensor versions, but can't connect to newer sensor versions.
Download the update packages from the Azure portal
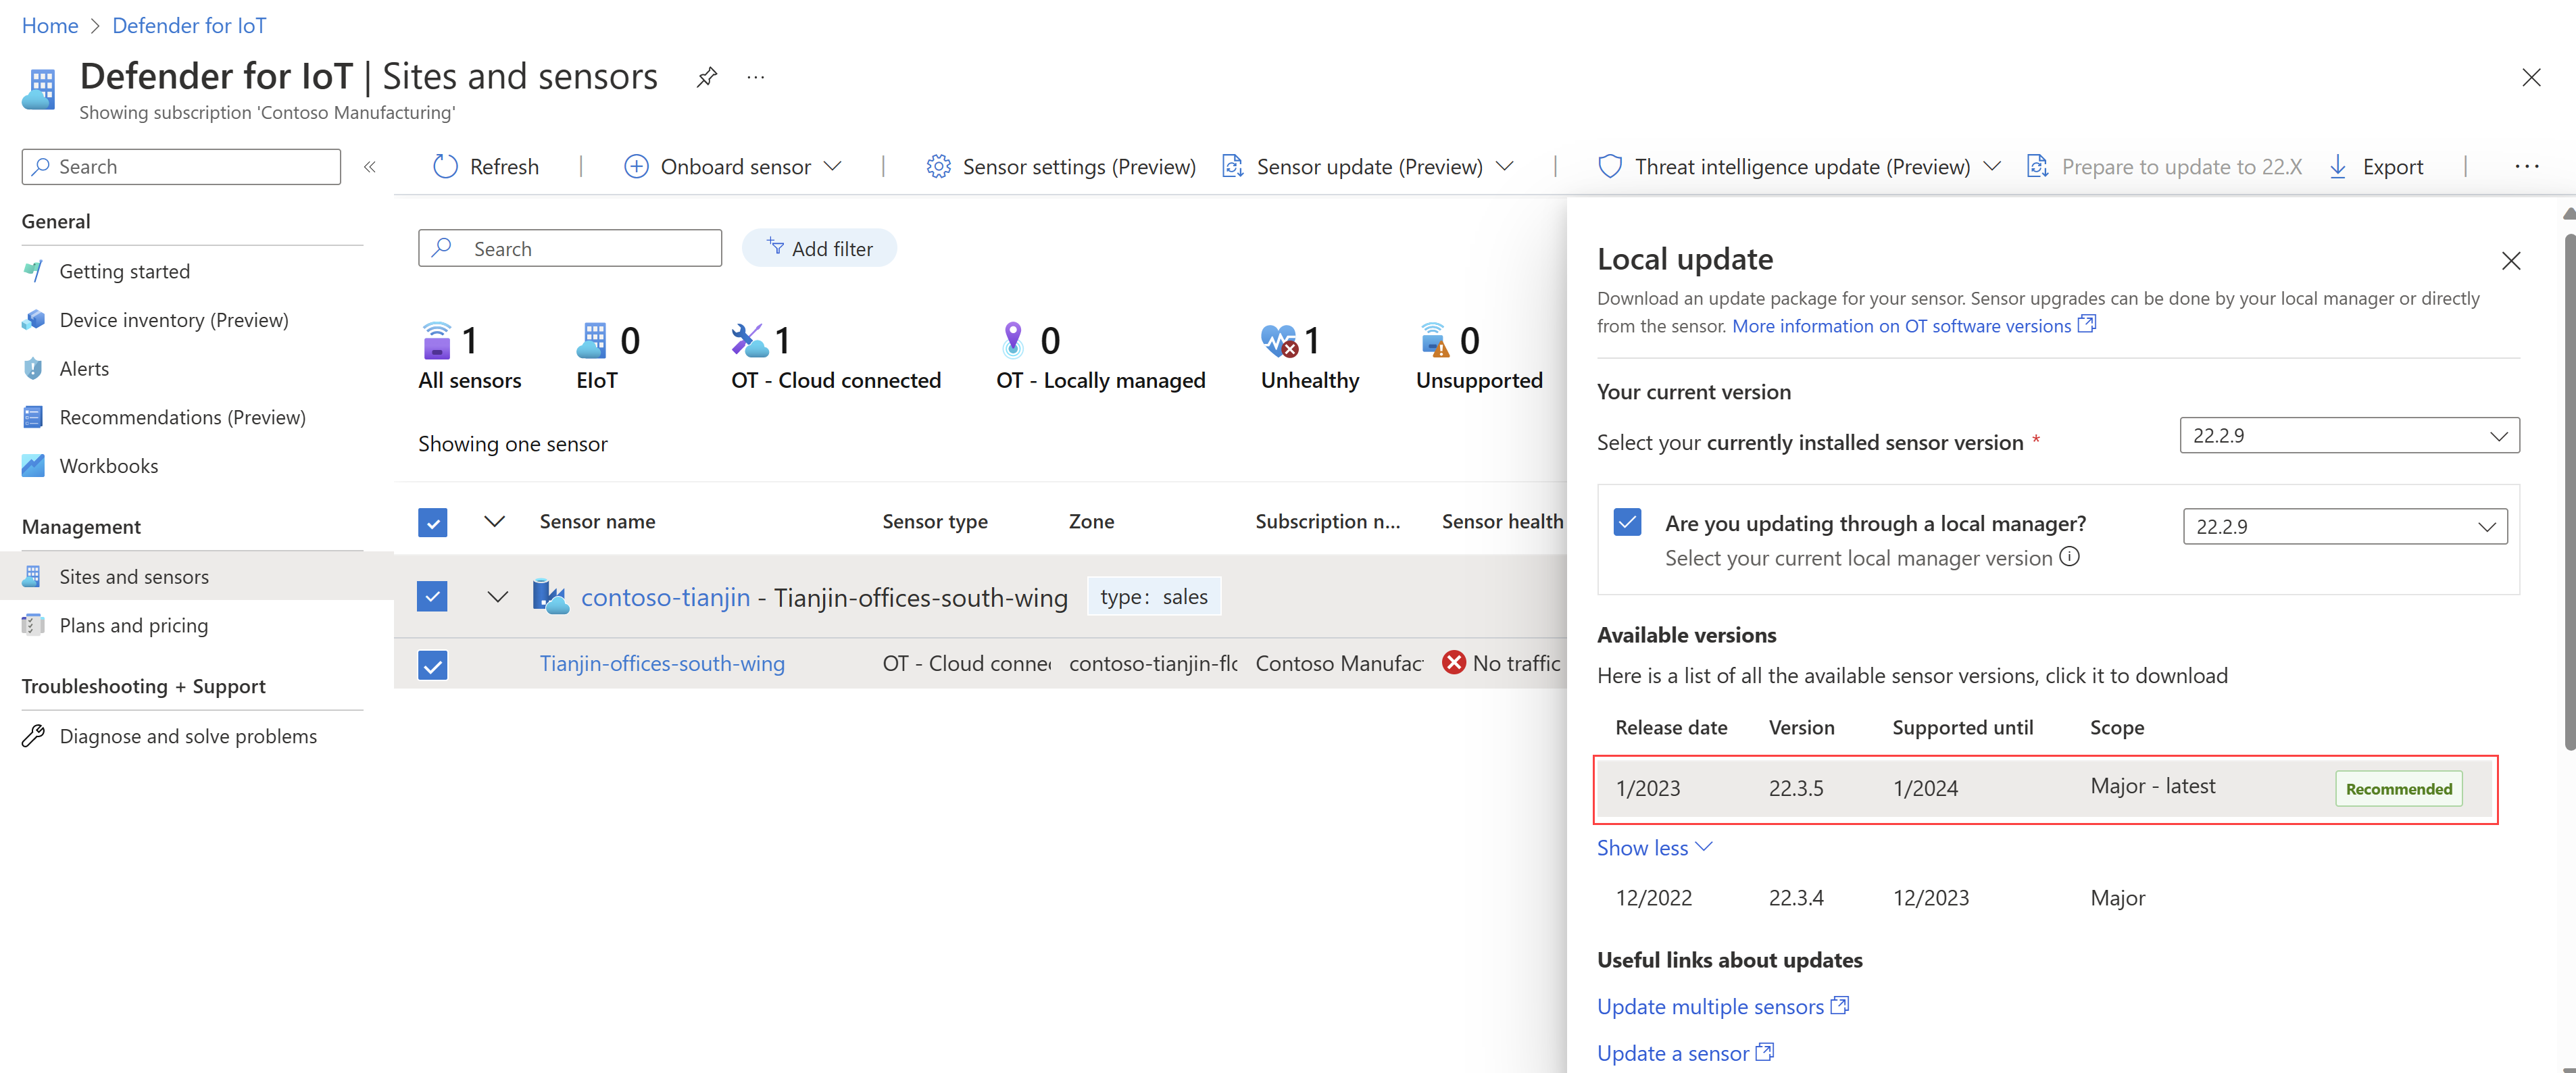
In Defender for IoT on the Azure portal, select Sites and sensors > Sensor update (Preview).
In the Local update pane, select the software version that's currently installed on your sensors.
Select the Are you updating through a local manager option, and then select the software version that's currently installed on your on-premises management console.
In the Available versions area of the Local update pane, select the version you want to download for your software update.
The Available versions area lists all update packages available for your specific update scenario. You may have multiple options, but there will always be one specific version marked as Recommended for you. For example:
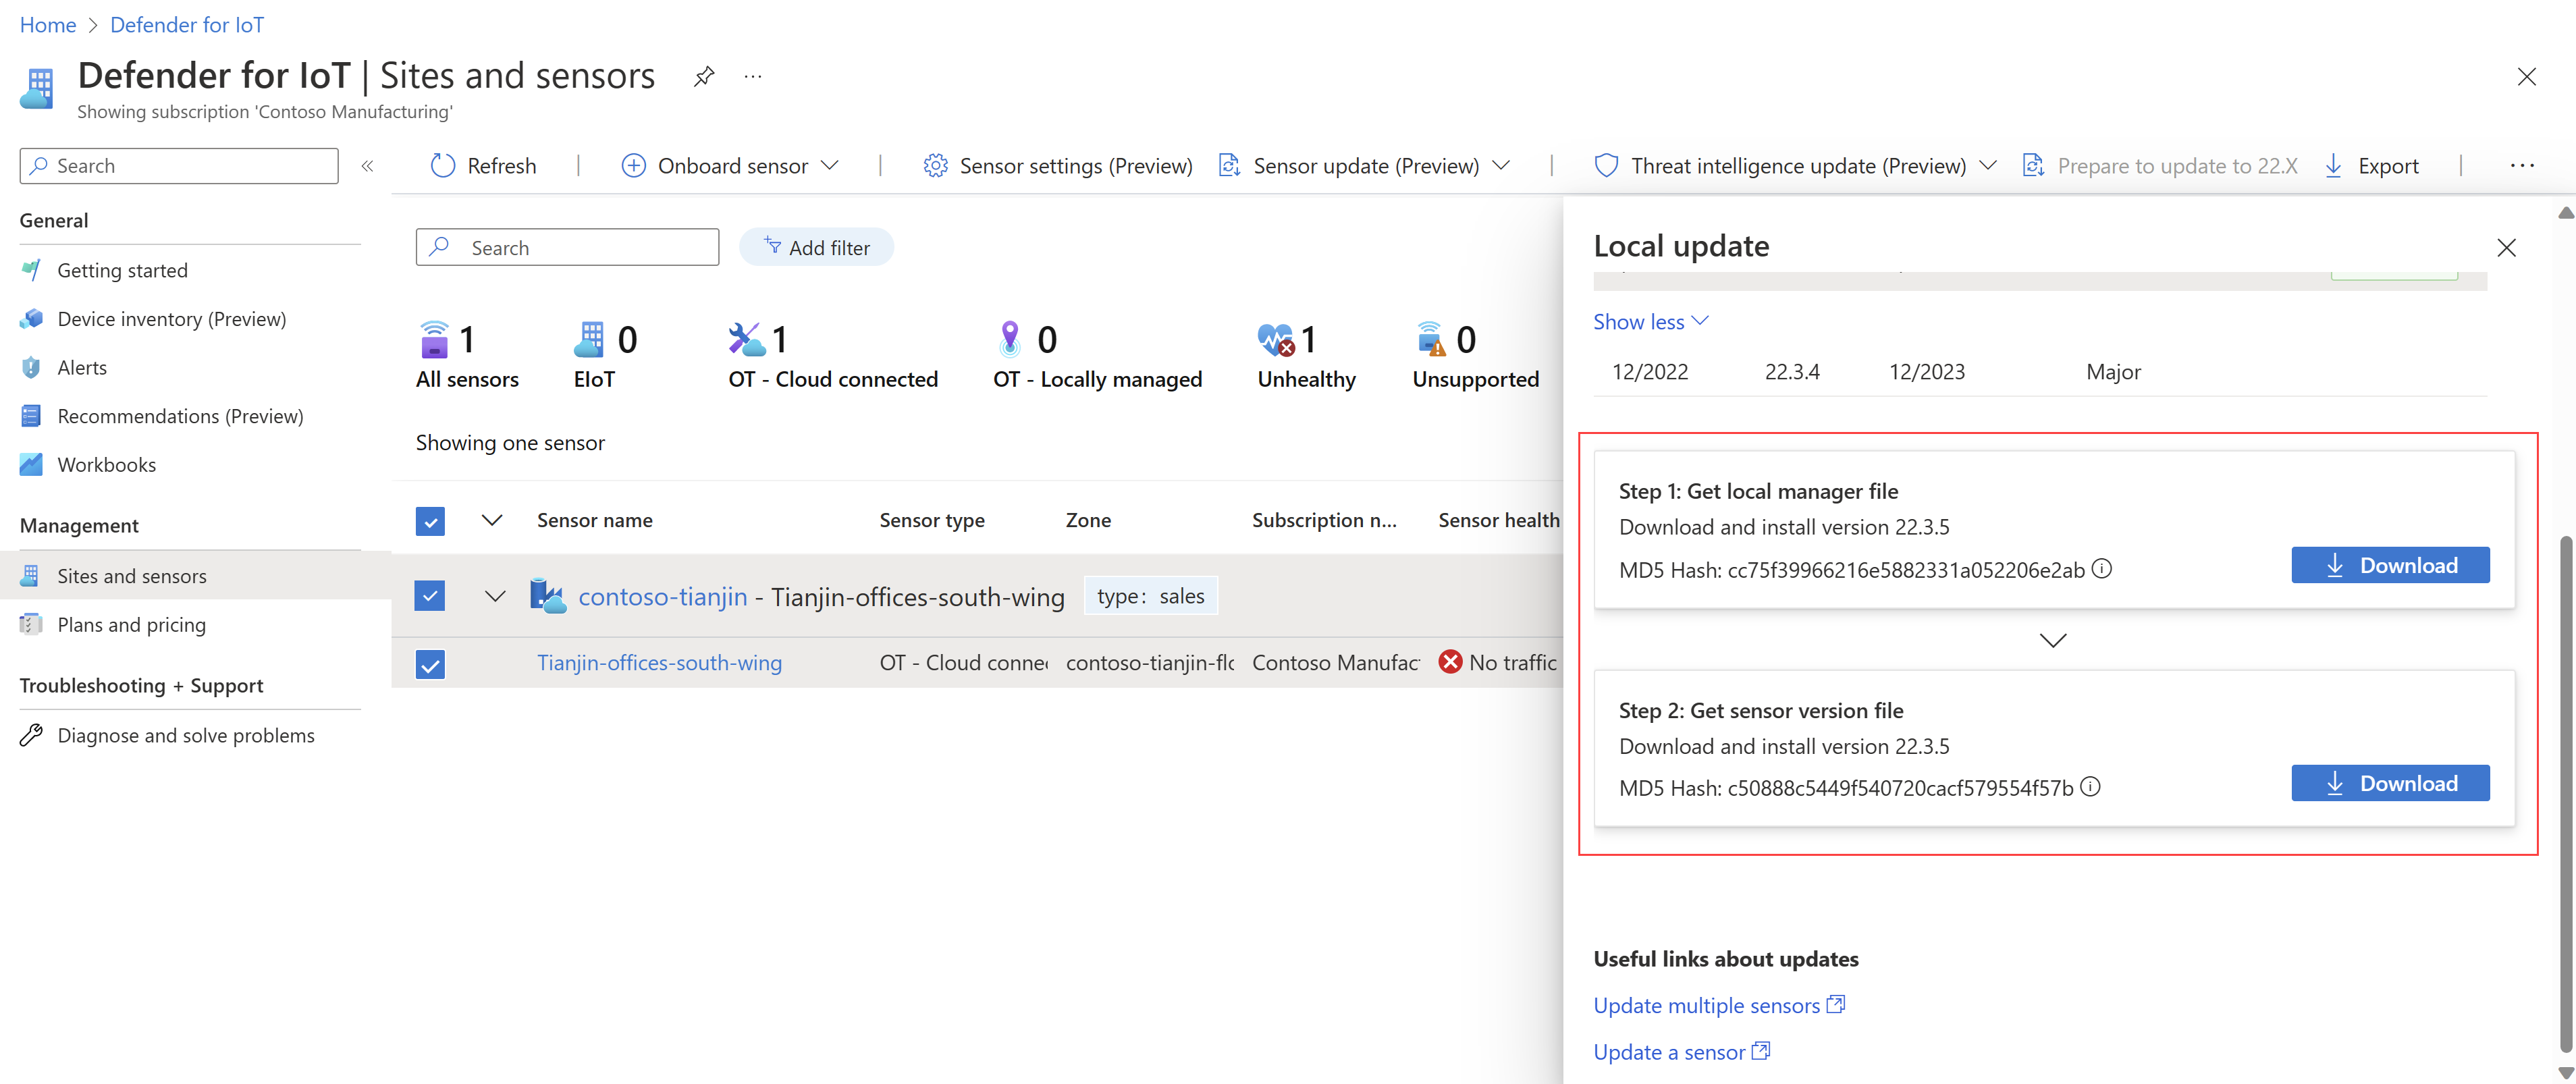
Scroll down further in the Local update pane and select Download to download the software file.
If you'd selected the Are you updating through a local manager option, files will be listed for both the on-premises management console and the sensor. For example:
The update packages are downloaded with the following file syntax names:
sensor-secured-patcher-<Version number>.tarfor the OT sensor updatemanagement-secured-patcher-<Version number>.tarfor the on-premises management console update
Where
<version number>is the software version number you're updating to.
All files downloaded from the Azure portal are signed by root of trust so that your machines use signed assets only.
Update an on-premises management console
Sign into your on-premises management console and select System Settings > Version Update.
In the Upload File dialog, select BROWSE FILE and then browse to and select the update package you'd downloaded from the Azure portal.
The update process starts, and may take about 30 minutes. During your upgrade, the system is rebooted twice.
Sign in when prompted and check the version number listed in the bottom-left corner to confirm that the new version is listed.
Update your OT sensors from the on-premises management console
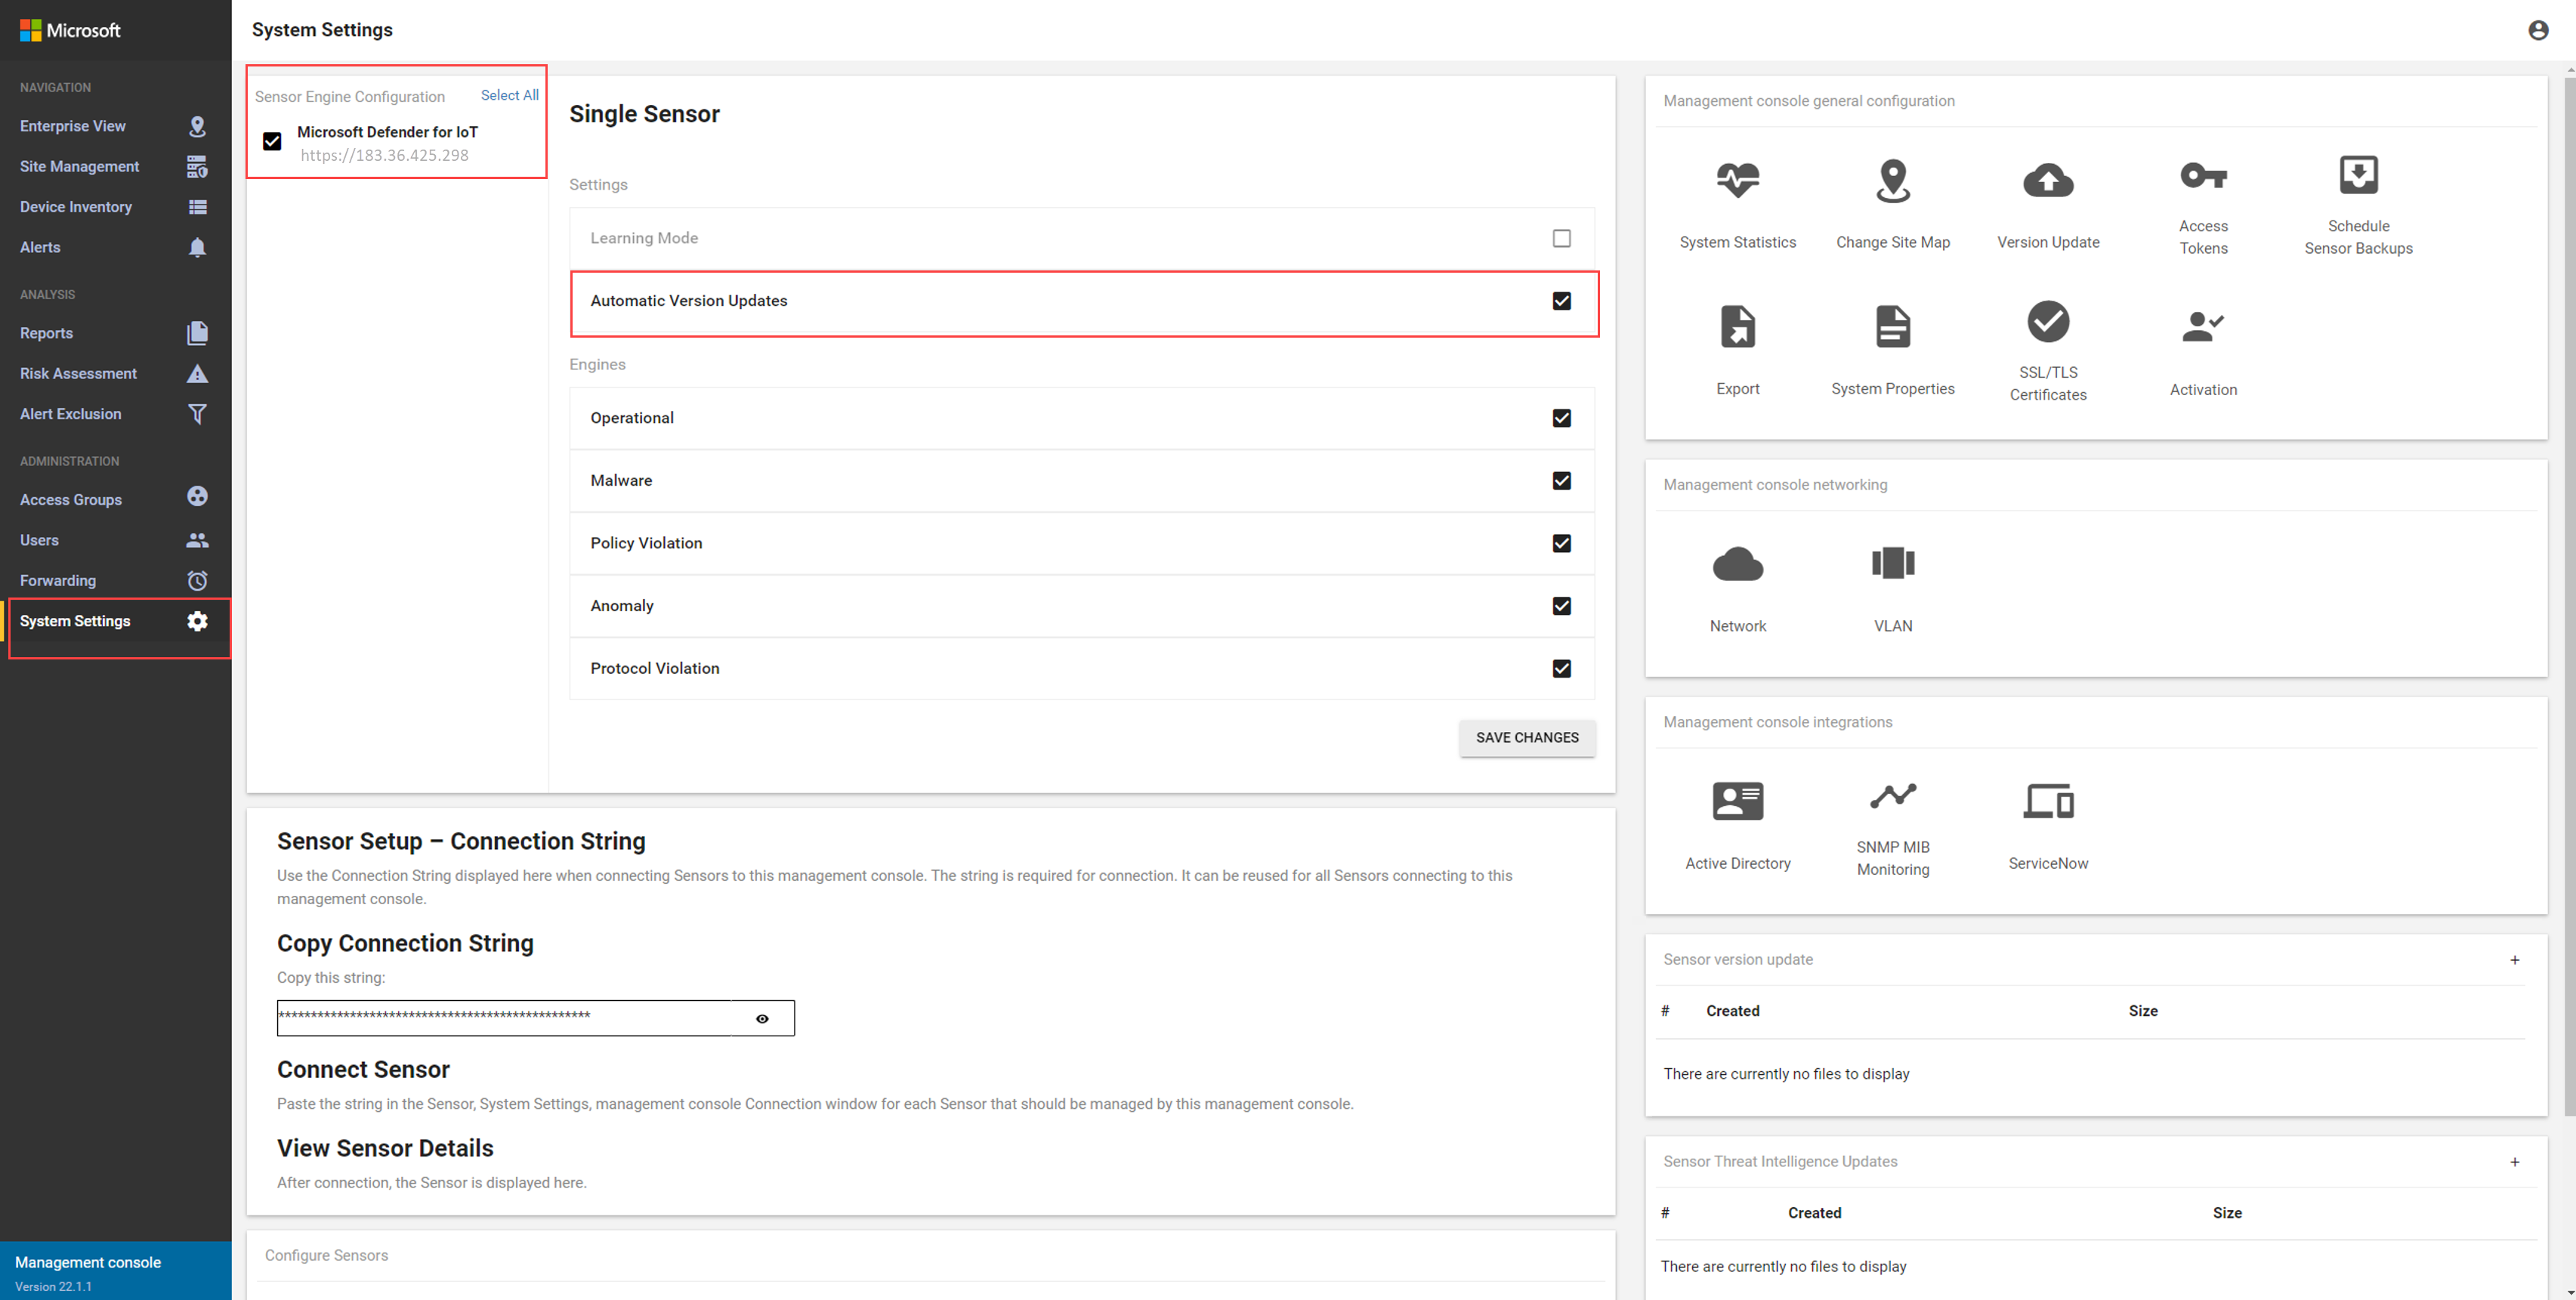
Sign into your on-premises management console, select System Settings, and identify the sensors that you want to update.
For any sensors you want to update, make sure that the Automatic Version Updates option is selected.
Also make sure that sensors you don't want to update are not selected.
Save your changes when you're finished selecting sensors to update. For example:
Important
If your Automatic Version Updates option is red, you have an update conflict. An update conflict might occur if you have multiple sensors marked for automatic updates but the sensors currently have different software versions installed. Select the Automatic Version Updates option to resolve the conflict.
Scroll down and on the right, select the + in the Sensor version update box. Browse to and select the update file you'd downloaded from the Azure portal.
Updates start running on each sensor selected for automatic updates.
Go to the Site Management page to view the update status and progress for each sensor.
If updates fail, a retry option appears with an option to download the failure log. Retry the update process or open a support ticket with the downloaded log files for assistance.
Push system settings to OT sensors
If you have an OT sensor already configured with system settings that you want to share across to other OT sensors, push those settings from the on-premises management console. Sharing system settings across OT sensors saves time and streamlines your settings across your system.
Supported settings include:
- Mail server settings
- SNMP MIB monitoring settings
- Active Directory settings
- DNS reverse lookup settings
- Subnet settings
- Port aliases
To push system settings across OT sensors:
Sign into your on-premises management console and select System settings.
Scroll down to view the Configure Sensors area and select the setting you want to push across your OT sensors.
In the Edit ... Configuration dialog, select the OT sensor you want to share settings from. The dialog shows the current settings defined for the selected sensor.
Confirm that the current settings are the ones you want to share across your system, and then select Duplicate.
Select Save to save your changes.
The selected settings are applied across all connected OT sensors.
Monitor disconnected OT sensors
If you're working with locally managed OT network sensors and on-premises management console, we recommend that you forward alerts about OT sensors that are disconnected from the on-premises management console to partner services.
View OT sensor connection statuses
Sign into the on-premises management console and select Site Management to check for any disconnected sensors.
For example, you might see one of the following disconnection messages:
The on-premises management console can’t process data received from the sensor.
Times drift detected. The on-premises management console has been disconnected from sensor.
Sensor not communicating with on-premises management console. Check network connectivity or certificate validation.
Tip
You may want to send alerts about your OT sensor connection status on the on-premises management console to partner services.
To do this, create a forwarding alert rule on your on-premises management console. In the Create Forwarding Rule dialog box, make sure to select Report System Notifications.
Retrieve forensics data stored on the sensor
Use Defender for IoT data mining reports on an OT network sensor to retrieve forensic data from that sensor’s storage. The following types of forensic data are stored locally on OT sensors, for devices detected by that sensor:
- Device data
- Alert data
- Alert PCAP files
- Event timeline data
- Log files
Each type of data has a different retention period and maximum capacity. For more information, see Create data mining queries and Data retention across Microsoft Defender for IoT.
Turn off learning mode from your on-premises management console
A Microsoft Defender for IoT OT network sensor starts monitoring your network automatically as soon as it's connected to your network and you've signed in. Network devices start appearing in your device inventory, and alerts are triggered for any security or operational incidents that occur in your network.
Initially, this activity happens in learning mode, which instructs your OT sensor to learn your network's usual activity, including the devices and protocols in your network, and the regular file transfers that occur between specific devices. Any regularly detected activity becomes your network's baseline traffic.
This procedure describes how to turn off learning mode manually for all connected sensors if you feel that the current alerts accurately reflect your network activity.
To turn off learning mode:
Sign into your on-premises management console and select System Settings.
In the Sensor Engine Configuration section, select one or more OT sensors you want to apply settings for, and clear the Learning Mode option.
Select SAVE CHANGES to save your changes.
Next steps
For more information, see:
- Manage individual sensors
- Connect your OT sensors to the cloud
- Track sensor activity
- Update OT system software
- Troubleshoot on-premises management console
- Manage sensors with Defender for IoT in the Azure portal
- Manage threat intelligence packages on OT sensors
- Control the OT traffic monitored by Microsoft Defender for IoT


