Quickstart: Launch your first Java application in Azure Container Apps
This article shows you how to deploy the Spring PetClinic sample application to run on Azure Container Apps. Rather than manually creating a Dockerfile and directly using a container registry, you can deploy your Java application directly from a Java Archive (JAR) file or a web application archive (WAR) file.
By the end of this tutorial you deploy a web application, which you can manage through the Azure portal.
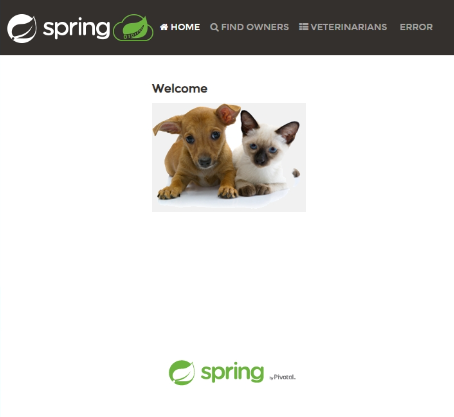
The following image is a screenshot of how your application looks once deployed to Azure.

Prerequisites
| Requirement | Instructions |
|---|---|
| Azure account | If you don't have one, create an account for free. You need the Contributor or Owner permission on the Azure subscription to proceed. Refer to Assign Azure roles using the Azure portal for details. |
| GitHub Account | Get one for free. |
| git | Install git |
| Azure CLI | Install the Azure CLI. |
| Container Apps CLI extension | Use version 0.3.47 or higher. Use the az extension add --name containerapp --upgrade --allow-preview command to install the latest version. |
| Java | Install the Java Development Kit. Use version 17 or later. |
| Apache Maven | Download and install Apache Maven. |
Prepare the project
Clone the Spring PetClinic sample application to your machine.
git clone https://github.com/spring-projects/spring-petclinic.git
git clone https://github.com/spring-petclinic/spring-framework-petclinic.git
Build the project
Change into the spring-petclinic folder.
cd spring-petclinic
Clean the Maven build area, compile the project's code, and create a JAR file, all while skipping any tests.
mvn clean verify
After you execute the build command, a file named petclinic.jar is generated in the /target folder.
Note
If necessary, you can specify the Tomcat version in the Java build environment variables.
Change into the spring-framework-petclinic folder.
cd spring-framework-petclinic
Clean the Maven build area, compile the project's code, and create a WAR file, all while skipping any tests.
mvn clean verify
After you execute the build command, a file named petclinic.war is generated in the /target folder.
Deploy the project
Deploy the JAR package to Azure Container Apps.
Note
If necessary, you can specify the JDK version in the Java build environment variables.
Now you can deploy your WAR file with the az containerapp up CLI command.
az containerapp up \
  --name <CONTAINER_APP_NAME> \
  --resource-group <RESOURCE_GROUP> \
  --subscription <SUBSCRIPTION_ID>\
  --location <LOCATION> \
  --environment <ENVIRONMENT_NAME> \
  --artifact <JAR_FILE_PATH_AND_NAME> \
  --ingress external \
  --target-port 8080 \
  --query properties.configuration.ingress.fqdn
Note
The default JDK version is 17. If you need to change the JDK version for compatibility with your application, you can use the --build-env-vars BP_JVM_VERSION=<YOUR_JDK_VERSION> argument to adjust the version number.
You can find more applicable build environment variables in Java build environment variables.
Deploy the WAR package to Azure Container Apps.
Now you can deploy your WAR file with the az containerapp up CLI command.
az containerapp up \
  --name <CONTAINER_APP_NAME> \
  --resource-group <RESOURCE_GROUP> \
  --subscription <SUBSCRIPTION>\
  --location <LOCATION> \
  --environment <ENVIRONMENT_NAME> \
  --artifact <WAR_FILE_PATH_AND_NAME> \
  --build-env-vars BP_TOMCAT_VERSION=10.* \
  --ingress external \
  --target-port 8080 \
  --query properties.configuration.ingress.fqdn
Note
The default Tomcat version is 9. If you need to change the Tomcat version for compatibility with your application, you can use the --build-env-vars BP_TOMCAT_VERSION=<YOUR_TOMCAT_VERSION> argument to adjust the version number.
In this example, the Tomcat version is set to 10 (including any minor versions) by setting the BP_TOMCAT_VERSION=10.* environment variable.
You can find more applicable build environment variables in Java build environment variables.
Verify app status
In this example, containerapp up command includes the --query properties.configuration.ingress.fqdn argument, which returns the fully qualified domain name (FQDN), also known as the app's URL.
View the application by pasting this URL into a browser. Your app should resemble the following screenshot.
