Getting Started with C++ in Visual Studio
Note
This article applies to Visual Studio 2015. If you're looking for the latest Visual Studio documentation, see Visual Studio documentation. We recommend upgrading to the latest version of Visual Studio. Download it here
By completing this walkthrough, you’ll become familiar with many of the tools and dialog boxes that you can use when you develop applications with Visual Studio. You’ll create a simple "Hello, World"-style application while you learn more about working in the integrated development environment (IDE).
This topic contains the following sections:
Debug and Test the application
Build a release version of the app
Sign In to Visual Studio
When you start Visual Studio for the first time, you are given the chance to sign in using a Microsoft account such as Live or Outlook. Signing in allows your settings to be synchronized across all your devices. For more information, see Signing in to Visual Studio
Figure 1: Visual Studio IDE
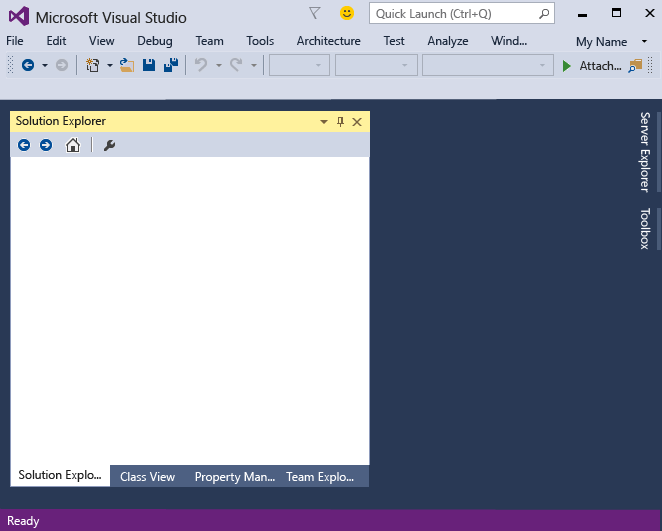
After you open Visual Studio, you can see the three basic parts of the IDE: tool windows, menus and toolbars, and the main window space. Tool windows are docked on the left and right sides of the app window, with Quick Launch, the menu bar, and the standard toolbar at the top. The center of the application window contains the Start Page. When you open a solution or project, editors and designers appear in this space. When you develop an application, you’ll spend most of your time in this central area.
Create a simple application
When you create an app in Visual Studio, you first create a project and a solution. For this example, you’ll create a Windows console application.
To create a console app
On the menu bar, choose File, New, Project.

In the Visual C++ category, choose the Win32 Console Application template, and then name the project
GreetingsConsoleApp.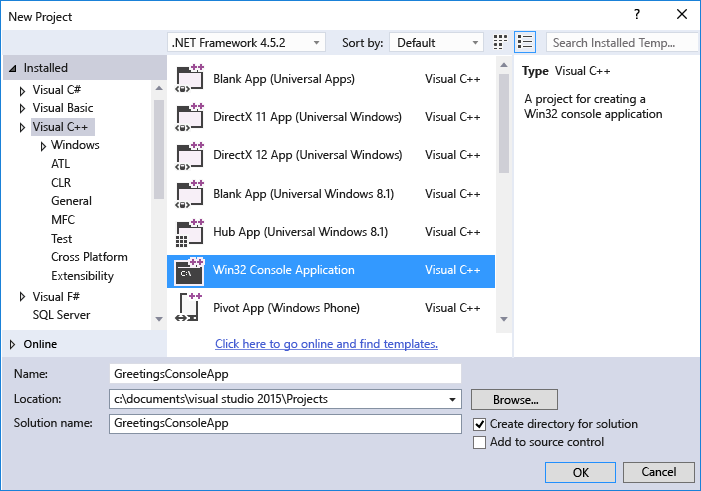
When the Win32 Application Wizard appears, choose the Finish button.
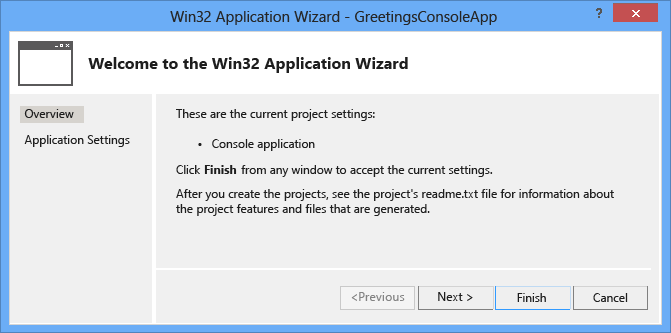
The GreetingsConsoleApp project and solution, with the basic files for a Win32 console app, are created and automatically loaded into Solution Explorer. The GreetingsConsoleApp.cpp file is opened in the code editor. The following items appear in Solution Explorer:
Figure 4: Project items
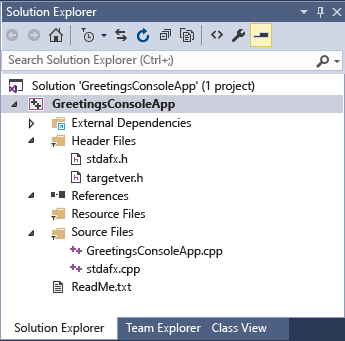
Add Code to the Application
Next, you'll add code to display the word "Hello" in the console window.
To display “Hello” in the console window
In the GreetingsConsoleApp.cpp file, enter a blank line before the line
return 0;and then enter the following code:cout << "Hello\n";A red squiggly line appears under
cout. An error message appears if you point to it.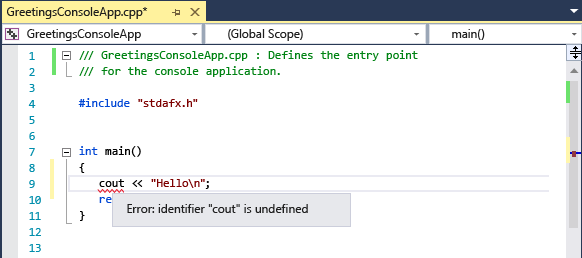
The error message also appears in the Error List window. You can display the window by, on the menu bar, choosing View, Error List.
cout is included in the <iostream> header file.
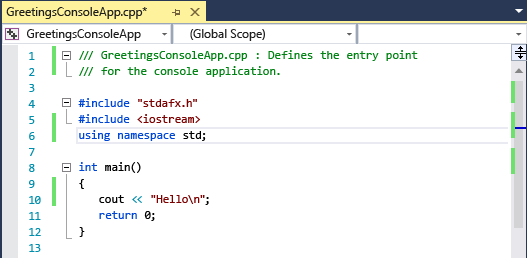
To include the iostream header, enter the following code after
#include "stdafx.h":#include \<iostream\> using namespace std;You probably noticed that a box appeared as you entered code, providing suggestions for the characters that you entered. This box is part of C++ IntelliSense, which provides coding prompts, including listing class or interface members and parameter information. You can also use code snippets, which are pre-defined blocks of code. For more information, see Using IntelliSense and Code Snippets.
The red squiggly line under
coutdisappears when you fix the error.Save the changes to the file.
Debug and Test the application
You can debug GreetingsConsoleApp to see whether the word "Hello" appears in the console window.
To debug the application
Start the debugger.
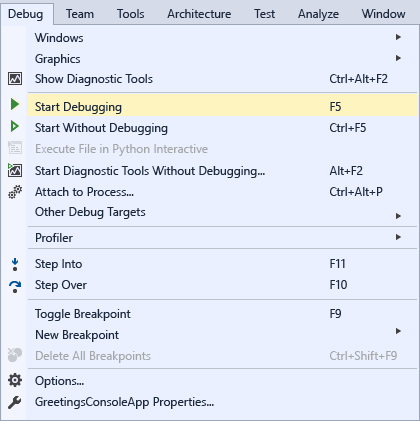
The debugger starts and runs the code. The console window (a separate window that looks like a command prompt) appears for a few seconds but closes quickly when the debugger stops running. To see the text, you need to set a breakpoint to stop program execution.
To add a breakpoint
Add a breakpoint from the menu bar at the line
return 0;. You can also just click in the left margin to set a breakpoint.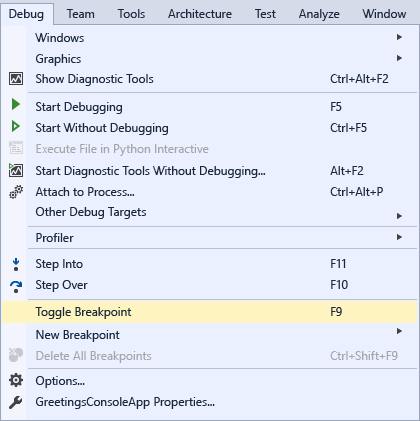
A red circle appears next to the line of code in the far left margin of the editor window.
Choose the F5 key to start debugging.
The debugger starts, and a console window appears showing the word Hello.

Press SHIFT + F5 to stop debugging.
For more information, see Console Projects.
Build a release version of the app
Now that you’ve verified that everything works, you can prepare a release build of the application.
To clean the solution files and build a release version
From the menu bar, delete intermediate files and output files that were created during previous builds.
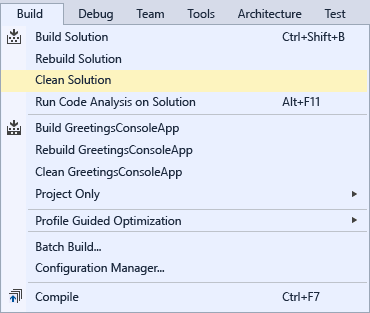
Change the build configuration for GreetingsConsoleApp from Debug to Release.

Build the solution.
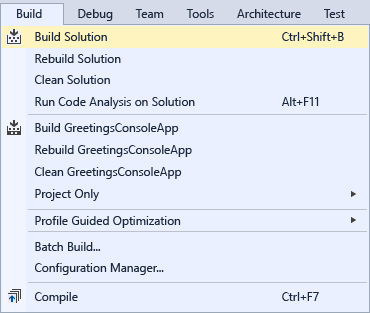
Congratulations on completing this walkthrough! If you want to explore more examples, see Visual Studio Samples.
See Also
Walkthrough: Create a Simple Application Productivity Tips Visual Studio Samples Get Started Developing with Visual Studio