Building ClickOnce apps using build vNext
We had earlier posted a blog that explains how to build ClickOnce applications using XAML build definition https://blogs.msdn.com/b/tfssetup/archive/2015/09/15/build-and-publish-a-clickonce-app-using-team-build-vso.aspx
Based on popular demand, we’ll now see how to build ClickOnce Apps using Build vNext, on-prem/VSO
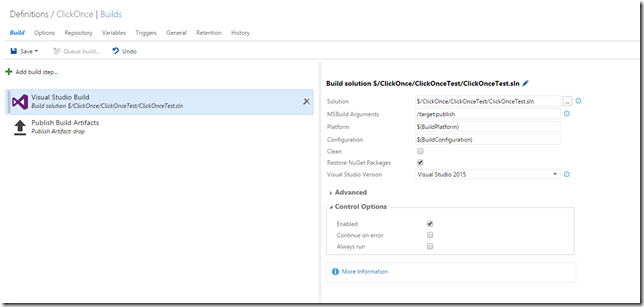
First, create a new build definition of Type vNext.
We have two steps – Visual Studio Build and Publish Build Artifacts and an optional third if we need to copy ClickOnce output to some directory like UNC path/IIS website folder.
First thing we need to specify is the MSBuild arguments in the Visual Studio Build step.
· Select the solution
· In the MSBuild arguments specify /target:publish
Next, we need to specify the build drop settings in Publish Build Artifacts step
· Select the root of the solution as the Copy Root value
· In the contents tab specify **/bin
· Select the artifact type as File Share and specify a path for drop
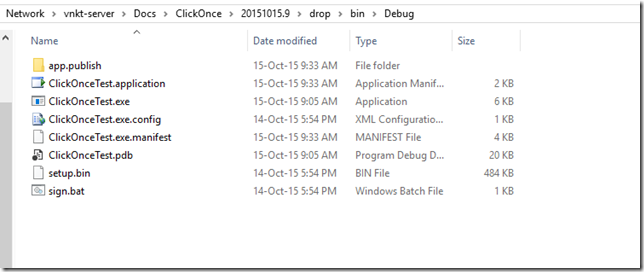
At this point if you queue a new build you will have the publish folder copied to your build drop. I checked my UNC share for drop vnkt-server and this is what I see.
So you already have the App.Publish folder that has the ClickOnce manifests in the actual drop location.
You can either manually pick from here/use some release tool like release management to deploy to the UNC/IIS server that needs to host the app.
If you choose to automate this you can add an additional step PowerShell.
· First create an new PowerShell script within your source control
· Write the code to pick the files from the app.publish folder to the UNC path
 Param(
 [string]$directory = $env:BUILD_SOURCESDIRECTORY
 #This is to create a variable that picks the environment variable for the working directory for the build agent
 )

 $append = "\ClickOnceTest\ClickOnceTest\bin\Debug\app.publish\*"
 #This is to create the variable that represents the organization structure for where the clickonce files go
 #ClickOnceTest is my solution name and hence this path

 $finaldirectory = $directory + $append
 #Getting the file location of where the ClickOnce files are present on the build server

 $dest = "\\vnkt-server\ClickOnce"
 #Variable for the UNC publish paht

 Copy-Item $finaldirectory $dest –recurse -force
 #Recursive copy
· Check this into source control
· In the PowerShell step select this in the Script filename argument
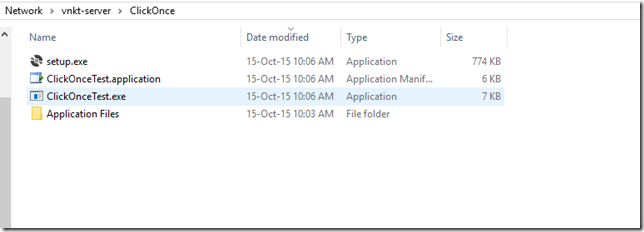
· This would ensure your ClickOnce latest build is copied to your desired destination folder in addition to your build drop. You can write more detailed scripts here that would handle stopping IIS website etc.
You can still use the additional steps for signing (using a certificate in window certificate store, under build service account) as specified in my previous blog using another PowerShell Task/Command Utility step. The logic is going to be similar.
Content created by – Venkata Narasimhan
Content reviewed by – Romit Gulati
Feel free to let us know if you needed any clarifications/improvements.
Comments
Anonymous
October 15, 2015
when publishing a ClickOnce application for the first time using Publish Wizard in Visual Studio than additional files are generated eg. index.htm and publish.htm. Do you've scripts which generates those files too ?Anonymous
October 19, 2015
Hi Daniel, This would be of help blogs.msdn.com/.../how-to-generate-publish-htm-with-msbuild.aspxAnonymous
July 26, 2016
The deployement here is made in the build process.Is it possible to do it in the release management in tfs ?Anonymous
April 24, 2017
Is there any way to auto-increment the publish version number?


