Part 7 - Windows Server 2012 R2 AD FS - Federated Web SSO
This is Part 7 of a multi-part series on how to deploy a complete end-to-end Federated Web SSO solution using Windows Server 2012 R2's AD FS role and the Web Application Proxy. In this part I will deploy external DNS to support the required DNS records for both CONTOSO and FABRIKAM, and deploy CONTOSO's and FABRIKAM's workstations as well as a non domain joined workstation.
In case you missed it:
Here is Part 1 - Overview
Here is Part 2 - Installing AD DS, AD CS, and DNS Records
Here is Part 3 - Installing SQL Database Services
Here is Part 4a - Installing CONTOSO's SharePoint Services
Here is Part 4b - Installing FABRIKAM's SharePoint Services
Here is Part 5a - Installing CONTOSO's AD FS Services
Here is Part 5b - Installing FABRIKAM's AD FS Services
Here is Part 6a - Installing CONTOSO's Web Application Proxies
Here is Part 6b - Installing FABRIKAM's Web Application Proxies
Topology
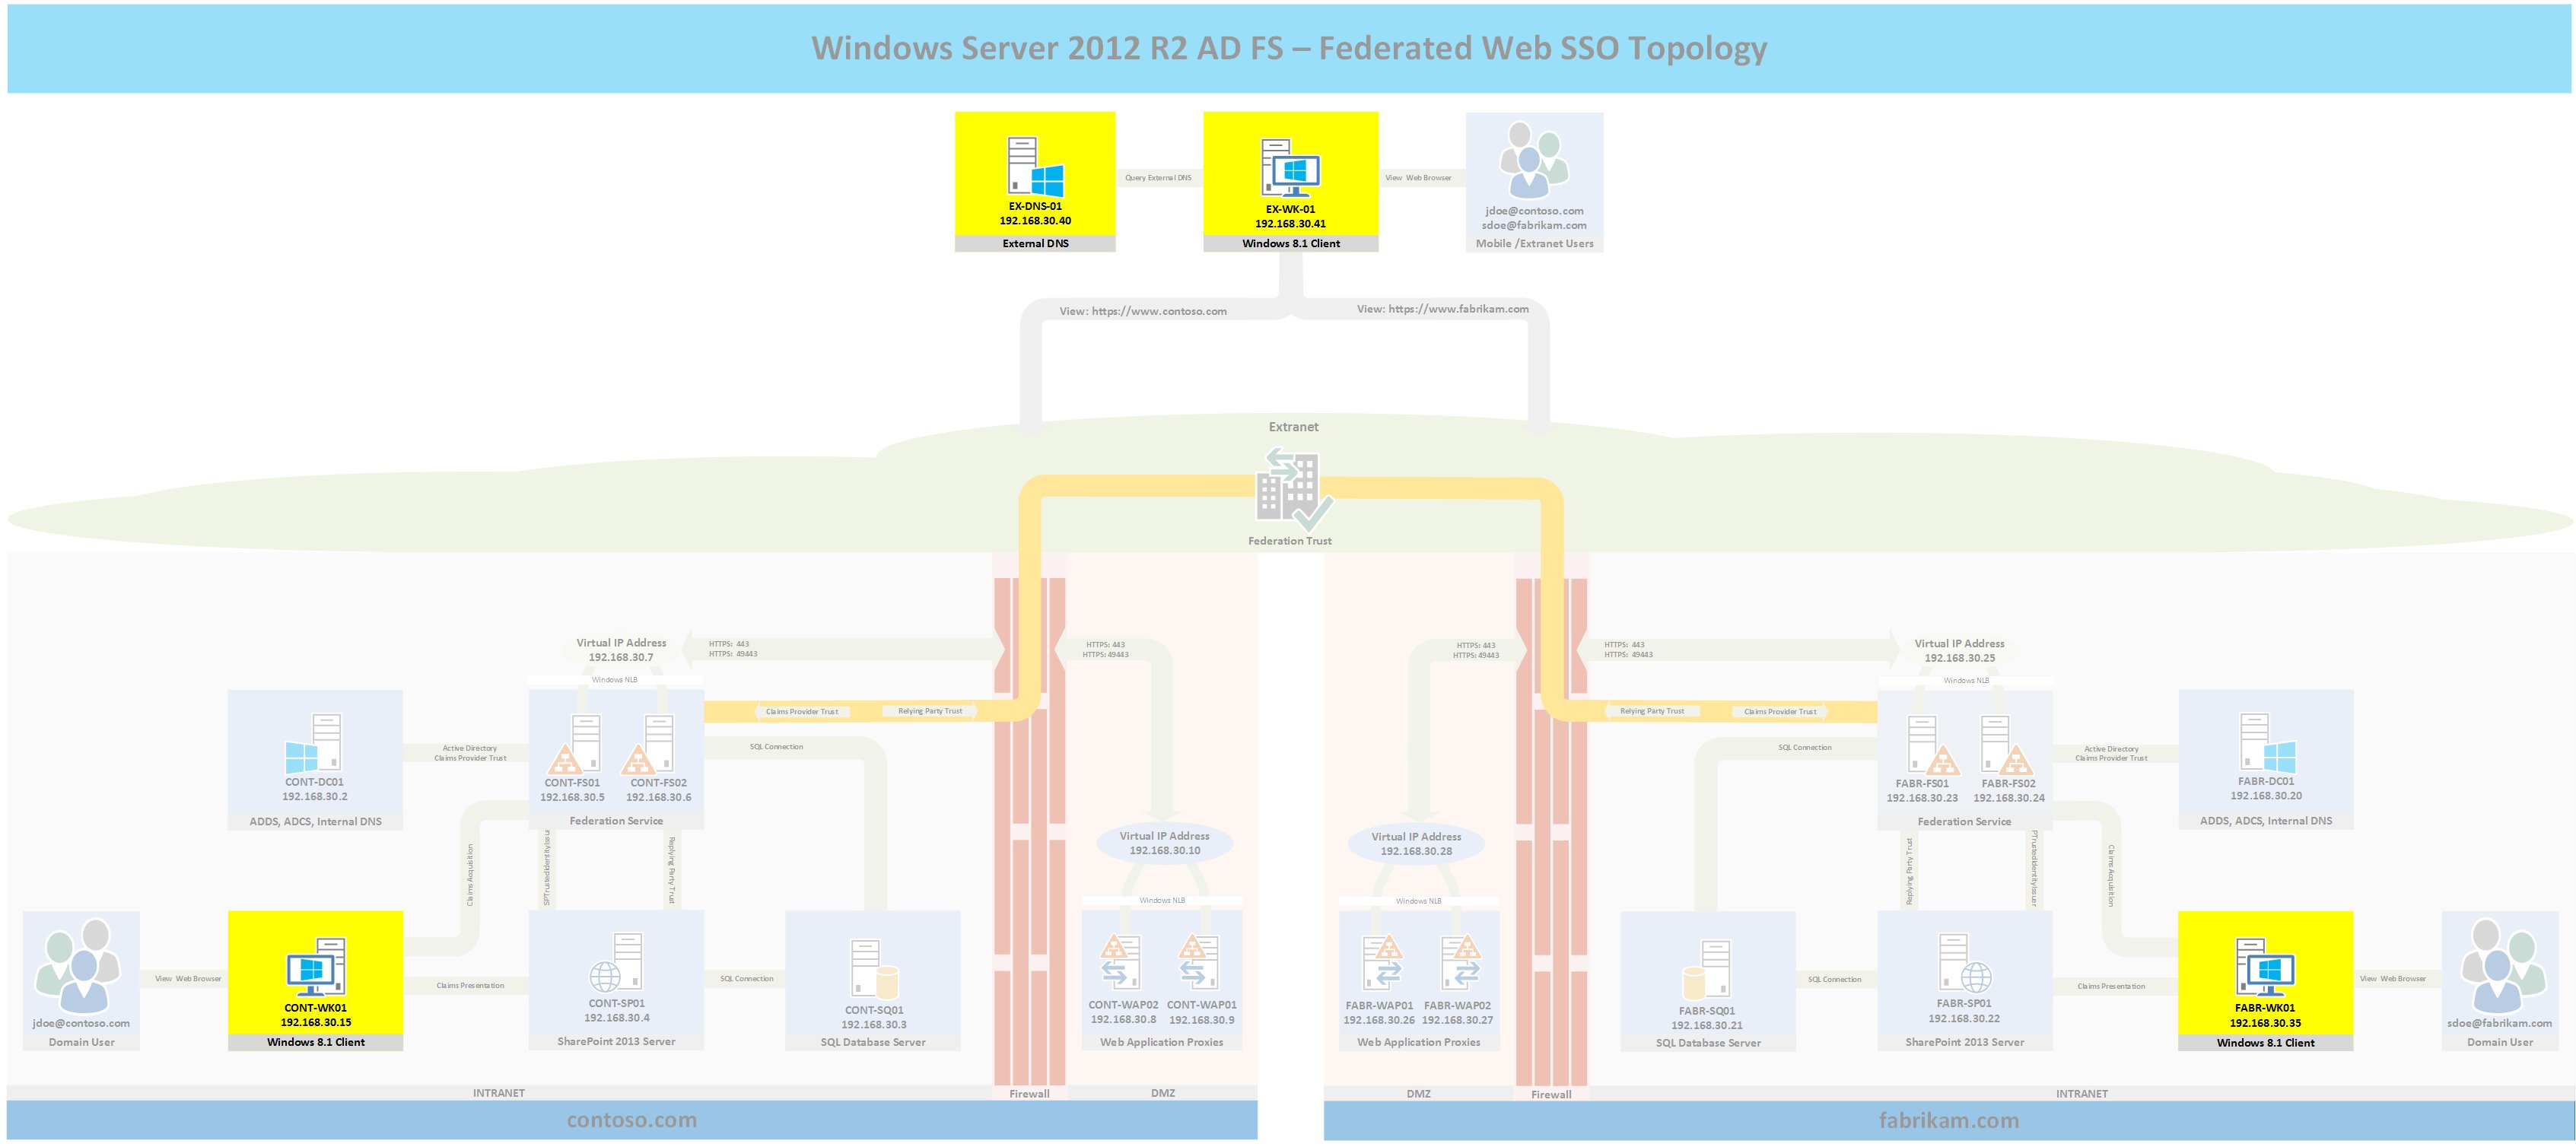
The following topology highlights in yellow the server and 3 workstations that will be built for part 7 and where they fit into the overall topology. If you wish to see the full topology click here
Deploy External DNS Server
For this lab scenario, the external DNS server will be used to host the external DNS records for both CONTOSO and FABRIKAM. In the real world each organization would probably control their own corporate namespace and would create the necessary records in their externally accessible DNS zones. For this lab environment, EX-DNS-01 will serve the role of root DNS server and will contain A records that help external clients locate each organization's federation services and web services.
This section will deploy the external DNS server.
- Deploy a Windows Server 2012 R2 workgroup server and configure the IP addess, subnet mask, DNS Server, and hostname. For the purposes of this series the information will be as follows:
- Hostname: EX-DNS-01
- IP Address: 192.168.30.40
- Subnet Mask: 255.255.255.0
- DNS Server: 192.168.30.40
- Add the DNS Server role to the server by typing the following command from an elevated PowerShell window:
- Add-WindowsFeature DNS,RSAT-DNS-Server -IncludeManagementTools
- Create a new root DNS zone by typing the following command from an elevated PowerShell window:
- Add-DnsServerPrimaryZone -Name . -ZoneFile root.dns I made this line bold to ensure you see that the zone's name is a dot. Ensure you include the dot to create a new root DNS zone.
Add DNS records to the root zone using the following commands:
- Add-DnsServerResourceRecordA -ZoneName . -Name www.contoso.com -IPV4Address 192.168.30.4
- Add-DnsServerResourceRecordA -ZoneName . -Name sts.contoso.com -IPV4Address 192.168.30.10
- Add-DnsServerResourceRecordA -ZoneName . -Name www.fabrikam.com -IPV4Address 192.168.30.22
- Add-DnsServerResourceRecordA -ZoneName . -Name sts.fabrikam.com -IPV4Address 192.168.30.28
It is very important to note that the federation DNS records point to the IP address of the WAP, NOT the ADFS servers within the external DNS. IN a production environment, the ADFS servers will typically be behind a firewall and are completely inaccessible from the Extranet.
Validation
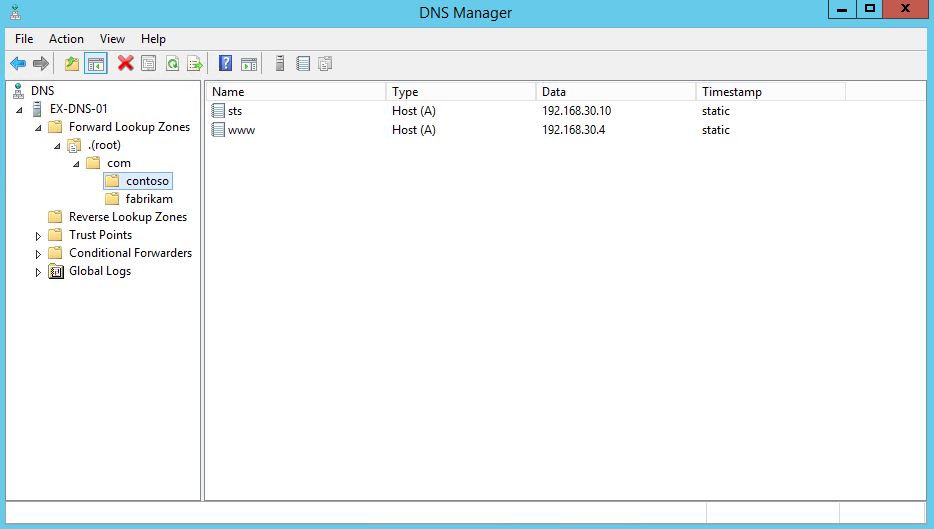
You can validate that the zone and records were properly created by opening the dnsmgmt.msc console and expanding the root DNS zone. The zone should appear as shown in the following figure.
Deploy WORKGROUP Workstation
To demonstrate use cases in a mobility environment or a bring your own device environment where users are not domain joined or need to access services while outside of the corporate network, create a Windows 8 or Windows 10 workstation that is not domain joined and configure it with the following configuration:
- Hostname: EX-WK-01
- IP Address: 192.168.30.41
- Subnet Mask: 255.255.255.0
- DNS Server: 192.168.30.40
Export the public keys for the Certificate Authorities from the FABRIKAM domain and from the CONTOSO domain and import them into the workstation's trusted root CA store.
From the workstation you should be able to open the following URLs:
- https://www.contoso.com
- https://sts.contoso.com/federationmetadata/2007-06/federationmetadata.xml
- https://www.fabrikam.com
- https://sts.fabrikam.com/federationmetadata/2007-06/federationmetadata.xml
If you get certificate errors opening any of the URLs ensure you imported the public keys for the CONTOSO and FABRIKAM CAs into the Trusted Root Certificate Authority Store of the workstation.
Deploy CONTOSO Workstation
For this client I am going to use a Windows 10 Professional client since Windows 10 Pro is now available. Create a Windows 10 or Windows 8 workstation and configure it using the following configuration:
- Hostname: CONT-WK01
- IP Address: 192.168.30.15
- Subnet Mask: 255.255.255.0
- DNS Server: 192.168.30.2
Join the new workstation to the contoso.com domain.
Deploy FABRIKAM Workstation
For this client I am going to use a Windows 10 Professional client since Windows 10 Pro is now available. Create a Windows 10 or Windows 8 workstation and configure it using the following configuration:
- Hostname: FABR-WK01
- IP Address: 192.168.30.35
- Subnet Mask: 255.255.255.0
- DNS Server: 192.168.30.20
Join the new workstation to the fabrikam.com domain.
Wrap-Up
You now have two forests, external DNS, certificate services, database services, web services, AD FS services, and Web Application Proxies. The only remaining steps are to start configuring the AD FS trusts and certificates so that SharePoint accepts the claims issued by the AD FS servers and so that each organization trusts the claims issued by the other organization.
Comments
- Anonymous
October 27, 2015
Overview
The purpose of this series is to walk you through step-by-step from start to finish setting - Anonymous
October 28, 2015
This is Part 8 of a multi-part series on how to deploy a complete end-to-end Federated Web SSO solution - Anonymous
October 28, 2015
This is Part 9 of a multi-part series on how to deploy a complete end-to-end Federated Web SSO solution

