Configure data flow endpoints for Azure Data Explorer
Important
This page includes instructions for managing Azure IoT Operations components using Kubernetes deployment manifests, which is in preview. This feature is provided with several limitations, and shouldn't be used for production workloads.
See the Supplemental Terms of Use for Microsoft Azure Previews for legal terms that apply to Azure features that are in beta, preview, or otherwise not yet released into general availability.
To send data to Azure Data Explorer in Azure IoT Operations, you can configure a data flow endpoint. This configuration allows you to specify the destination endpoint, authentication method, table, and other settings.
Prerequisites
- An instance of Azure IoT Operations
- An Azure Data Explorer cluster. Follow the Full cluster steps in the Quickstart: Create an Azure Data Explorer cluster and database. The free cluster option doesn't work for this scenario.
Create an Azure Data Explorer database
In the Azure portal, create a database in your Azure Data Explorer full cluster.
Create a table in your database for the data. You can use the Azure portal and create columns manually, or you can use KQL in the query tab. For example, to create a table for sample thermostat data, run the following command:
.create table thermostat (
    externalAssetId: string,
    assetName: string,
    CurrentTemperature: real,
    Pressure: real,
    MqttTopic: string,
    Timestamp: datetime
)
Enable streaming ingestion on your table and database. In the query tab, run the following command, substituting
<DATABASE_NAME>with your database name:.alter database ['<DATABASE_NAME>'] policy streamingingestion enableAlternatively, enable streaming ingestion on the entire cluster. See Enable streaming ingestion on an existing cluster.
Assign permission to managed identity
To configure a data flow endpoint for Azure Data Explorer, we recommend using either a user-assigned or system-assigned managed identity. This approach is secure and eliminates the need for managing credentials manually.
After the Azure Data Explorer database is created, you need to assign a role to the Azure IoT Operations managed identity that grants permission to write to the database.
If using system-assigned managed identity, in Azure portal, go to your Azure IoT Operations instance and select Overview. Copy the name of the extension listed after Azure IoT Operations Arc extension. For example, azure-iot-operations-xxxx7. Your system-assigned managed identity can be found using the same name of the Azure IoT Operations Arc extension.
- In your Azure Data Explorer database (not cluster), under Overview select Permissions > Add and then select Ingestor as the role. This gives the managed identity the necessary permissions to write to the Azure Data Explorer database. To learn more, see Role-based access control.
- Search for the name of your user-assigned managed identity set up for cloud connections or the system-assigned managed identity. For example, azure-iot-operations-xxxx7.
- Then, select Select.
Create data flow endpoint for Azure Data Explorer
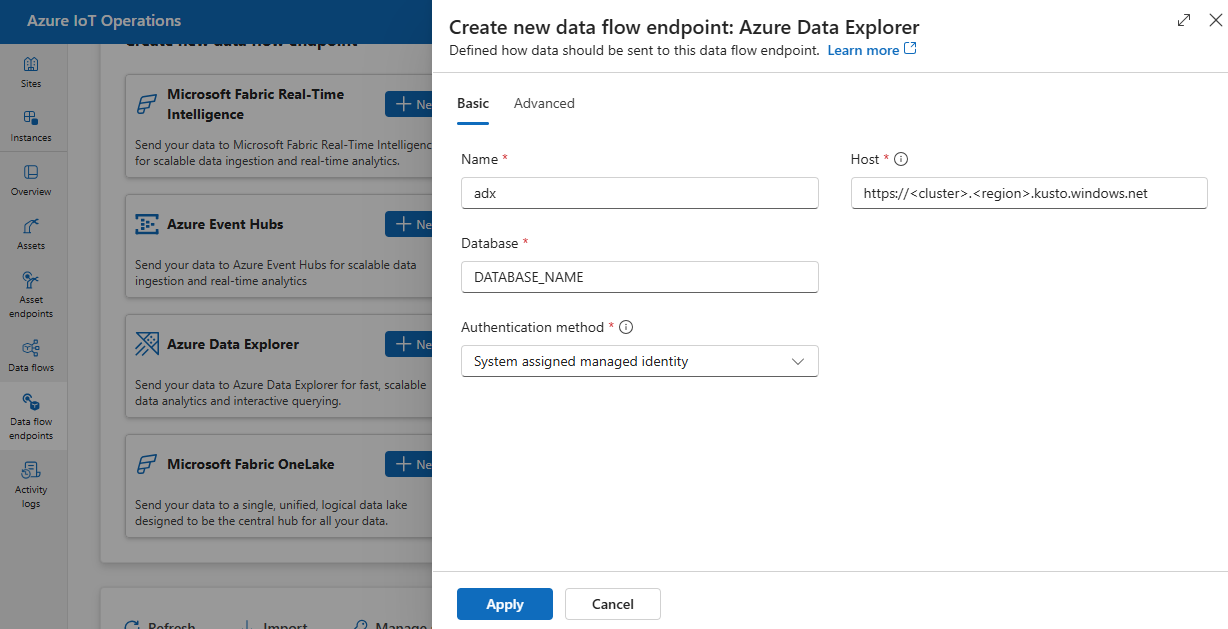
In the operations experience, select the Data flow endpoints tab.
Under Create new data flow endpoint, select Azure Data Explorer > New.

Enter the following settings for the endpoint:
Setting Description Name The name of the data flow endpoint. Host The hostname of the Azure Data Explorer endpoint in the format <cluster>.<region>.kusto.windows.net.Authentication method The method used for authentication. Choose System assigned managed identity or User assigned managed identity. Client ID The client ID of the user-assigned managed identity. Required if using User assigned managed identity. Tenant ID The tenant ID of the user-assigned managed identity. Required if using User assigned managed identity. Select Apply to provision the endpoint.
Available authentication methods
The following authentication methods are available for Azure Data Explorer endpoints.
System-assigned managed identity
Before you configure the data flow endpoint, assign a role to the Azure IoT Operations managed identity that grants permission to write to the Azure Data Explorer database:
- In Azure portal, go to your Azure IoT Operations instance and select Overview.
- Copy the name of the extension listed after Azure IoT Operations Arc extension. For example, azure-iot-operations-xxxx7.
- Go to Azure Data Explorer database (not cluster), under Overview select Permissions > Add and then select an appropriate role.
- Search for the name of your system-assigned managed identity. For example, azure-iot-operations-xxxx7.
- Select Select.
Then, configure the data flow endpoint with system-assigned managed identity settings.
In the operations experience data flow endpoint settings page, select the Basic tab then choose Authentication method > System assigned managed identity.
If you need to override the system-assigned managed identity audience, you can specify the audience setting.
In most cases, you don't need to specify other settings. This configuration creates a managed identity with the default audience https://api.kusto.windows.net.
User-assigned managed identity
To use user-assigned managed identity for authentication, you must first deploy Azure IoT Operations with secure settings enabled. Then you need to set up a user-assigned managed identity for cloud connections. To learn more, see Enable secure settings in Azure IoT Operations deployment.
Before you configure the data flow endpoint, assign a role to the user-assigned managed identity that grants permission to write to the Azure Data Explorer database:
- In Azure portal, go to Azure Data Explorer database (not cluster), under Overview select Permissions > Add and then select an appropriate role.
- Search for the name of your user-assigned managed identity.
- Select Select.
Then, configure the data flow endpoint with user-assigned managed identity settings.
In the operations experience data flow endpoint settings page, select the Basic tab then choose Authentication method > User assigned managed identity.
Enter the user assigned managed identity client ID and tenant ID in the appropriate fields.
Here, the scope is optional and defaults to https://api.kusto.windows.net/.default. If you need to override the default scope, specify the scope setting via Bicep or Kubernetes.
Advanced settings
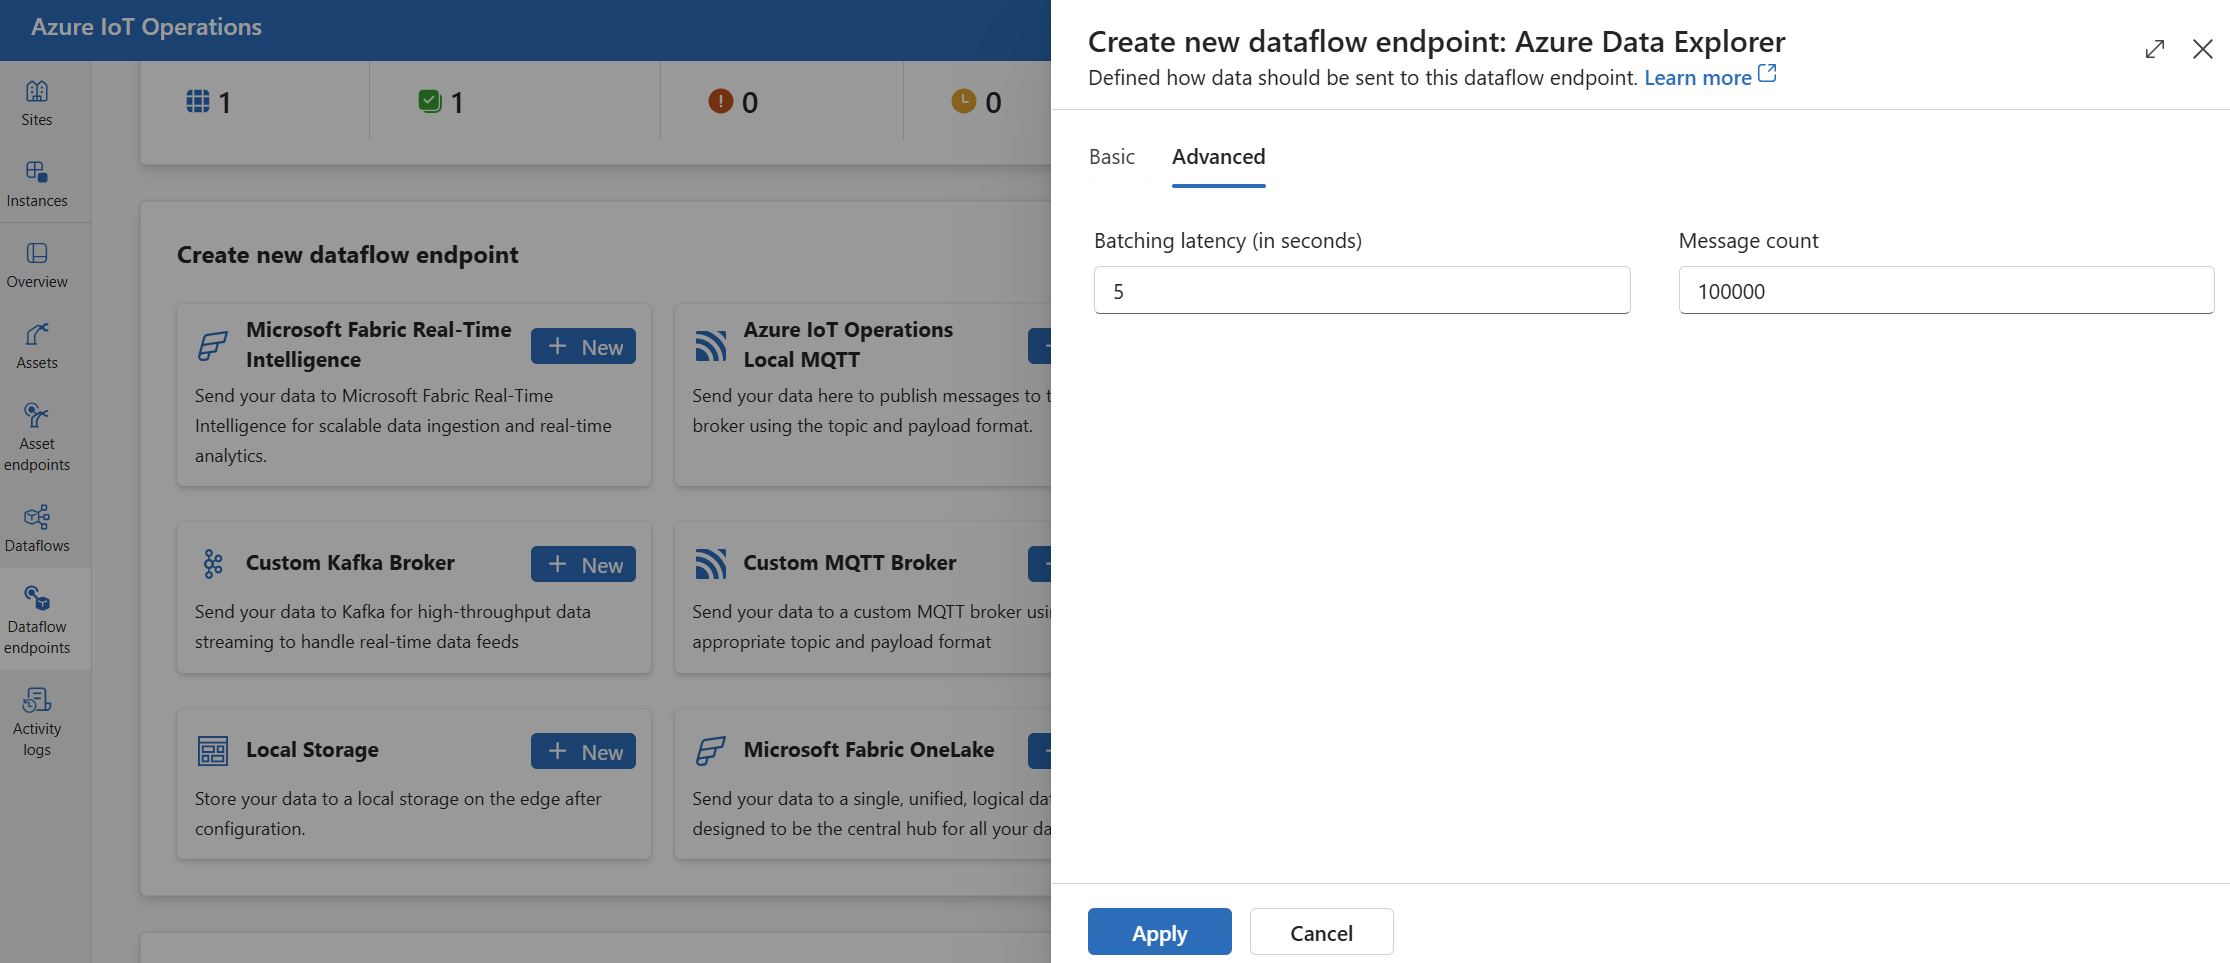
You can set advanced settings for the Azure Data Explorer endpoint, such as the batching latency and message count.
Use the batching settings to configure the maximum number of messages and the maximum latency before the messages are sent to the destination. This setting is useful when you want to optimize for network bandwidth and reduce the number of requests to the destination.
| Field | Description | Required |
|---|---|---|
latencySeconds |
The maximum number of seconds to wait before sending the messages to the destination. The default value is 60 seconds. | No |
maxMessages |
The maximum number of messages to send to the destination. The default value is 100000 messages. | No |
For example, to configure the maximum number of messages to 1000 and the maximum latency to 100 seconds, use the following settings:
In the operations experience, select the Advanced tab for the data flow endpoint.

Next steps
To learn more about data flows, see Create a data flow.