在 Windows 應用程式之間共享憑證
除了使用者標識碼和密碼組合之外,需要安全驗證的 Windows 應用程式可以使用憑證進行驗證。 驗證使用者時,憑證驗證可提供高度的信任。 在某些情況下,服務群組需要驗證多個應用程式的使用者。 本文說明如何使用相同的憑證來驗證多個 Windows 應用程式,以及如何提供方法讓用戶匯入已提供以存取受保護 Web 服務的憑證。
應用程式可以使用憑證向 Web 服務進行驗證,而多個應用程式可以使用憑證儲存的單一憑證來驗證相同的使用者。 如果商店中不存在憑證,您可以將程式代碼新增至您的應用程式,以從 PFX 檔案匯入憑證。 本快速入門中的用戶端應用程式是 WinUI 應用程式,而 Web 服務是 ASP.NET Core Web API。
提示
如果您有關於開始撰寫 Windows 應用程式或 ASP.NET Core Web API 的問題,Microsoft Copilot 是絕佳的資源。 Copilot 可協助您撰寫程式代碼、尋找範例,以及深入瞭解建立安全應用程式的最佳做法。
必要條件
- 已安裝 ASP.NET 和 Web 開發和 Windows 應用程式開發工作負載的 Visual Studio。
- 最新的 Windows 軟體開發工具套件 (SDK) 會在您的 WinUI 應用程式中使用 Windows 執行階段 (WinRT) API。
- 使用自我簽署憑證的PowerShell 。
建立並發佈安全的 Web 服務
開啟 Microsoft Visual Studio,然後從開始畫面選取 [建立新專案 ]。
在 [建立新專案] 對話框中,選取 [選取專案類型] 下拉式清單中的 [API],以篩選可用的專案範本。
選取 [ASP.NET Core Web API] 範本,然後選取 [下一步]。
將應用程式命名為 「FirstContosoBank」,然後選取 [ 下一步]。
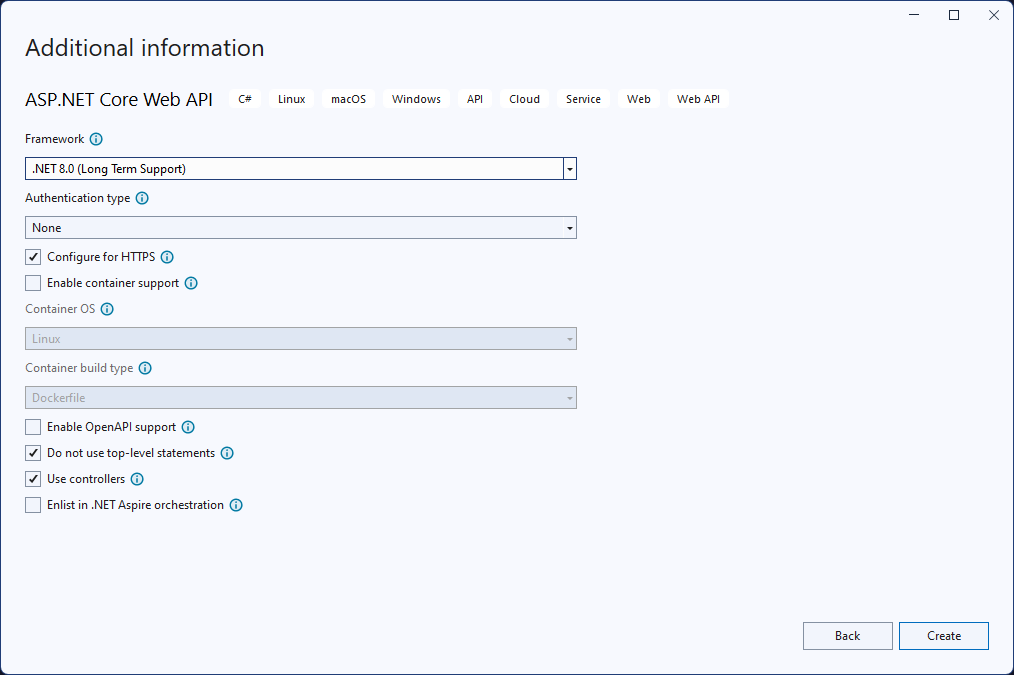
選擇 [.NET 8.0 或更新版本] 作為 [架構],將 [驗證類型] 設定為 [無],確定已核取 [設定 HTTPS]、取消核取 [啟用 OpenAPI 支援]、核取 [不要使用最上層語句和使用控制器],然後選取 [建立]。

以滑鼠右鍵按兩下 Controllers 資料夾中WeatherForecastController.cs檔案,然後選取 [重新命名]。 將名稱變更為 BankController.cs ,並讓 Visual Studio 重新命名類別和類別的所有參考。
在launchSettings.json檔案中,將 “launchUrl” 的值從 “weatherforecast” 變更為 “bank”,以用於該值的所有三個組態。
在BankController.cs檔案中,新增下列 「Login」 方法。
[HttpGet]
[Route("login")]
public string Login()
{
    // Return any value you like here.
    // The client is just looking for a 200 OK response.
    return "true";
}
開啟 NuGet 封裝管理員,並搜尋並安裝最新穩定版本的 Microsoft.AspNetCore.Authentication.Certificate 套件。 此套件提供 ASP.NET Core 中憑證驗證的中間件。
將新的類別新增至名為 SecureCertificateValidationService 的專案。 將下列程式代碼新增至 類別,以設定憑證驗證中間件。
using System.Security.Cryptography.X509Certificates; public class SecureCertificateValidationService { public bool ValidateCertificate(X509Certificate2 clientCertificate) { // Values are hard-coded for this example. // You should load your valid thumbprints from a secure location. string[] allowedThumbprints = { "YOUR_CERTIFICATE_THUMBPRINT_1", "YOUR_CERTIFICATE_THUMBPRINT_2" }; if (allowedThumbprints.Contains(clientCertificate.Thumbprint)) { return true; } } }開啟Program.cs,並以下列程式代碼取代 Main 方法中的程式代碼:
public static void Main(string[] args)
{
    var builder = WebApplication.CreateBuilder(args);

    // Add our certificate validation service to the DI container.
    builder.Services.AddTransient<SecureCertificateValidationService>();

    builder.Services.Configure<KestrelServerOptions>(options =>
    {
        // Configure Kestrel to require a client certificate.
        options.ConfigureHttpsDefaults(options =>
        {
            options.ClientCertificateMode = ClientCertificateMode.RequireCertificate;
            options.AllowAnyClientCertificate();
        });
    });

    builder.Services.AddControllers();

    // Add certificate authentication middleware.
    builder.Services.AddAuthentication(
    CertificateAuthenticationDefaults.AuthenticationScheme)
       .AddCertificate(options =>
    {
        options.AllowedCertificateTypes = CertificateTypes.SelfSigned;
        options.Events = new CertificateAuthenticationEvents
        {
            // Validate the certificate with the validation service.
            OnCertificateValidated = context =>
            {
                var validationService = context.HttpContext.RequestServices.GetService<SecureCertificateValidationService>();

                if (validationService.ValidateCertificate(context.ClientCertificate))
                {
                    context.Success();
                }
                else
                {
                    context.Fail("Invalid certificate");
                }

                return Task.CompletedTask;
            },
            OnAuthenticationFailed = context =>
            {
                context.Fail("Invalid certificate");
                return Task.CompletedTask;
            }
        };
     });

     var app = builder.Build();

     // Add authentication/authorization middleware.
     app.UseHttpsRedirection();
     app.UseAuthentication();
     app.UseAuthorization();

     app.MapControllers();
     app.Run();
 }
上述程式代碼會將 Kestrel 伺服器設定為需要用戶端憑證,並將憑證驗證中間件新增至應用程式。 中間件會使用
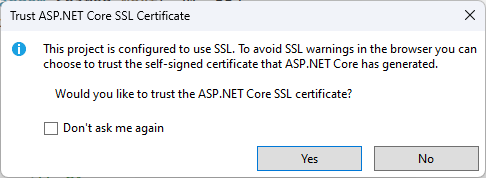
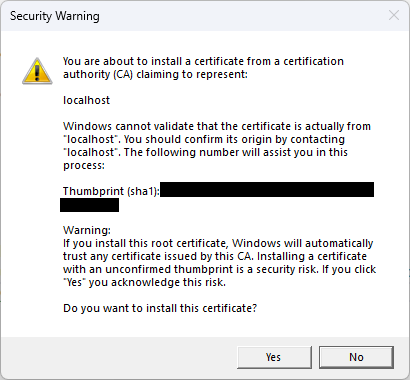
SecureCertificateValidationService類別來驗證客戶端憑證。 驗證OnCertificateValidated憑證時會呼叫 事件。 如果憑證有效,事件會呼叫Success方法。 如果憑證無效,事件會使用錯誤訊息呼叫Fail方法,而錯誤訊息將會傳回給用戶端。開始偵錯專案以啟動 Web 服務。 您可能會收到有關信任和安裝 SSL 憑證的訊息。 針對每個訊息按兩下 [是 ],以信任憑證並繼續偵錯專案。


Web 服務將在提供
https://localhost:7072/bank。 您可以開啟網頁瀏覽器並輸入網址來測試Web服務。 您會看到產生的天氣預報數據格式化為 JSON。 建立用戶端應用程式時,讓 Web 服務保持執行。
如需使用 ASP.NET Core 控制器型 Web API 的詳細資訊,請參閱 使用 ASP.NET Core 建立 Web API。
建立使用憑證驗證的 WinUI 應用程式
現在您已經擁有一個或多個安全的 Web 服務,您的應用程式可以使用憑證對這些 Web 服務進行驗證。 當您使用來自 WinRT API 的 HttpClient 物件向已驗證的 Web 服務提出要求時,初始要求將不會包含客戶端憑證。 經過驗證的 Web 服務將回應用戶端驗證要求。 發生這種情況時,Windows 用戶端將自動查詢憑證儲存以取得可用的用戶端憑證。 您的使用者可以從這些憑證中進行選擇,以對 Web 服務進行驗證。 有些憑證受密碼保護,因此您需要為使用者提供輸入憑證密碼的方法。
注意
目前還沒有 Windows 應用程式 SDK API 來管理憑證。 您必須使用 WinRT API 來管理應用程式中的憑證。 我們也會使用 WinRT 記憶體 API 從 PFX 檔案匯入憑證。 任何具有套件身分識別的 Windows 應用程式都可以使用許多 WinRT API,包括 WinUI 應用程式。
我們將實作的 HTTP 用戶端程式代碼會使用 。NET 的 HttpClient。 WinRT API 中包含的 HttpClient 不支援客戶端憑證。
如果沒有可用的用戶端憑證,則使用者需要將憑證新增至憑證儲存。 您可以在應用程式中包含程式碼,使使用者能夠選擇包含用戶端憑證的 PFX 檔案,然後將該憑證匯入到用戶端憑證存放區中。
提示
您可以使用 PowerShell Cmdlet New-SelfSignedCertificate 和 Export-PfxCertificate 來建立自我簽署憑證,並將其導出至 PFX 檔案以搭配本快速入門使用。 如需詳細資訊,請參閱 New-SelfSignedCertificate 和 Export-PfxCertificate。
請注意,產生憑證時,您應該儲存憑證的指紋,以用於Web服務進行驗證。
開啟 Visual Studio,然後從起始頁面建立新的 WinUI 專案。 將新專案命名為「FirstContosoBankApp」。 按一下 [建立] 建立新的專案。
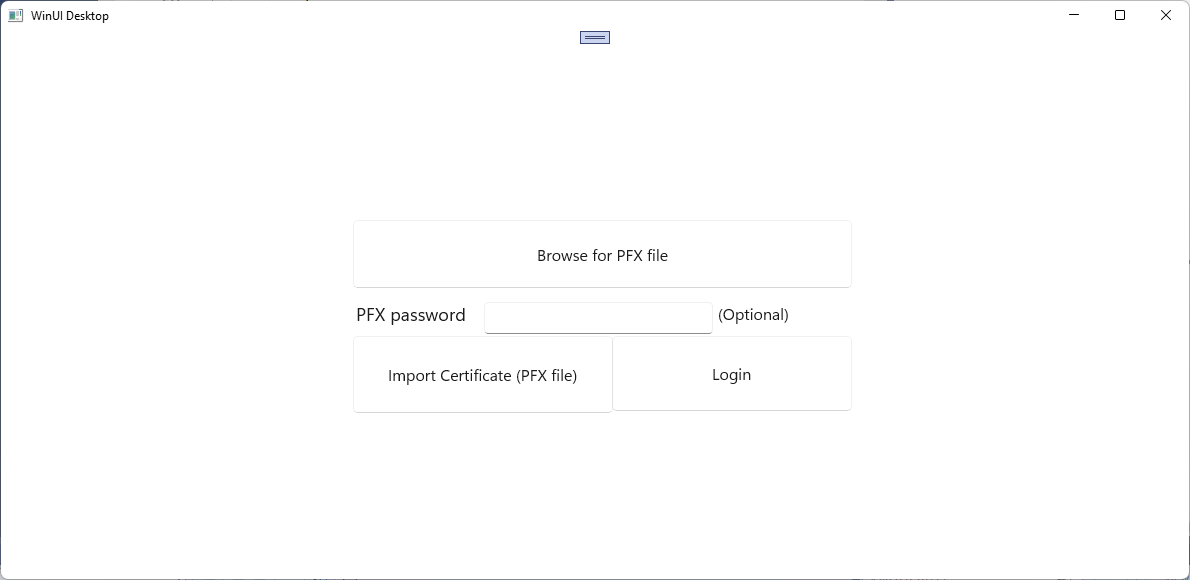
在MainWindow.xaml檔案中,將下列 XAML 新增至 Grid 元素,並取代現有的 StackPanel 元素及其內容。 此XAML 包括一個用於瀏覽要匯入的PFX 檔案的按鈕、一個用於為受密碼保護的PFX 檔案輸入密碼的文字方塊、一個用於匯入所選PFX 檔案的按鈕、一個用於登入安全 Web 服務的按鈕,以及顯示目前動作狀態的文字區塊。
<Button x:Name="Import" Content="Import Certificate (PFX file)" HorizontalAlignment="Left" Margin="352,305,0,0" VerticalAlignment="Top" Height="77" Width="260" Click="Import_Click" FontSize="16"/>
<Button x:Name="Login" Content="Login" HorizontalAlignment="Left" Margin="611,305,0,0" VerticalAlignment="Top" Height="75" Width="240" Click="Login_Click" FontSize="16"/>
<TextBlock x:Name="Result" HorizontalAlignment="Left" Margin="355,398,0,0" TextWrapping="Wrap" VerticalAlignment="Top" Height="153" Width="560"/>
<PasswordBox x:Name="PfxPassword" HorizontalAlignment="Left" Margin="483,271,0,0" VerticalAlignment="Top" Width="229"/>
<TextBlock HorizontalAlignment="Left" Margin="355,271,0,0" TextWrapping="Wrap" Text="PFX password" VerticalAlignment="Top" FontSize="18" Height="32" Width="123"/>
<Button x:Name="Browse" Content="Browse for PFX file" HorizontalAlignment="Left" Margin="352,189,0,0" VerticalAlignment="Top" Click="Browse_Click" Width="499" Height="68" FontSize="16"/>
<TextBlock HorizontalAlignment="Left" Margin="717,271,0,0" TextWrapping="Wrap" Text="(Optional)" VerticalAlignment="Top" Height="32" Width="83" FontSize="16"/>
儲存 MainWindow 變更。
開啟MainWindow.xaml.cs檔案,然後新增下列
using語句。using System; using System.Security.Cryptography.X509Certificates; using System.Diagnostics; using System.Net.Http; using System.Net; using System.Text; using Microsoft.UI.Xaml; using Windows.Security.Cryptography.Certificates; using Windows.Storage.Pickers; using Windows.Storage; using Windows.Storage.Streams;在MainWindow.xaml.cs檔案中,將下列變數新增至 MainWindow 類別。 他們會指定 「FirstContosoBank」Web 服務之安全 登入 服務端點的位址,以及保存要匯入證書存儲之 PFX 憑證的全域變數。 將
<server-name>更新為localhost:7072API 專案launchSettings.json檔案的 「HTTPs」 組態中指定的埠或埠。private Uri requestUri = new Uri("https://<server-name>/bank/login"); private string pfxCert = null;在 MainWindow.xaml.cs 檔案中,為登入按鈕和方法來新增下列點選處理程式,以存取受保護的Web服務。
private void Login_Click(object sender, RoutedEventArgs e)
{
    MakeHttpsCall();
}

private async void MakeHttpsCall()
{
    var result = new StringBuilder("Login ");

    // Load the certificate
    var certificate = new X509Certificate2(Convert.FromBase64String(pfxCert),
                                           PfxPassword.Password);

    // Create HttpClientHandler and add the certificate
    var handler = new HttpClientHandler();
    handler.ClientCertificates.Add(certificate);
    handler.ClientCertificateOptions = ClientCertificateOption.Automatic;

    // Create HttpClient with the handler
    var client = new HttpClient(handler);

    try
    {
        // Make a request
        var response = await client.GetAsync(requestUri);

        if (response.StatusCode == HttpStatusCode.OK)
        {
            result.Append("successful");
        }
        else
        {
            result = result.Append("failed with ");
            result = result.Append(response.StatusCode);
        }
    }
    catch (Exception ex)
    {
        result = result.Append("failed with ");
        result = result.Append(ex.Message);
    }

    Result.Text = result.ToString();
}
接下來,為按鈕新增下列按兩下列按下處理程式,以流覽 PFX 檔案,以及將選取的 PFX 檔案匯入證書儲存的按鈕。
private async void Import_Click(object sender, RoutedEventArgs e)
{
    try
    {
        Result.Text = "Importing selected certificate into user certificate store....";
        await CertificateEnrollmentManager.UserCertificateEnrollmentManager.ImportPfxDataAsync(
              pfxCert,
              PfxPassword.Password,
              ExportOption.Exportable,
              KeyProtectionLevel.NoConsent,
              InstallOptions.DeleteExpired,
              "Import Pfx");

        Result.Text = "Certificate import succeeded";
    }
    catch (Exception ex)
    {
        Result.Text = "Certificate import failed with " + ex.Message;
    }
}

private async void Browse_Click(object sender, RoutedEventArgs e)
{
    var result = new StringBuilder("Pfx file selection ");
    var pfxFilePicker = new FileOpenPicker();
    IntPtr hwnd = WinRT.Interop.WindowNative.GetWindowHandle(this);
    WinRT.Interop.InitializeWithWindow.Initialize(pfxFilePicker, hwnd);
    pfxFilePicker.FileTypeFilter.Add(".pfx");
    pfxFilePicker.CommitButtonText = "Open";
    try
    {
        StorageFile pfxFile = await pfxFilePicker.PickSingleFileAsync();
        if (pfxFile != null)
        {
            IBuffer buffer = await FileIO.ReadBufferAsync(pfxFile);
            using (DataReader dataReader = DataReader.FromBuffer(buffer))
            {
                byte[] bytes = new byte[buffer.Length];
                dataReader.ReadBytes(bytes);
                pfxCert = System.Convert.ToBase64String(bytes);
                PfxPassword.Password = string.Empty;
                result.Append("succeeded");
            }
        }
        else
        {
            result.Append("failed");
        }
    }
    catch (Exception ex)
    {
        result.Append("failed with ");
        result.Append(ex.Message); ;
    }

    Result.Text = result.ToString();
}
開啟 Package.appxmanifest 檔案,並將下列功能新增至 [功能] 索引標籤。
- EnterpriseAuthentication
- SharedUserCertificates
執行您的應用程式並登入您的安全 Web 服務,並將 PFX 檔案匯入本機憑證存放區。

您可以使用這些步驟建立多個應用程式,這些應用程式會使用相同的使用者憑證來存取相同或不同的安全 Web 服務。
