編輯

共用方式為


Edit provisioning policies

You can update provisioning policies to change assignments or key attributes, like image and network connection.

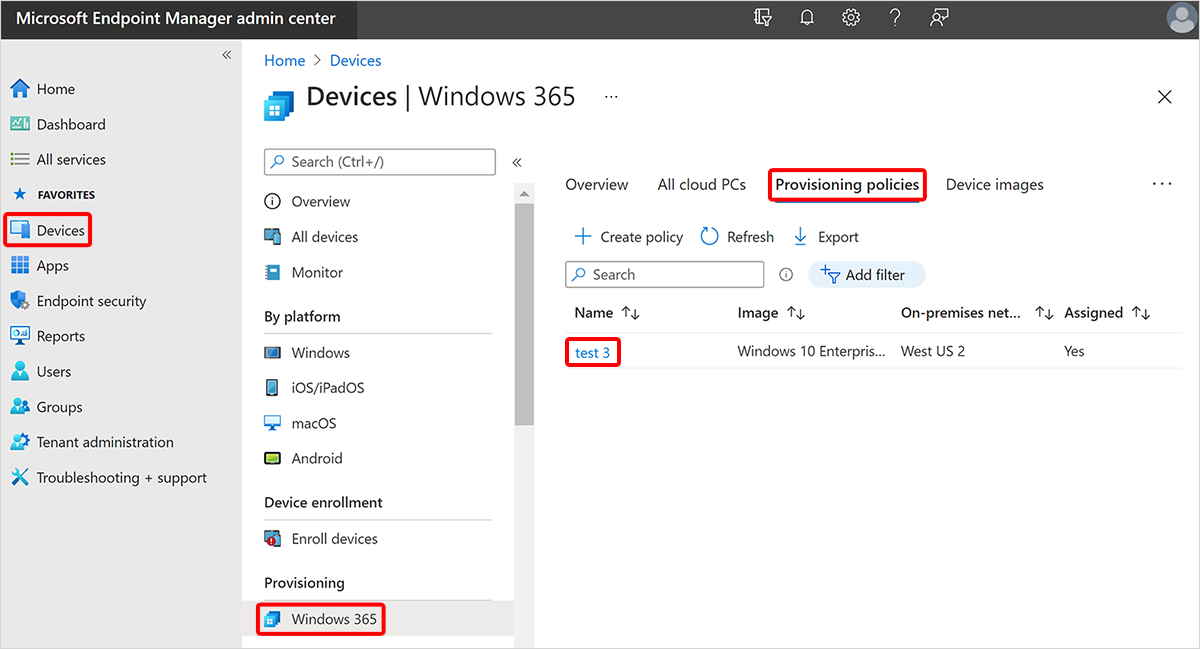
  1. Sign in to the Microsoft Intune admin center, select Devices > Windows 365 (under Provisioning) > Provisioning policies > select a policy. Screenshot of edit policy
  2. On the policy page, you can edit the General information, Image, and Assignments by selecting Edit next to each header.

If you change the network, image, region or single sign-on configuration in a provisioning policy, no change will occur for previously provisioned Cloud PCs. Newly provisioned or reprovisioned Cloud PCs will honor the changes in your provisioning policy. To change the network or image of previously provisioned Cloud PCs to align with the changes, you must reprovision those Cloud PCs. To change the region or single sign-on of previously provisioned Cloud PCs to align with the changes, you must apply the current configuration.

If you edit the name of the provisioning policy in the General information, the following will occur:

  • Any Cloud PC in the All Cloud PCs node will have the new policy name updated in the Provisioning policy column.

  • New Cloud PCs created from the provisioning policy will have the new name registered as the device’s enrollmentProfileName in Microsoft Entra ID and Microsoft Intune. The enrollmentProfileName property for existing Cloud PCs won't change. If you followed the steps to create a dynamic device group containing all Cloud PCs from a specific provisioning policy, edit the dynamic device group, and add a new rule so that the group contains both the existing Cloud PCs and any new Cloud PCs from the provisioning policy:

    • Property = enrollmentProfileName
    • Operator = Equals
    • Value = <New name for provisioning policy>

If you assign new users to the provisioning policy, and these users have a valid Cloud PC license, provisioning automatically occurs.

If you remove users from the provisioning policy assignment:

  • The grace period is triggered for Enterprise Cloud PCs.
  • Frontline Cloud PCs in dedicated mode are immediately deprovisioned.
  • Frontline Cloud PCs in shared mode remain unchanged.

Apply the current configuration for Enterprise and Frontline in dedicated mode

To apply a configuration change to existing Cloud PCs:

  1. Modify and save the changes to an existing provisioning policy.
  2. From the policy page, select Apply this configuration.
  3. Select the configuration change to apply to existing Cloud PCs from the available list including:
    1. Region.
    2. Single sign-on.
  4. Select Apply.

Important

  • When you apply a new region, Cloud PCs are shutdown during the application process for the targeted Cloud PCs. Users are disconnected and any unsaved work is lost.
  • When you apply single sign-on, Cloud PCs deployed before April 2023 are shutdown during the application process. As this operation takes time, applying SSO to a large number of Cloud PCs can restart the VMs over a long period of time and won't complete immediately.

Apply the current configuration for Frontline in shared mode

To apply a configuration to existing Cloud PCs:

  1. Modify and save the changes to an existing provisioning policy.
  2. From the policy page, select Reprovision.
  3. Select the percentage of Cloud PCs that you want to make sure is available for user connections.
  4. Select Continue.

Important

When you apply a new configuration, Cloud PCs are shutdown during the application process. Users won't be disconnected if the Cloud PC is in use. Cloud PCs wait for the user to disconnect before reprovisioning.

Next steps

Learn about the automated provisioning steps.